Tiki Central / Other Crafts / Wendy Cevola - Doing a major repair of a Tiki Diablo bowl.
Post #794296 by danlovestikis on Fri, Apr 5, 2019 8:12 AM
|
D

danlovestikis
Posted
posted
on
Fri, Apr 5, 2019 8:12 AM
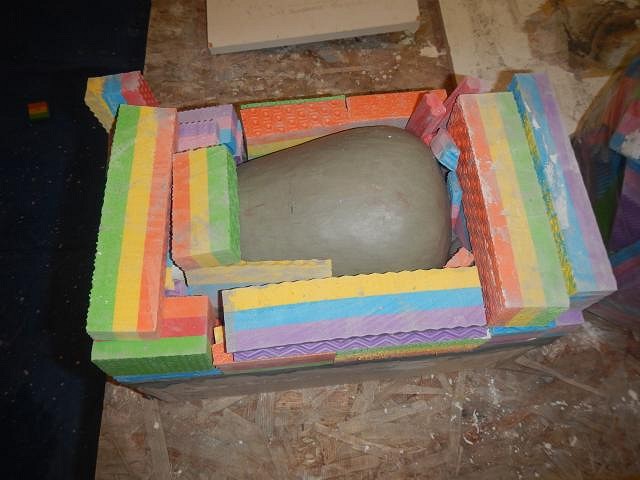
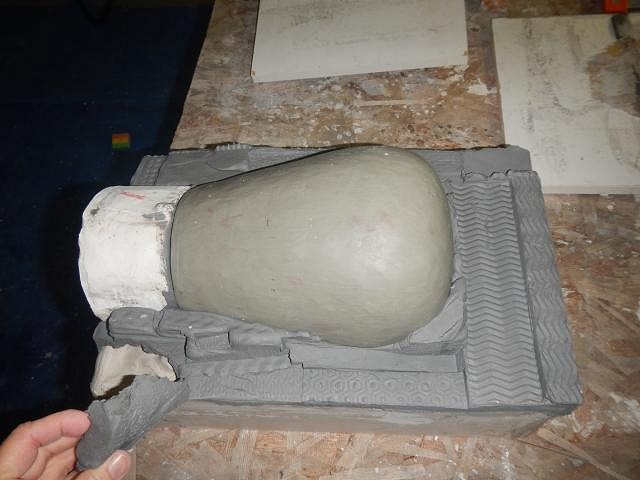
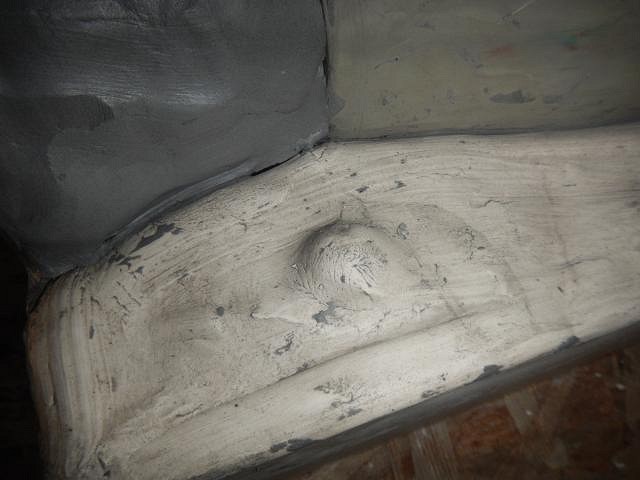
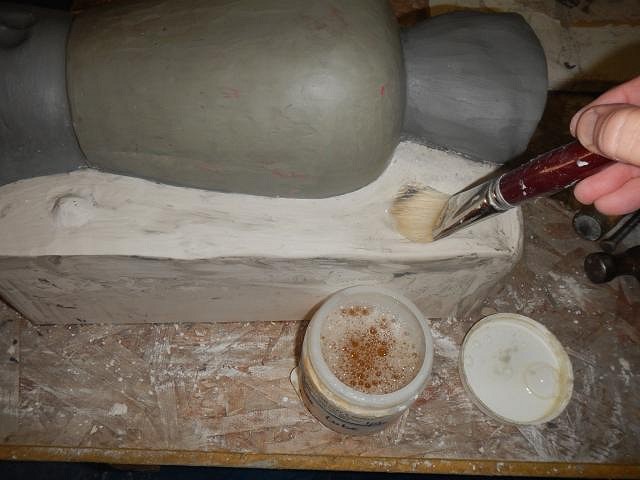
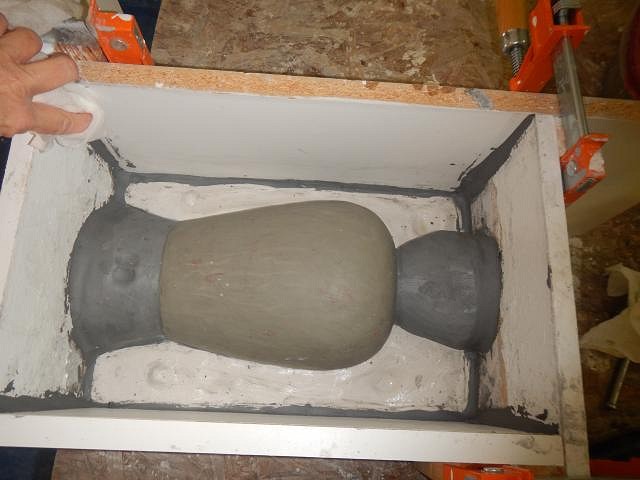
hang10tiki ha ha, what I said to Hope Chest and Hammo!!! hang10tiki on fb someone said it looked like Big Toe. =================================== More steps on making the helmet mold so I can fill some more wishes. We put belts around the pieces and flipped the mold. The belts held it all in place. Now I can remove the blocks and the layer of clay. Here's my tip. To make thin mold lines and a mold without sharp edges that can break off the rounded part of the mold needs to be carved off. See where it turns down as the plaster meets the sculpt that's the area. This shows how it looks after carving it flat. So the next piece poured will also be flat. The top piece of clay when removed will be the opening in which the slip is poured in and the excess is poured out. The bottom piece will be removed and the last mold piece will be made there. Next three layers of mold soap are applied. I let them almost dry each time and then I blot with a dry paper towel. Again, snakes are put up the box seams and any areas where the new mold piece joins the box. If you miss a place it will leak horribly. Next Dan and I mix the plaster. He runs the mixer and I gently tap in the plaster. WEAR A MASK THE ENTIRE DAY YOU WORK. The plaster dust that permanently sticks in your lungs floats for hours. Pour it into the box, watch for leaks. It set up in the winter in about 45 minutes. As it sets a layer of water appears at the top, leave that alone it will disappear as the plaster heats up. The mold box is removed. Only the round bottom piece is left to make. Friday is here. Today will be a sanding day for me. I have some dry projects ready to fine tune and to put into the kiln. Cheers, Wendy |