Tiki Central / Other Crafts
How to Cut and install Lauhala Matting?
Pages: 1 24 replies
|
SF

Slacks Ferret
Posted
posted
on
Sun, Dec 27, 2009 7:48 PM
I gots me a 50' roll of lauhala and I'm looking to install it soon. So how does one go about cutting lauhala matting accurately(ish)? Should I be duct-taping it where I'm gonna cut it? And then duct tape it again to keep it from falling apart? And what should I use to cut it? Box-cutter knife? Utility knife? Electric tin-snips? Also.. what would you use to put it up on a drywall surface? I'm thinking staples and caulking gun construction glue...but I'm willing to entertain other methods. Mahalo for any input.
[ Edited by: Slacks Ferret 2009-12-27 19:49 ] |
|
P

pdrake
Posted
posted
on
Sun, Dec 27, 2009 8:02 PM
duct tape will probably leave a residue. masking tape should work fine. a good sharp utility knife and a heavy straight edge. don't use a cheap utility knife with a single blade. you'll hate yourself. get either an olfa with a snap off or another kind that has cartridges so you don't have to replace the blade every few cuts. good luck! |
|
MPP

Mr. Pupu Pants
Posted
posted
on
Sun, Dec 27, 2009 9:08 PM
Hello there my good Mr. Ferret :) Anyway, once I glued the matting onto the wall, I tore the width of the tape down to a narrower width where it would not be seen beneath the bamboo ot trim that covered the seams or ends. Also--I applied the tape to both sides after measuring and marking the cut and it really helped to keep the shape and minimize the shifting of the weave that can occur when you cut a piece down to size. |
|
T

tikiskip
Posted
posted
on
Sun, Dec 27, 2009 9:58 PM
Elmers glue. |
|
R

RevBambooBen
Posted
posted
on
Mon, Dec 28, 2009 10:42 AM
[ Edited by: RevBambooBen 2009-12-28 10:49 ] |
|
S

Swanky
Posted
posted
on
Tue, Dec 29, 2009 7:29 AM
What he said. I have always just cut with a utility knife over cardboard or something and use some straight edge. Staple it up. You can add adhesive to the back as well, but it has mixed results unless you can get it on thick and keep some pressure on it. As for taping it up, I have not done that at all. It will only be affected at the corners as far as falling apart. A little care. But it also depends on your installation. In most cases, the edge of the matting will get covered and so a clean line is not too important. And a couple of staples in the right place keeps it intact. Ideally you are not cutting anything but length, so you have a lot less to worry about than when you start cutting pieces around door frames, etc. That's where you need a little more care. |
|
SF
Slacks Ferret
Posted
posted
on
Tue, Dec 29, 2009 2:36 PM
Mahalo for the information folks! I've got it up and it's looking great. I use tin snips to cut and construction glue with a whole bunch of staples to put it up. It t'was a whole lot easier than I thought it was gonna be. |
|
T

TikiMango
Posted
posted
on
Tue, Dec 29, 2009 5:33 PM
Don't forget that you can collect all the bit o' pieces of matting that fell on the floor and place them to hide your staples if needed. Just weave them back into the matting. |
|
BTS

BIG tiki scott
Posted
posted
on
Tue, Dec 29, 2009 6:30 PM
pics pics pics!!!! lol!! cheerz!! |
|
SF
Slacks Ferret
Posted
posted
on
Tue, Dec 29, 2009 10:40 PM
A damn fine handy hint! Thanks! |
|
SF
Slacks Ferret
Posted
posted
on
Tue, Dec 29, 2009 10:40 PM
A damn fine handy hint! Thanks! |
|
CAA

Chip and Andy
Posted
posted
on
Wed, Dec 30, 2009 7:56 AM
And if any staples are still showing after you weave in the bits.... take a fine point sharpie and color whatever part of the staple still shows. And... Pix! Or we ain't believing you finished the project. |
|
SF
Slacks Ferret
Posted
posted
on
Wed, Dec 30, 2009 11:50 AM
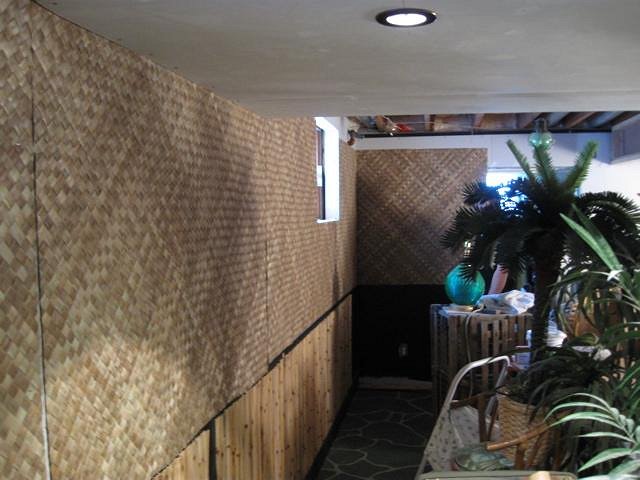
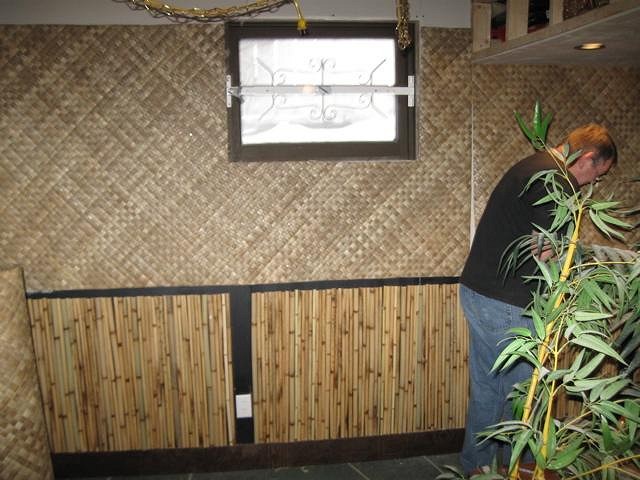
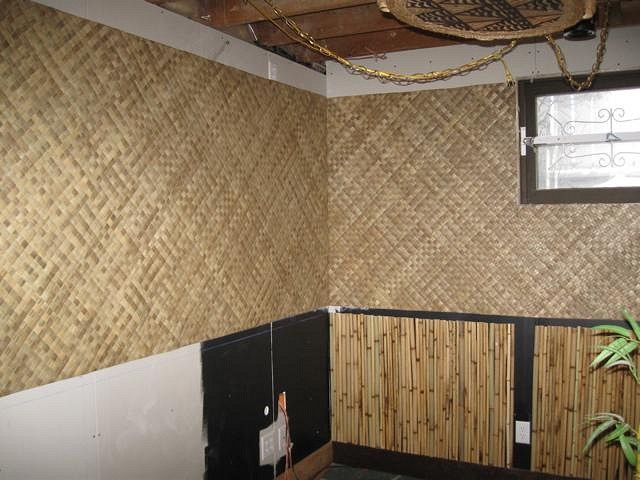
OK. A few pix:
|
|
M

Murph
Posted
posted
on
Wed, Dec 30, 2009 12:38 PM
Looks great! |
|
J

JackLord
Posted
posted
on
Sat, Jan 2, 2010 5:32 PM
I have a question along these lines: When you cut and attach the matting to walls, how do you account for outlets and light switches on the walls? |
|
R
RevBambooBen
Posted
posted
on
Sat, Jan 2, 2010 6:41 PM
|
|
J
JackLord
Posted
posted
on
Sun, Jan 3, 2010 1:17 PM
Tnanks BB, but not possessing your talents, could you please elaborate. What do I do with the painters tape? |
|
SF
Slacks Ferret
Posted
posted
on
Mon, Jan 11, 2010 3:00 PM
That's a pretty good question. Anyone know the answer? |
|
T
tikiskip
Posted
posted
on
Mon, Jan 11, 2010 3:37 PM
All you are trying to do is keep the matting |
|
T

TikiG
Posted
posted
on
Mon, Jan 11, 2010 3:54 PM
Ditto! The matting looks good Slacks... |
|
T
tikiskip
Posted
posted
on
Mon, Jan 11, 2010 7:52 PM
"how do you account for outlets and light switches on the walls?" I know this is the hillbilly way but I cut the piece to fit wall space. |
|
R
RevBambooBen
Posted
posted
on
Mon, Jan 11, 2010 8:20 PM
I use the blue tape to remind me where the outlets are. So, I can cut them out later. I've never had a problem with Lauhala falling apart by itself. Be nice to it and it'll be nice to you back. Butter sounds interesting! Rock on Slacks! |
|
T
tikiskip
Posted
posted
on
Thu, Jan 14, 2010 8:02 AM
When I cut Lauhala matting I'm cutting a two foot wide circle |
|
G

GatorRob
Posted
posted
on
Fri, Jan 15, 2010 11:02 AM
For our room, we didn't really have any trouble with the lahala falling apart. Taped the backside where a cut would go and then cut with regular ol' scissors because it's pretty thin stuff. Then came the aging stain. Used contact cement (3M? can't remember) to put it up. No staples. Just rolled it on with a paint roller and it sticks like a champ. For outlets, yep, marked them with blue tape and went back and cut out the holes. Pretty easy stuff do deal with. Ceilings are an entirely different matter though, requiring a stable ladder, a good sense of balance and a strong marriage. |
|
J
JackLord
Posted
posted
on
Sun, Jan 17, 2010 12:43 PM
I think Tikiship got what I was asking the best. I was not worried about the matting falling part- but its good that has been brought to my attention by BB and others. I was wondering how you would cut a piece and then know where to cut the holes for the outlets and switches. While you can probably feel through the matting, sticking a metal blade towards an outlet would be...insane. Anyway, the butter trick should do it. Thank to all of you. My education continues. |


Pages: 1 24 replies