Tiki Central / Tiki Gallery
My first Tiki from Yorkshire England
Pages: 1 44 replies
|
B

bananamansl
Posted
posted
on
Wed, Apr 27, 2011 3:47 PM
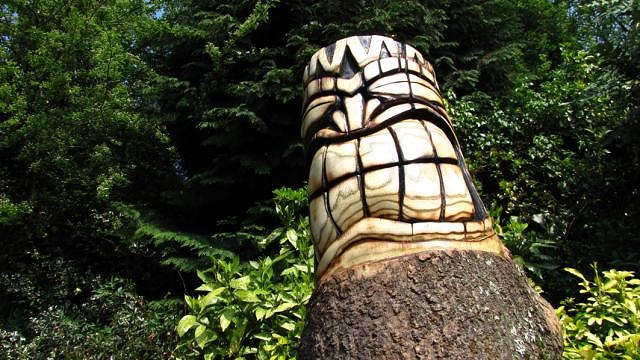
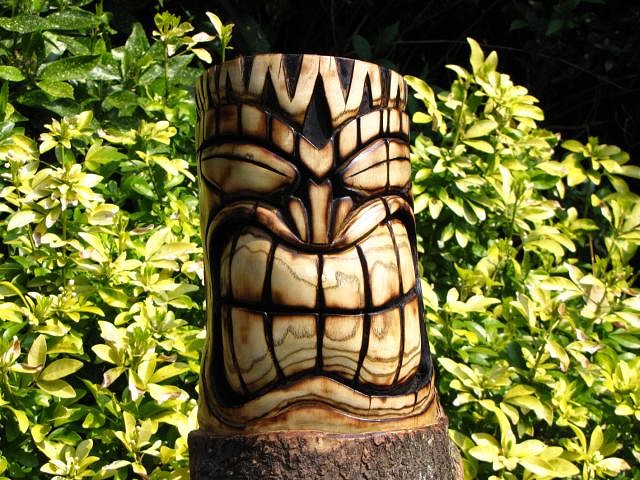
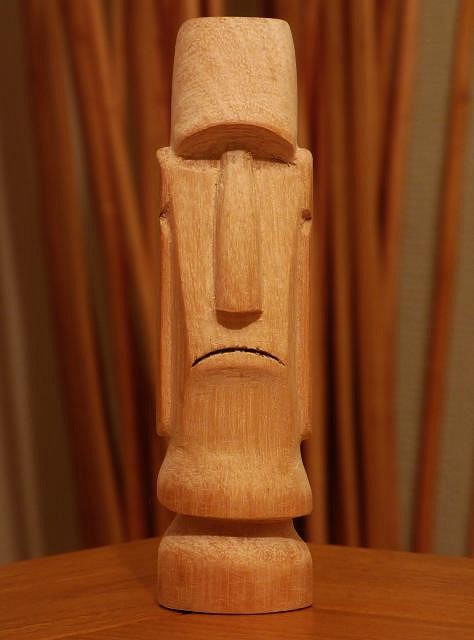
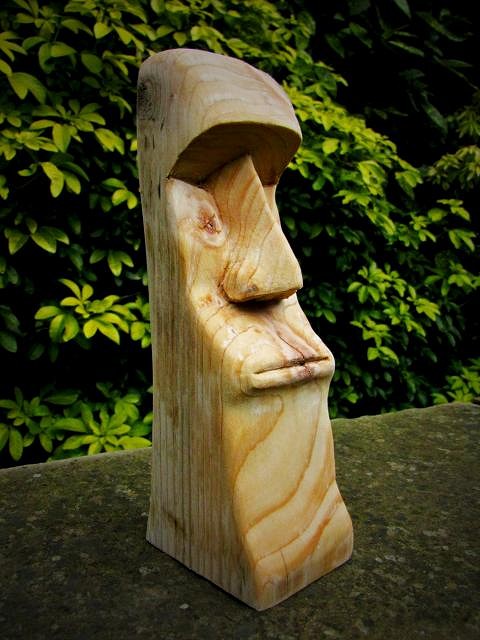
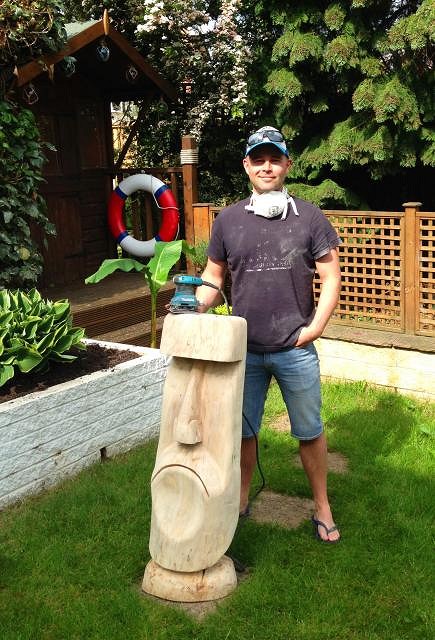
This is my first attempt at carving my own Tiki, it took me over 4 weeks using only chisels, the wood used is pine. It stands around 4-5ft and will guard the entrance to my forth coming Tiki bar/Surf bar to be built in my shed. I look forward to your comments. I am already planning my next design and can't wait to get started. All the best Tiki Steve! |
|
M

McTiki
Posted
posted
on
Wed, Apr 27, 2011 4:10 PM
First? Welcome to TC Steve. Thats an awesome first carve my friend. Tiki Bar should be interesting as well. Thanks for sharing and welcome again. Mahalo McTiki |
|
M

mudbone
Posted
posted
on
Wed, Apr 27, 2011 4:31 PM
Welcome aboard and that's a great first carving,well planned out, good carving,burned nicely,love the grain. Good job, dude. |
|
D

danlovestikis
Posted
posted
on
Wed, Apr 27, 2011 5:51 PM
That's terrific. If you have step by step photos you should open a thread on the carving page. Then all the carvers will write you lots of messages. I did my first wooden tiki last year and it was fun to read the comments. Did you use a blow tourch to darken the deep areas? Wendy |
|
B
bananamansl
Posted
posted
on
Thu, Apr 28, 2011 3:35 PM
Cheers guys! I've added further photos of my work in progress on the Tiki carving post! |
|
!

!kopecky!
Posted
posted
on
Wed, Jun 8, 2011 2:25 PM
lovely! |
|
T

TikiBlues
Posted
posted
on
Sun, Jun 19, 2011 9:20 PM
That's your FIRST attempt? |
|
PD

Pikeys Dog
Posted
posted
on
Sun, Jun 26, 2011 11:00 AM
Where in Yorkshire are you Steve? I'm down in South Yorkshire - Sheffield to be exact... Cheers, Joe. |
|
Z

ZeroTiki
Posted
posted
on
Wed, Jun 29, 2011 5:59 PM
That is brilliant...especialy for a first time! |
|
B
bananamansl
Posted
posted
on
Fri, Sep 9, 2011 4:57 PM
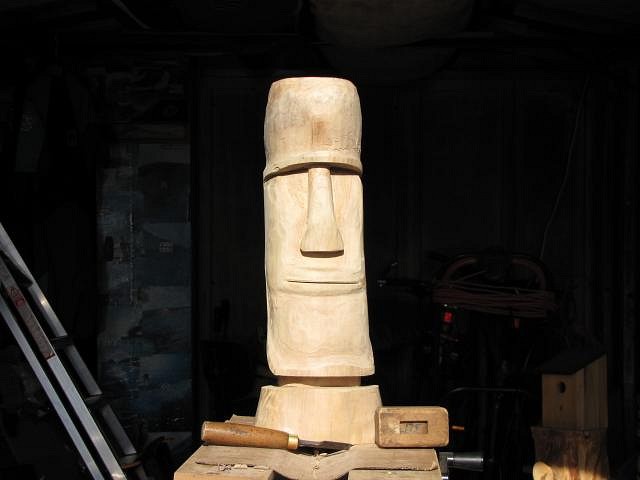
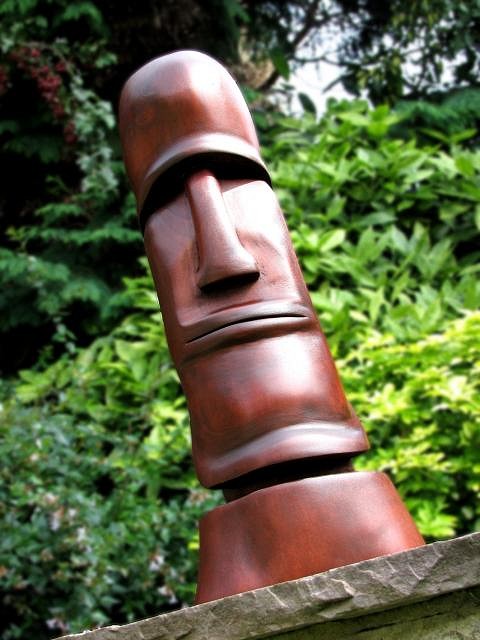
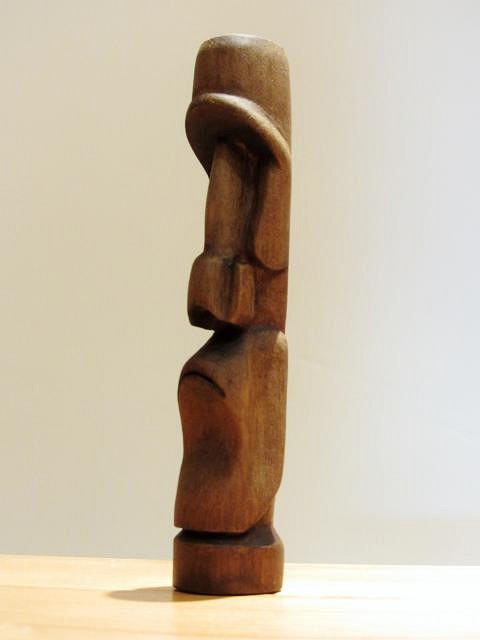
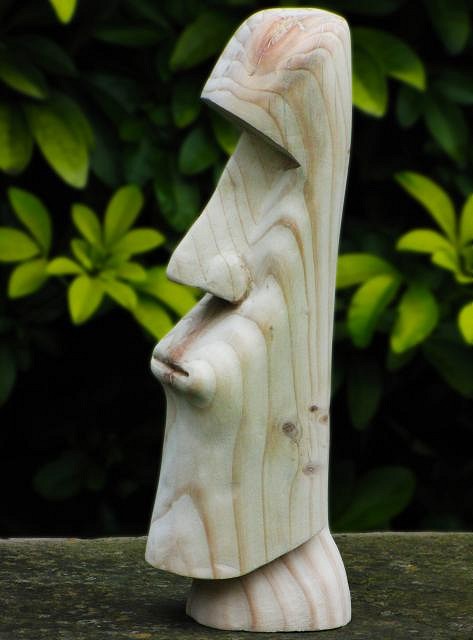
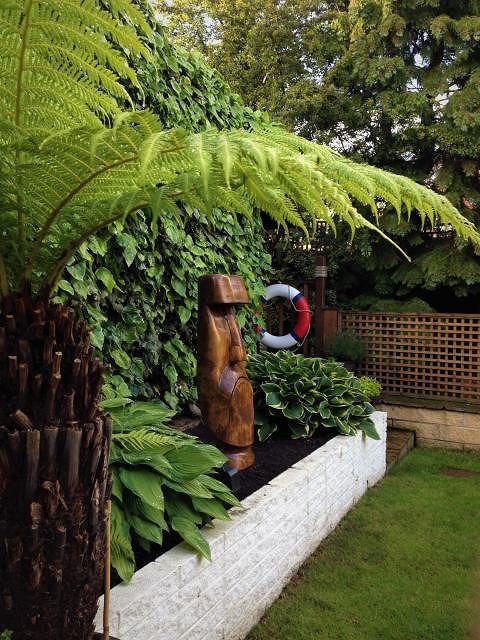
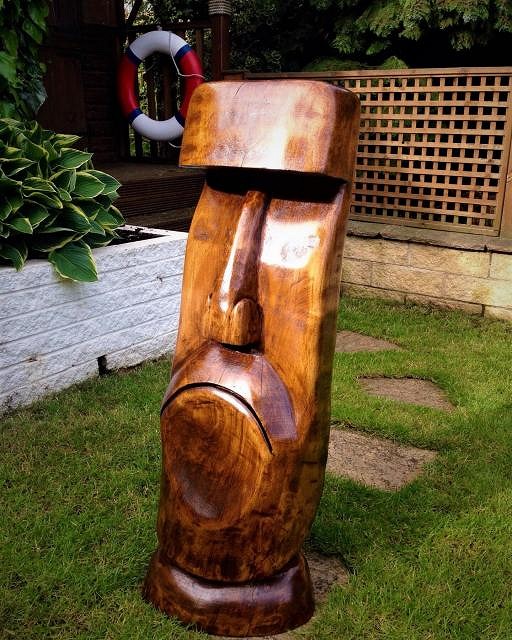
Just finished my latest carving! I found a very dry Sycamore stump and decided to carve an Easter Island head. Photos to be added shortly as it is now finished with mahoganny stain and wax finish. DUM DUM! |
|
Z
ZeroTiki
Posted
posted
on
Fri, Sep 9, 2011 9:17 PM
brilliant! |
|
B
bananamansl
Posted
posted
on
Sat, Sep 10, 2011 8:49 AM
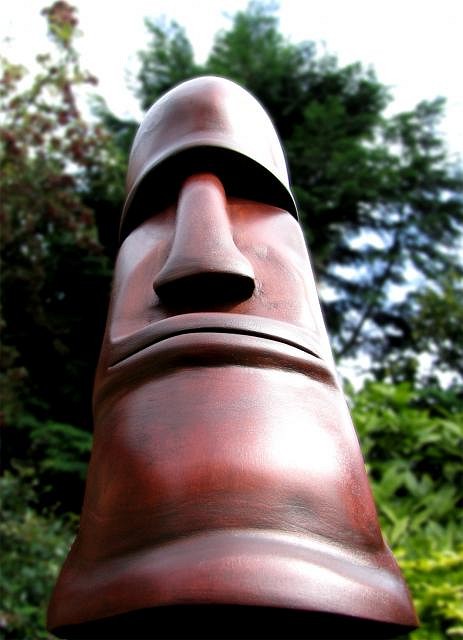
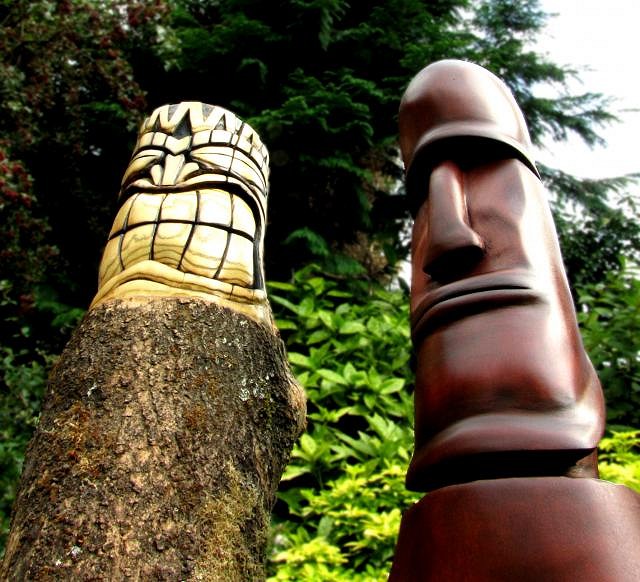
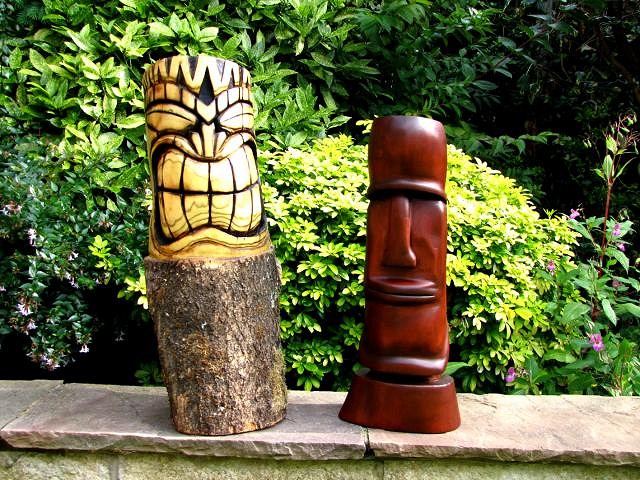
My second Tiki finished with Mahogany stain & waxed.
My wood carvings so far!
|
|
Z
ZeroTiki
Posted
posted
on
Sat, Sep 17, 2011 1:14 PM
That shade of stain is perfect. Nicely done! |
|
CC

Cut-throat Cullen
Posted
posted
on
Mon, Oct 10, 2011 4:33 AM
they both look awesome! very impressive for your first carvings :) |
|
C

castaway17
Posted
posted
on
Mon, Oct 10, 2011 6:19 AM
Beautiful finish on the Moai. I like the way the wood grain shows up in the tiki smile- shows the depth of the cuts. Nice work all around! |
|
T

ToddVegas
Posted
posted
on
Tue, Nov 29, 2011 2:24 PM
That wood grain effect on the teeth of your first tiki is amazing. Excellent job on both! |
|
HJ

Haole Jim
Posted
posted
on
Tue, Nov 29, 2011 6:29 PM
Hip! Good looking Tiki and Moai. Yours was inspiring; am in process of drying a couple pieces of pine to try first Tiki carving, this winter. |
|
B
bananamansl
Posted
posted
on
Sun, Dec 4, 2011 8:52 AM
[ Edited by: bananamansl 2011-12-11 02:18 ] |
|
B
bananamansl
Posted
posted
on
Sun, Mar 4, 2012 1:14 PM
20CM Maoi for my Tiki Bar! Not yet sanded or stained. Considering painting it in fluorescent paint to glow up under my black light.
|
|
B
bananamansl
Posted
posted
on
Sun, Feb 10, 2013 2:19 PM
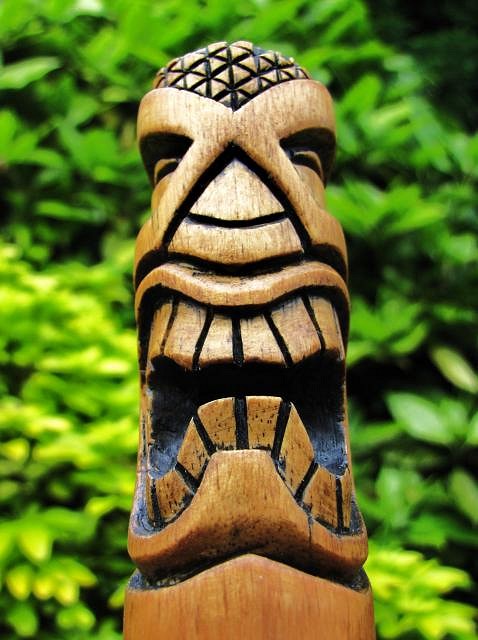
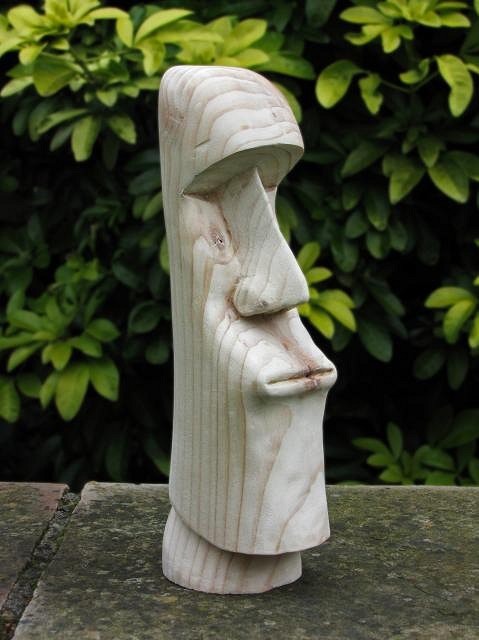
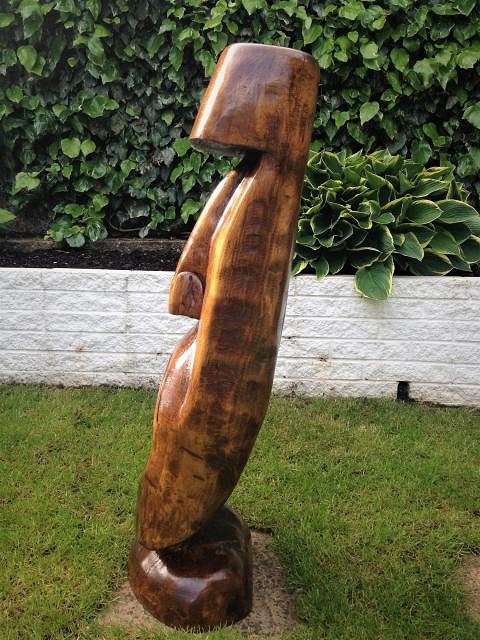
Named 'Gabe' after Sylvester Stalone in Cliffhanger.
Carved with palm chisels, finished with Oak wood stain.
|
|
G

GROG
Posted
posted
on
Sun, Feb 10, 2013 3:26 PM
Good stuff. GROG like. |
|
H

hiltiki
Posted
posted
on
Mon, Feb 18, 2013 7:23 AM
Very nice I like it too. |
|
H

HelenCampbell
Posted
posted
on
Thu, Feb 21, 2013 12:05 AM
That was your first? Wow! It is great! How I wish I could do that great on my first tiki too. My brother and I were planning to make one. We want to add it in our tropical inspired backyard. We already have some tiki torches in it which we have got last year from http://www.buytikitorches.com and we think having those tiki faces will add more beauty in our yard. Hope we can do as good as yours. :) [ Edited by: Hakalugi - Fixed link - 2013-02-21 20:23 ] |
|
HJ
Haole Jim
Posted
posted
on
Sat, Apr 13, 2013 11:11 PM
Well, aint' you freakin' hip! Fine, fine work. Tiki in England! You go, Dude! |
|
B
bananamansl
Posted
posted
on
Sun, Jun 30, 2013 11:33 AM
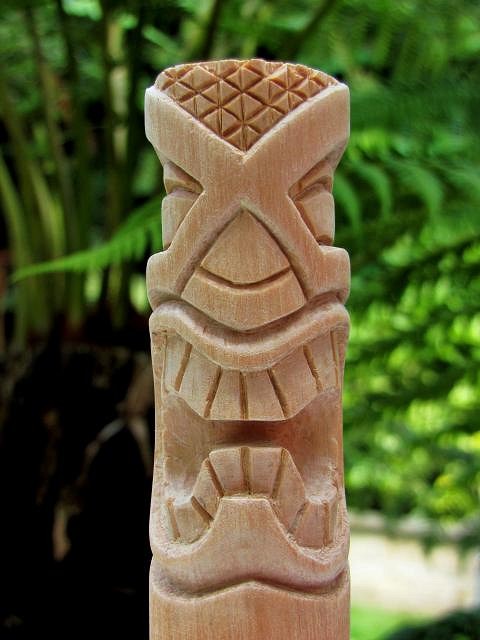
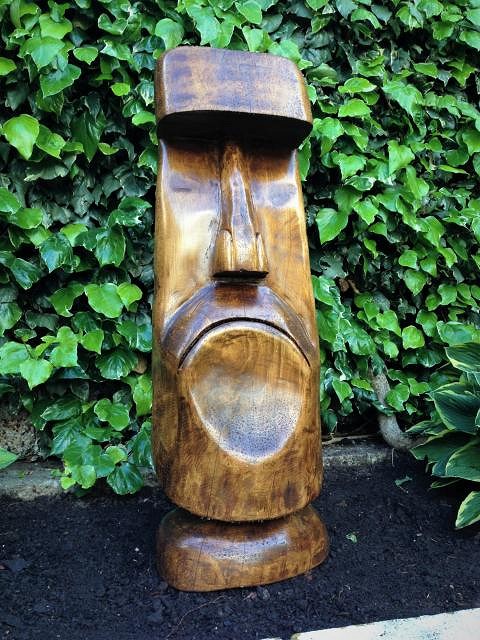
My latest Tiki.
Sanded and oiled.
|
|
H

hang10tiki
Posted
posted
on
Tue, Jul 2, 2013 8:59 PM
Good stuff Jon |
|
D

Dermdude
Posted
posted
on
Wed, Jul 3, 2013 12:17 PM
yo brah, nice work! I posted one of my latest carvings here and I have gotten a lot of recommendations to take it deeper! I am not excited about it but I broke out the chisels and have started to retool my entire carving. I had an ideal for adding some tattoo style etcings to the face. I do have plenty of experience with refinishing furniture never with a wax finish, only stain and french polish. I don't want stain to absorb very deep I want it to sit on top so I can carve with exacto knife and show lighter grain below. |
|
D
Dermdude
Posted
posted
on
Wed, Jul 3, 2013 2:31 PM
yo brah, nice work! I posted one of my latest carvings here and I have gotten a lot of recommendations to take it deeper! I am not excited about it but I broke out the chisels and have started to retool my entire carving. I had an ideal for adding some tattoo style etcings to the face. I do have plenty of experience with refinishing furniture never with a wax finish, only stain and french polish. I don't want stain to absorb very deep I want it to sit on top so I can carve with exacto knife and show lighter grain below. |
|
B
bananamansl
Posted
posted
on
Tue, Jul 23, 2013 3:17 PM
Dermdude, I fine sanded the remaining chisel marks then coated the Moai with Mahogany wood stain. The wax finish was added with a lint free cloth, 2-3 coats then buffed. Unfortunately now riddled with wood worm! Cheers. |
|
T

Tattotiki
Posted
posted
on
Wed, Dec 25, 2013 3:06 AM
Really nice. And thats from a Lancastrian. |
|
B
bananamansl
Posted
posted
on
Wed, Jan 8, 2014 1:48 PM
Thanks for the comments. |
|
B
bananamansl
Posted
posted
on
Sat, Mar 15, 2014 3:11 PM
First carve of 2014! Almost finished.
|
|
P

Plunkett
Posted
posted
on
Sat, Mar 15, 2014 5:15 PM
I must ask what was the stain you used for that mahogany red? Brand and colour? It was your tikis that got me into carving my own, I'm using 1 inch dowel at the moment as I'm in a flat but next month I'll have a garden and shed to do he same size as yourself! |
|
B
bananamansl
Posted
posted
on
Sun, Mar 23, 2014 12:18 PM
I used 'Colron Refined Wood Dye Deep Mahogany'. Finished with 'Colron Finishing Wax'. It's in quarantine at the moment getting treated for woodworm. Cheers. |
|
P
Plunkett
Posted
posted
on
Sun, Mar 23, 2014 2:28 PM
Thanks dude, I'm using the same exsept I used the refined beeswax, I'm guessing that's where I went wrong, sorry to hear about your tiki |
|
B
bananamansl
Posted
posted
on
Sun, Apr 6, 2014 12:08 PM
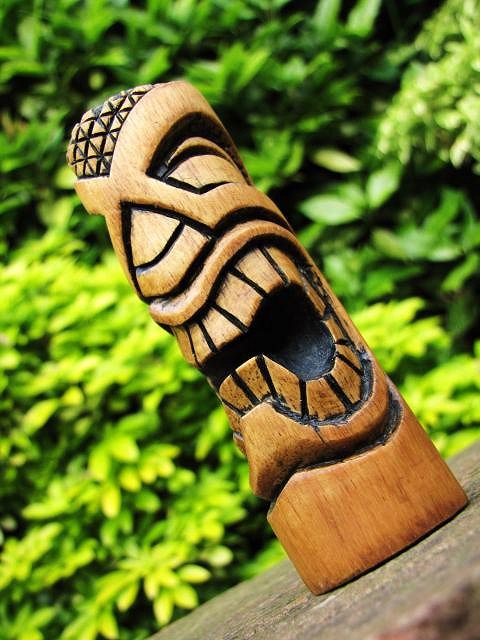
Now for the stain!
Impressed with my & Flexcut palm chisels.
|
|
0

0utl1n3
Posted
posted
on
Wed, Feb 25, 2015 9:11 AM
Wooo that moai came out great |
|
B
bananamansl
Posted
posted
on
Mon, Oct 8, 2018 12:57 PM
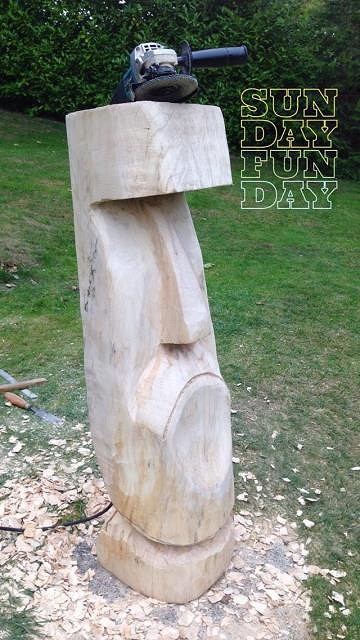
Working on a new Moai! It's been a while. Larger scale, so been using chainsaw, angle grinder, Flexcut Sculpting chisels! Good fun so far!
|
|
BB

Bam Bam
Posted
posted
on
Mon, Oct 8, 2018 1:02 PM
Love the scowl! |
|
B
bananamansl
Posted
posted
on
Mon, Jun 10, 2019 10:27 AM
Latest Moai sanded & ready for oiling! More pics to follow.
|
|
B
bananamansl
Posted
posted
on
Sun, Jun 23, 2019 12:11 PM
Finished!
|
|
BS

BIG SMOOTH
Posted
posted
on
Wed, Sep 25, 2019 5:42 PM
Love your carving B man! And your surf bar! And that Australian fern tree is beautiful! I bought my dad 1 for his birthday a while back and be time I went home it was on the compost heap! He said it had died! I spied it under a bush on its side not long ago when I visited my parents! Wonder if I can bring it back to life! |
|
B
bananamansl
Posted
posted
on
Tue, Oct 1, 2019 2:12 PM
Thanks for the comments! Tree Ferns are awesome. I've had 2 for the last 5 years. I live in Yorkshire UK so need to winter them from severe frost, other than this, seem hardy & have coped well. The key to success, is to water frequently(don't hold back) directly into the crown & apply some feed(if potted) once you start to get fronds in the Spring. Give them a chance to root(if potted), this can take some time, so ensure you stake them. Also, due to cost per ft, avoid burying too much of the base, if you sit them on top of the soil & stake them well, eventually the root ball will bind the soil & you can remove the stakes. Over the last couple of years I've noticed the crowns on both ferns have narrowed resulting in shorter thronds. This seems to be a common problem if they don't receive enough water during the year. Learn as you go! Good luck! |
|
BS
BIG SMOOTH
Posted
posted
on
Thu, Oct 3, 2019 5:00 PM
Thanks for the advice. Il see how I get on! Hopefully it can be brought back from the dead! Fingers crossed! |
|
T

Tall_Dave's_Midnight_Jungle_Lurk
Posted
posted
on
Wed, Dec 4, 2019 10:45 AM
Yes yes, very nice work! Love the reduction of form. Very cool. |

Pages: 1 44 replies