Tiki Central / Tiki Carving
My first Tikis!!!!
Pages: 1 8 replies
|
V

VespaVago
Posted
posted
on
Fri, Aug 6, 2004 11:35 PM
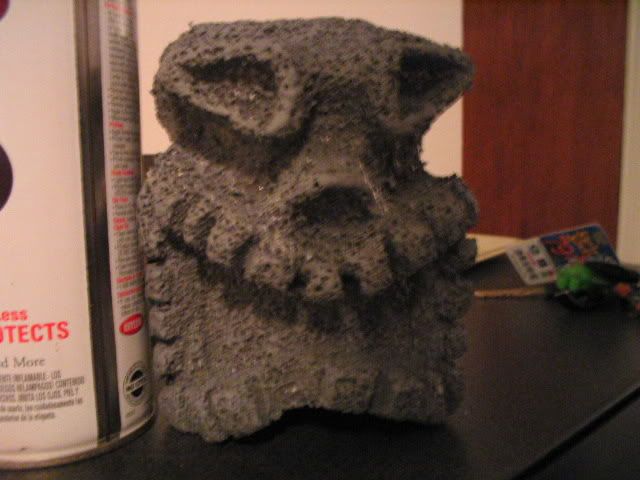
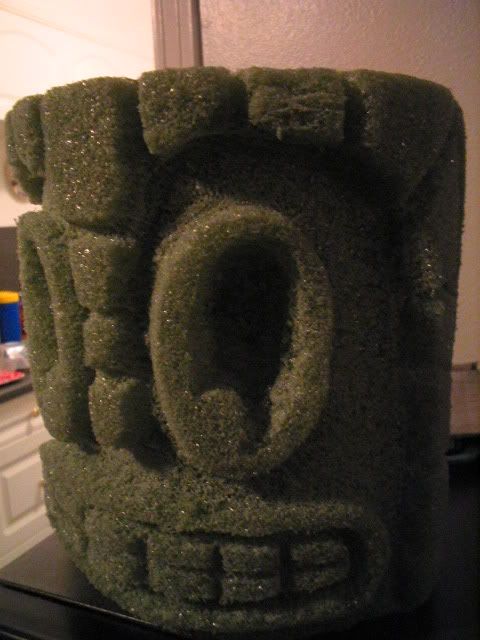
So after a trip to Vegas and scoring an Aku-Aku mug from the old Stardust for 10 bux I decided that maybe it was time to start carving em rather than hunting em. I traded my garage for an apt. ayear ago so I decided to use foam for now. I was wondering if anyone has any suggestions for applying a hardner or even what to do to harden polystyrene (I tried acrylic sealer but that was a little too messy and ineffective for my tastes). My first attempt on 5"x5" foam: http://img.photobucket.com/albums/v181/vespavago/tikibetter.jpg My second using a block of floral foam about 3x the size of the first guy... http://img.photobucket.com/albums/v181/vespavago/newtiki2.jpg [ Edited by: VespaVago on 2004-08-06 23:36 ] [ Edited by: VespaVago on 2004-08-06 23:37 ] |
|
B

Benzart
Posted
posted
on
Sat, Aug 7, 2004 9:16 AM
Welcom VespaVago. Your #2 is a 100% improvement over #1, which means #3 should Really be Killer. Keep it up and bring us more pictures.... |
|
V
VespaVago
Posted
posted
on
Sat, Aug 7, 2004 11:45 AM
Thanx a lot! After I completed tiki number 1 I havent been able to think about anything except making more. Thank God my wife found this bbs! Thanks for the support! |
|
O

Octane
Posted
posted
on
Sat, Aug 7, 2004 7:15 PM
as ben said your work is progressing nicely. i look forward to seeing your next. by the way how is that foam stuff to carve? |
|
V
VespaVago
Posted
posted
on
Sat, Aug 7, 2004 9:30 PM
Thanks! I cant wait to get started on a full figure just as soon as I can make it to the foam store in north Houston (I live on an island town on the gulf coast) which is 1-2 hours away. The foam wasnt too bad to work with. I found a fridge box not to long ago so I carved it up into a booth to contain the brunt of the foam dust. I used a shitty 5.99 dremel I got from big lots cause the only thing its good for cutting is foam. LOL. Im trying some coats of plaster now to see how its gonna hold up... |
|
G

Gigantalope
Posted
posted
on
Sun, Aug 8, 2004 12:38 AM
Your work looks good, the more you do, the better at it you will get. There is a product made to our into the hollow areas in boat hulls to keep water out. It's a two part foam. You can make a vessle the approximate dimansions of the tiki you want to make, mix the polimer and make the foam yourself. It looks like mocha when you mix it, then it gets foamy and grows. It ends up looking kinda anglefood cakey, but is carvable, and if you make a mistake, you can back-fill Another swell but more free form tequnique is to get any polystiyrene (sp) surfoboade blanks, packing foam...anything. draw out your design carefully like you would presketch a watercolor. Think of what parts you want raised, and what parts you want to recede. You can paint figures, letters, negative space...what-ever. The areas you want to be elivated in the relief, simply paint with old housepaint. If you want a crisp edge to somthing, cut it's boarder with an xacto. Once it's dry, get some carburator cleaner, and spray it on the foam (unpainted) that you wish to be negative space, or background. It will shrivel and look rough like stone. The painted areas will remain shielded. This tecnique is of course harmfull to the enviroment, but is done with stuff you can fine in most garages. You won't have the control you have using a dremil tool, but it's effects are pretty nice. Let me know if my ramble is unclear. Gigantalope. |
|
V
VespaVago
Posted
posted
on
Mon, Aug 9, 2004 8:09 AM
Did you say carve with carb cleaner! LOL, I restore old Vespas and that one thing I have an abundance of! Dont worry, your rambling was very well recived and I am in the process of trying to secure some marine foan to try it out. Oh,BTW, the plaster actually worked out great. Its a little cumbersome to work with but if I reduce it down enough and use lotsa coats it works like a charm. |
|
T

Thanatos
Posted
posted
on
Mon, Aug 9, 2004 9:28 PM
looks great! |
|
F

freddiefreelance
Posted
posted
on
Fri, Aug 20, 2004 10:54 PM
I like the Moon Eyes on the 2nd Tiki. I'll agree with Ben that you'll be even better on your third piece. Like Buckminster Fuller said (and MicroSoft proves), it takes 3 tries to get the bugs out of whatever you're doing. |
Pages: 1 8 replies