Tiki Central / Tiki Carving
Mr&Mrs Hoptiki Our Latest Projects
Pages: 1 31 replies
|
MB

Mr&Mrs BPHoptiki
Posted
posted
on
Fri, Apr 13, 2007 10:04 PM
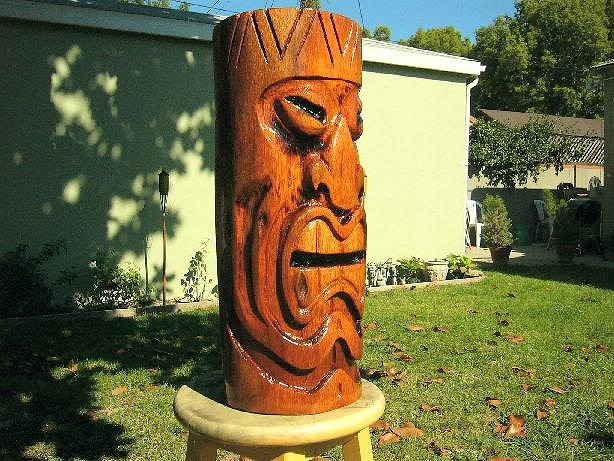
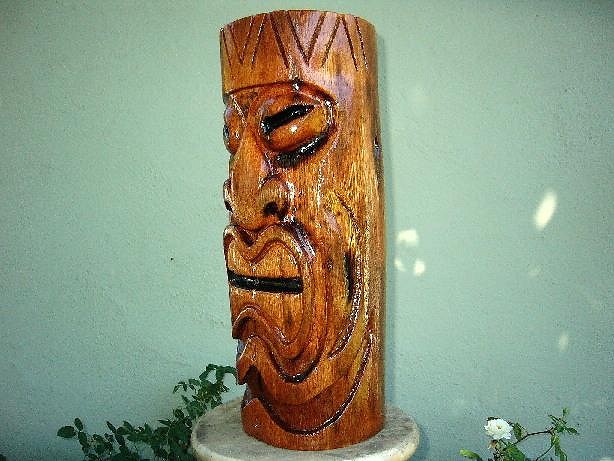
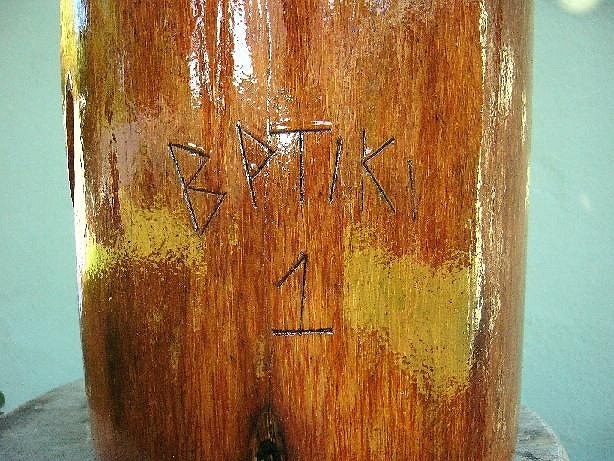
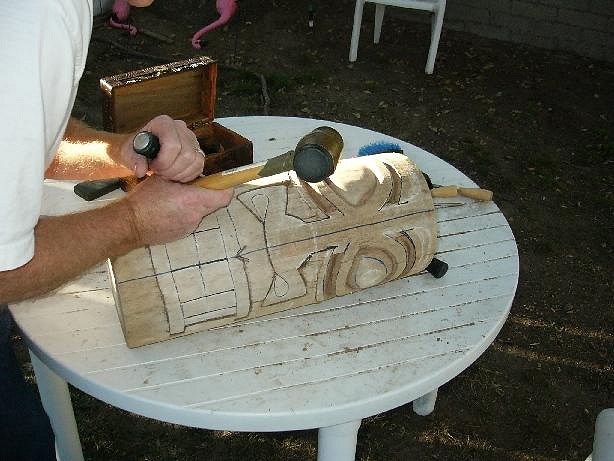
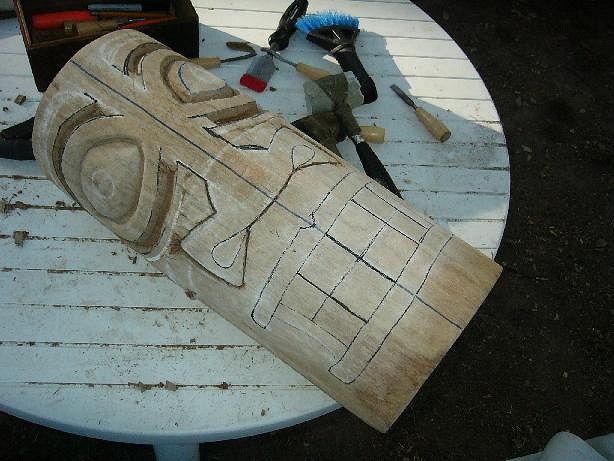
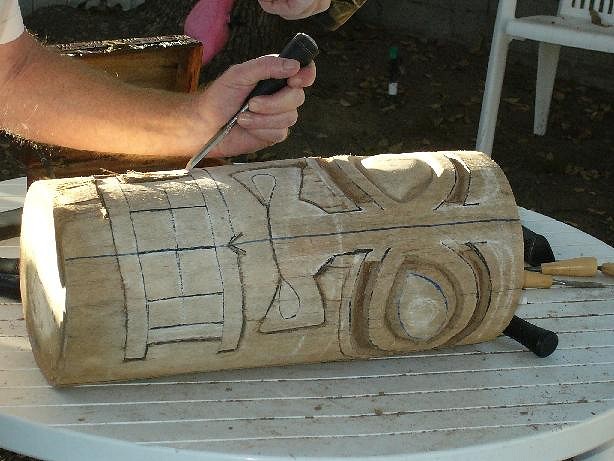
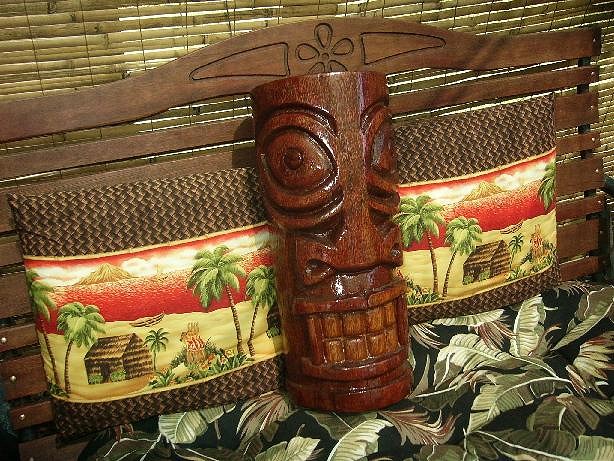
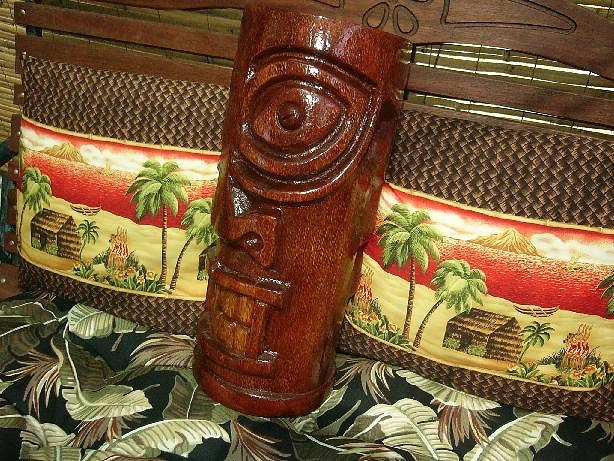
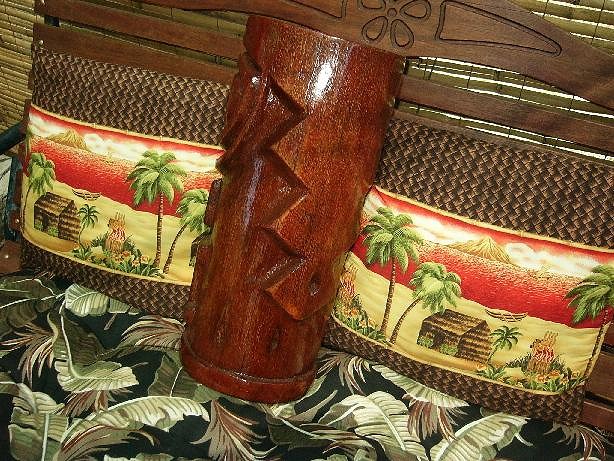
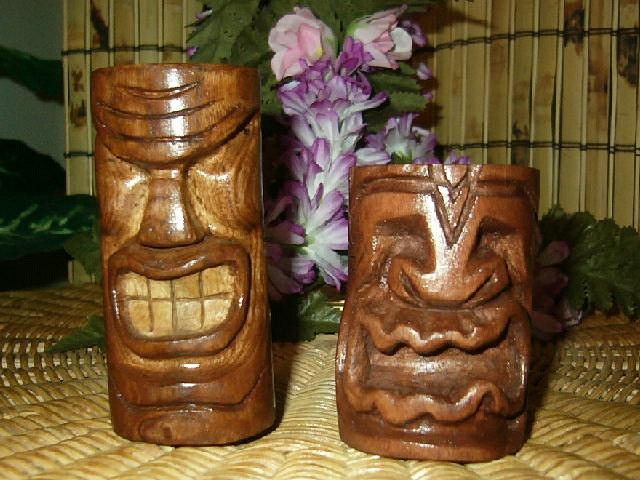
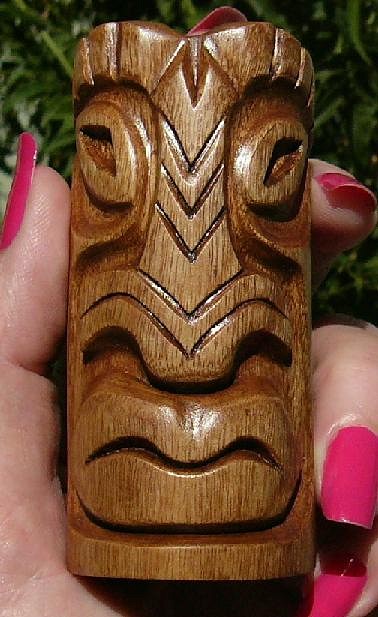
Hi every one, We've been lurking and learning for about a year now. We carved our first tiki last summer. Since then we've made another large tiki and several small ones. I, Mr.Hoptiki do the the designing and the majority of the carving and she, Mrs.Hoptiki, does the finishing. Or at least it's supposed to work that way...So here's BPTiki #1 Thanks for looking. [ Edited by: Mr&Mrs BPHoptiki 2007-05-01 12:28 ] [ Edited by: Mr&Mrs BPHoptiki 2007-05-01 12:37 ] [ Edited by: Mr&Mrs BPHoptiki 2007-05-10 17:39 ] [ Edited by: Mr&Mrs BPHoptiki 2007-05-10 17:56 ] [ Edited by: Mr&Mrs BPHoptiki 2007-09-09 22:21 ] [ Edited by: Mr&Mrs BPHoptiki 2008-04-30 10:30 ] |
|
P

PockyTiki
Posted
posted
on
Fri, Apr 13, 2007 10:07 PM
awesome! That's a really good one! I love the face. |
|
TD

Tiki Duddy
Posted
posted
on
Fri, Apr 13, 2007 10:09 PM
heyy thats awsome. great stuff. been around for about a year? should of said hello from time to time. |
|
MB
Mr&Mrs BPHoptiki
Posted
posted
on
Fri, Apr 13, 2007 10:12 PM
Thanks PockyTiki we are having great fun with our carving. Smiles, Mrs Hoptiki |
|
MB
Mr&Mrs BPHoptiki
Posted
posted
on
Fri, Apr 13, 2007 10:14 PM
Hey thanks Tiki Duddy. Smiles to you too, Mrs Hoptiki |
|
C

Clarita
Posted
posted
on
Sat, Apr 14, 2007 8:33 AM
WoW! Thats a great first one you are an excellent teem! Can't wait to see more! |
|
B

Benzart
Posted
posted
on
Sat, Apr 14, 2007 10:31 AM
Well, this BPTiki #1 looks Really Excellent! What a Funcollaboration, you both must be Very Proud. |
|
MB
Mr&Mrs BPHoptiki
Posted
posted
on
Sat, Apr 14, 2007 2:49 PM
Mrs Hoptiki here, Clarita - Thanks for the compliments. We've seen your tiki candles, they are super neat. Benzart - Hello to you, the Master Craftsman of Tiki Central. We are honored by your compliment and encouragement dear Sir. You are a great teacher and inspiration to us. Smiles, Mrs Hoptiki |
|
S

Sneakytiki
Posted
posted
on
Sat, Apr 14, 2007 3:08 PM
Nice tiki. It makes the firewood pile look like a bunch of blanks to me. It's great to collaborate with another person on a project like that. |
|
MB
Mr&Mrs BPHoptiki
Posted
posted
on
Sun, Apr 15, 2007 1:30 PM
Thanks Sneakytiki. I'm always looking for wood now. I haven’t had much luck on the bigger sizes. After Mrs. Hoptiki had been looking at Tiki Central for awhile she said she wanted to carve a tiki. It just so happened on my way to work the week before some one had cut up a Mexican Fan palm and dumped it by the side of the road. I hadn’t paid much attention to it since I'd never picked up a chisel before. Anyway, There were four pieces left so I snagged them and ordered some cheap $10.00 chisels on line. I could kick myself now for not getting more of that palm wood but at the time I didn’t even know the spices of palm it was. Oh well… Mr Hoptiki [ Edited by: Mr&Mrs BPHoptiki 2007-04-15 13:32 ] |
|
QK

Queen Kamehameha
Posted
posted
on
Sun, Apr 15, 2007 6:29 PM
wow! another great first time tiki carver, so much talent on this site. Your a great team, keep it up! Amy |
|
M

MBL
Posted
posted
on
Mon, Apr 30, 2007 5:23 AM
I really like your work on this Tiki. And the step by step pictures. It certainly is a help for those just starting out. The design is cool too. Do you have any others? |
|
M

McTiki
Posted
posted
on
Mon, Apr 30, 2007 6:16 AM
Very nice "first" Tiki! Welcome to the carving bug! Welcome to TC! Mahalo McTiki |
|
MB
Mr&Mrs BPHoptiki
Posted
posted
on
Tue, May 1, 2007 12:35 PM
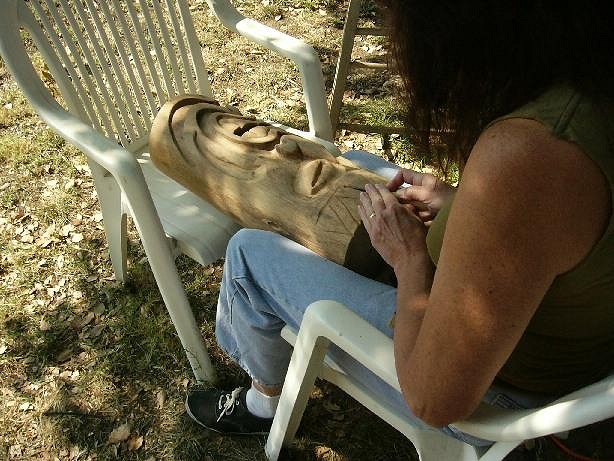
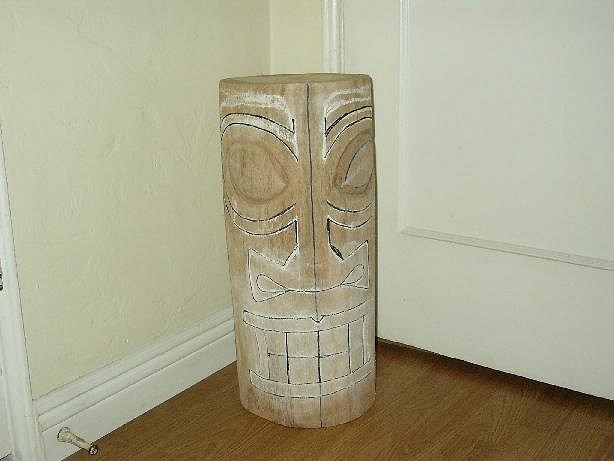
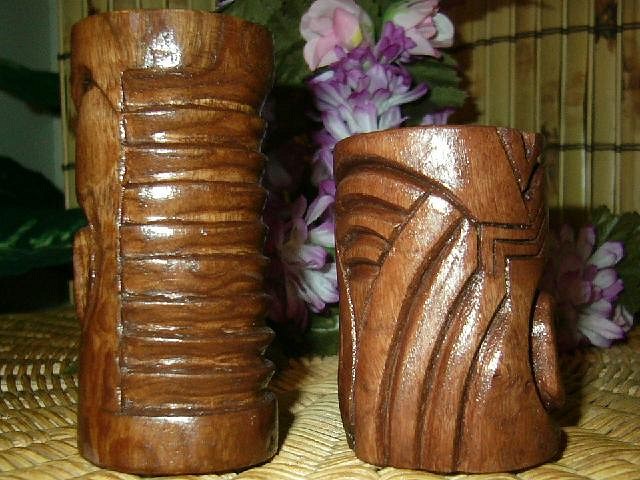
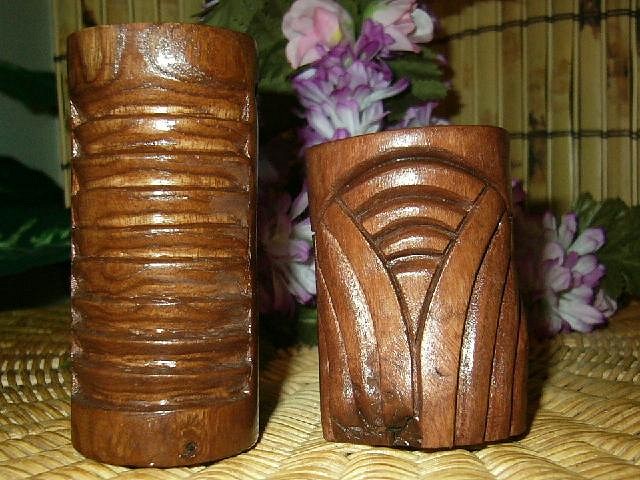
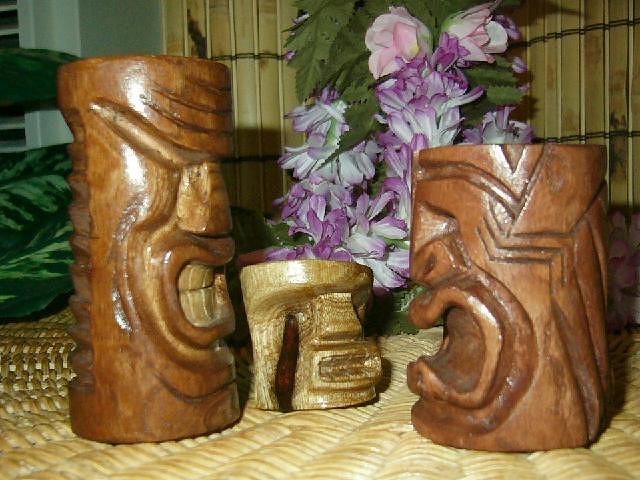
Mrs Hoptiki here: Thanks MBL, yes we do have more. Due to Mr Hoptiki and my work schedule, we are a lot slower than some with our carving and posting. We actually have carved eleven tiki’s so far. I’ll be posting them as time allows. Hey hi McTiki. We sure have enjoyed watching your carving work. We do have the “carving bug.” thanks to all you T C carvers for spreading it to us, hee hee. Thanks for the T C welcome. Here is BPTiki #2. I call him “learning tiki.” Keep in mind that we have no prior experience with carving let alone carving Palm wood. So we have a lot of learning to do. The wood was so splintery, it was tough to get any detail. Also, learned that working palm on a long vertical (like we did with the sides of the mouth and nose) doesn‘t work very well. We angst over him awhile then decided to sand and finish him up with stain and spar…and on to our next project, a “pocket tiki” using different wood. Will those post photo’s soon. Thanks for taking a look our work as we progress.
[ Edited by: Mr&Mrs BPHoptiki 2007-05-01 12:39 ] |
|
B

Babalu
Posted
posted
on
Tue, May 1, 2007 6:41 PM
The tag team thing is very cool you two... The work is looking most excellent! Watch out, this carving thing is addictive. I'm sure your finding that out. |
|
B
Benzart
Posted
posted
on
Tue, May 1, 2007 7:32 PM
Wow, The BPHoptikis are Quite a Team. I really am Impressed with your first 2 tikis. I believe you both did an Excellent job all the way down to the finish. My Only recommendation would to use Much thinner coats of varnish/poly as what you have is very thick and shiny looking.. If you sand between coats(following the instructions on the label) and coat several times, you actually end up with a much smoother fionish that doesn't look quite so thick. For your First tikis you get an A+++ and move to the head of the class... :) :) :) |
|
M
MBL
Posted
posted
on
Wed, May 2, 2007 5:09 AM
I second that! QUITE A TEAM! Really cool! I love the style and the depth. It shows that you can really do some great things with a few chisels...The finish is great too! Where do you get your design inspiration? |
|
MB
Mr&Mrs BPHoptiki
Posted
posted
on
Thu, May 10, 2007 5:38 PM
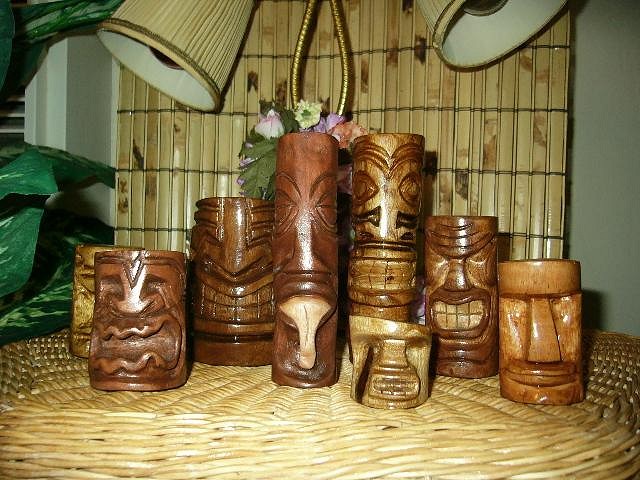
Mrs Hoptiki here, Benzart - thank you for the counsel about the varnish/poly.Your mentoring is always welcomed with us. You’re absolutely right. We've gotta lose that plastic coated look. Some of the ones in these next pictures have that look also. From now on we will be taking much more care with our finishing. And sand sand sand, and sand some more. MBL- We are a fortunate couple to be able to work so well together. I would have to say that our inspiration comes from all the carvers and creative people right here at Tiki Central. As I have said we started carving last summer. We were lucky to have found a couple of palm logs to carve, but after they were finished we had no other wood. The area where we live has loads of Camphor Laurel trees so we began to collect fallen and cut pieces of it from around the neighborhood. Camphor Laurel is the tree that they make CamphoPhenique Wound Care ointment from. I smells a lot like Vick's Vapor Rub and the wood is kind of oily. After we started carving we discovered that it has lots of small hole’s inside(I'm guessing oil/sap pockets , but we were on fire to carve so we used what we had and devil be damned. So here’s our tikis from last summer up till now in the order that they were carved.They range in size from about 1 1/2" to 6" tall. First Moai attempt - Mask tiki - Dog Chewed Tiki :lol: (hee hee, A Tribute to Sneakytiki) Smilin' Tiki- We are thinking of doing a large version of this guy. Go'in for the Grandpa Simpson look on the tiki to the right. Here Mr Hoptiki tries his hand at hands. Mr Hoptiki's first"tongue tiki." Group shot, ok Smile everybody! [ Edited by: Mr&Mrs BPHoptiki 2007-05-10 18:06 ] |
|
B
Benzart
Posted
posted
on
Thu, May 10, 2007 7:13 PM
Man thats a Sweet bunch of tikis, You guys are really doing well there. Love the Black tears streaming from that short guys 1 eye. cool |
|
TBBMT

tiki beat by marcus thorn
Posted
posted
on
Thu, May 10, 2007 7:53 PM
they are so cool keep up the good work [ Edited by: tiki beat by marcus thorn 2007-05-10 19:56 ] |
|
B

benella
Posted
posted
on
Fri, May 11, 2007 5:10 AM
Very cool family |
|
M
McTiki
Posted
posted
on
Fri, May 11, 2007 6:53 AM
Nice family shot ! I like the fact that it's a team effort. Kinda refreshing actually. I, like many of the carvers here.....we carve in solitude. Mahalo McTiki |
|
M

MAILMAN76
Posted
posted
on
Fri, May 11, 2007 1:04 PM
HI MR&MS I wone say that I like your work.It is verry nice carving you make. |
|
M
MBL
Posted
posted
on
Fri, Sep 7, 2007 6:31 AM
We need more from the husband wife team!!!! I love this work! |
|
MB
Mr&Mrs BPHoptiki
Posted
posted
on
Sun, Sep 9, 2007 10:16 PM
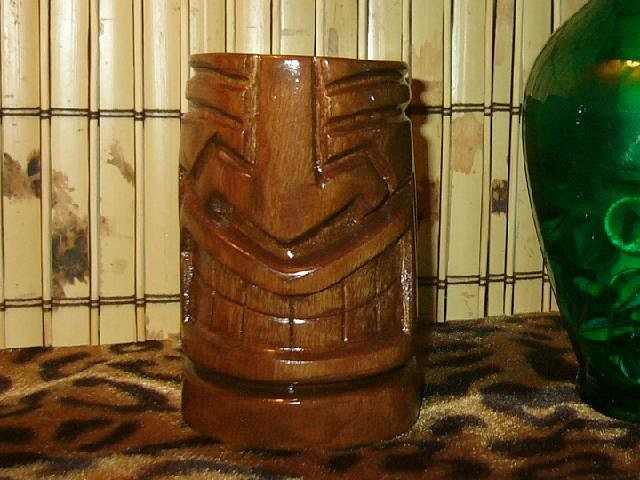
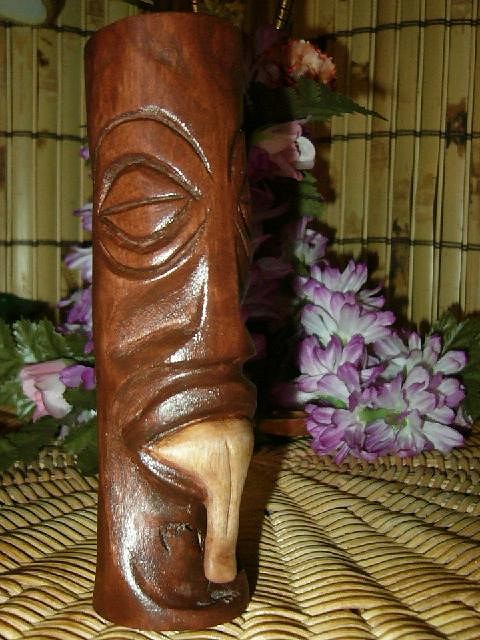
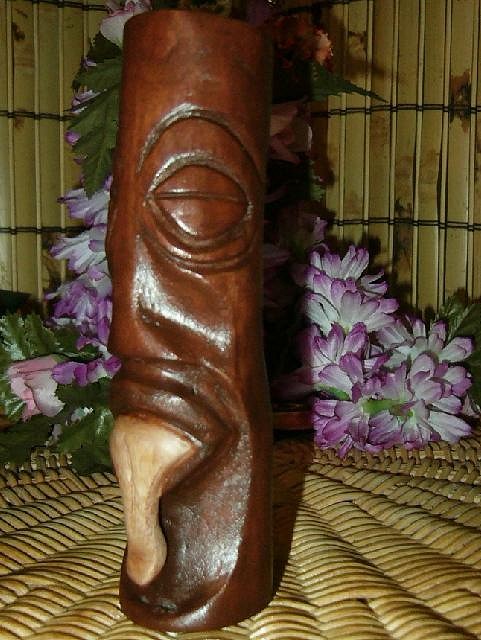
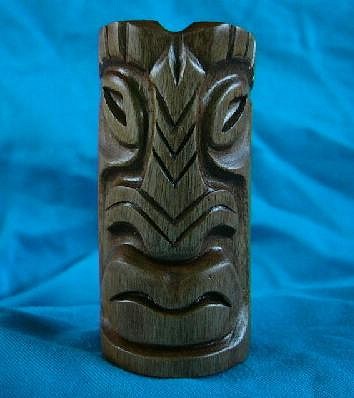
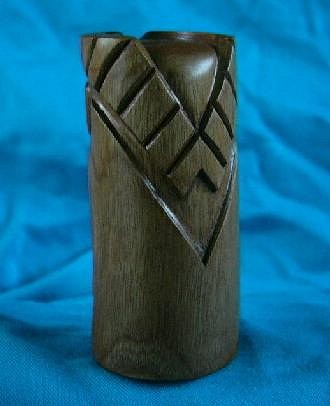
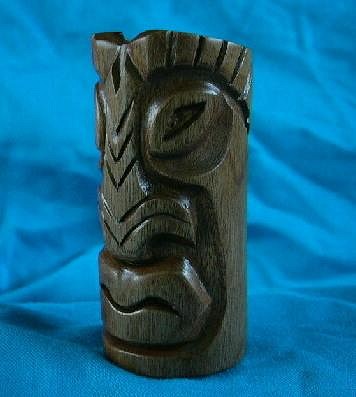
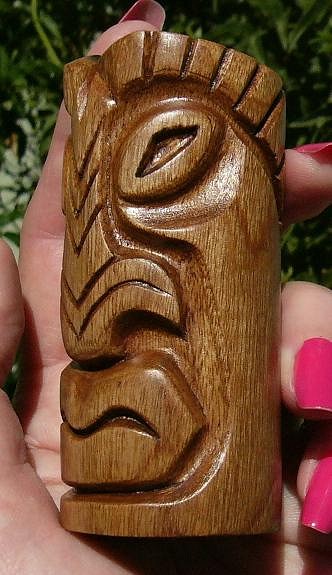
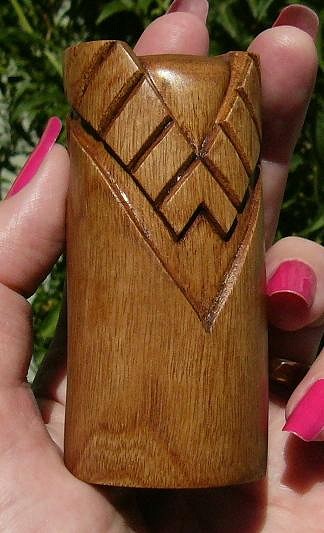
Thanks a lot MBL. Very kind of you. Our style so far has been sort of Polynesian pop free style. But we want to try our hand at more traditional Hawaiian carving soon. We still have a lot to learn, and sure are having fun with it. Mrs. Hoptiki and I have been pretty busy the past few months, but we've been doing a little carving here and there. This is a tiki Mrs. Hoptiki did. It’s one of our favorites so far. She took Benzart’s advice and sanded the heck out of it, stained it and then used a low gloss tung oil finish,buffing in between each coat with fine steel wool. Four coats in all. We like the way it turned out. Here’s a few other projects that we are working on. First the big guy. So there you have it! We just wish we had more time to carve. Aloha to all and thanks for looking. |
|
M
MBL
Posted
posted
on
Mon, Sep 10, 2007 7:38 AM
What kind of wood is that you are using? is that palm? |
|
T

TheBigT
Posted
posted
on
Mon, Sep 10, 2007 8:01 AM
Cool! Love the design work on that one! Nice finish too. Is that just the blue background that gives the tiki a sort of greenish tone? That gives me an idea to try out different colors of stain. Bet that would look really cool. |
|
C
Clarita
Posted
posted
on
Mon, Sep 10, 2007 11:10 AM
I'll say it again...Great team!Congrats! |
|
MB
Mr&Mrs BPHoptiki
Posted
posted
on
Mon, Sep 10, 2007 12:16 PM
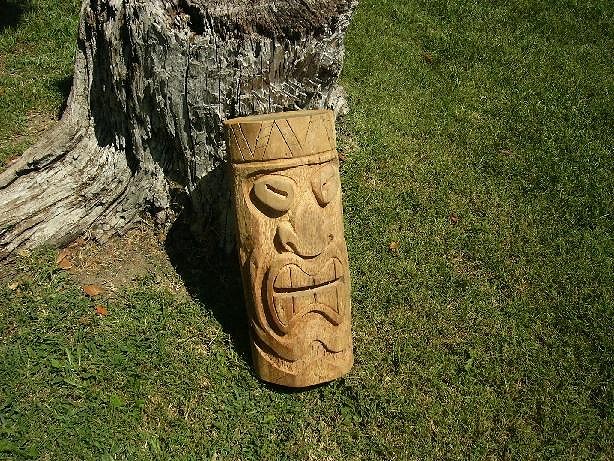
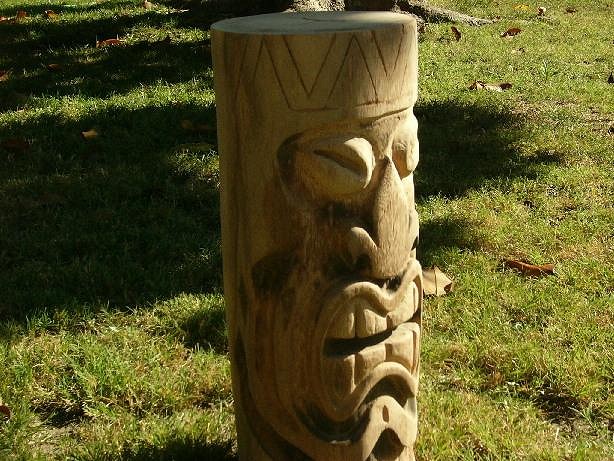
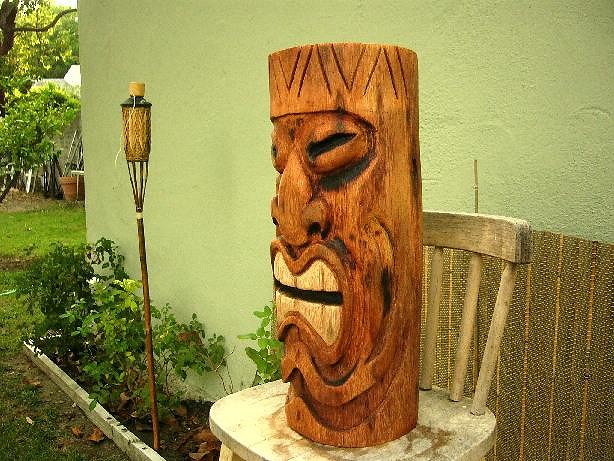
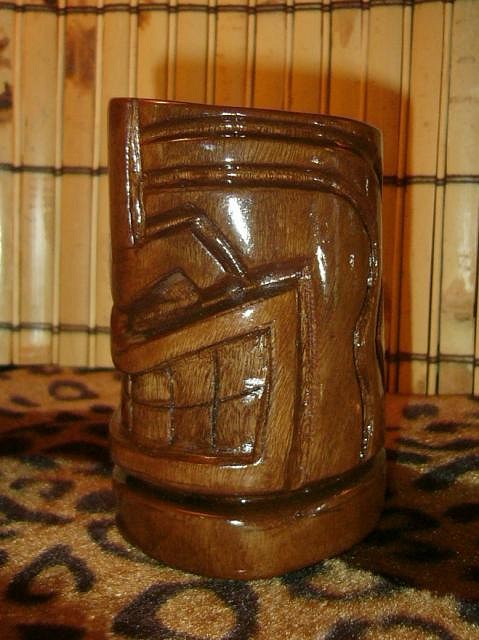
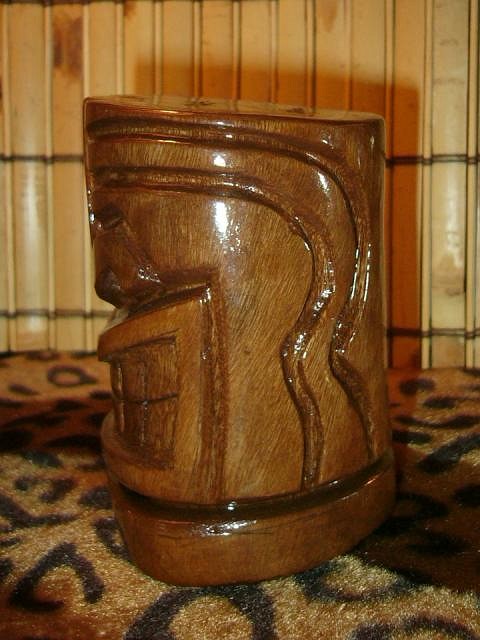
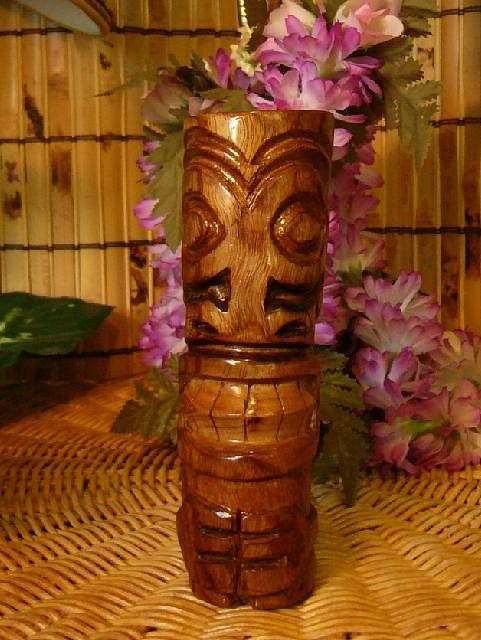
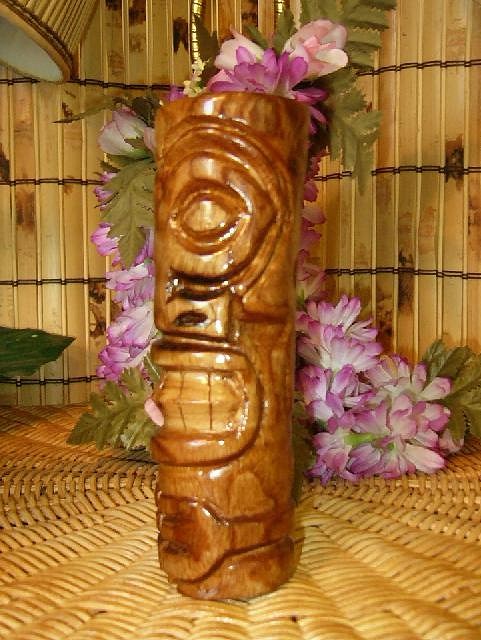
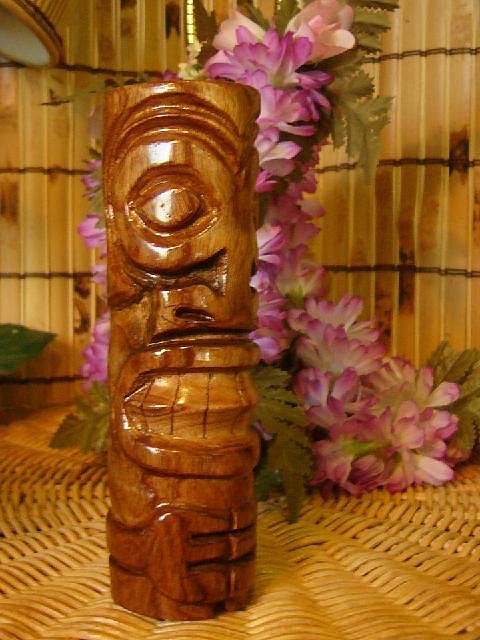
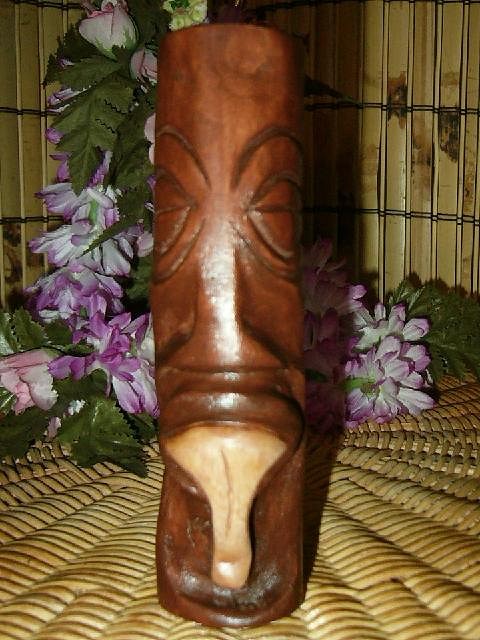
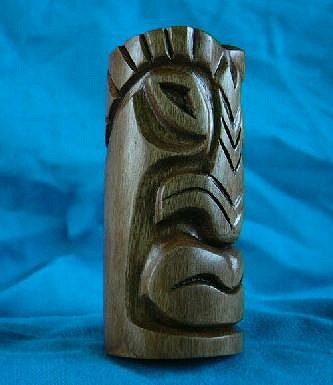
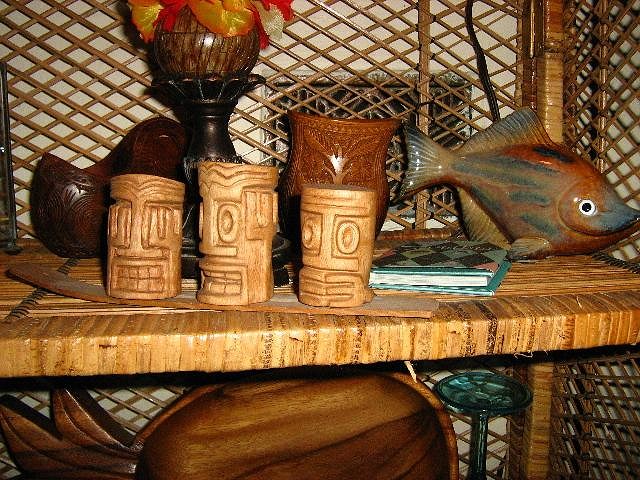
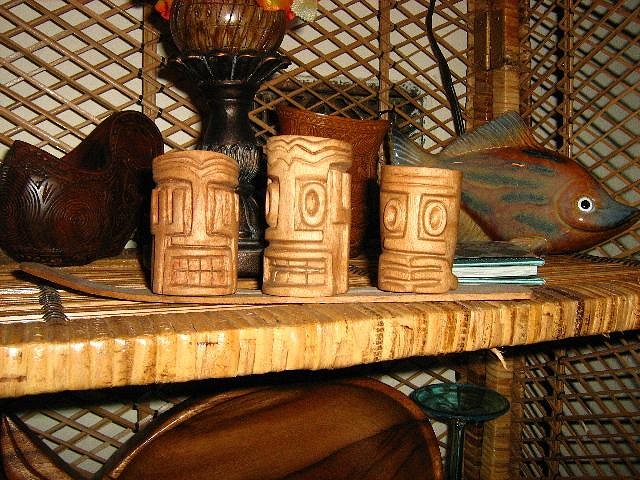
Aloha, Mrs Hoptiki here, MBL - The “big guy” is palm wood. The smaller guys are camphor laurel wood. Here are some better pictures of my tiki that I took this morning.
Thanks again, Mrs Hoptiki |
|
MB
Mr&Mrs BPHoptiki
Posted
posted
on
Wed, Apr 30, 2008 11:45 AM
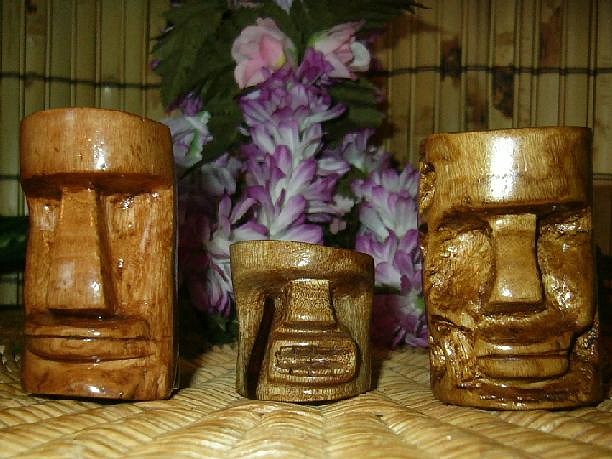
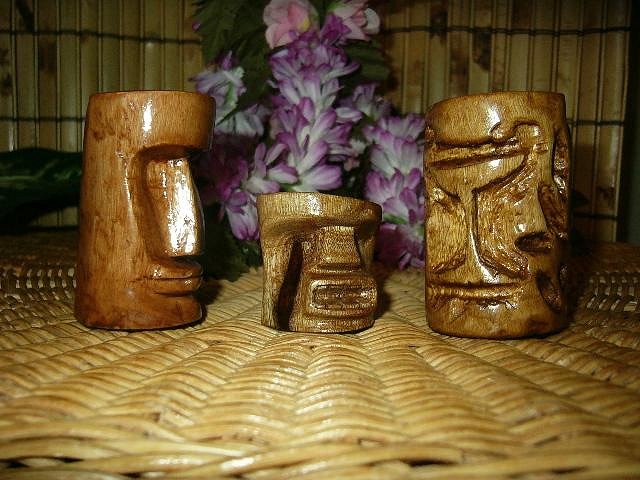
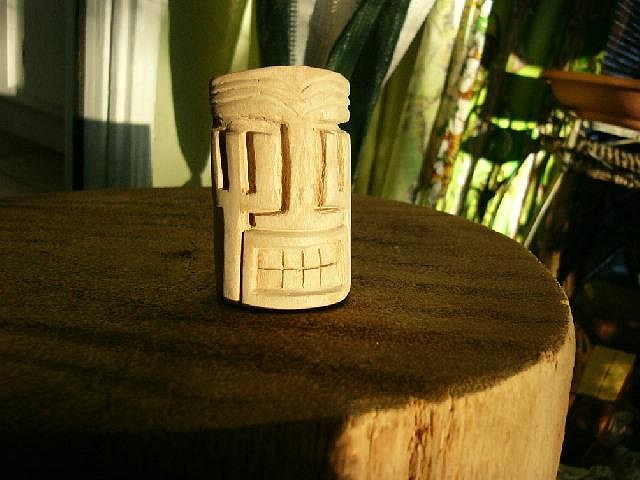
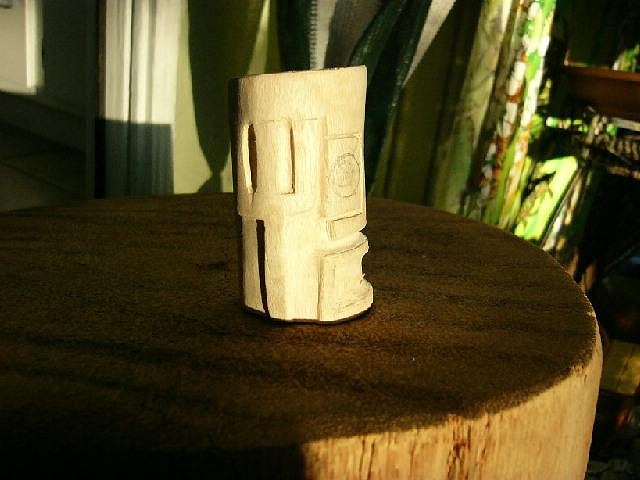
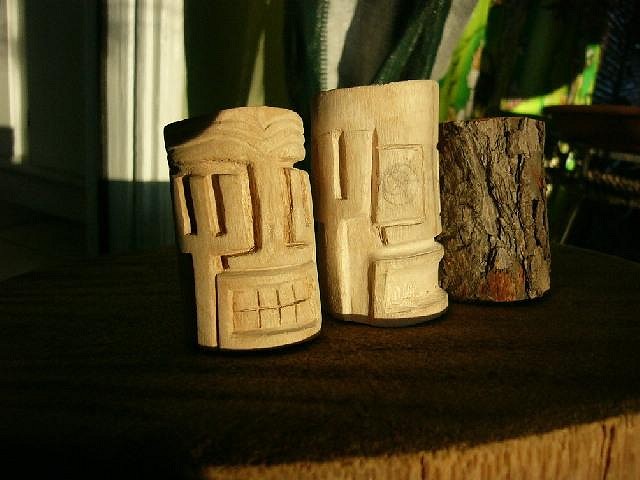
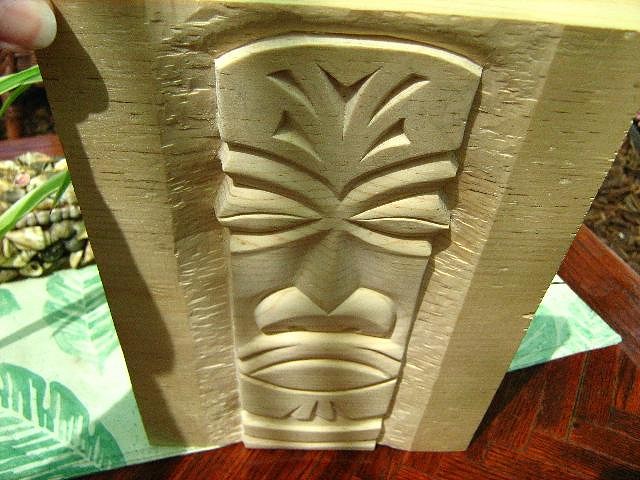
Mr Hoptiki's Carvings: Mr Hoptiki’s most recent carvings are these three little guys. He calls them “Tiki Bots.”
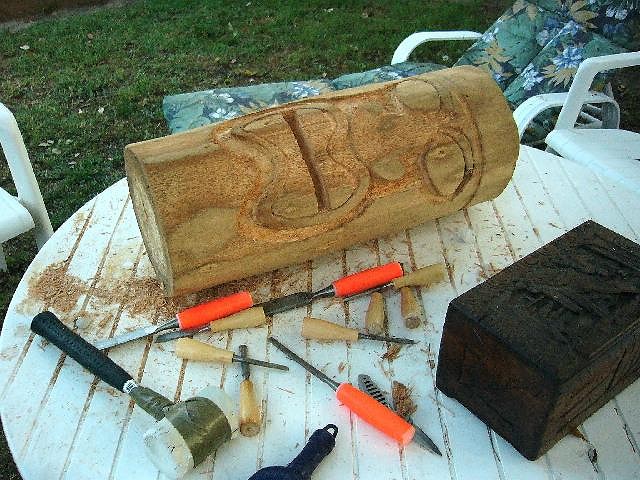
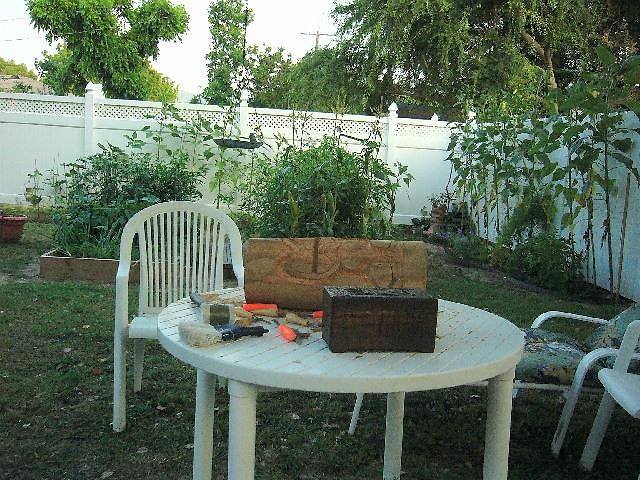
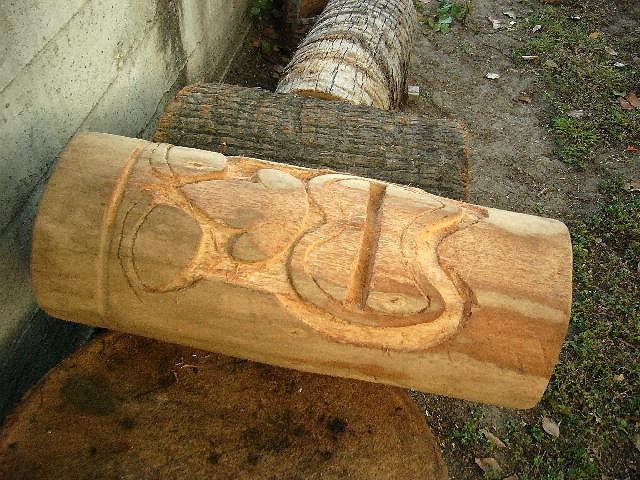
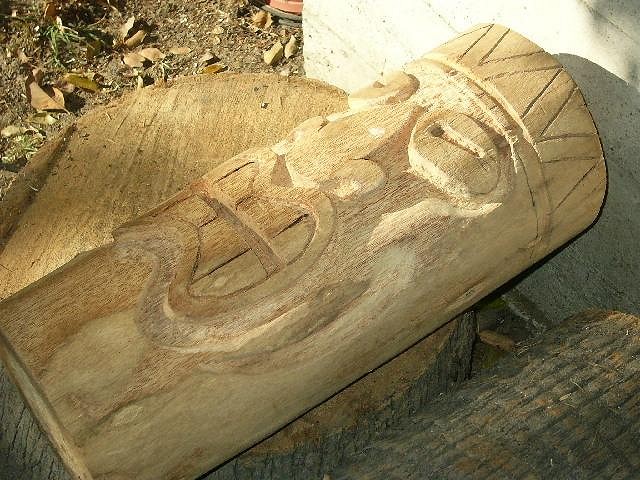
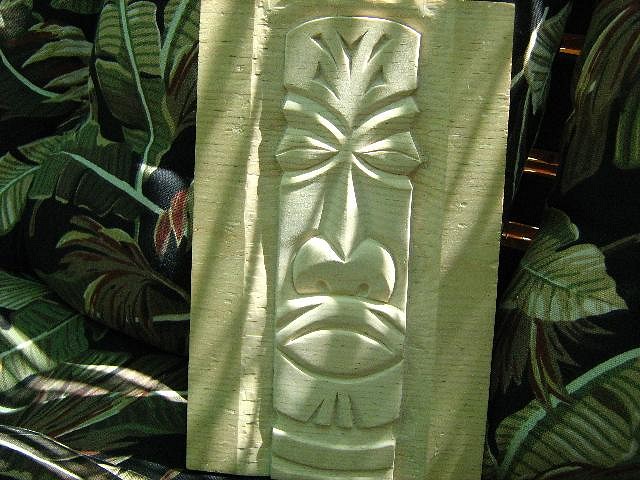
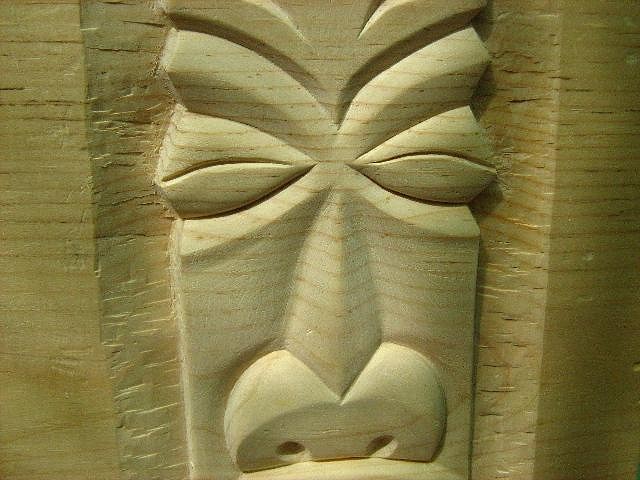
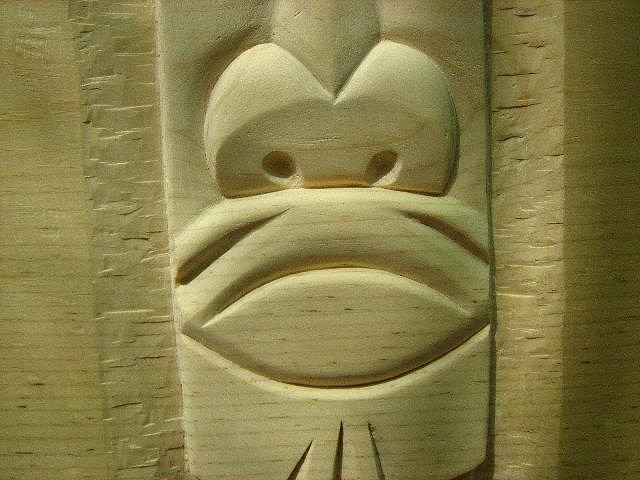
Mrs Hoptiki's Carvings: I've been working on a Swamp Fire inspired carving. Doug Horn is one of my favorite tiki artists. It's a 11 1/2 X 7 piece to hang in my living room. I have used just plain old pine wood because it’s soft and easier for me to carve (I’ve got a bit of an arthritis problem). The only drawback in using the pine wood is that it chips easily. I’d like to add tattoo’s if I can figure out how to do them properly. I still have some refinements to make,sanding and of course the staining and finish.
Mahalo for looking. |
|
B
Benzart
Posted
posted
on
Wed, Apr 30, 2008 12:31 PM
I Really Like this guy, you have created some very Sharp, crisp detail, Especially for that Chippy Pine. I Love hao smooth you have him, Very difficult with that pine not to show the grain ridges. |
|
MB
Mr&Mrs BPHoptiki
Posted
posted
on
Wed, Apr 30, 2008 12:50 PM
Thanks Benzart, I don't claim to be an artist in any way, but I sure love to carve when I am able to do it. MrsHoptiki |


Pages: 1 31 replies