Tiki Central / Tiki Carving
Geedavee is posting carvings.
|
G

geedavee
Posted
posted
on
Wed, Dec 10, 2008 7:36 PM
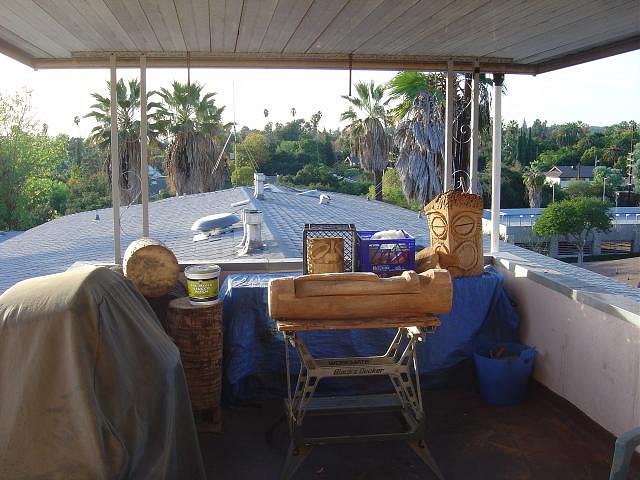
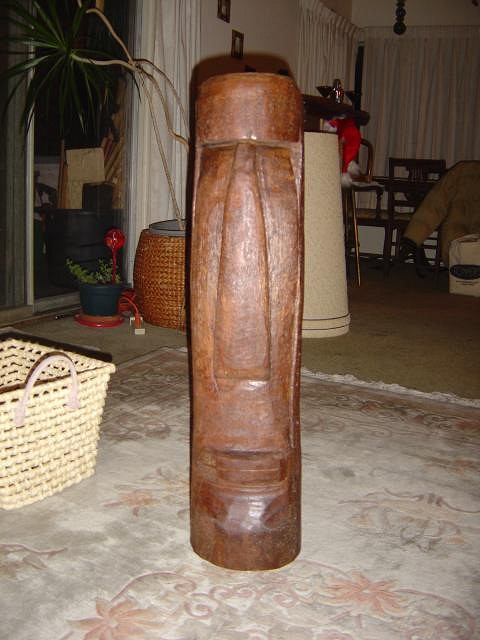
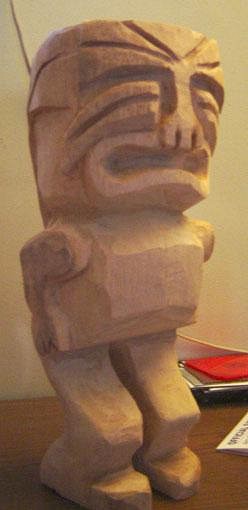
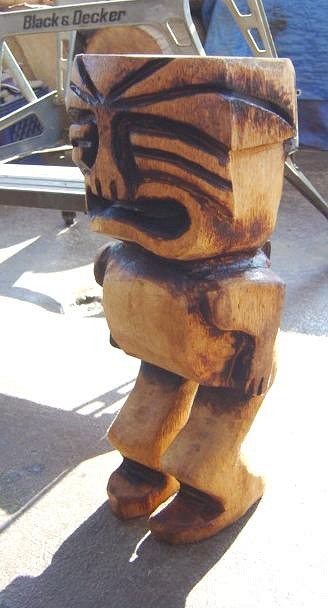
Hello everyone. For those of you who don't know me, I have been to about 3 of the chops, I carve on my balcony and I have done about 5 tikis. I am by no means a traditional style tiki carver, and I usually
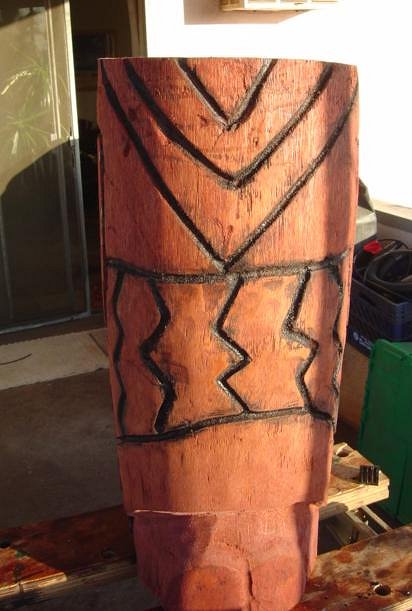
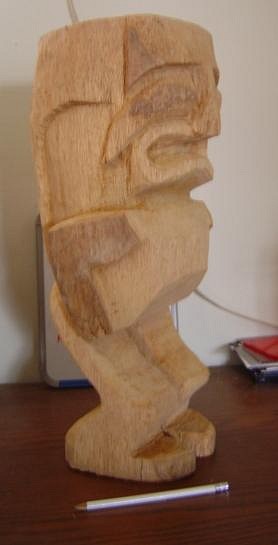
Here is a progress pic of my current carving.
Any comments would be appreciated. Thanks.
|
|
TT

Tucson Tiki
Posted
posted
on
Wed, Dec 10, 2008 10:37 PM
They look great! [ Edited by: Tucson Tiki 2008-12-11 07:35 ] |
|
T

T_birdman
Posted
posted
on
Thu, Dec 11, 2008 2:17 AM
Hey Dave, you just keep doing what you're doing and don't worry about sanding or any of that crap, you're on a natural progression to get where you're happy with what you've made, and each one will get easier for you! Some folks would argue that the ancient works weren't overly sanded, moreover they were rough as hell! There are plenty of examples of tiki's in the rough here that are amazing! And you made some nice, deep cuts into several of them already, you know where you're going dude! You're doing a fine job laddy! Tucson, I don't make a lot of posts, but your critique came off a little like a Mister Know-it-all, for a self proclaimed "Rookie" carver. The one thing I've noticed about how folks here comment on others work is to look for the good points in someones work and focus the encouragement and praise to help guide them on, not make them feel like crap! Maybe I should have PM'ed you on this but it's bugging me! Sorry. |
|
B

Benzart
Posted
posted
on
Thu, Dec 11, 2008 4:28 AM
Right on both parts, Your tikis are looking great for your first ones and Much better than Mine did at this stage. Just search here and the 'net for tiki images, the more you have to look at the more you figure out how to do the features that work best for you. Most of all be safe and have FUN! That's what it's ALL About. :lol: :P :D :o |
|
4

4WDtiki
Posted
posted
on
Thu, Dec 11, 2008 5:33 AM
Dave, I like that in progress tiki a lot, just the way it is. I'm patial to the rough-hewn look. |
|
TT
Tucson Tiki
Posted
posted
on
Thu, Dec 11, 2008 7:26 AM
I am sorry if I sounded a little rough. I was a little buzzed last night. Your stuff is great like I said. Make yourself happy with your carves. That's the most important part of this hobby is enjoying what you do. Again I apologize. Sorry. Keep at it and you will progress with every one. |
|
B

Bowana
Posted
posted
on
Thu, Dec 11, 2008 7:30 AM
Looking good, Davee! Bowana |
|
G
geedavee
Posted
posted
on
Thu, Dec 11, 2008 3:05 PM
Tuscon Tiki's comments were edited before I got a chance to see them so no harm no foul. It looks like it had to do with sanding. What do most people use to do their sanding? For inspiration, I use Tiki Magazine, "Tiki Modern", and "Tiki Style", or other Thanks for all of your responses. |
|
B

buzzard
Posted
posted
on
Thu, Dec 11, 2008 7:09 PM
hey geedavee |
|
BTP

blindy the pirate
Posted
posted
on
Sat, Dec 13, 2008 10:12 AM
Don't lie to the man! :lol: One of my favorite tools to use is my 4" grinder with 36 grit sandpaper. It removes a lot of material in short order. You still have to sand after you use it, but it can smooth out chisel marks easily. |
|
T

TheBigT
Posted
posted
on
Sat, Dec 13, 2008 11:25 AM
Hey they look great. They have a lot of character probably due to the rough hewn finish. I think it's cool. 8) |
|
SF

Slacks Ferret
Posted
posted
on
Sat, Dec 13, 2008 12:50 PM
Amen to that! Once I discovered this, I was able to make alot of progress with my large tikis. Still not done them yet though... |
|
SF
Slacks Ferret
Posted
posted
on
Sat, Dec 13, 2008 12:52 PM
Looks like you have a nice spot to carve there Geedavee! I'm jealous. Especially since a horrible winter snowstorm has just crippled my city. |
|
G
geedavee
Posted
posted
on
Mon, Dec 15, 2008 12:30 PM
I just picked up an angle grinder at a local pawn shop. Unfortunately, it is raining in the LA area this week so carving I figure that outdoor tikis look better with a rough look, Thanks again for all of the input.
|
|
GP

Grand Poobah
Posted
posted
on
Mon, Dec 15, 2008 12:58 PM
I hope you are feeling better. I have found that most people at this site are really freindly and helpful. I have just recently joined and people just to very encouraging. While i don't have much to offer I thought I would throw out some help. I have a great deal of power tools from cabinetry work that I do on the side. They have been useless for me in carving! One tool that I have found helpful is a porter cable profile sander. The sander comes in a case and you can attach different sanding heads to match your profiles. The sanding heads are small and can fit into tight spaces. I don't light to use the tool itself, but the heads are helpful. The heads are made from some sort of rubberized material. They can be easily nicked or lost. Porter cable may actually sell the tips as replacements independent of the tool. If sanding is a concern, they might be helpful. Although I wouldn't advise buying the profiles and the sander as it can be expensive. Using them by hand also cuts down on dust, especially breathing it in. Good luck and health |
|
G
geedavee
Posted
posted
on
Tue, Dec 30, 2008 4:50 PM
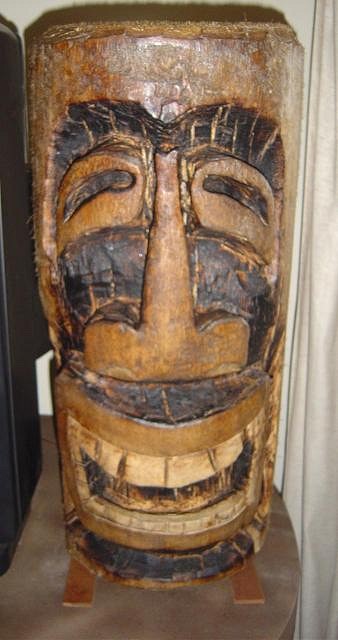
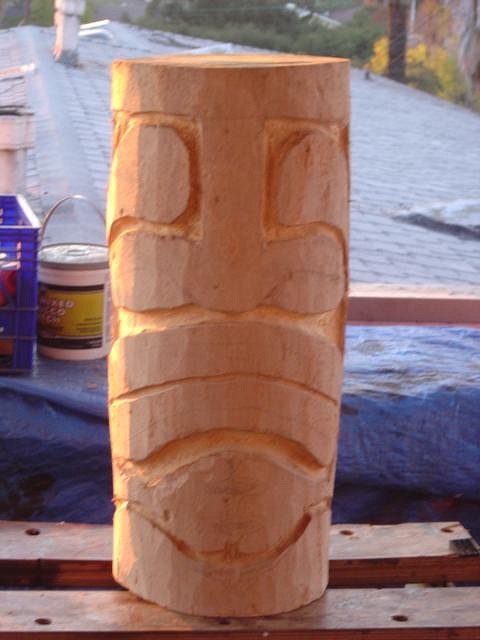
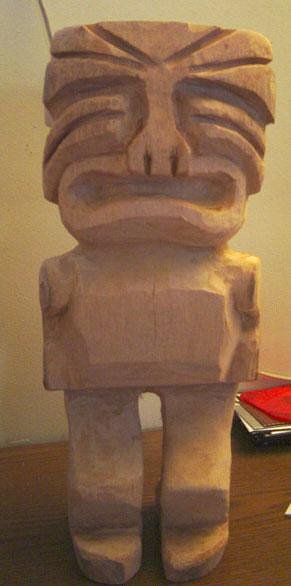
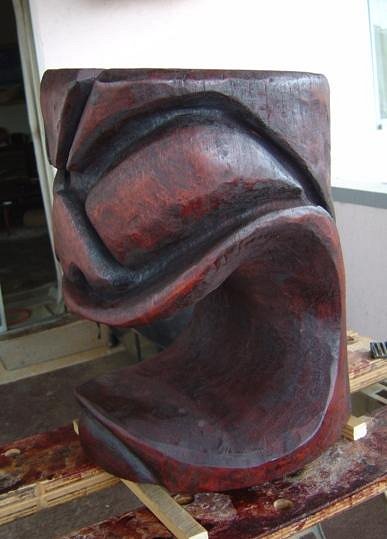
I finished that progress tiki and I have moved on to the next one.
It's kind of raw, but I have purchased some new sanding bits How can I carve very deep but narrow lines? Like 2" deep. I want to carve the lines on this guy very deep.
Any input would be helpful. I hope to make it to some chops soon. |
|
4
4WDtiki
Posted
posted
on
Tue, Dec 30, 2008 6:35 PM
A chainsaw would work. :wink: There's a chop this Sunday, check the events forum! |
|
D

drasticwagon
Posted
posted
on
Tue, Dec 30, 2008 7:40 PM
DOUBLE POST
[ Edited by: drasticwagon 2008-12-30 19:42 ] |
|
D
drasticwagon
Posted
posted
on
Tue, Dec 30, 2008 7:42 PM
|
|
G
geedavee
Posted
posted
on
Sat, Jan 10, 2009 10:12 AM
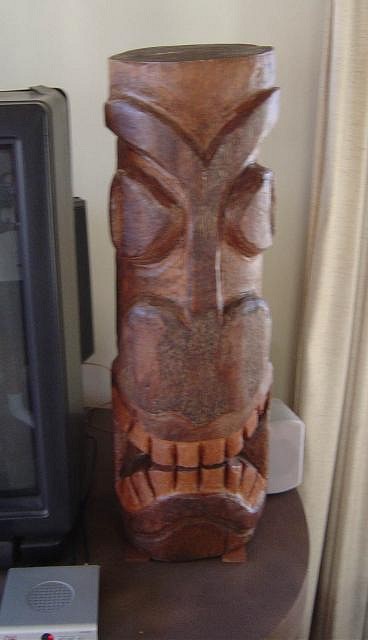
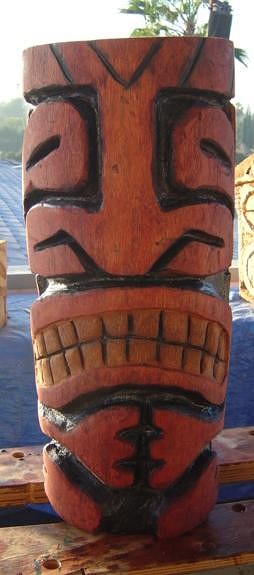
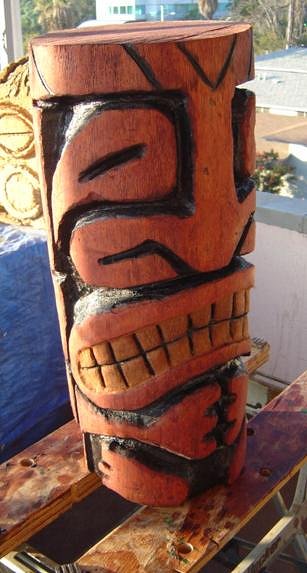
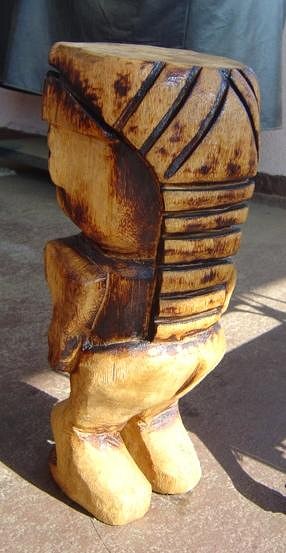
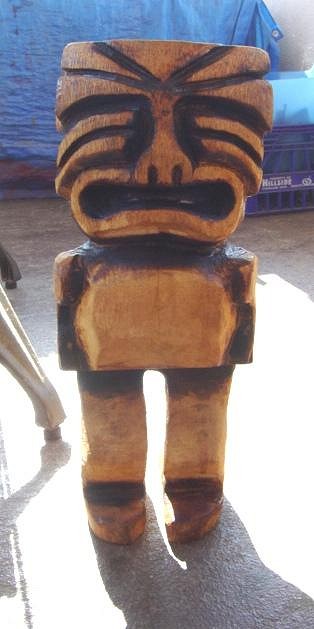
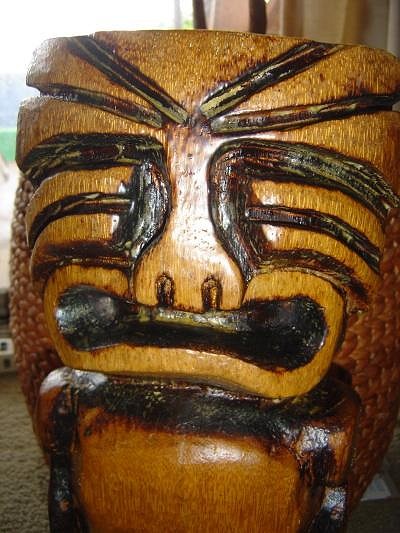
Here is my latest. I tried something different with this one. I am getting the sanding down better, but when I burned it, it I kind of like the look. I like them cartoony. I am trying to do more with the sides and the back. I also need to graduate from flat tops.
|
|
T
T_birdman
Posted
posted
on
Sat, Jan 10, 2009 12:37 PM
Nice Dave! Looking good and making your own call on your direction to go next! You can do it! |
|
4
4WDtiki
Posted
posted
on
Sat, Jan 10, 2009 2:20 PM
Lookin good, Dave. What stain is that, I love the warmness it has. |
|
G
geedavee
Posted
posted
on
Mon, Jan 12, 2009 3:22 PM
Thanks for the input. The photo on this one is unsealed. I added Spar Varnish which I find What do you guys use to seal your tikis? Time to start the next one.
|
|
B
Benzart
Posted
posted
on
Mon, Jan 12, 2009 5:43 PM
Lookin good Davee and getting better by the tiki. I find for the first few coats, just plain Shellac works best for me because it dries very fast, you can put in on fairly thick and then sand it down before the next coat. You can layer 3 coats in a couple hours , sanding between (Important for nice finish!) coats. Then follow that up with 3more coats of varnish, poly or whatever you want, Sanding between coats and letting it dry according to mfg recommendations. Make SURE you don't Glop the spar on,, just coat it as Thinly as possible with the brush, very dry but total coverage. When you finish the last coat, don't sand, just let it dry and you will have a purely beautiful finish that looks like it grew on the piece. |
|
N

nickyr2009
Posted
posted
on
Tue, Jan 13, 2009 9:05 AM
Your Tikis seem to vary in style all over the place - thats good! What would help you to grasp the 3d thing is to take what you feel are successes and build upon them. Look for a style in a series perhaps. But there is no substitute for the process of gaining experience! You can see that you are getting better. Working with other, and better. carvers will go along way! |
|
G
geedavee
Posted
posted
on
Mon, Feb 2, 2009 2:59 PM
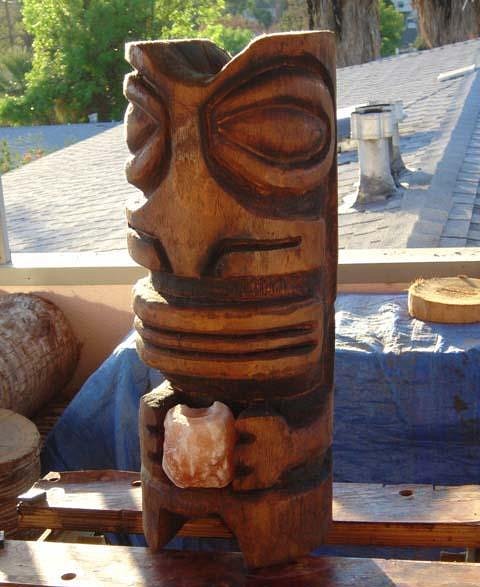
Well I finished another one. This is based on some I saw on 4WD's thread.
He is holding a Himalayan Salt Lamp which adds a nice glow when illuminated. I also have a surround sound speaker that will fit in there as well. Thanks to Benzart's advice, I am doing the multi coats of shellac instead of one sloppy coat of Spar Varnish. It makes a huge difference. I am still making mistakes, but I am learning. I still need to improve my skills and try a few other styles before I develop my own style.
|
|
S

seeksurf
Posted
posted
on
Mon, Feb 2, 2009 10:46 PM
Nice job, keep them coming and I don't know how 4WD kicks |
|
BD

big daddy
Posted
posted
on
Tue, Feb 3, 2009 5:18 AM
nice job, really like the salt lamp he's holding. keep it up. bd |
|
4
4WDtiki
Posted
posted
on
Tue, Feb 3, 2009 6:53 AM
Great job Dave, I'm flattered! How long did it take? |
|
T
T_birdman
Posted
posted
on
Tue, Feb 3, 2009 8:04 PM
LOOOOOKING GOOOOOOD! |
|
G
geedavee
Posted
posted
on
Tue, Feb 3, 2009 8:48 PM
This took about 20 hours of total work. I need to do more of the big stuff with the chainsaw. Thanks for all the input.
|
|
G
geedavee
Posted
posted
on
Sat, Apr 18, 2009 11:39 AM
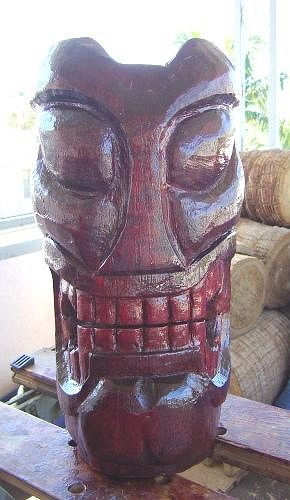
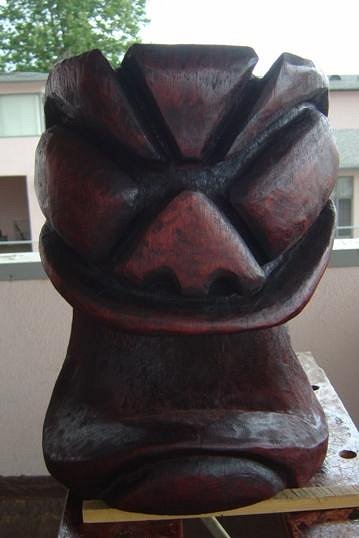
I just finished my latest tiki. Now that the weather is improving, I hope to do more carving.
I found someone that can provide me with a few bigger logs so I can start adding bodies and head-dresses. Kind comments welcome. Still looking for my own style. This one was based on a drawing I saw.
|
|
S
seeksurf
Posted
posted
on
Sat, Apr 18, 2009 5:01 PM
Nice job, i like the mouth and teeth on this guy. |
|
G
geedavee
Posted
posted
on
Mon, May 11, 2009 4:57 PM
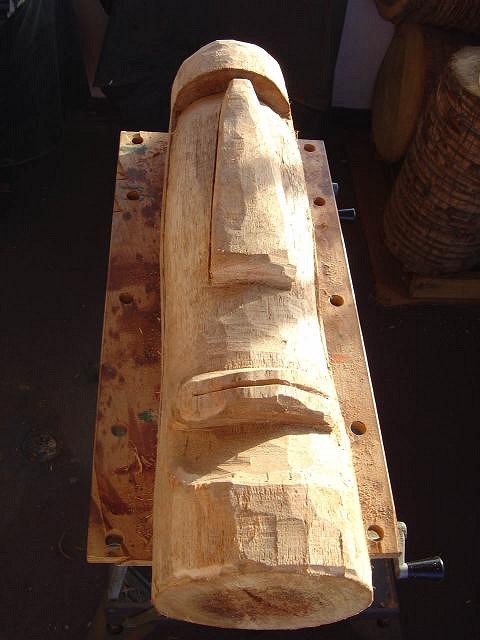
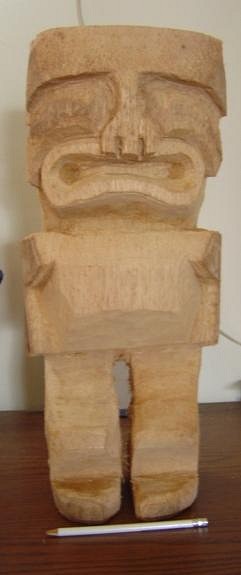
I am currently trying to do a tiki that actually has a carved body and it looks like I have made a few errors. Does anyone have any suggestions on what to do with his face/head/chest? Right now he looks like one of those guys at the gym that just work out their upper body.
[ Edited by: geedavee 2009-05-11 16:57 ] |
|
B
Benzart
Posted
posted
on
Tue, May 12, 2009 5:13 AM
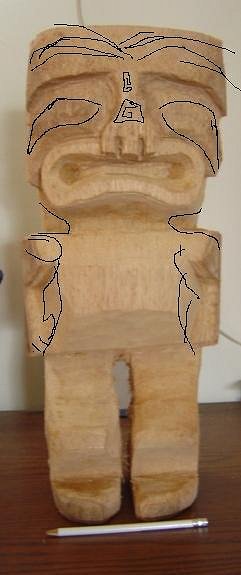
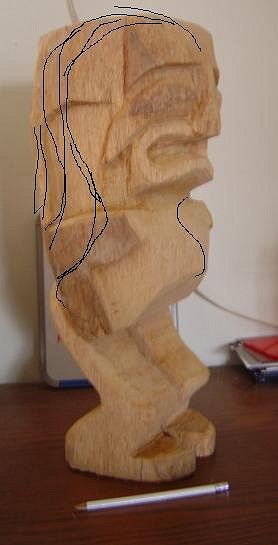
Aww,Gee, lemme See, I wold just start working on the features and detail, rounding out the arms, shaping the body, shaping the head/headdress and then some finer finish tats or whatever fits in.
|
|
G
geedavee
Posted
posted
on
Tue, May 12, 2009 7:54 PM
Thanks so much for your input. I did my best to take your advice.
I still have more shaping to do. I broke off the nose, but wood glue took care of it. Thanks again. |
|
T

TikiMango
Posted
posted
on
Wed, May 13, 2009 5:06 AM
I'm using a TouchPad and Paint, so my sketch is crude as well. He still looks a bit heavy in the chest since his legs are on the thin side. Like you said, I wouldn't mess with his legs as you might lose one, but you can work on his chest and arms more.
|
|
G
geedavee
Posted
posted
on
Wed, May 13, 2009 7:27 PM
Thanks for the advice TikiMango, but I couldn't redo the arms without having to deal with the fingers I already carved so I decided to finish up on this one and move on to the next one. Here it is with the first coat of shellac. I am hoping that 3 coats of shellac and 3 coats of Poly will be enough to cover up the ammonia smell. I learned that I need to work with taller logs if I am going to do full bodies. Thanks again. |
|
4
4WDtiki
Posted
posted
on
Wed, May 13, 2009 7:35 PM
Dave, if it's fan palm, some pieces do reek like that. |
|
G
geedavee
Posted
posted
on
Fri, Jun 5, 2009 9:15 PM
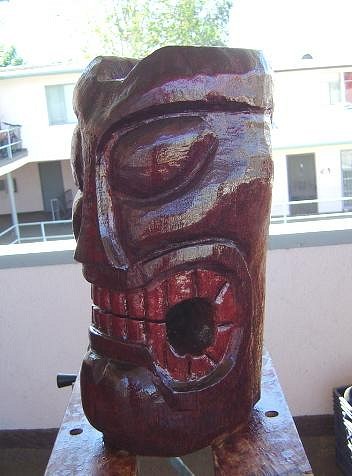
Well I finished another one. This makes number 12. Space limitations only allow me to work on small logs for now.
I am currently adding 3 coats of shellac, then 3 coats of varnish. |
|
G
geedavee
Posted
posted
on
Sat, Jun 6, 2009 9:46 AM
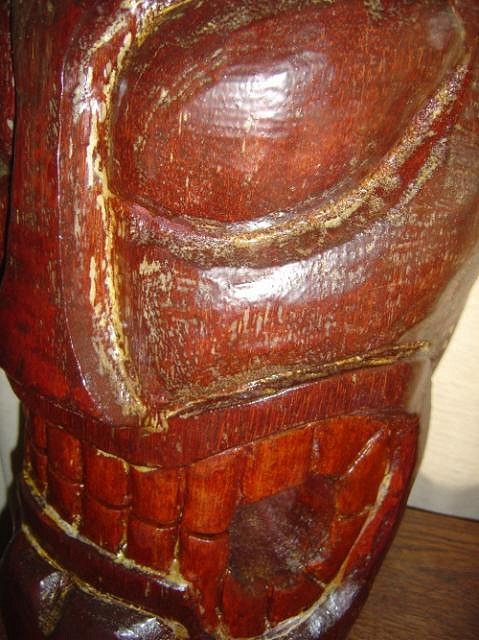
I seem to be having some issues with my shellac or poly in that after a few weeks, it is beginning to peel. See the yellow parts that look like bad dental hygiene?
I know I am doing something wrong. Any experts out there want to tell me where I am going wrong and what can I do to fix the damage? Any advice would be helpful. |
|
4
4WDtiki
Posted
posted
on
Sat, Jun 6, 2009 12:48 PM
I've never used shellac, but is it drying fully between coats? Is the wood fully dried before sealing? |
|
P

Polynesiac
Posted
posted
on
Sat, Jun 6, 2009 6:12 PM
What kind of shellac are you using? |
|
G
geedavee
Posted
posted
on
Mon, Jun 8, 2009 11:18 AM
The shellac I am using is called Zinsser Bulls Eye Clear Shellac. I then follow up with 3 coats of either Marine Spar or Polyurethane. I did seal the bottom of the tiki so any remaining water wouldn't have a place to drain. These are indoor tikis so I started tacking neoprene to the bottom of them. |
|
P
Polynesiac
Posted
posted
on
Mon, Jun 8, 2009 7:33 PM
Here's my guesses - In your last picture you posted, the buildup does look pretty thick around the teeth. It may be that you are applying too much at once. It's always better to go light and do more coats. 3 coats are plenty, especially for indoor tikis when one coat or no coat is fine too. Indoor tikis don't generally have to be protected from the weather. I have carved tikis that I've never put polyurathane on and they look exactly the same as they did when I finished carving and staining them years ago. YES still seal the bottom of your tiki, and put several coats on that. Not only does it help in drying, but it also helps keep critters out (termites and whatnot). Neoprene is fine to attach to the bottom of your tiki (I'm sure it makes it easier to slide around your house). I may suggest just checking under there every so often (until the tiki totally dries) for mold. It does happen occasionally. Hopefully that helped. Let us know if you have any other questions! Have fun carving! PS - I like that big mouth guy!!!! It looks like he has a lot to say (or eat!!!) ----EDIT----
[ Edited by: Polynesiac 2009-06-08 19:36 ] |
|
G
geedavee
Posted
posted
on
Tue, Jun 9, 2009 11:19 AM
I think I may be putting the shellac on a little too thick. I was under the impression that the shellac is a sealer and the polyurethane or the spar will protect it from scratches. So if I only apply a few layers of shellac or only a few layers of Polyurethane or Spar, the tiki will be okay for indoor use? I put three coats of shellac on the big mouth guy so I guess he is done except for the bottom. So for outdoor tikis, what would I use? Thanks for all of the info |
|
4
4WDtiki
Posted
posted
on
Tue, Jun 9, 2009 12:05 PM
Three layers of either will be fine for outdoor use. For indoor use, no coating is needed, unless you want the gloss look. |
|
G
geedavee
Posted
posted
on
Tue, Jun 9, 2009 12:58 PM
I guess I have been really overcoating these things. Thanks for your help once again. I hope to make it to a chop as soon as there is one on a Saturday. Thanks again |