Tiki Central / Tiki Carving
New GREEN LAVA tiki step-by-step
|
A

Aweulekuula
Posted
posted
on
Tue, Jan 19, 2010 6:46 AM
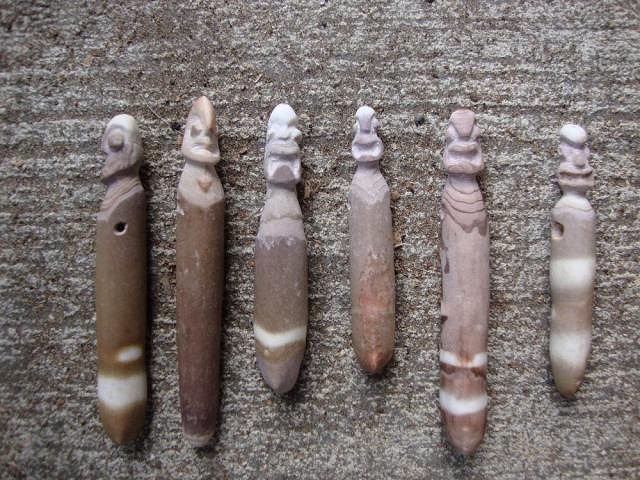
A whole bunch of carved slate pencil sea urchin spines like the ones they found in the late 1800s (probably depictions of Ku'ula or another fishing 'Aumakua) on Hawaii. These are made to be worn as necklaces.
Playing around with different Hawaiian head styles for these Ku'ula pendants.
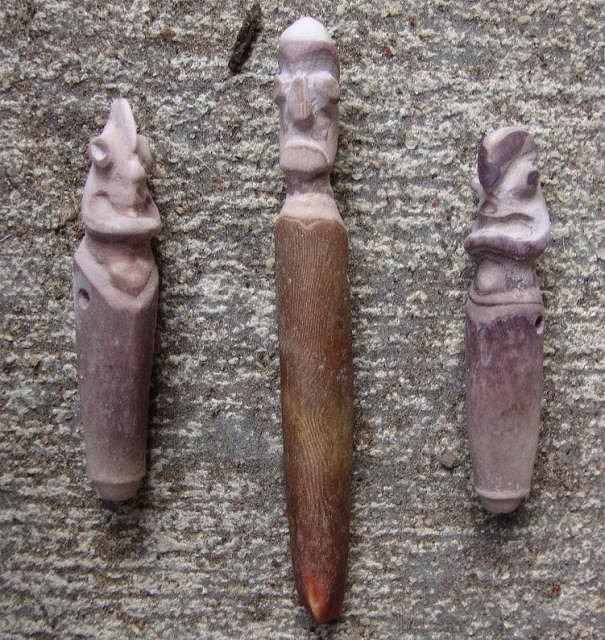
These two I will keep. It is Hina-puki-ia on the left and Ku'ula-Kai on the right. |
|
A
Aweulekuula
Posted
posted
on
Tue, Jan 19, 2010 6:49 AM
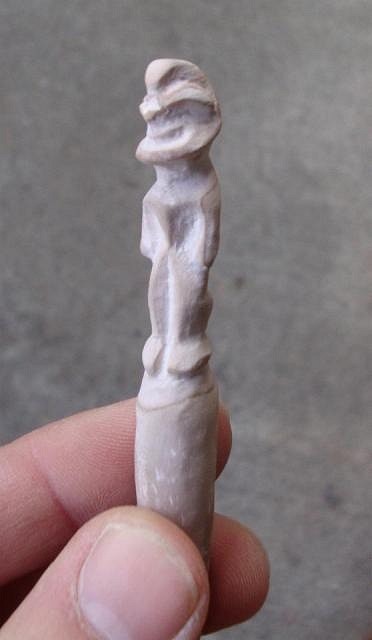
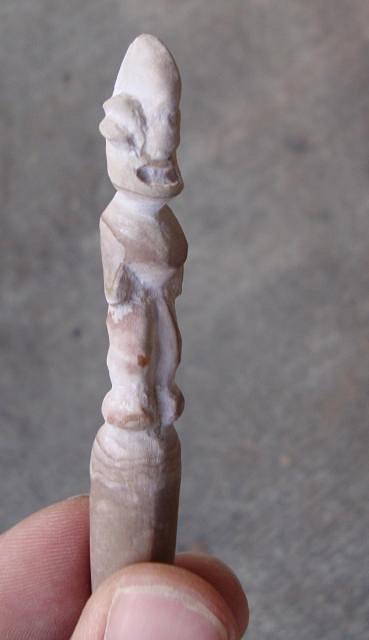
I got a better camera for Christmas, so I thought I'd take a better pictuer of the first full-body spine (They only carved the head traditionally).
This fellow was carved so that the first full-body spine wouldn't feel so alone. Aloha! Marcus |
|
A
Aweulekuula
Posted
posted
on
Sun, Feb 7, 2010 4:12 PM
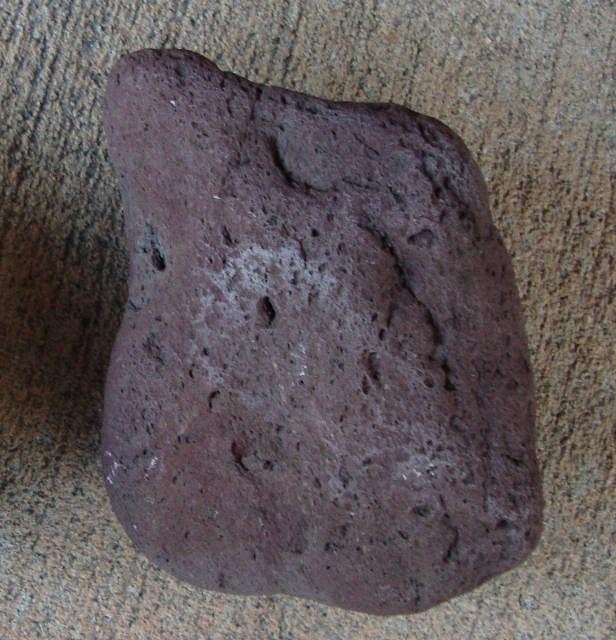
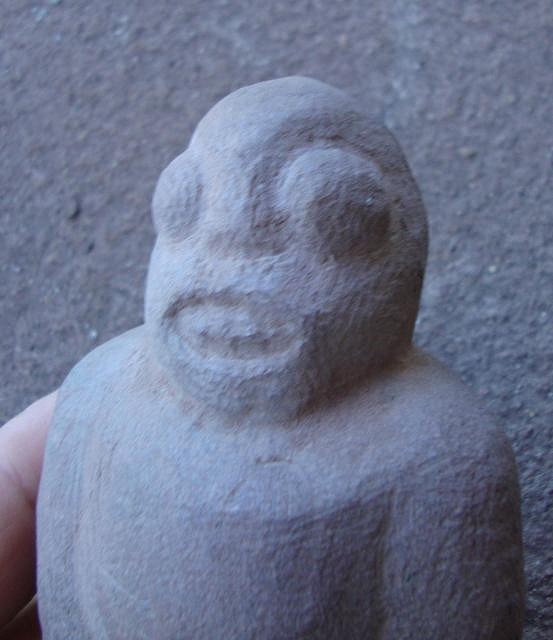
My friends from the Big Island sent me this nice chunk of either soft red basalt or super-hard red tuffa stone. So, I decided to see if there was a tiki hiding inside...
After an hour and a half of grinding the fellow started to take shape, sort of.
Half an hour of trying to grind away most of the deep cuts from the diamond blade and the rough outline was finished.
More to come... |
|
A
Aweulekuula
Posted
posted
on
Sun, Feb 7, 2010 4:19 PM
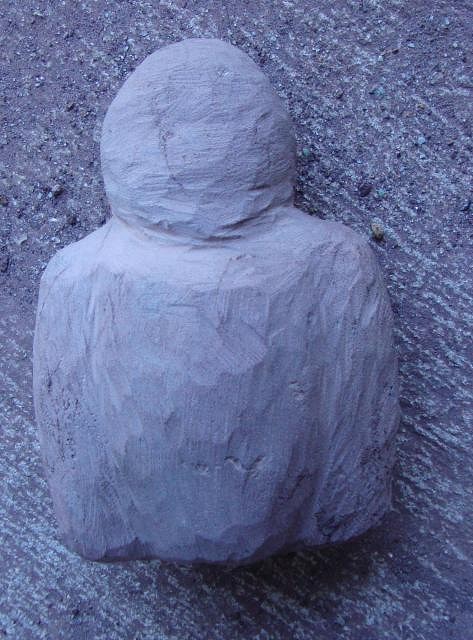
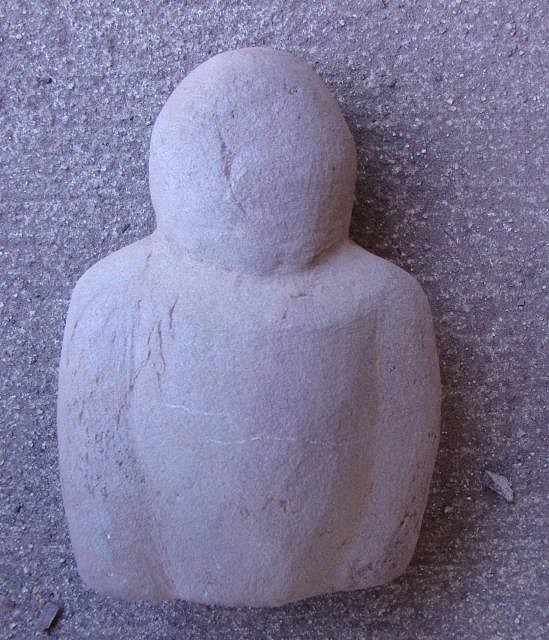
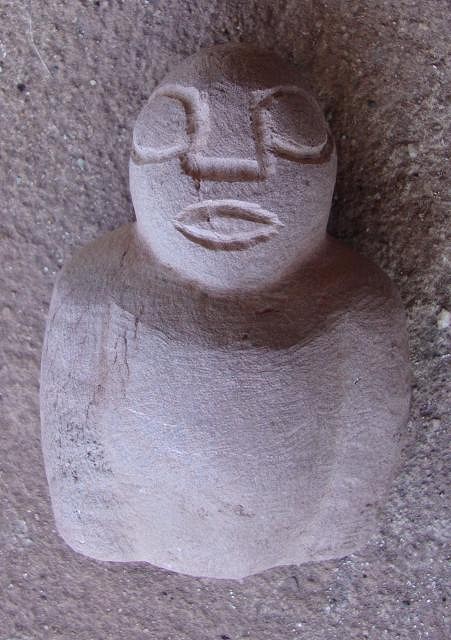
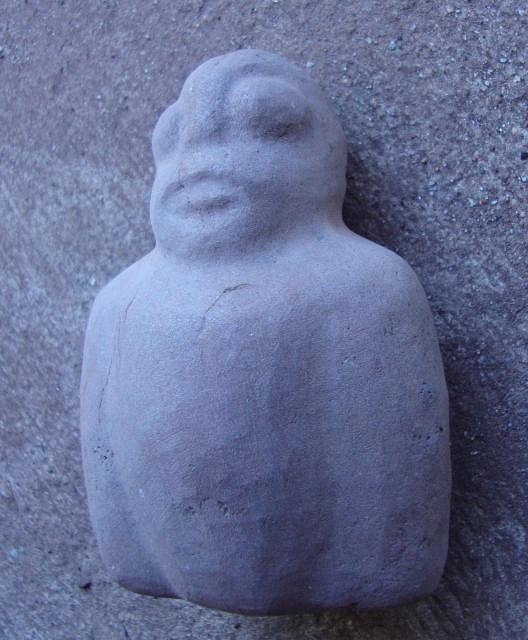
Now I put the diamond circular saw away and get out the tungsten-carbide drill and grouting bits to start smoothing out the body.
Using the same bit it was time to start carving the facial pattern rough.
Then the facial features got rounded out.
Now it was time to bring out the aluminum oxide grinder to smooth the whole thing down.
Six different grades of sandpaper later and Mr. Red was done.
Aloha! Marcus [ Edited by: Aweulekuula 2010-02-07 16:21 ] |
|
B

Benzart
Posted
posted
on
Sun, Feb 7, 2010 5:17 PM
Marcus, Thanks for the "Step-by-Step", I Know it takes a lot of extra time to stop your progress just to shoot a couple photos, How large is he about 5 or 6 inches tall? Was that hard or soft stone? |
|
T

TikiMango
Posted
posted
on
Sun, Feb 7, 2010 7:39 PM
I love progress threads, thanks for sharing. Do you hold this guy in your hands while you shape, or do you do something a little more safer? |
|
A

amate
Posted
posted
on
Mon, Feb 8, 2010 3:52 AM
Visiting your thread is like a trip to the museum. Your art has an authentic and primal feel to it. I love it. |
|
W

wplugger
Posted
posted
on
Mon, Feb 8, 2010 5:07 AM
you sure make that look EZ. |
|
A
Aweulekuula
Posted
posted
on
Mon, Feb 8, 2010 5:38 AM
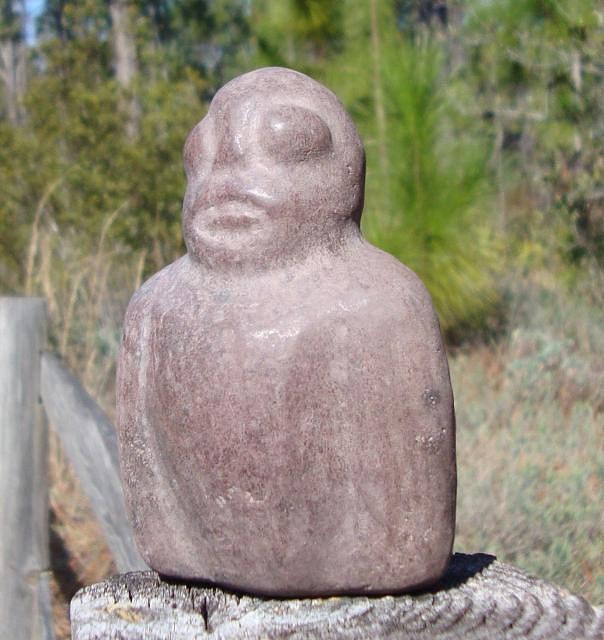
I have to admit that I do the not-so-safe thing in holding the tiki by hand when I carve it. It's the only way I can reach all around, but I do wear thick gloves. This stone is too hard to carve with steel tools (they evaporate--literally) but this specimen was not the hardest I have carved. This guy is about 5 inches tall and actually got another round of hand-polishing this morning, so once the sun is up I should be able to shoot another image. There is an all-green lava stone tiki coming soon. Aloha! Marcus |
|
L

laojia
Posted
posted
on
Mon, Feb 8, 2010 8:20 AM
Thank's for sharing the step by step! Nice ti'i with this cool tuff tought... :roll: J. |
|
A
Aweulekuula
Posted
posted
on
Wed, Oct 27, 2010 7:45 AM
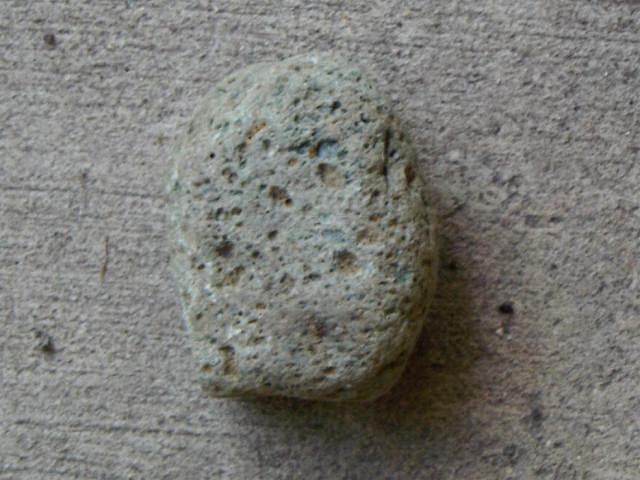
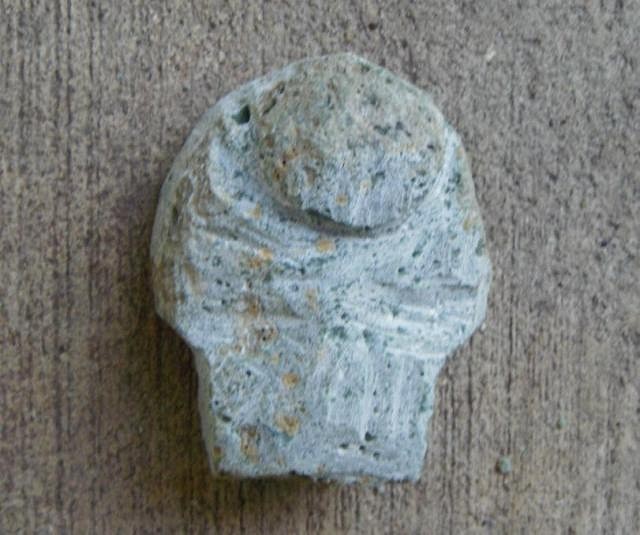
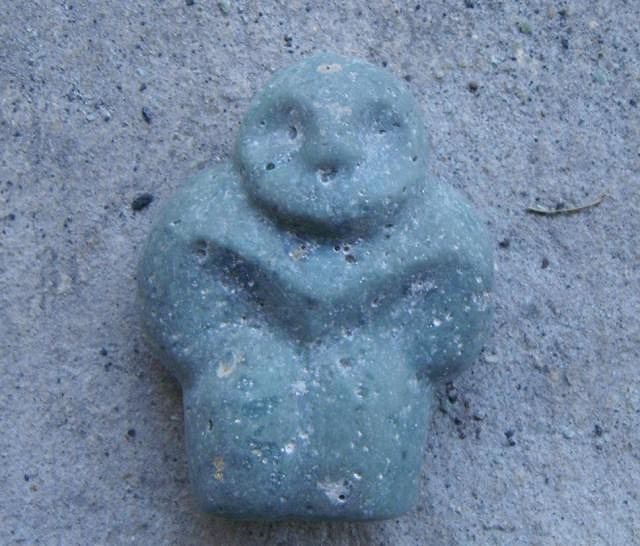
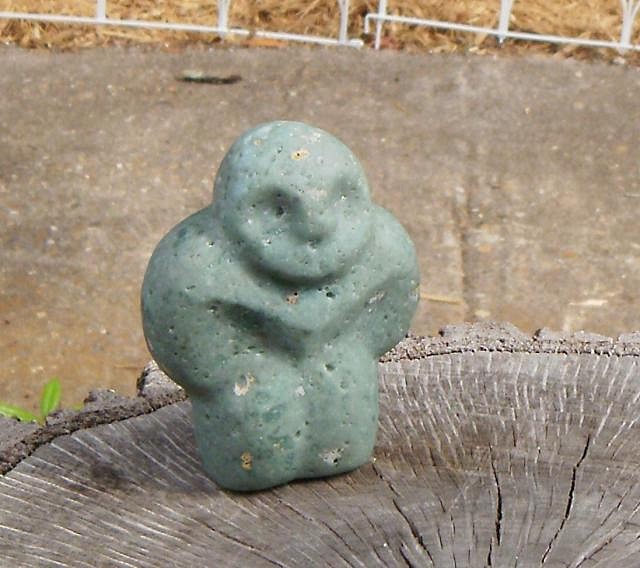
Okay, this took FOREVER to get too. Life just gets busy, doesn't it? This is a very curious form of lava from the Big Island. Geologically speaking it is a form of Rhiolite, meaning that it is very mineral-poor and mainly consists of silica. It is related to white pumice, but much, much denser and almost semi-translucent. I had to buy this rock from a Hawaiian family who knows where to find this very rare stone. This 4 1/2 Ki'i was carfed for the 7-year-old daughter of a friend of mine when she got very sick.
The rough stone. Note the gas bubbles and overall whiteness.
The first rough-cuts are made to get a feel for the design.
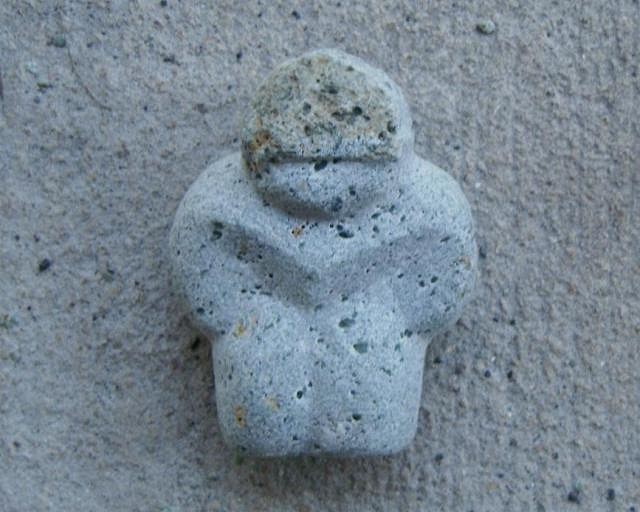
The body is taking shape.
The body shapes are done and work on the face begins. |
|
A
Aweulekuula
Posted
posted
on
Wed, Oct 27, 2010 7:50 AM
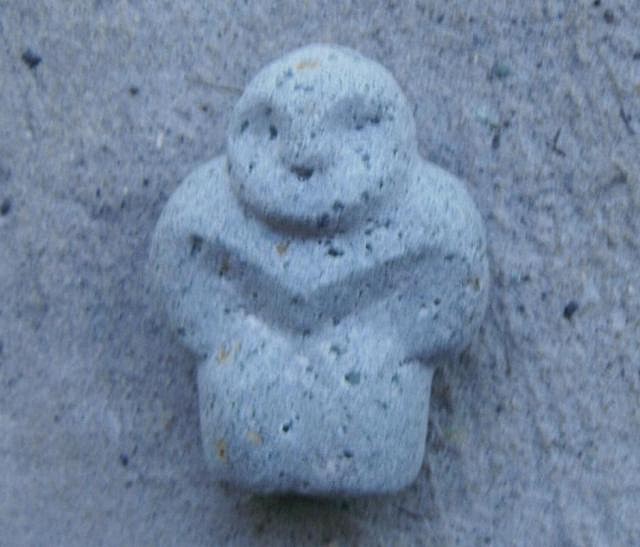
The body and face shapes are done, now its time for the surface grinding and polish.
Two grades of sandpaper later.
The Ki'i is done. Loos almost like jade. |
|
A
Aweulekuula
Posted
posted
on
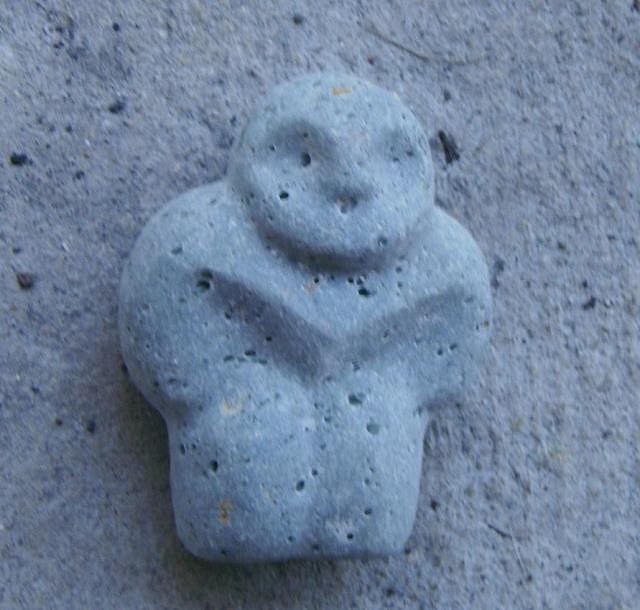
Wed, Oct 27, 2010 7:51 AM
The fine polish is done as well. |