Tiki Central / Tiki Carving
How to carve a Pahu drum - lessons on YouTube
Pages: 1 24 replies
|
T

Tahitiki
Posted
posted
on
Wed, Jul 15, 2009 7:17 AM
Here is 10 lessons on YouTube on how to carve a Pahu drum: http://www.youtube.com/user/AcadHawaiianArts Makes me want to carve one... soon hopefully Tahitiki [ Edited by: Tahitiki 2009-07-15 07:18 ] |
|
T

TheBigT
Posted
posted
on
Wed, Jul 15, 2009 9:16 AM
Thanks for the link! Good videos so far. I'm on part 4. I wonder if they used Buzzy as a consultant! :lol: :lol: |
|
BPB

Bay Park Buzzy
Posted
posted
on
Tue, Jul 28, 2009 11:24 AM
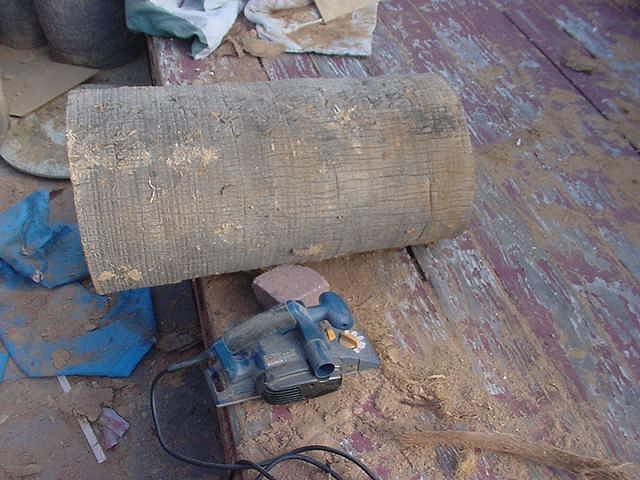
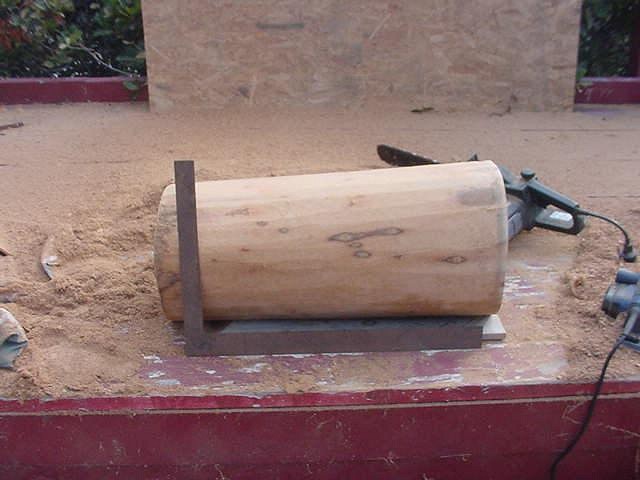
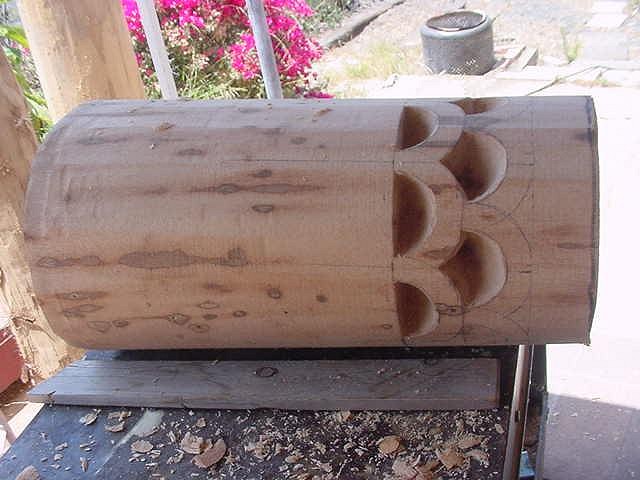
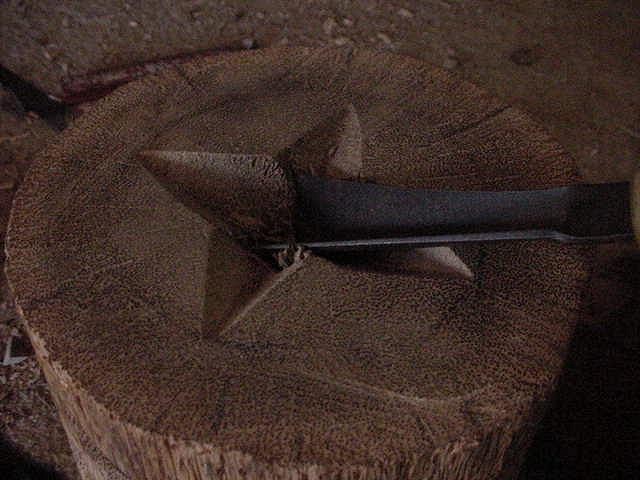
I thought I'd give one of these guys a try. I've been wanting to try making a drum without a fixed head for a while now. These look kind of simple and would be a good trial run for this type of head. I think I can knock one out in this style in about a day. I'm following the videos and basically making the same one they are. At the end of the day yesterday, I got the log ready so I could jump right into it today. I'll go episode by episode with my progress here on this thread. Episode 1: Defronding the log with a big pry bar. The way he does it looks a little labor intensive. I'd probably just use the draw knife or a razor blade to get rid of them. Episode 2: Initial log stripping with the draw knife. If the skin was any thicker on my log, I would have used the draw knife like he did. I use the draw knife on about 70% of the logs I strip. I didn't need to do this step because just a couple passes with the trusty Ryobi planer didi the job. Episode 3: I knew this guy knew what he was talking about when he pulled out the electric planer. I did this step exactly like he did. Episode 4: Levelling the log. This was a good tutorial with the little wedge idea. I'll definitely start doing it that way. Now all I need is a level spot on my property...Only thing I do different is wait and do the top after it's hollowed. It's easier to level the rim as opposed to the entire plane of the log end. This is one of the hardest parts to get right. I used the chainsaw for the initial cut and will go back with an angle grinder and fix it up.
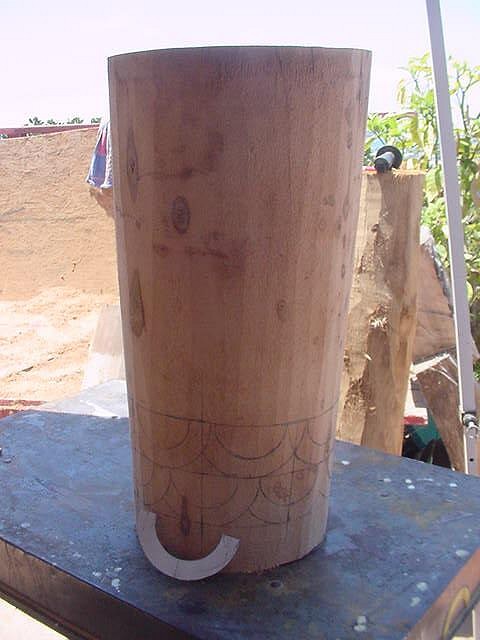
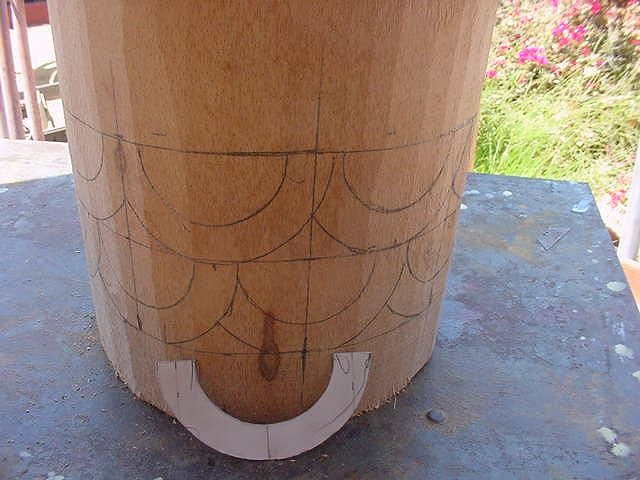
Epidode 5: Dividing up the log. I think I'll make a 2.75" foot, two 3" base sections and about 17.5" bell part. Episode 6: math and drafting time. This is where I am now. I'll drag it up on the table, mark it out, and make the stencil. Off to work! |
|
BPB
Bay Park Buzzy
Posted
posted
on
Tue, Jul 28, 2009 1:36 PM
Quick break update I did the episode 6 work: I'm going to bypass video 7 and hollow out both ends at the same time. Video 8: Base carving Definitely have to know your tools and ability to tackle this part effectively. There are some challenging parts to this... Back to it... |
|
T
Tahitiki
Posted
posted
on
Tue, Jul 28, 2009 1:46 PM
Great one, I'm getting ready to starts one as well. |
|
T

tikiwinebear
Posted
posted
on
Tue, Jul 28, 2009 2:29 PM
Fantastic step-by-step, Buzzy! Can't wait to see the final product. With your skills, I bet it will be one sweet drum. I can't even imagine how the ancients carved these without our modern tools!! Aloha! |
|
K

KAHAKA
Posted
posted
on
Tue, Jul 28, 2009 2:37 PM
Even with the modern tools, it looks like a lot of work! Nice job so far. The AHA tutorial was fun to watch. |
|
BPB
Bay Park Buzzy
Posted
posted
on
Tue, Jul 28, 2009 3:52 PM
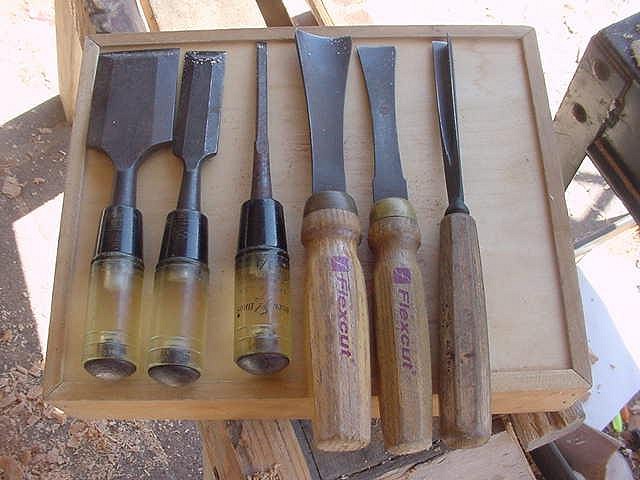
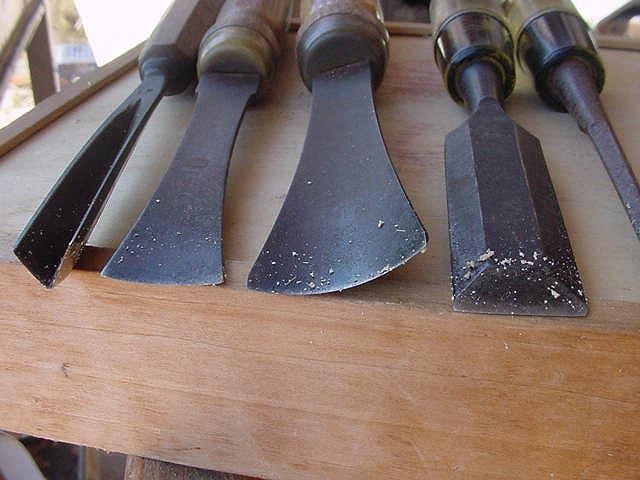
Lunch break update: Still on Video part 8. Here's the progress: I used only these tools for this part: Profiles of most used tools: back to it... |
|
BPB
Bay Park Buzzy
Posted
posted
on
Tue, Jul 28, 2009 5:46 PM
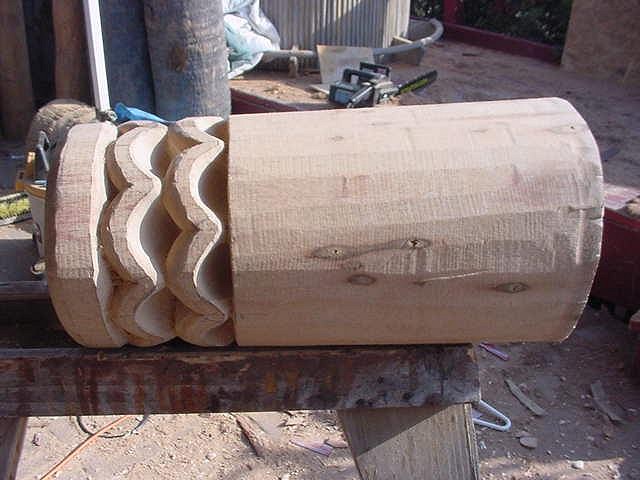
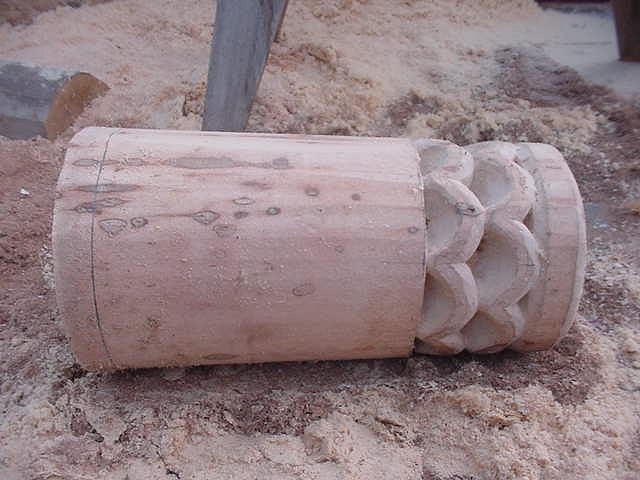
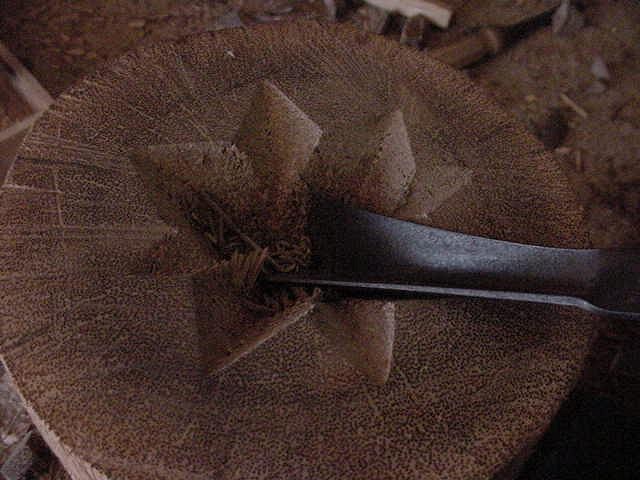
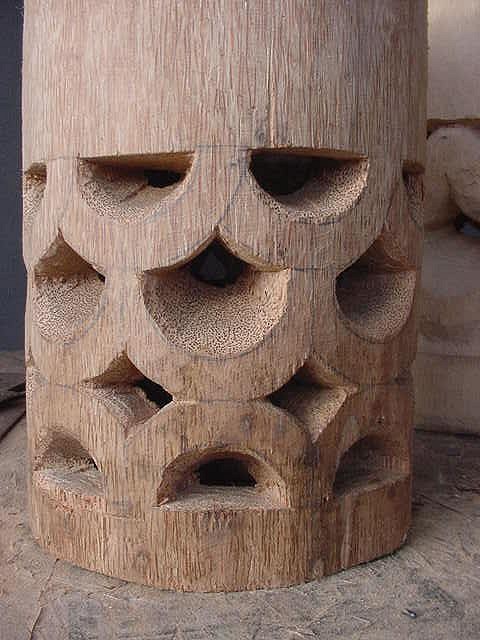
I think this will take me up to parts of video 9-10 I rounded the base for looks and so it will not chip, just like the video said. Also, I rounded the tops on the bottom row of arches: now rounding off the tops of the arches on the top row: The top row done the same way: now the bottoms are rounded out on both rows: the one in the video has two chambers. Mine will be hollowed out all the way. that part sucks to do. I think I need a turning tool gouge like i the video. Might save a few slams to the hand. In a few minutes, I'll get to hollowing it. My goal is to have that done by sunset. I need to work fast, and I've been working real fast for a real long time. |
|
M

MadDogMike
Posted
posted
on
Tue, Jul 28, 2009 6:38 PM
You're a carving monster Buzz! So what's the difference between the fixed drum head and the other (non-fixed?) Is one head tacked on and the other laced on? |
|
BPB
Bay Park Buzzy
Posted
posted
on
Tue, Jul 28, 2009 10:19 PM
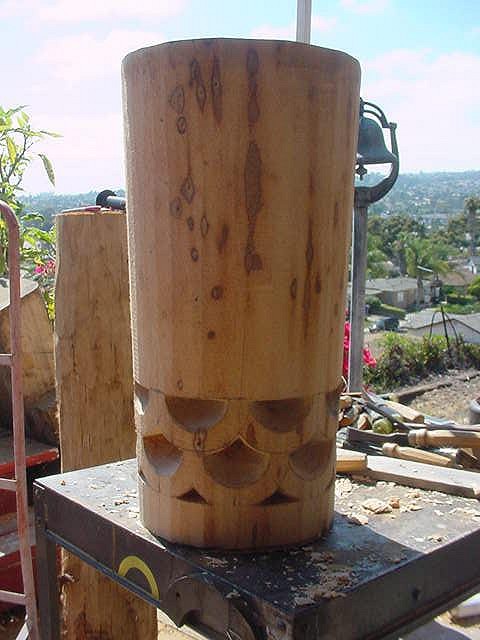
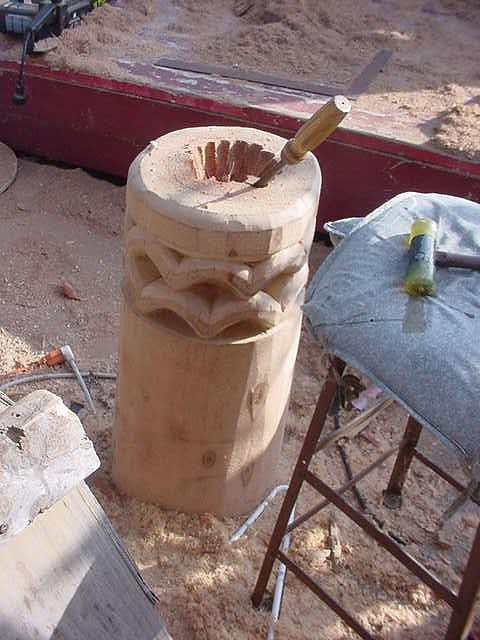
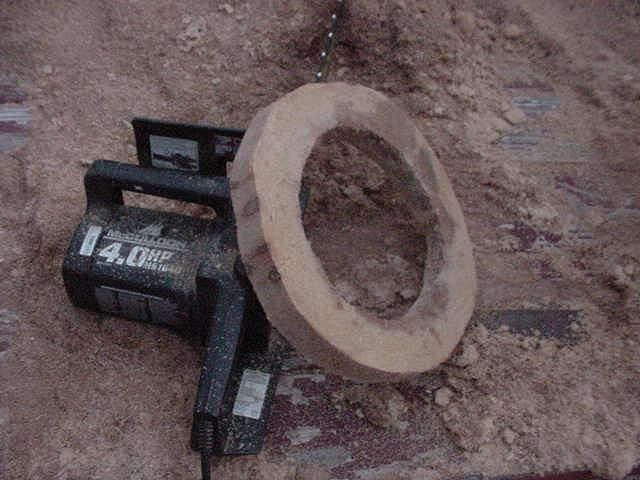
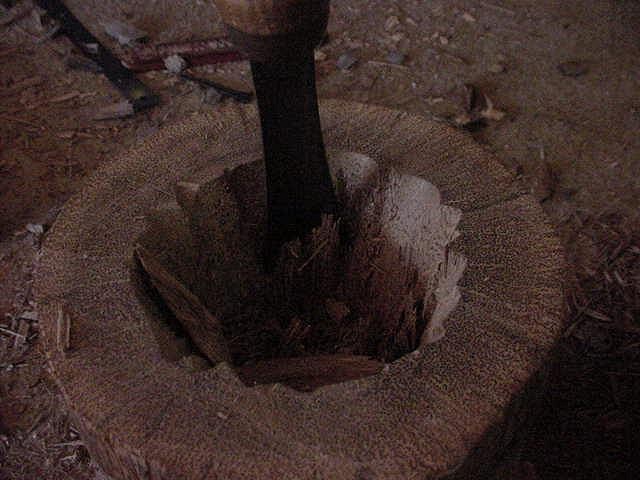
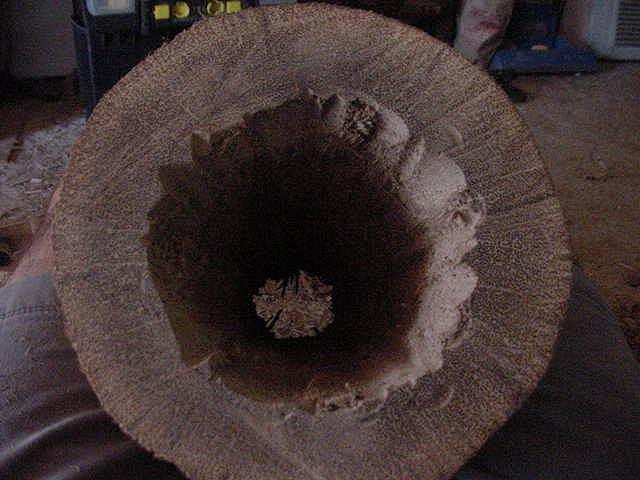
Maddog: You're right. Some lashed drums like the one I'm making here: My next step was to continue on with Episode 10 and hollow out the bottom: It's the wet and soft part of the log so it comes out easier the deeper you go. Finished it up with the sander on the inside after I had it close to the final width I stopped when I could see daylight in the lower cutouts. I just barely exposed that part Sunset was approaching, and I had the rim to do next I measured out the top like he did in Episode 4 and used the chainsaw to cut it There's the drum donut: Episode 11: the Rim I had the whole thing carved before dark tonight:
Episode 11 was the last one, so I guess I'm on my own now... Good luck to anyone else who gives this a shot. I wouldn't recommend trying to do it in a single day, either. I really killed myself doing that much at once. I'll update here again after it dries and I sand it. |
|
P

pdrake
Posted
posted
on
Tue, Jul 28, 2009 10:33 PM
wow, that's quite impressive. no power tools on the hollowing out. you do really great work. i hope it turns out well. |
|
C

Cammo
Posted
posted
on
Wed, Jul 29, 2009 4:01 AM
Hey Buzzy, can you post multiple episode YouTube videos of us watching you following multiple YouTube videos of how to carve a drum? And this looks so cool, why not stick a Tiki face on one side? It's not just COOL, it's beyond that, its SCHWANG-RIFIC! |
|
M
MadDogMike
Posted
posted
on
Wed, Jul 29, 2009 8:57 AM
OK Cammo, let me guess - the word SCHWANGRIFIC was keeping you awake so you got up at four-frickin-o'clock to post it? |
|
C
Cammo
Posted
posted
on
Wed, Jul 29, 2009 8:37 PM
I was gonna say SWANK-RIFIC but it didn't sound dirty enough! |
|
BPB
Bay Park Buzzy
Posted
posted
on
Sun, Aug 2, 2009 12:50 PM
I did another smaller one last week. It's 12" tall and 7" in diameter. I'll put my post from my carving thread here so that in the future people can find as much info as possible on these in one spot.
Buzzy Out! |
|
C

Clarita
Posted
posted
on
Sat, Aug 8, 2009 1:24 PM
Great clips, fun and interesting, what the hell they guy say at the end of each chapter? I still can't get it. ..... shut up or something like that... |
|
BPB
Bay Park Buzzy
Posted
posted
on
Wed, Aug 19, 2009 11:53 AM
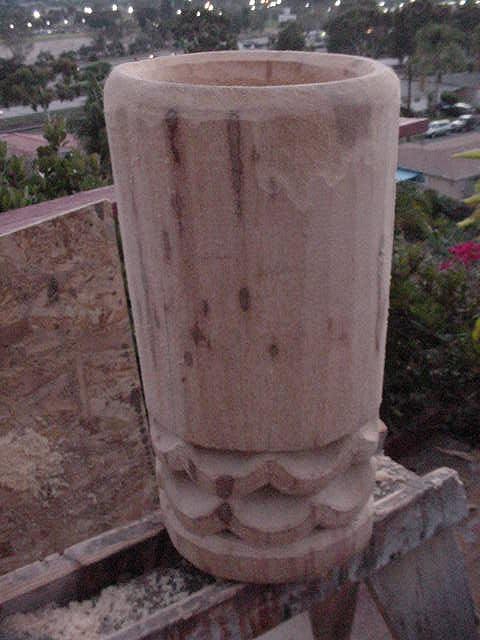
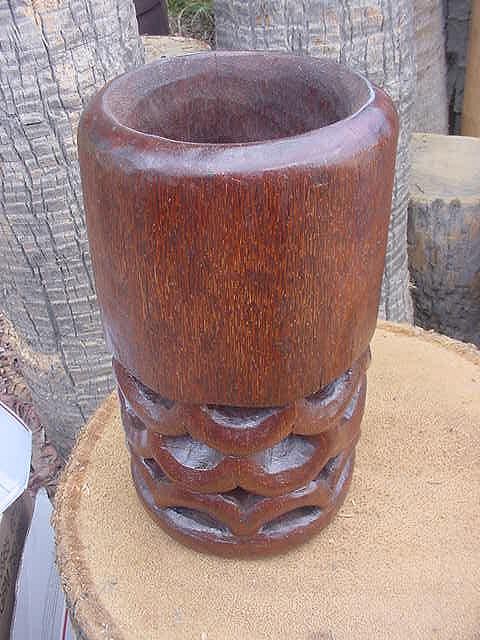
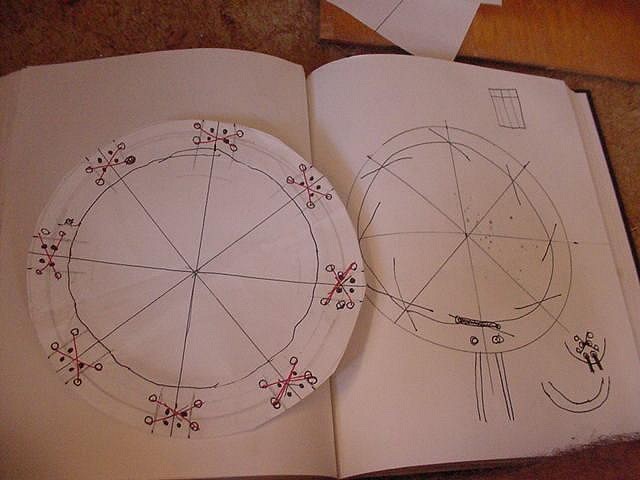
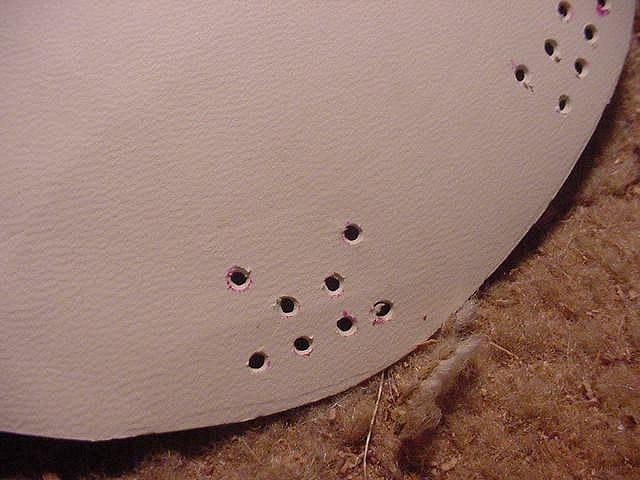
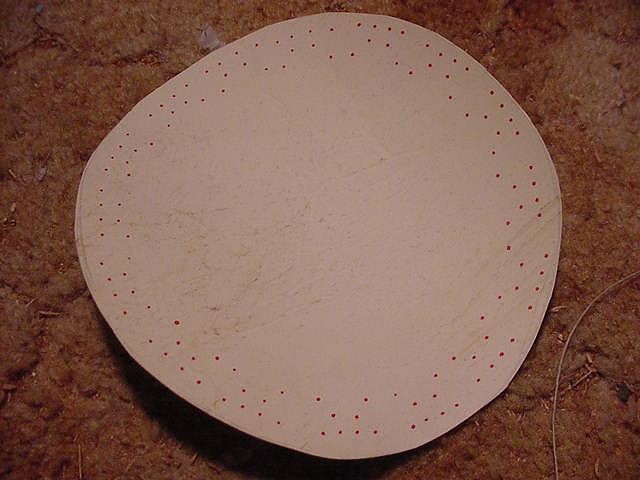
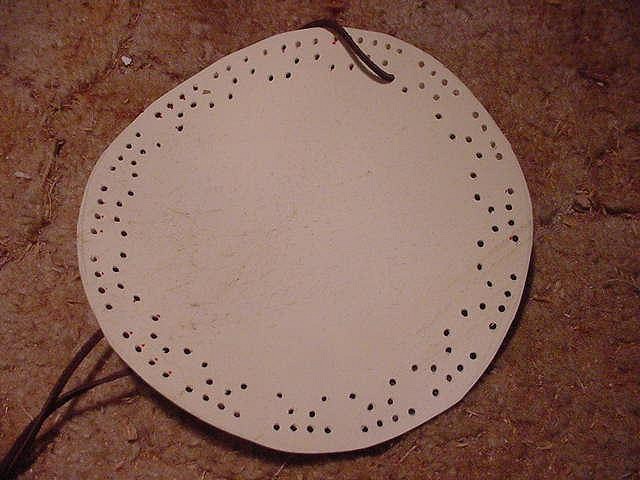
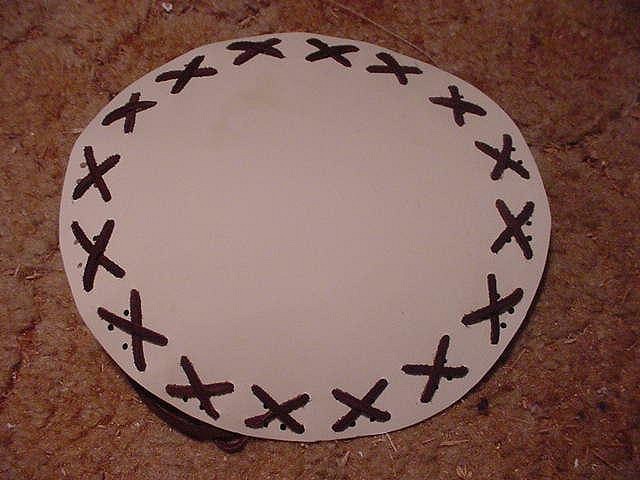
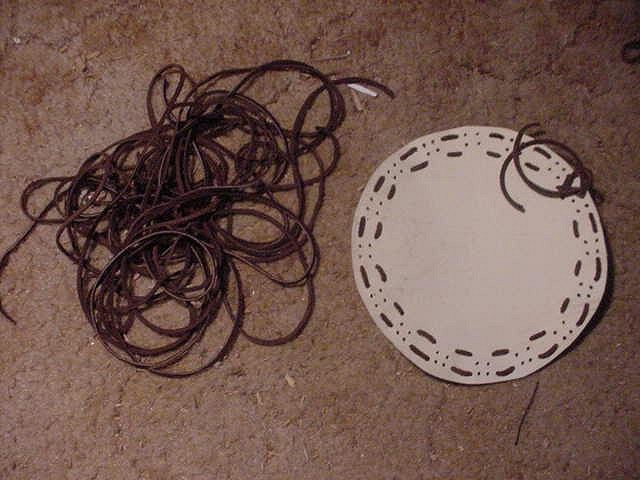
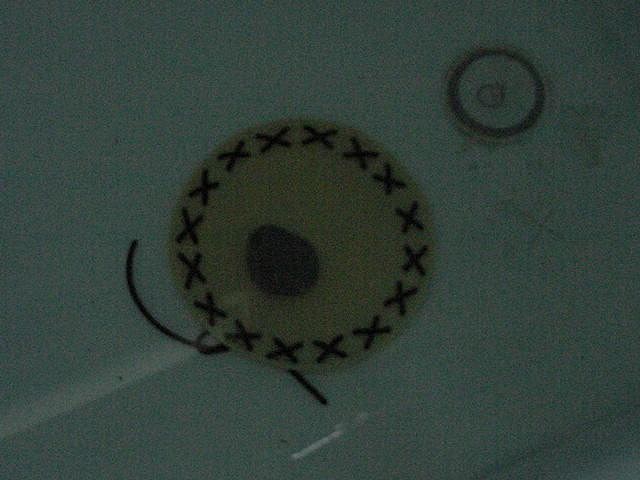
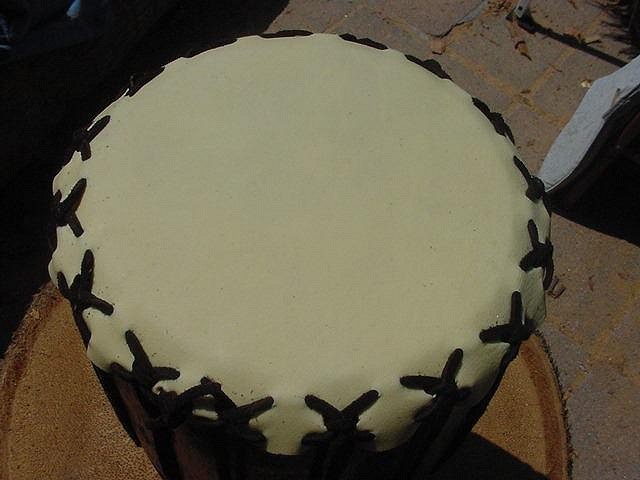
My litle Pahu drum is all sanded and finished up: Now it's time for the head. I wanted a reinforced edge because I'm using a thin piece of goat. I had to figure a way to attach the head without ripping it under the tension. I did some figuring on paper and then made a template: This is the piece after punching in the holes: Hole pattern: Here's a test I did to make sure the holes were aligned correctly I cut another piece of goat and redid the layout with more holes: After cutting a bunch of holes, I was ready to start the weave: Half way through. Topside when done: Bottom when done: Next I measured and cut the 8 pieces that I will use to attach the head to the drum: The head's been soaking for a couple hours and is just about ready to be stuck on. Buzzy out! |
|
M
MadDogMike
Posted
posted
on
Wed, Aug 19, 2009 2:13 PM
Looks beautiful, but how's it gonna sound? Can you make an MP3 recording and embed it here? :D |
|
BPB
Bay Park Buzzy
Posted
posted
on
Wed, Aug 19, 2009 2:44 PM
It's all done!:
It's still wet right now. I will not know for a few hours. It already sounds decent, but it will become much better sounding as it tightens. Buzzy Out! |
|
B

Benzart
Posted
posted
on
Thu, Aug 20, 2009 5:31 AM
Awesome Stuff Buzzy, your drums are ALL really beautiful. |
|
T
TheBigT
Posted
posted
on
Thu, Aug 20, 2009 9:17 AM
Great job on the lashing. Looks too complicated for my mind. :P If you have a mic for your notebook or pc, you can download Audacity from audacity.sourceforge.net. It will record from your mic and let you save as mp3. All for free! |
|
BPB
Bay Park Buzzy
Posted
posted
on
Thu, Aug 20, 2009 12:38 PM
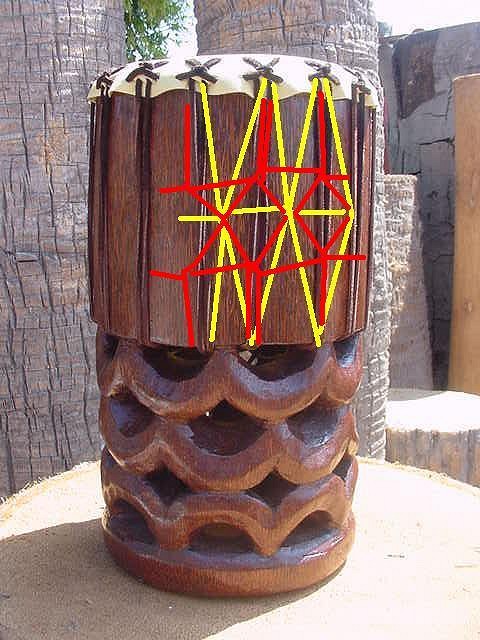
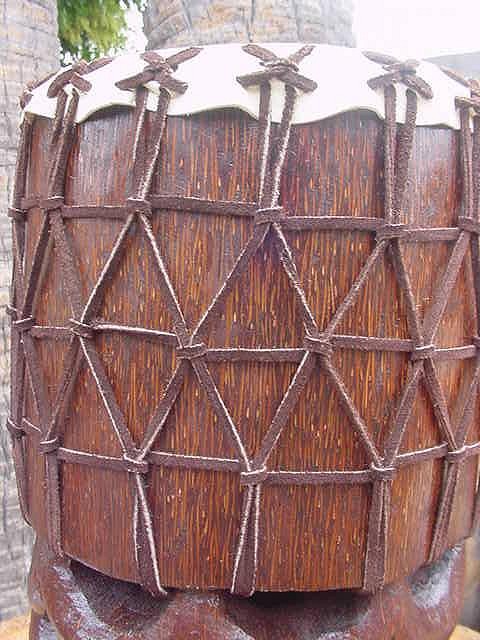
It's going to take a big leap up in complications right here... The head just wasn't tight enough after it shrunk up. I think the leather cords might have stretched a bit too. To fix this, I could either redo it with a different type of cord, leave it, or turn it into a tunable drum. To increase the tension on the head, I needed to stretch the cords more. I took the right cord of one attach point and pulled it to the left cord of the attach point next to it. I went all the way around the drum like this To increase the tension more, I did another wrap to make the new triangles half the size they were: Here is what you end up with: A very complicated looking lash job with a very tight head The best part is that you can now tune it. You just slide the bands in the direction of the arrows and as the triangle gets smaller, the tension increases, tightening the head: Buzzy Out! |
|
T
TheBigT
Posted
posted
on
Fri, Aug 21, 2009 7:32 AM
Whoa, that's a trip. Looks really cool I must say. |
|
B

Beachbumz
Posted
posted
on
Fri, Aug 21, 2009 6:37 PM
DAm Buzzy, you make it look all to easy... That drum is beautiful,nice work! |


Pages: 1 24 replies