Pages: 1 8 replies
|
8T

8FT Tiki
Posted
posted
on
Tue, Jul 28, 2009 4:20 PM
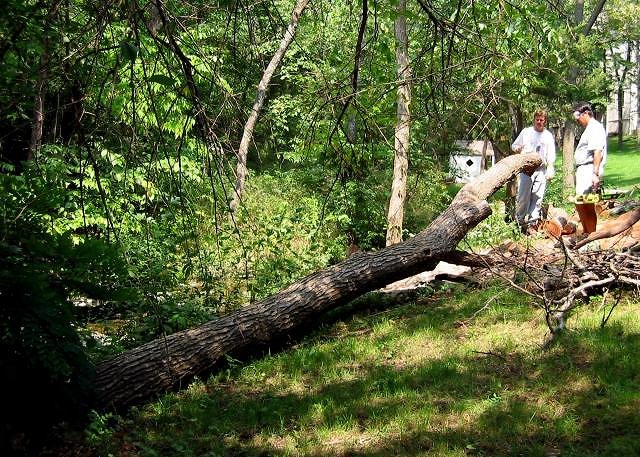
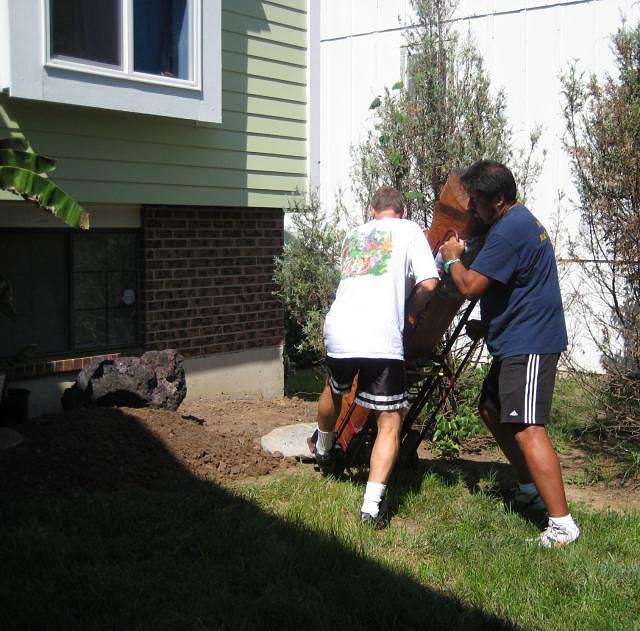
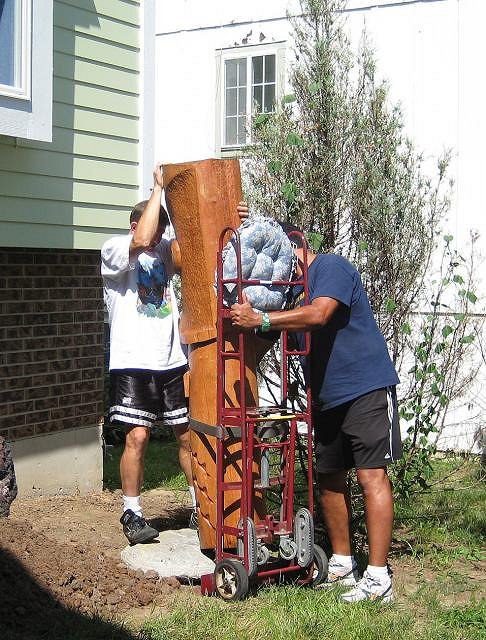
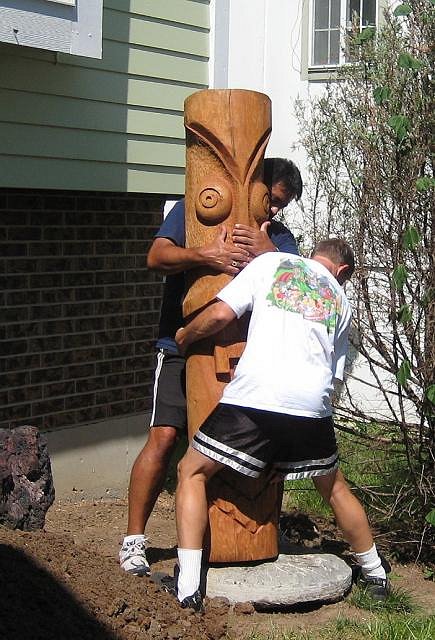
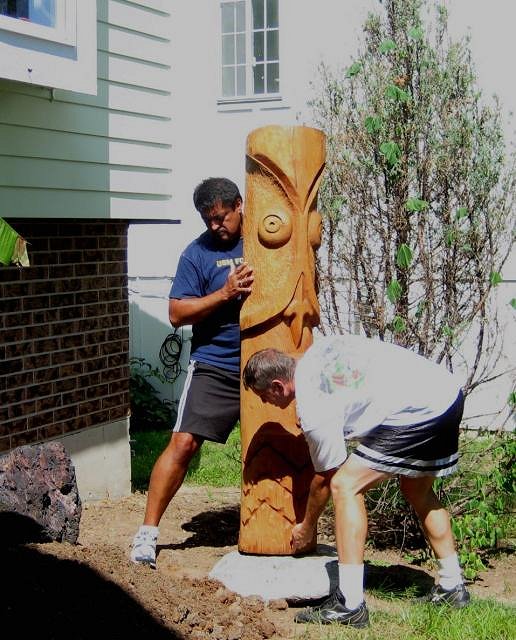
There have been a couple of older threads that touched on these issues. I will include a link to them below. But let's face it, this is a serious topic for anyone who has decided to, or may be considering putting a tiki outdoors. It can't be guarded 24/7 by even the most attentive owner so some sort of stabilization is necessary. I have used the following method for 2 carvings and both are solidly in place with no problems. Perhaps this will give someone else a few ideas to employ and if you have installed tikis outdoors and can add photos and tips to this thread, PLEASE DO! I had the opportunity to get a couple of nice sized logs from a family member who had this big walnut tree fall in his yard. All I had to do was help him cut it up. HAHA I really tricked him!
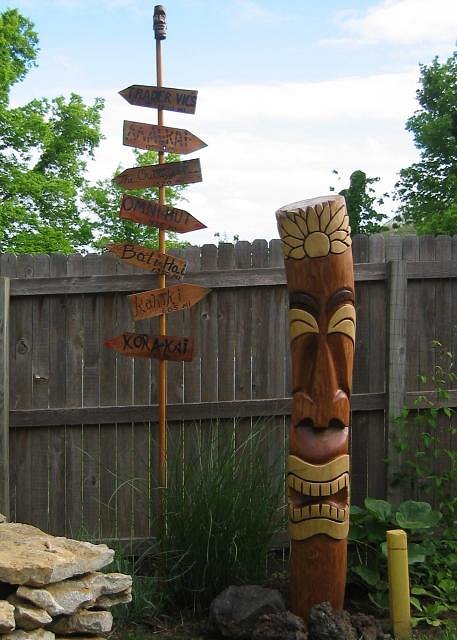
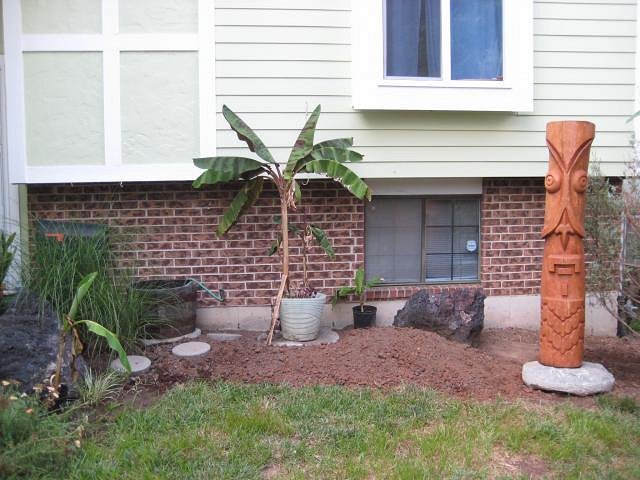
The first completed carving has been outside for over 2 years now. It is just under 6 FT tall.
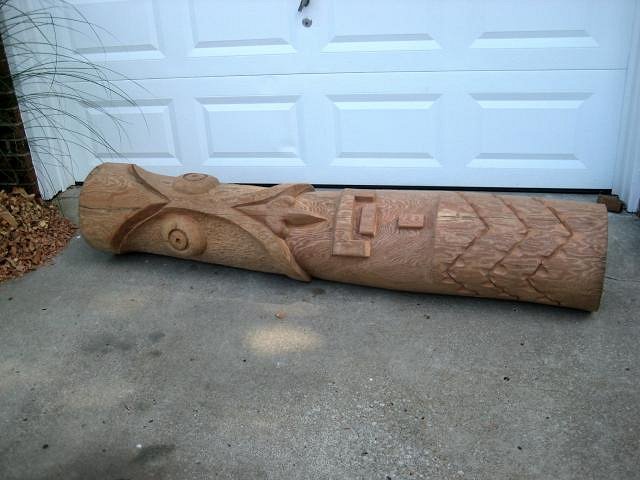
Here is the second carving just finished this past weekend.
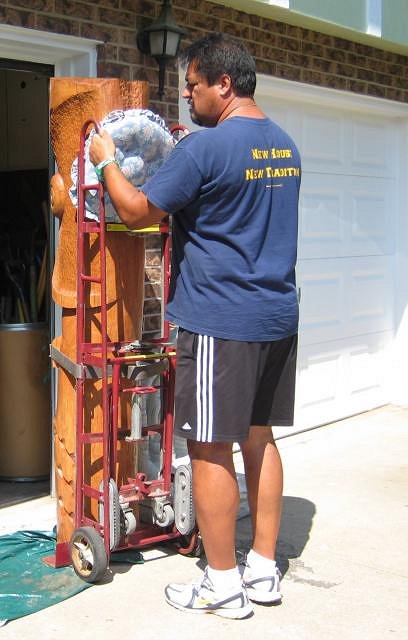
First you get a really big person (with a furniture dolly) to come over and help you. That is if the tiki weighs more than you can handle safely yourself.
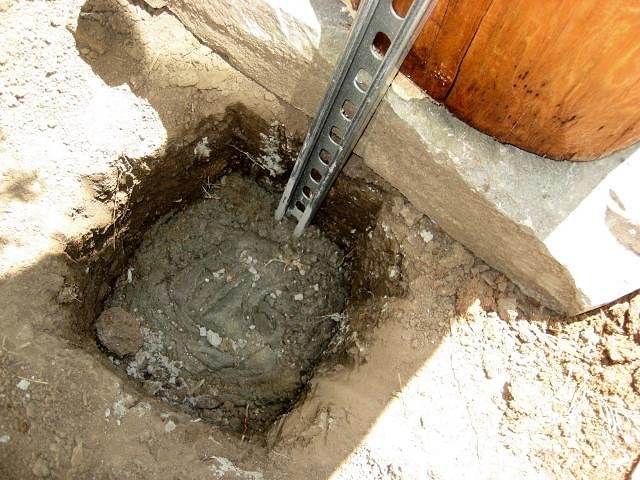
Then set it on a firm surface that will protect it from sinking into the ground. I am using a really heavy stone that I got from a highway constuction zone. The interstate was being widened and they had to do core drillings for the placement of new highway signs. They extracted dark gray limestone which is very dense and it was in a circular shape perfect for this use. You could also use flat patio blocks if the weight of the tiki isn't an issue. Those can be found at almost any store with a garden center.
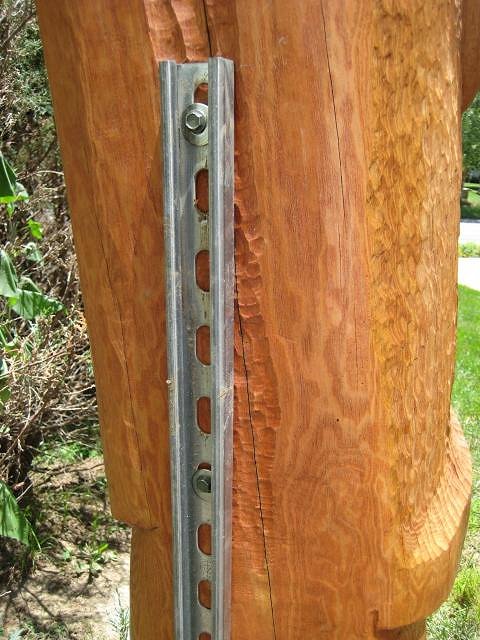
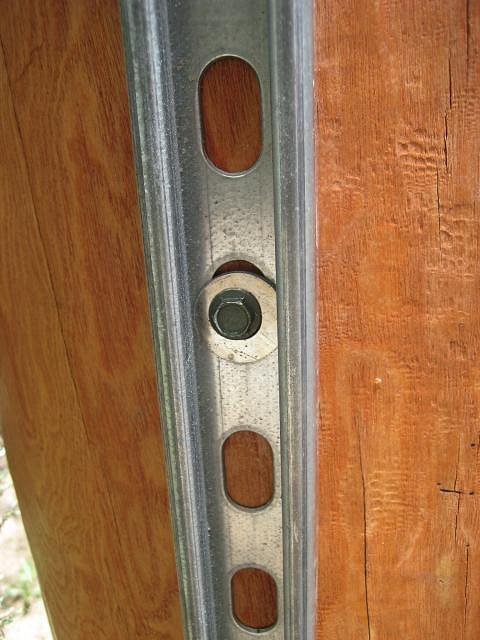
Prior to moving the tiki I had dug a 2 foot deep hole immediately behind the stone. After the tiki was in place on the stone, I added cement in the hole and inserted a strong metal support bar that you can get at Lowe's or Home Depot. It is slotted which allows you to secure the tiki by bolting through the metal bar and into the wood.
Here's a closer look at how I secured the tiki using 2 inch long 3/8" bolts and washers. I used 6 for this carving.
I don't worry about the theives now and I am sure the tikis won't fall over on their own. This method worked for me because I did not care about the metal rod being visible on the back side. I could paint them brown but neither of the tikis are in places where there will be people walking behind them. Hope this is helpful, here's the links I mentioned above: http://www.tikicentral.com/viewtopic.php?topic=11846&forum=7&hilite=securing tiki http://www.tikicentral.com/viewtopic.php?topic=7924&forum=7&hilite=planting seven I once was lost....... [ Edited by: 8FT Tiki 2009-07-28 16:22 ] |
|
D

drasticwagon
Posted
posted
on
Tue, Jul 28, 2009 5:39 PM
I like the lean on the 1st guy and the 2nd guy you say is walnut? What a nice piece of wood! |
|
AA

Aaron's Akua
Posted
posted
on
Tue, Jul 28, 2009 8:57 PM
8FT Paul - great topic, thanks for sharing! Lots of good ideas between these threads. Ben's idea of a completely concealed pole is the cleanest, but for me the plate & lag screw method seems the easiest which usually suits me best. Either way would work well to discourage thievery, or at the very least prevent my kid or one of the neighbors' from being squashed flat by way of falling tiki. Nice walnut tikis, BTW. |
|
S

Swanky
Posted
posted
on
Wed, Jul 29, 2009 9:27 AM
The bear and indian carver here in the mountains adds something you might want to consider. The reason wood carvings rot is that water can't evaporate, which is due to no air circulation. When this guy installs his big carvings, he rests them on 1 or so inch plumbing pipes. That gives a littel room for air flow under the wood, and a very minimum amount of touching of wood to anything where water will collect and rot. I have wondered about putting them on a raised grating of some sort as well to prevent rot. The one vintage piece I have has 3 holes from a plate that was lag bolted on it and probably connected to a cable. |
|
S

SilverLine
Posted
posted
on
Wed, Jul 29, 2009 9:50 AM
I like the plumbing pipe idea. Simple, cheap and effective. When I set mine outside I just put it on a brick smaller than the base of the log so that water would flow off and not under it. So far so good. This is a great topic as I plan to set out a larger carving at our lake house, where NOBODY is around to guard it for long periods of time. I've thought about footer plates sunk into concrete that bolt into the wood. 8ft's idea is better because it give better support. BTW 8ft, that tiki is AWSOME! it looks much better standing up than it did laying down! We'll never accidently drive past your house again! |
|
T

Tikilizard
Posted
posted
on
Wed, Jul 29, 2009 10:57 AM
If you didn't want something as large or distracting you could always use re-bar and a C clamp at the base. Cemented of course. Nice tiki! |
|
H

hewey
Posted
posted
on
Thu, Jul 30, 2009 8:15 PM
Great thread 8ft! I looked at this when a mate was talking about getting a large tiki carving. Our idea was to carve a recess into the back of the tiki for the metal bar, so it would sit flush with the surface of the tiki, and paint it to match the wood colour, so visually it would pretty much dissapear. All depends on your location and how many people will see the back I suppose. |
|
8T
8FT Tiki
Posted
posted
on
Sun, Aug 2, 2009 10:50 AM
Some good ideas have been added, Thanks & keep 'em coming.
Later, 8FT |
|
T
Tikilizard
Posted
posted
on
Sun, Aug 2, 2009 11:29 AM
Looks really nice. Can't wait to see the finished project. |
Pages: 1 8 replies