Tiki Central / Tiki Carving
KINO's carving thread....
|
T

TikiMango
Posted
posted
on
Thu, Nov 5, 2009 2:54 PM
3 & 3a, I'd let them dry completely before applying any finish. You live in AZ, they should dry out in a few weeks. I live in FL, and it takes months for them to dry out due to the humidity. I sealed mine too fast, mold grew under the varnish. Not the greatest thing to happen. |
|
T

tikigodz
Posted
posted
on
Thu, Nov 5, 2009 3:05 PM
KINO I have all the same questions. The only problem with praying them is cost$$$ |
|
T

Tikilizard
Posted
posted
on
Thu, Nov 5, 2009 4:22 PM
Are you going to put the carving inside or outside. What is the rain like in your area. I have used spray and it just doesn't hold up to South Florida weather. |
|
K

Kino
Posted
posted
on
Thu, Nov 5, 2009 6:30 PM
TikiMango--- So, after you finish carving, you just wait till its all dried and relatively light ? I tried some testing on some older, very dry Tiki's and they just soak up everything I throw at them without leaving any real amount of material on the outside. tikigodz--- I read somewhere on here that someone uses a wire brush or something like that after burning. Might be worth a try. tikilizard--- Probably gonna live outside, and our average annual rainfall is only about 3 inches. The real problem is the brutal sun ! It just bakes everything ! Keep the suggestions flowing, please !!! |
|
T
tikigodz
Posted
posted
on
Thu, Nov 5, 2009 7:06 PM
Hey Kino thanks for chekin in on my thread. |
|
B

Benzart
Posted
posted
on
Fri, Nov 6, 2009 2:47 AM
Hey Kino, I LOVE your questions: " 1- if I'm not sanding my piece will the above technique still have a nice look ? 2- how many coats of each product should I use ? 3- I carve palms, do I need to let them dry completely before the shellac/varnish ? 3a- if I seal them when they are still wet, will the moisture eventually dry out ?(slower maybe) 4 - what should I use to seal the top and bottom ?" 1, If you don't sand the carving it jst won't look too refined,,of course it depends on how well it was finished to begin with. If it is mostly chisled then not a lot of sanding is needed, if it is Chainsaw and grinder then more sanding is needed. With palm you don't want to rub against it and feel sharp thingies. 2,, I don't quite understand this ? so will just go over a quick finishing. first it depends on the wood, for palm you may need a few coats of stain depending on the look you want so stain is a "Just what looks good" kind of deal. for the clear, I like to give 2 or 3 coats of shellac as a sealer after the stain because it dries fast and can be SANDED between coats quickly. After the shellac, you already have a nice look and now you need the protection and the poly's or varnishes are next. LOOK at the directions before buying as many of the drying times are different and you want the fastes drying time because you should put on at least 3 coats to get the protection you want,, th More the merrier. You just don't wnt to be re coating it 6 months down the road. REMEMBER the poly's and varnishes are mostly for Protection. You Need to sand between coats to get proper adhering of the next coat. 3, should you let the palm dry before the poly coats? well it will take forever to dry a palm log so no is the correct answer but you need to let the Surface be dry which could take a few days.
EASY, 4 steps to finishing your tiki. Remember every piece is different, every log is different and all the finishes are different, the ONLY thing that is Not different is the Sanding part which ALWAYS Needs to be done. Hope this helps and also remember these are only My recommendations, everyone else will have their own. This works for me and I've been doing this for 25 years and have Always looked for the Easiest lazy mans way to finish a tiki! |
|
K
Kino
Posted
posted
on
Fri, Nov 6, 2009 12:02 PM
Ben, Everyone here on TC is so helpful. Mahalo |
|
K
Kino
Posted
posted
on
Fri, Nov 6, 2009 12:12 PM
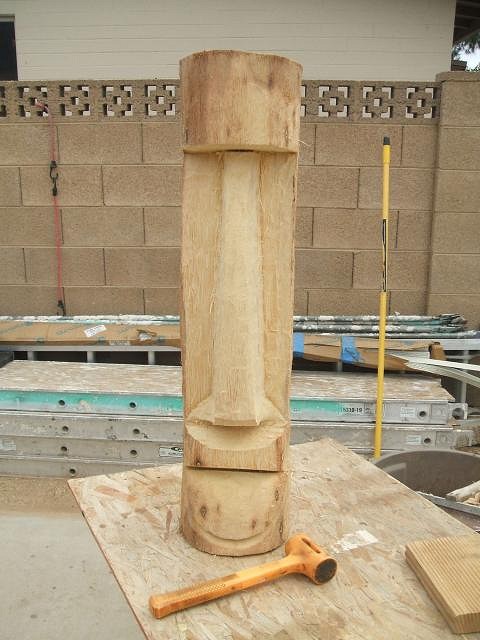
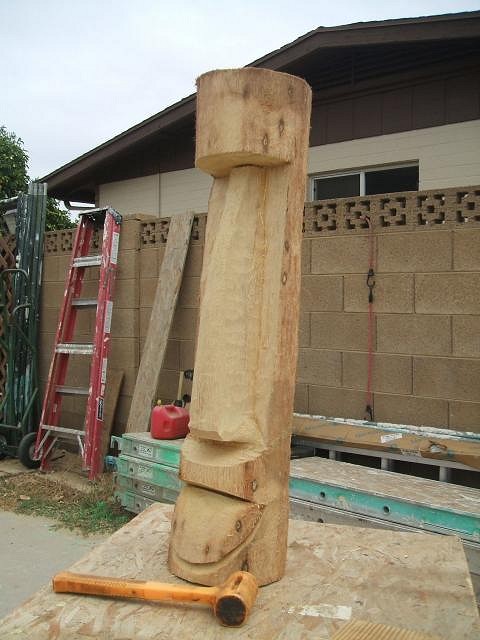
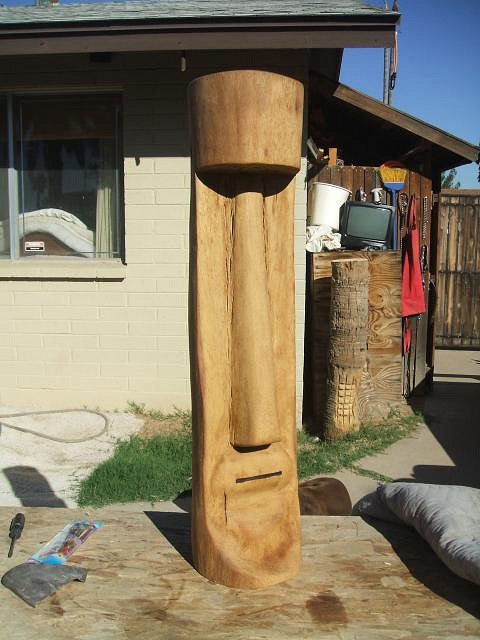
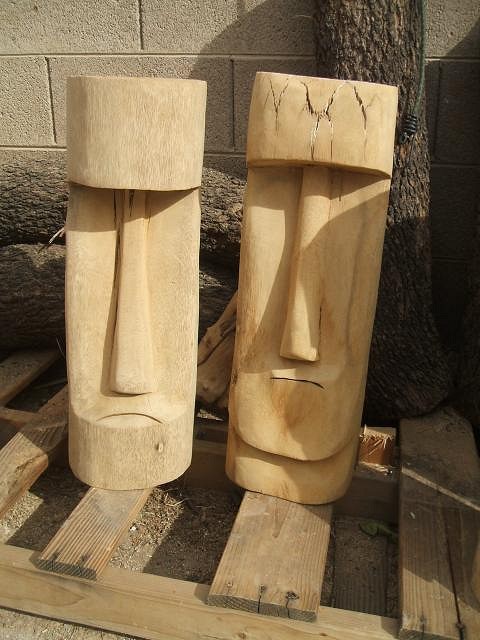
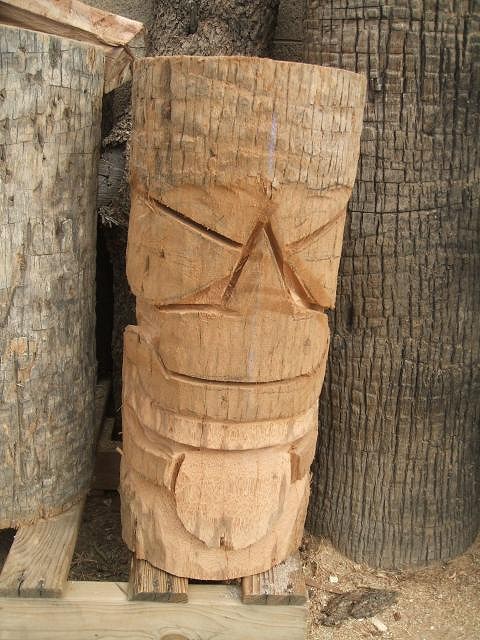
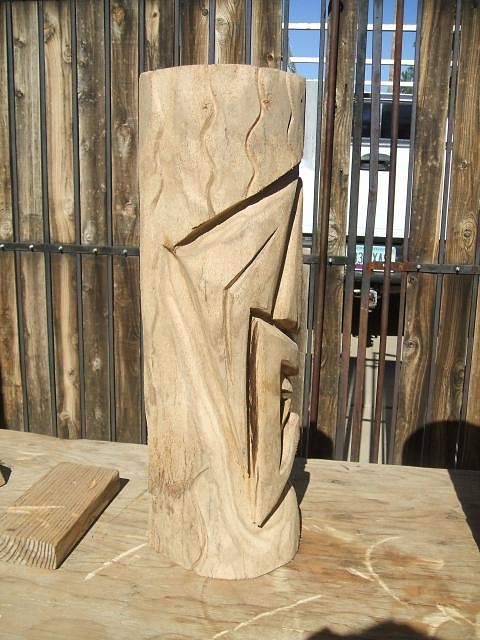
In the meantime, I have been wanting to bust out some simpler pieces to feed my addiction. Here is the start of my first Moai.
|
|
T
tikigodz
Posted
posted
on
Fri, Nov 6, 2009 5:56 PM
nice start And wsy to keep .em coming |
|
B
Benzart
Posted
posted
on
Sat, Nov 7, 2009 4:13 PM
Kino, Excellent looking Moai, take your time , he is looking Perfect! |
|
K
Kino
Posted
posted
on
Sun, Nov 8, 2009 8:25 PM
Ben, |
|
K
Kino
Posted
posted
on
Tue, Nov 17, 2009 11:17 AM
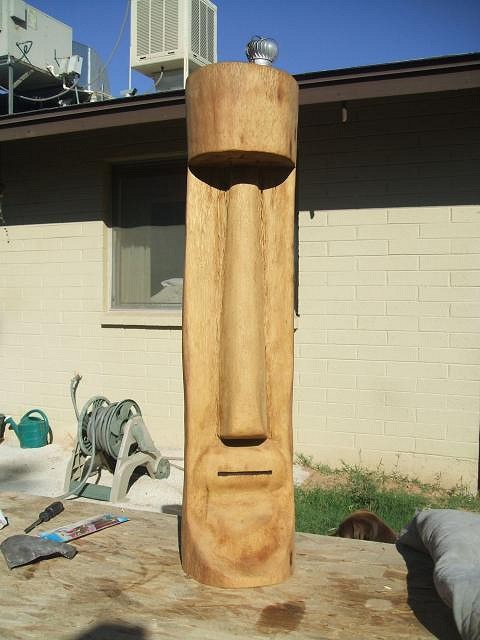
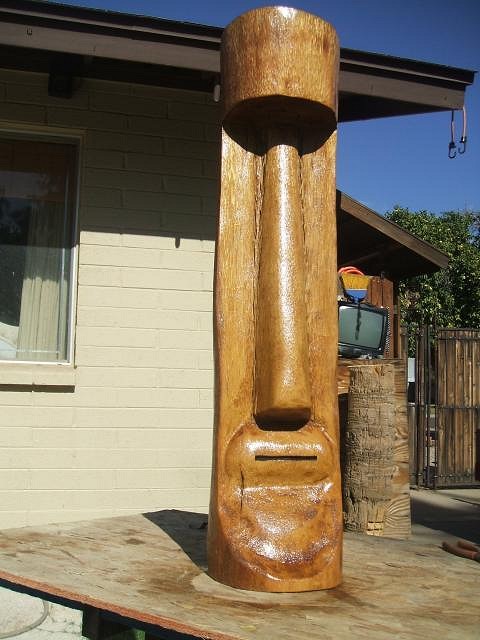
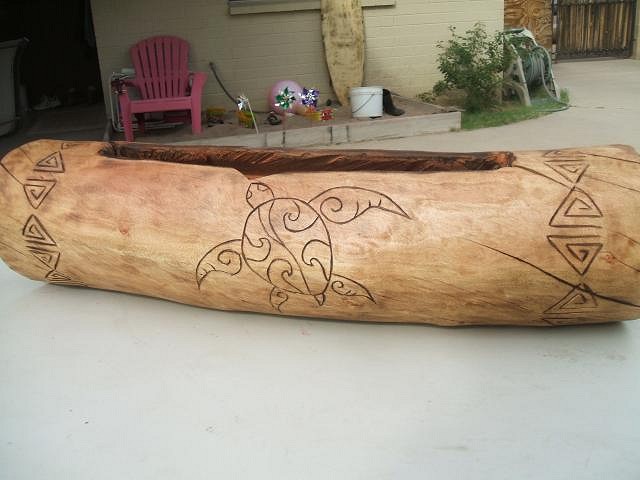
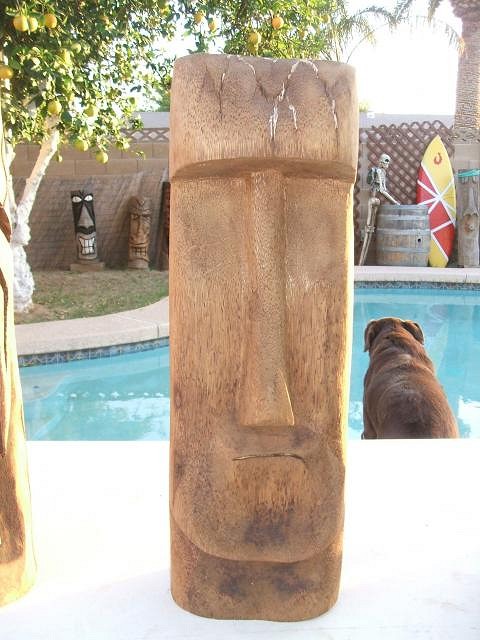
I had to wait for this Moai to dry a bit before continuing. Anyway, here are some shots after sanding and stain.
The stain is called puritan pine. |
|
K
Kino
Posted
posted
on
Wed, Nov 18, 2009 12:01 PM
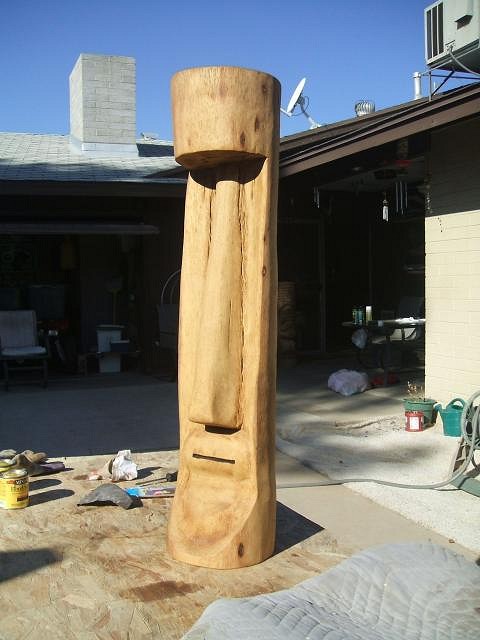
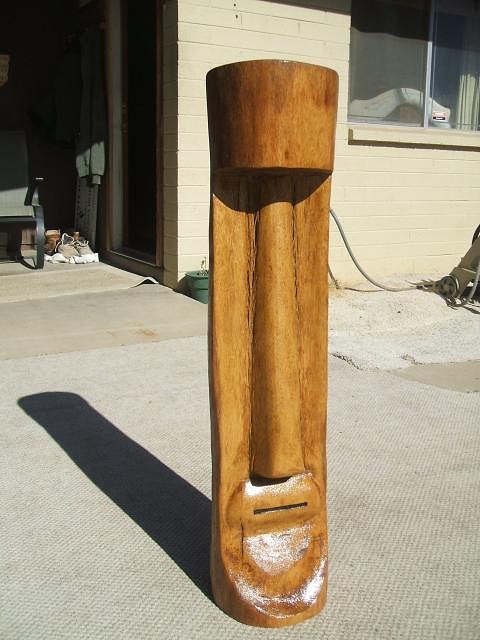
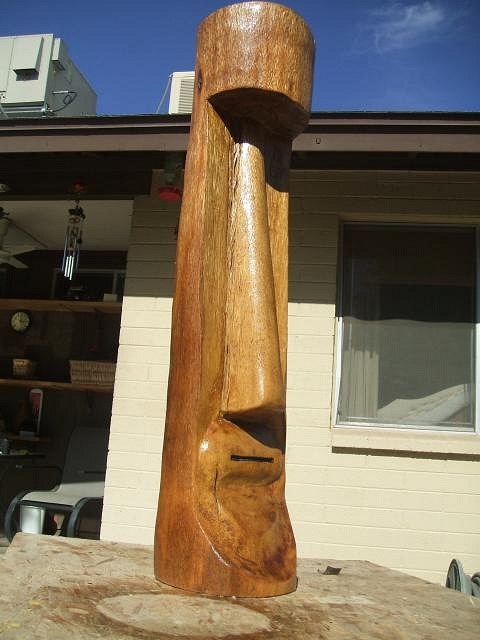
Got him sealed today.
|
|
C

claq50
Posted
posted
on
Wed, Nov 18, 2009 12:11 PM
looks good. I think i might just try Moai for my next carve. |
|
K
Kino
Posted
posted
on
Thu, Nov 19, 2009 5:11 PM
Since the shellac/urethane apps went well on the Moai
|
|
BTS

BIG tiki scott
Posted
posted
on
Thu, Nov 19, 2009 6:25 PM
moai looks kick ass dude!! very nice! and the other guy is sooooo wicked!! keep it up and lets see sum more!! cheerz!! |
|
B
Benzart
Posted
posted
on
Fri, Nov 20, 2009 7:22 AM
Kino, the Moai looks finished to me and an excellent job too! |
|
K
Kino
Posted
posted
on
Fri, Nov 20, 2009 11:28 AM
claq, tiki Scott, Ben - mahalo for da kine words. Ben and Aaron- extra special thanks for the instructions and advice on applying the finish. More to come..... |
|
K
Kino
Posted
posted
on
Wed, Feb 3, 2010 3:13 PM
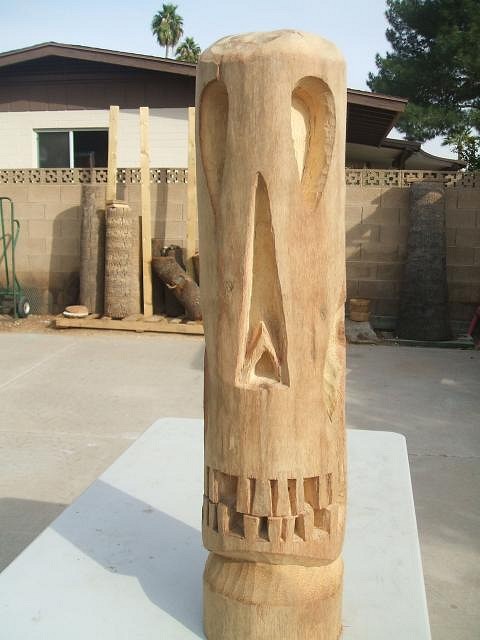
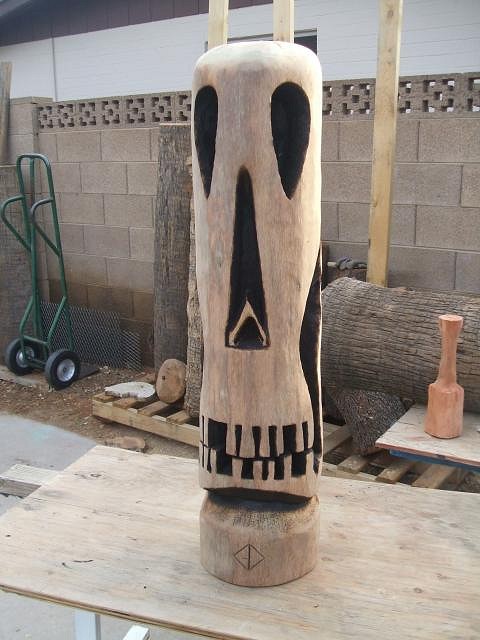
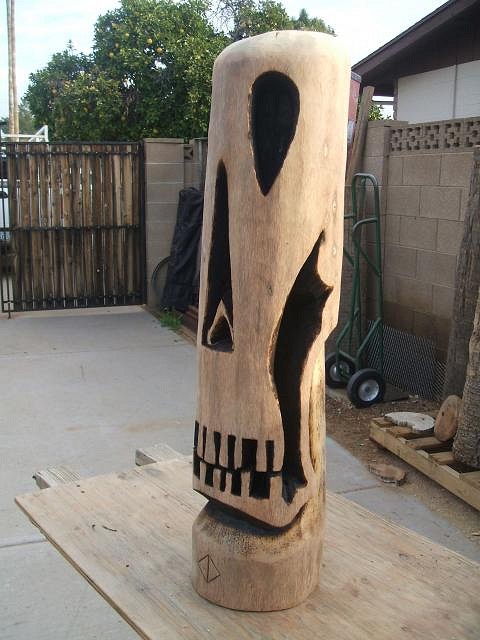
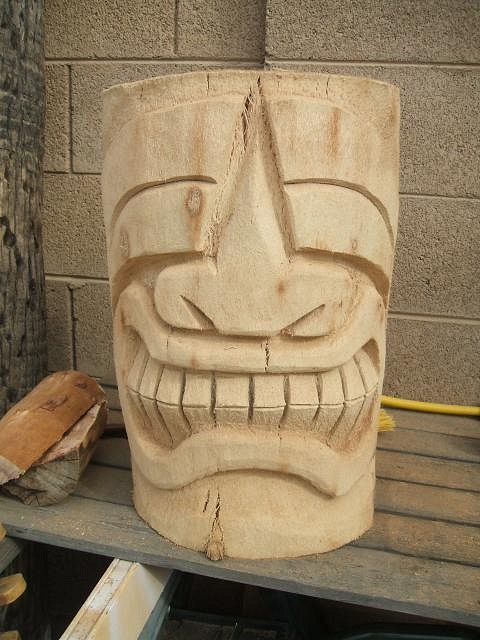
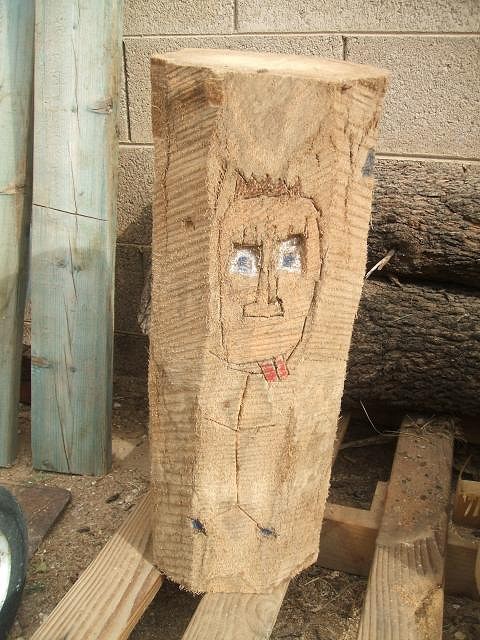
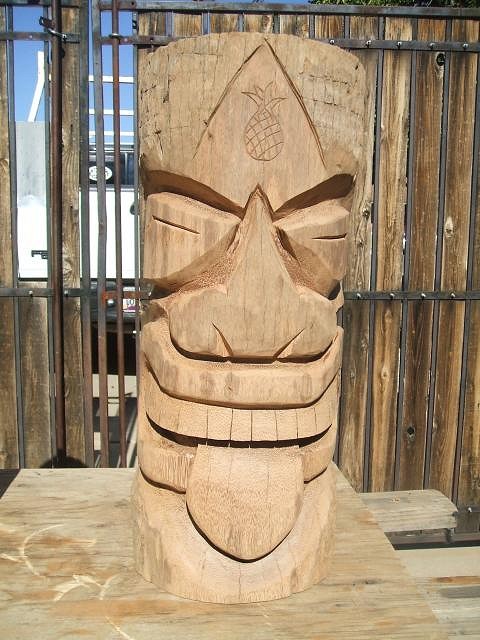
Well, it's been way too long since I been here. The inspiration for this guy came from a skull I saw here at TC
|
|
BTS
BIG tiki scott
Posted
posted
on
Wed, Feb 3, 2010 6:34 PM
kino!!! glad to see yah chopin!!! this skull is sweeeeett!!! cant wait to see him finished!!! nice and clean and unique love it!!! cheerz!! |
|
K
Kino
Posted
posted
on
Fri, Feb 5, 2010 12:07 PM
Mahalo for da-kine words Scott.
|
|
T

TheBigT
Posted
posted
on
Fri, Feb 5, 2010 1:24 PM
to boldly go where no man has gone before.... way to push the boundaries! |
|
K
Kino
Posted
posted
on
Mon, Nov 8, 2010 1:44 PM
Aloha everyone ! .
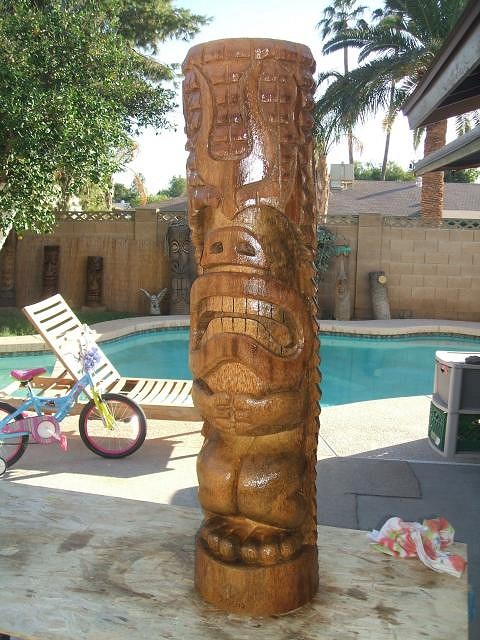
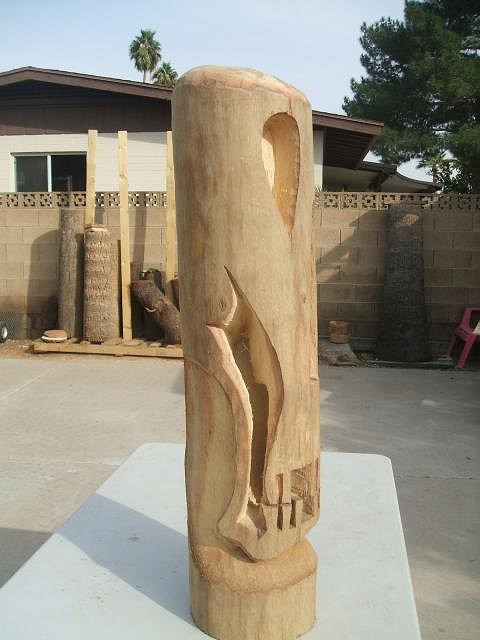
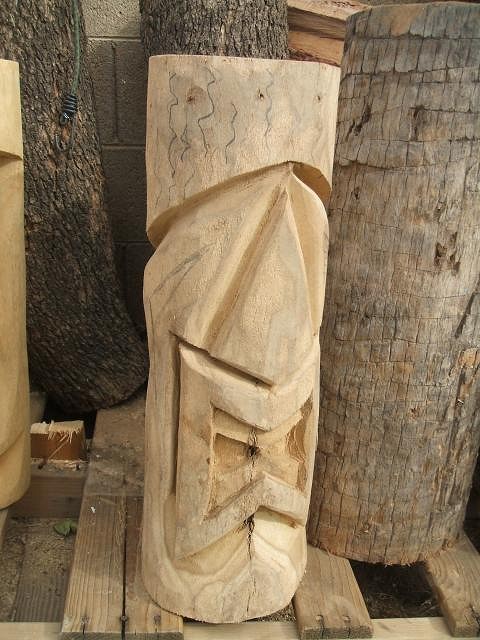
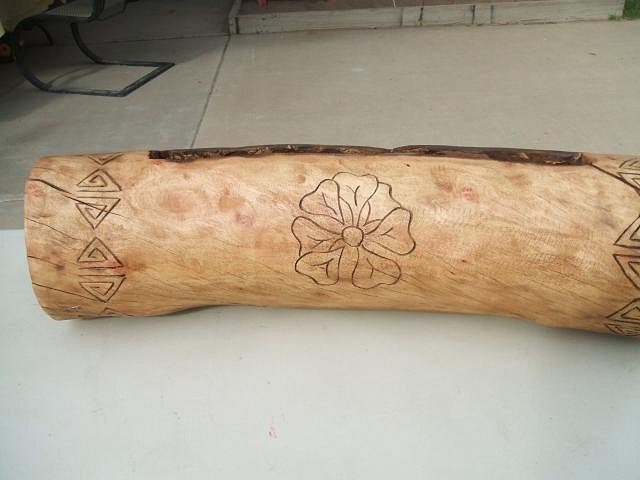
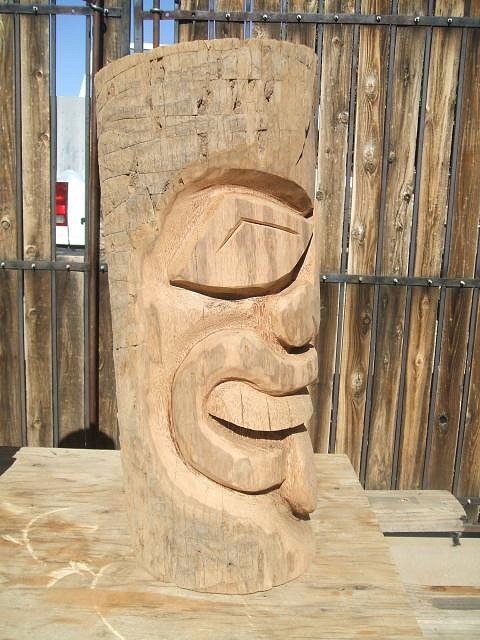
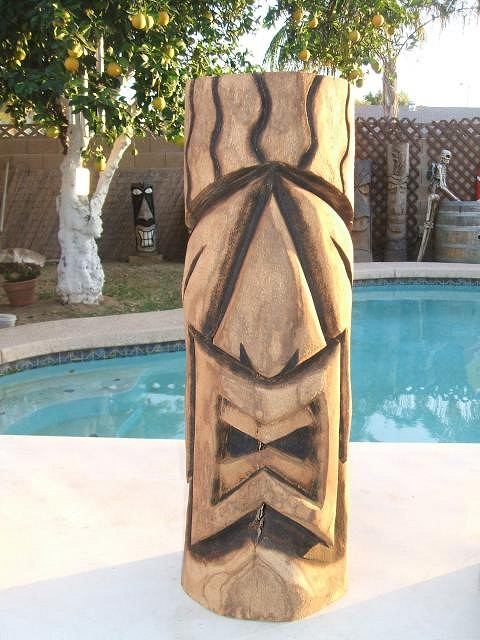
Just started this one today. I have a 4' tongue tiki that my wife loves, but
My 7yr old daughter wanted to try her hand with a chisel, Kino Thanks You [ Edited by: Kino 2010-11-08 13:45 ] |
|
4

4WDtiki
Posted
posted
on
Mon, Nov 8, 2010 6:50 PM
Kino, that slit drum looks Great! What kind of wood, and what did you use to hollow it out? That's gonna be gorgeous when you stain it. |
|
K
Kino
Posted
posted
on
Fri, Nov 12, 2010 12:38 PM
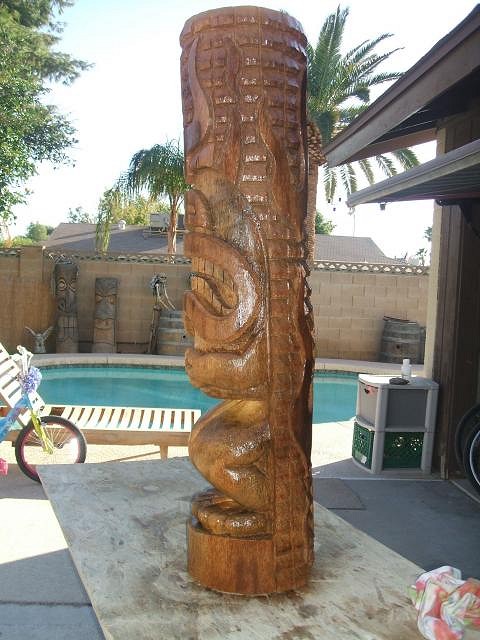
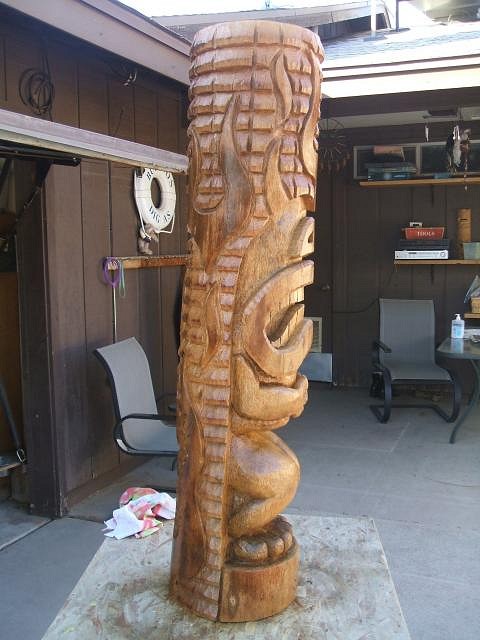
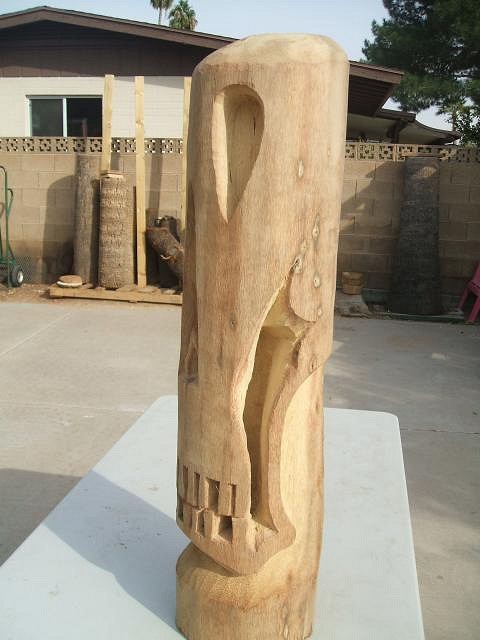
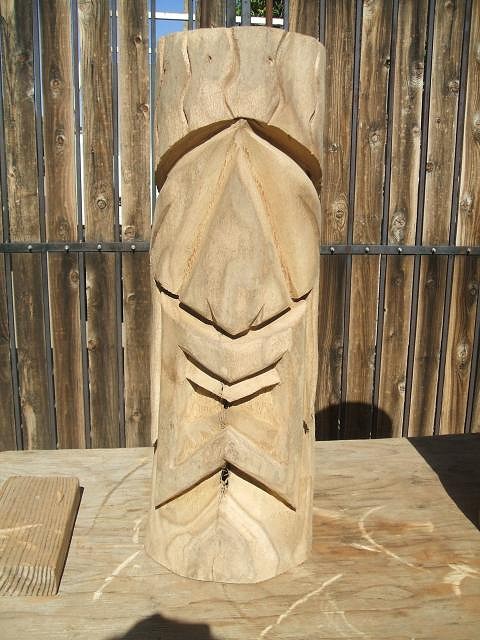
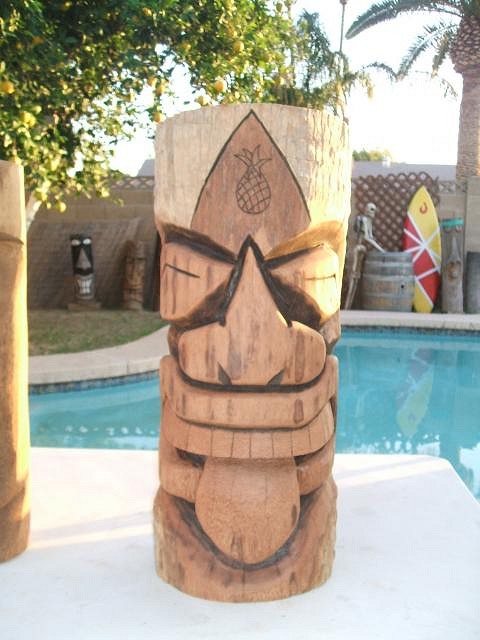
Thanks 4wdtiki. The wood is african sumac. just something I came across last year. I have It sounds cool , if only I could play it well. Anyway, here are some progress pics of two I started last week. Any ideas, suggestions, feedback are welcome.
|
|
A

amate
Posted
posted
on
Sun, Nov 14, 2010 2:02 PM
|
|
K
Kino
Posted
posted
on
Sat, Nov 20, 2010 6:23 PM
amate, thanks for looking, and mahalo. Ive been a little busy as of late, but did find some time to
[ Edited by: Kino 2010-11-20 18:42 ] |
|
4
4WDtiki
Posted
posted
on
Sat, Nov 20, 2010 8:02 PM
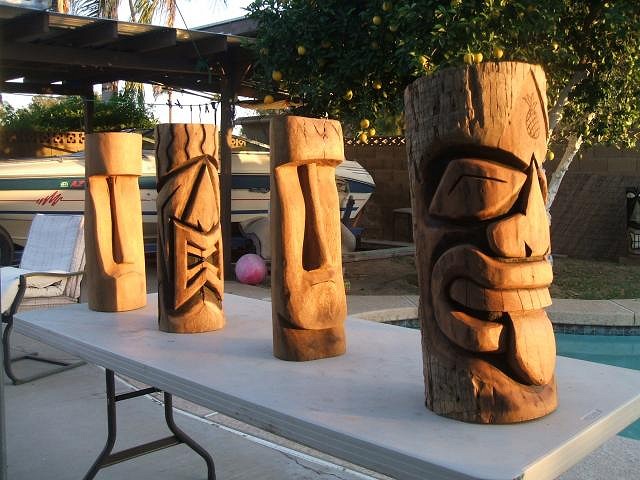
Looks to me like the moai was 'de-barked' down deep to the good wood, and the tongue tiki not as deep, barely past the bark. |
|
K
Kino
Posted
posted
on
Sun, Nov 21, 2010 7:33 AM
4wd - thats what I thought at first, but I did cut deep inside the mouth and tongue On another note, as you all can see, I am all over the place with |
|
4
4WDtiki
Posted
posted
on
Sun, Nov 21, 2010 7:42 AM
Are the two pieces from the same tree? |
|
K
Kino
Posted
posted
on
Sun, Nov 21, 2010 10:50 AM
no, not the same tree, but one would think that stain |
|
M

mijaba
Posted
posted
on
Wed, Nov 24, 2010 4:45 PM
Those EI's (Easter Islanders) are about as stoic as poker players! Those are four righteous tikis spread out there!! |
|
K
Kino
Posted
posted
on
Thu, Nov 25, 2010 7:02 AM
mijaba - mahalo for looking I've got more started but waiting for them to dry a little, |
|
K
Kino
Posted
posted
on
Tue, Dec 14, 2010 2:13 PM
Been too busy to get any choppin done, but I'm gettin itchy. |