Tiki Central / Tiki Carving
Tim Reis' aka CustomKiis - Carvings
Pages: 1 44 replies
|
C

Customkiis
Posted
posted
on
Wed, Nov 4, 2009 9:31 AM
In the past I have posted under the username: TR. I was living on Kauai, currently in Eugene, Oregon. I have been carving, fanatically, for the last 4 years. Due to my lack of experience I carve very conservatively. Each carving takes, on an average, 150-200 hrs to complete. Each carving is original and hand carved with chisels and gouges (except for the initial cutting of the log.) All carvings are made with Aloha! I would post pics here, however I only have a couple of photos on this computer. You can view my carvings at http://www.myspace.com/customkiis Enjoy! I am using Swiss carving tools which use a softer steel. The softer steel loses it's edge quicker than the harder steel, however it is easier to get them back to that razor sharp state that we all enjoy. Just my opinion. [ Edited by: Customkiis 2009-11-04 09:32 ] [ Edited by: Customkiis 2009-12-21 21:06 ] |
|
H

hottiki
Posted
posted
on
Wed, Nov 4, 2009 10:20 AM
[ Edited by: hottiki 2011-03-16 23:06 ] |
|
C
Customkiis
Posted
posted
on
Thu, Nov 5, 2009 9:28 AM
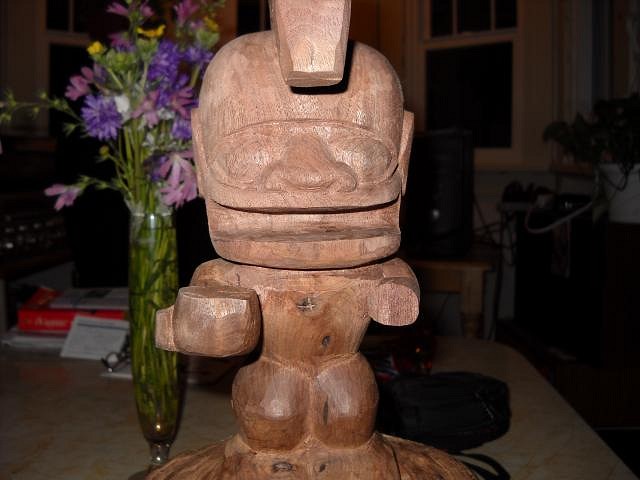
Most of my carvings are from 12"-24" with only two of them being over 30". I have carved ki'is from (1)Koa, (2)Formosa Koa, (1)Milo, (1)Hau, (3)Monkey Pod, (3)Walnut and (1)Yew. Most of the woods are medium hardwoods. My first carving was out of the Hau, which is soft. I quickly realized, if I was going to spend that much time on a carving, I wanted it to last. This is my current work-in-progress approx. 12" and made of English Walnut. The wood was given to me from a co-worker, who got it from a guy, who got it from a river in the midwest. English Walnut is infamous for having "checks". This piece had one that I was unaware of until I roughed it out. I was able to carve beyond the "check" almost completely removing the weakened wood, unfortunately I broke the hand off. I reattached it using a domino style loose tenon and some epoxy. Worked out pretty good.
[ Edited by: Customkiis 2009-11-05 09:29 ] [ Edited by: Customkiis 2009-12-21 20:43 ] |
|
C
Customkiis
Posted
posted
on
Thu, Nov 5, 2009 9:39 AM
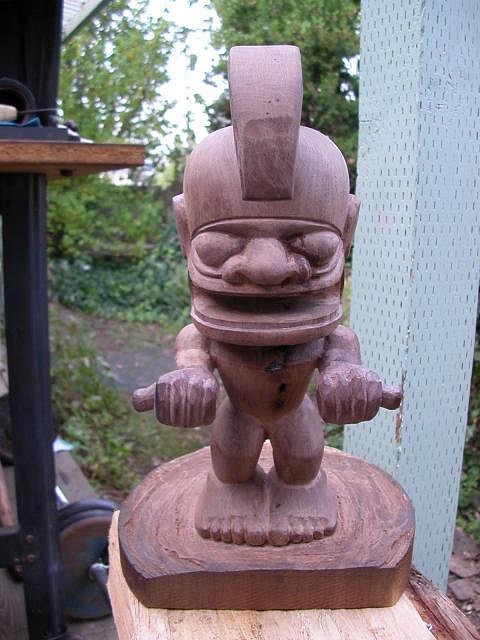
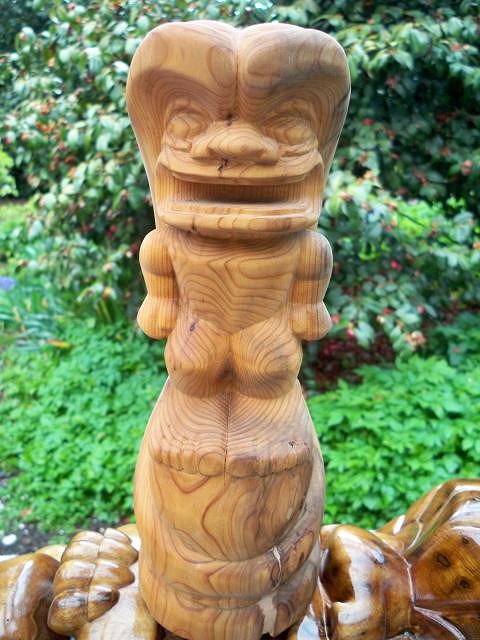
This carving is from a piece of Yew. My aunt has a Yew tree in her yard and I found some very interesting pieces, small logs, laying around that had very interesting colors ranging from orange to maroon/purplish. I did some research and found that the Yew tree is highly prized for bow making and had some medicinal value. So I turned this piece of firewood into a mantle decoration, for my aunt. I really enjoyed working with this wood. It carved very cleanly, a lot like Basswood, with little to no tear-out. It has the distinct grain of fir/pine, but was much more dense. One of my favorites to work with. This carving is another shorty, approx. 12"
|
|
A

AlohaStation
Posted
posted
on
Thu, Nov 5, 2009 9:41 AM
Welcome to TC!! Wow great carves. Stick around a while and keep posting. |
|
C
Customkiis
Posted
posted
on
Thu, Nov 5, 2009 9:45 AM
That is all I have on this computer. Will post others when i can get them. I think the thing I love the most about wood carving is that it forces me to live in the "now". While I am carving I have to think about that one mallet stroke or that one cut. When I am carving and thinking about past or future events, that is usually when mistakes happen. Wish I could live in the "now" more often, outside of carving. :). A hui ho |
|
T

TikiG
Posted
posted
on
Thu, Nov 5, 2009 10:38 AM
Customkiis - Love the elemental-being vibe I get when I look at your carvings, but I especially love the types of wood used in creating them...VERY COOL! These exotic woods really showcase each idols' mana. The Yew is fantastic! Please post more of your work here on TC and like the others I say keep up the great work :) Thanks for sharing. |
|
T

TikiMango
Posted
posted
on
Thu, Nov 5, 2009 2:57 PM
Your pictures on MySpace are terrific! Great style, and interpretation. Love the two-tone pieces. |
|
T

tikigodz
Posted
posted
on
Thu, Nov 5, 2009 3:11 PM
Just when your thinking you getting pretty good at this carving thing, Ther is always someone out there to give you a swift kick in the @$$ , You work is AWESOME!! and the time spent really shows,,, Keep them coming!! |
|
K

Kino
Posted
posted
on
Thu, Nov 5, 2009 6:47 PM
---------^--Perfectly expressed ! I couldnt agree more. |
|
L

laojia
Posted
posted
on
Sat, Nov 7, 2009 11:35 PM
Amazing work here! You've a beautiful own style. Please more pics!!! J. |
|
C
Customkiis
Posted
posted
on
Mon, Dec 21, 2009 9:17 PM
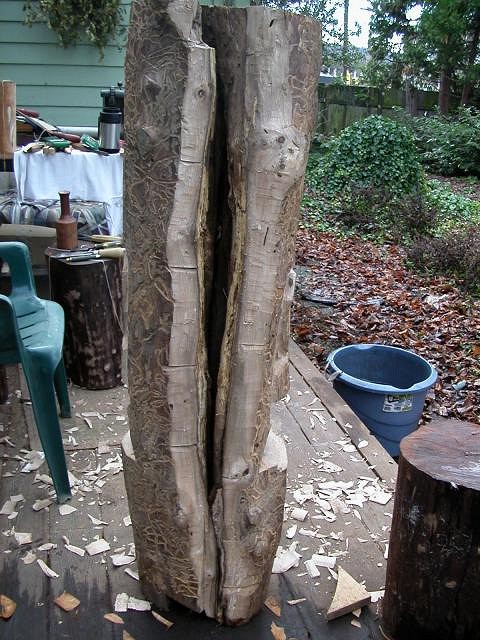
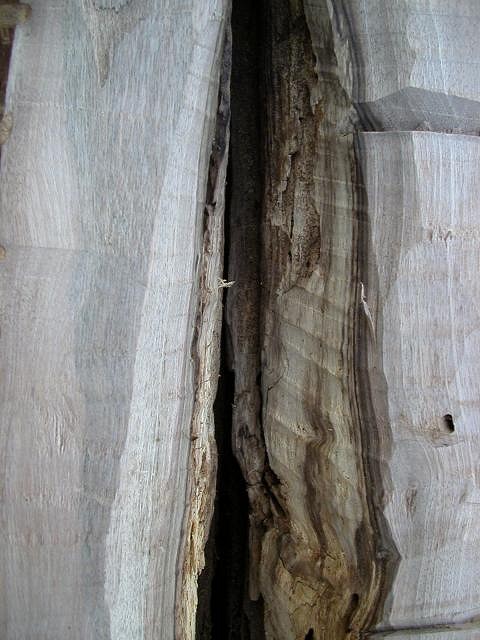
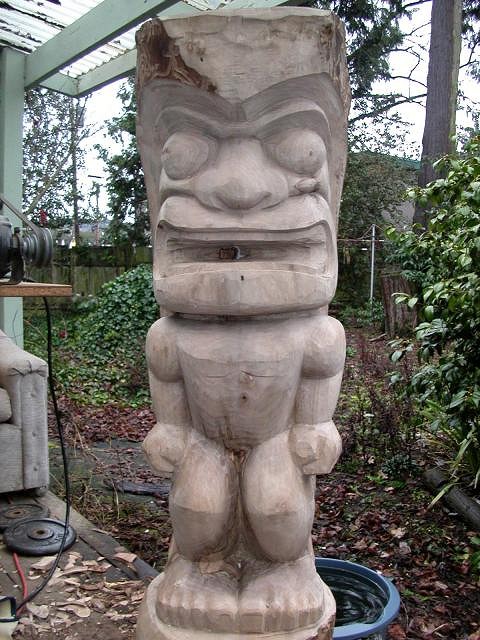
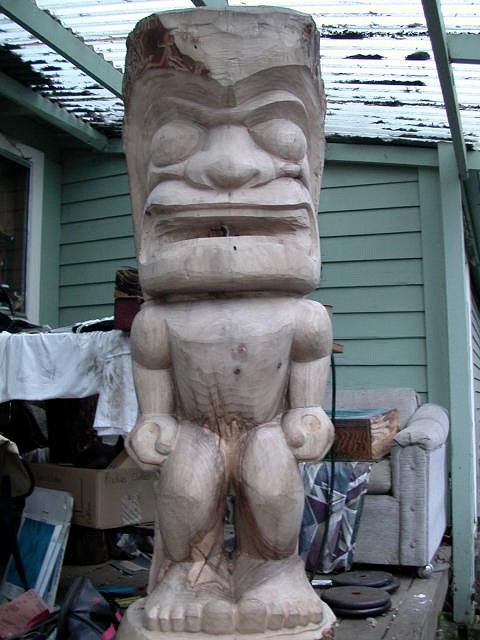
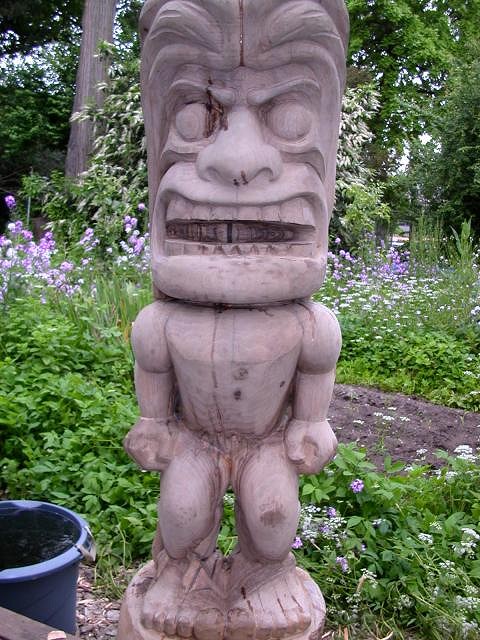
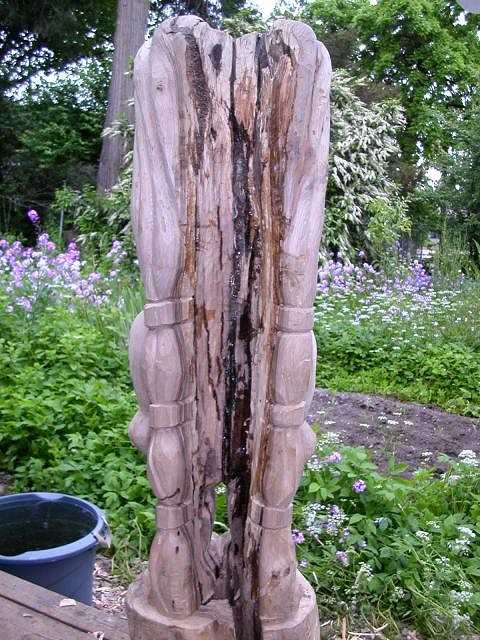
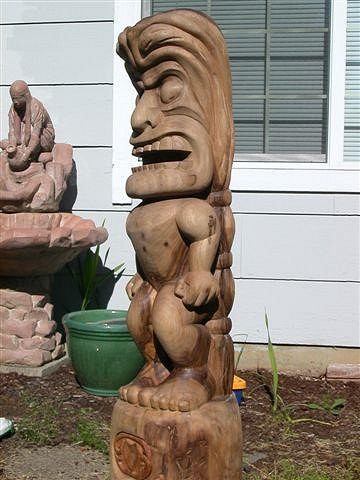
Here is my latest "Work in Progress" It is a 4ft tall walnut log, approx. 14 inches in diameter. I knew the log had some rot and bug damage and had to expose it in order to determine the extent of the rot. After seein how badly it was damaged I almost turned it into fire wood. After staring at it for a long time, I decided to carve it. I realized there was a lesson in that log. It was either going to make me realize "Leave rotten logs for firewood" or "rotten logs can be beautiful carvings, too." I know this carving will have a large crack running down the from the chest to the nose. I am hoping that the wood around the crack will be extremely colorful and wild looking. The body is mostly roughed out, I will post some pics when the body is a little more refined.
|
|
D

Davez_tikiz
Posted
posted
on
Tue, Dec 22, 2009 8:16 AM
Wow! you have an amazing style! Can't wait to see more! |
|
B

Benzart
Posted
posted
on
Tue, Dec 22, 2009 10:12 AM
Well I'm as "Wow'd as the rest of the posters. Excellent stuff you have here and the last 12" guy looks Really great, especially withoput the thick finish you are adding. You might try a rubbing poly to give a nice hand rubbed look without the deep shine. OH Yeah, your photo (on My Space) of the toy outrigget and the little shark looks REAL.... Yes, I saw the Peeps in the boat and I see they are trying to row away as fast as they can! They look real too. :o :P :lol: [ Edited by: Benzart 2009-12-22 10:15 ] |
|
C
Customkiis
Posted
posted
on
Sun, Dec 27, 2009 5:36 PM
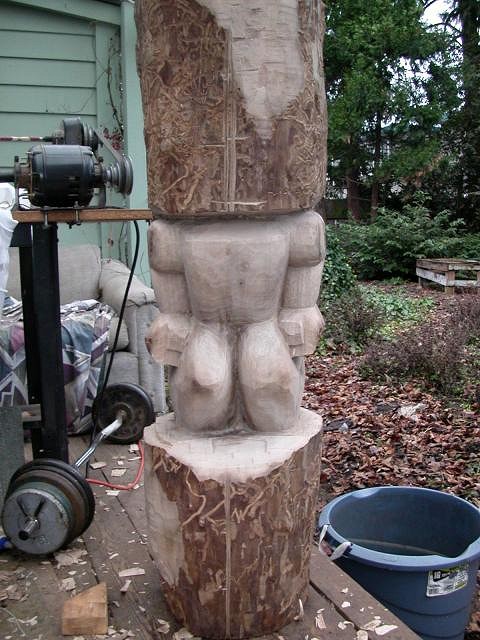
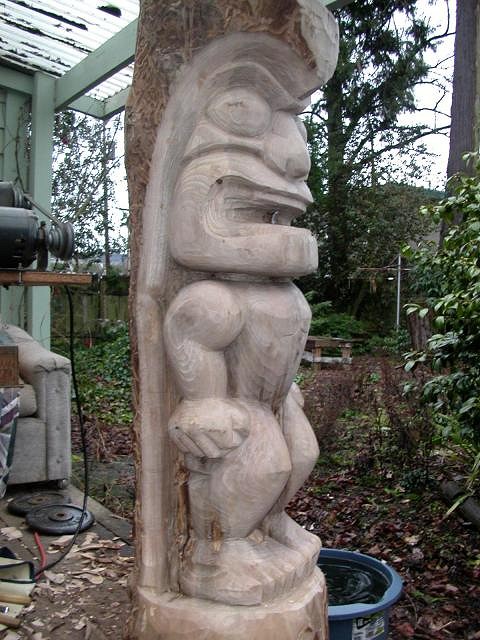
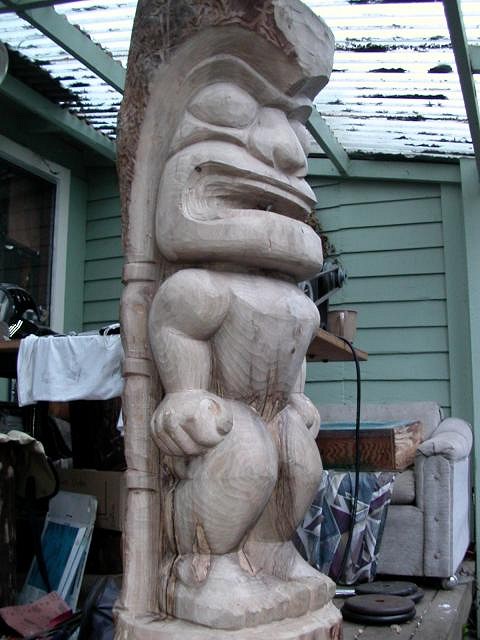
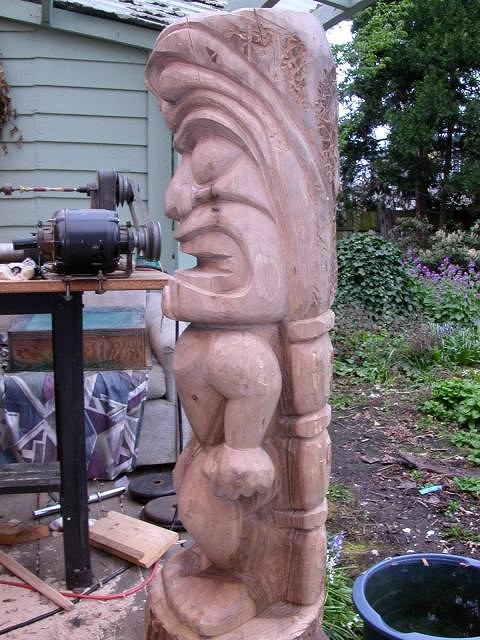
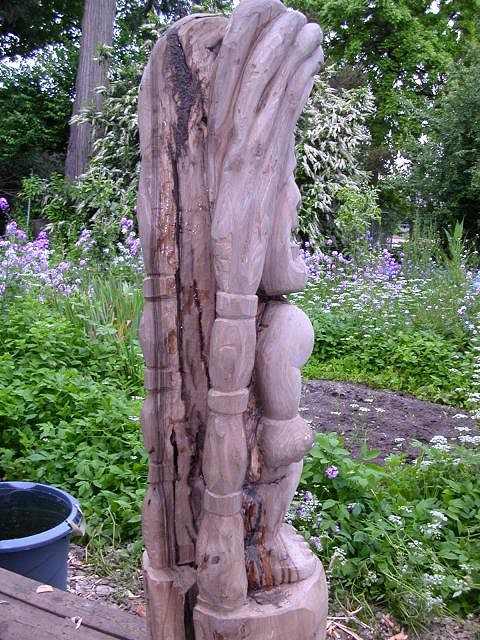
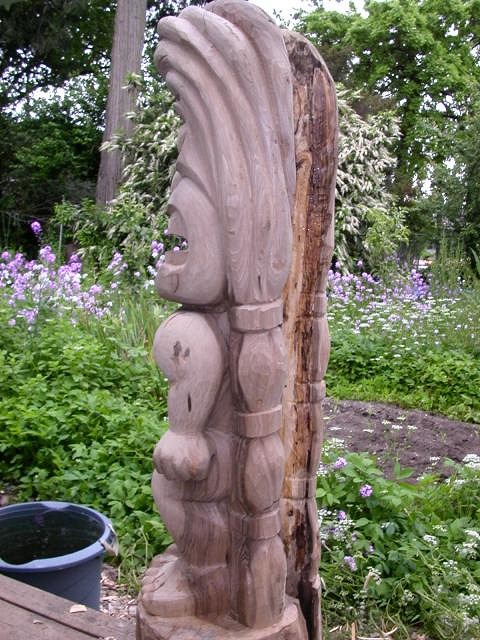
Well the body is pretty much roughed out. This carving will be a half-body with braids running to the ground. I am going to have to start outlining the braids, so that I can finish the side of the body, where the braids meet the body.
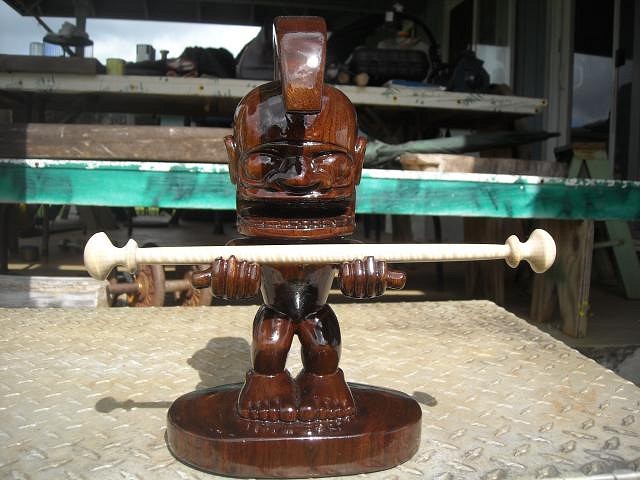
Benzart - that glossy finish is 6 coat of a spar varnish. I did in fact coat the small Yew carving with a rub on poly. Funny you mentioned that. I am still playing with different types of finishes. Do you have any that you prefer? Any that hold up well out doors? Mahalo |
|
D

drasticwagon
Posted
posted
on
Mon, Dec 28, 2009 3:37 AM
Wow I see what you are doing now. Nice Job |
|
C
Customkiis
Posted
posted
on
Sun, Jan 24, 2010 5:13 PM
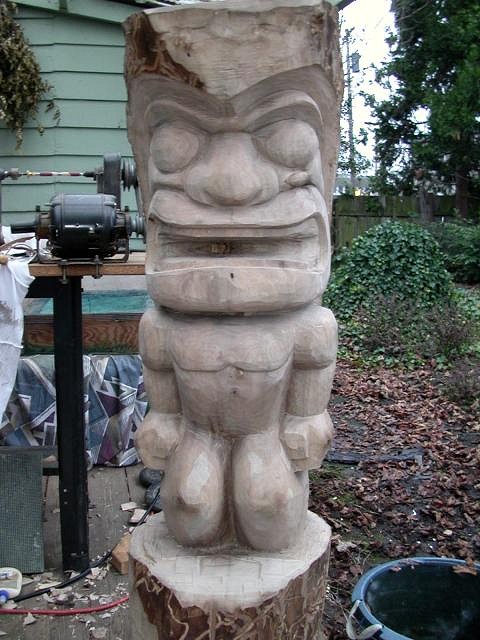
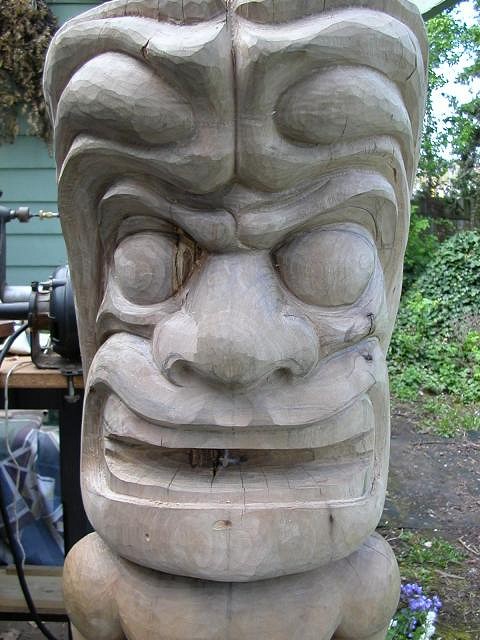
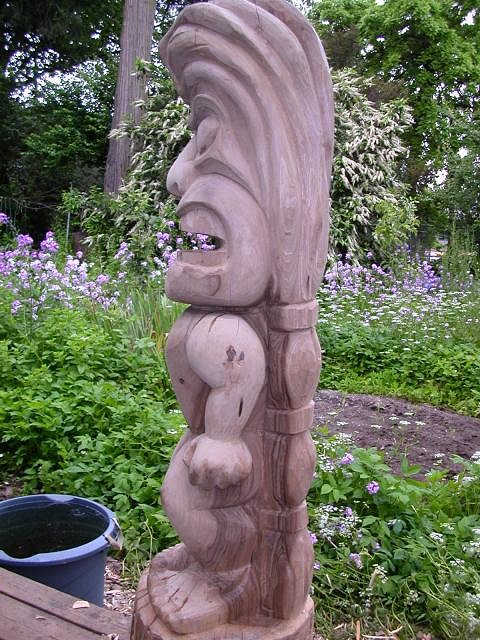
Here are some updated pics. The face is roughed out and I am starting to tie everything together. Had to rough out the feet to finish the legs. |
|
BTS

BIG tiki scott
Posted
posted
on
Sun, Jan 24, 2010 5:28 PM
KUSTOMKIIS!!!! very cool carve yah got goin here!!!! luv ur style!!!! this ones gonna be bad ass!!! cheerz!!! p.s. i luv logs and wood like this w the spalting and dis colorations!!!! they finish up BEAUTIFUL!!! |
|
D
drasticwagon
Posted
posted
on
Sun, Jan 24, 2010 6:06 PM
Nice new one and great proportion as well. |
|
T

TheBigT
Posted
posted
on
Sun, Jan 24, 2010 7:45 PM
I would never have guessed this dude was hidden in that nasty old log. Well done. :wink: |
|
B

benella
Posted
posted
on
Mon, Jan 25, 2010 11:58 AM
:o This piece looks already perfect. Great work. Benjamin. |
|
T

Tikilizard
Posted
posted
on
Mon, Jan 25, 2010 2:58 PM
Coming along really nice! A rotted old log? That's some talent. Thanks for the progress posts. |
|
T
TikiMango
Posted
posted
on
Mon, Jan 25, 2010 4:06 PM
Both the carve and the wood have some major personality going on, lovin' it all! |
|
C
Customkiis
Posted
posted
on
Sat, Mar 13, 2010 9:39 AM
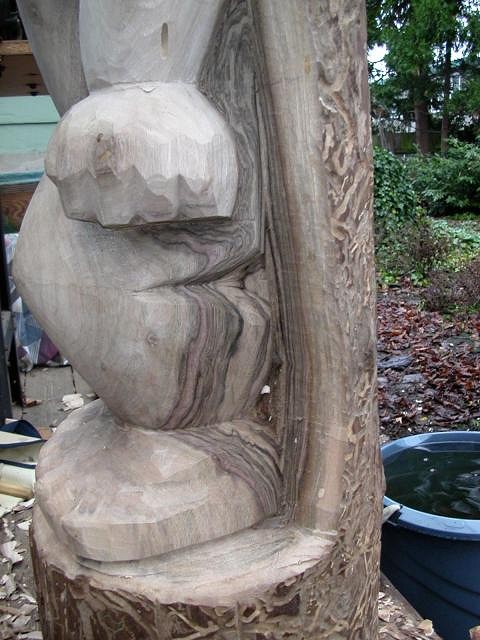
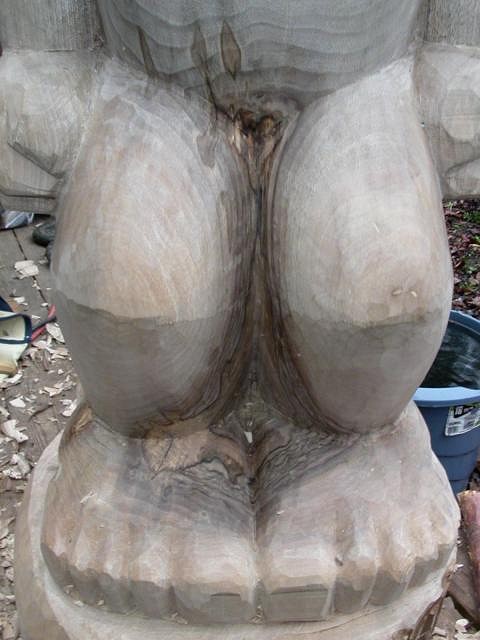
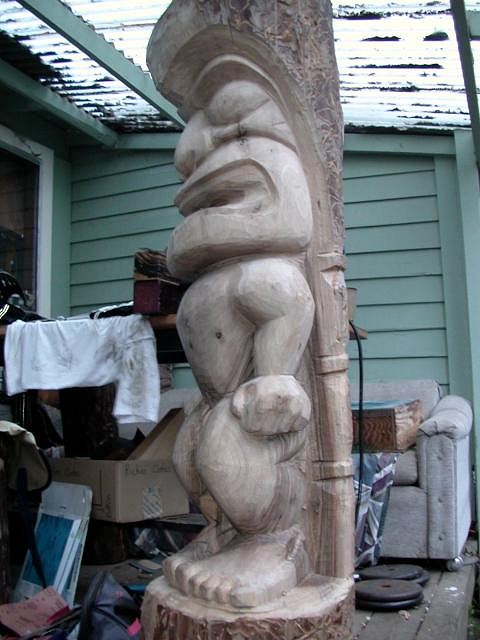
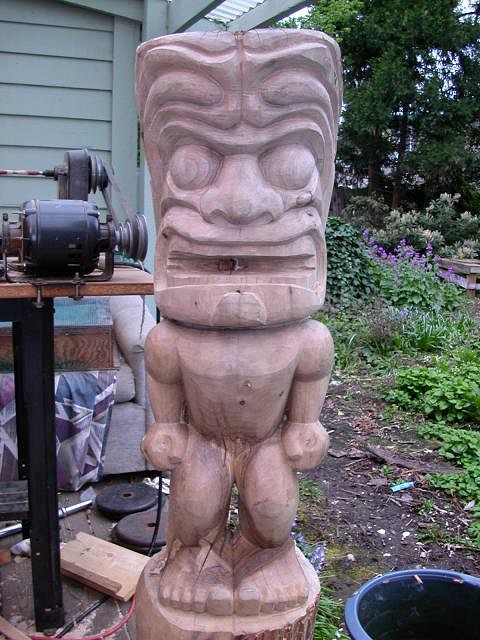
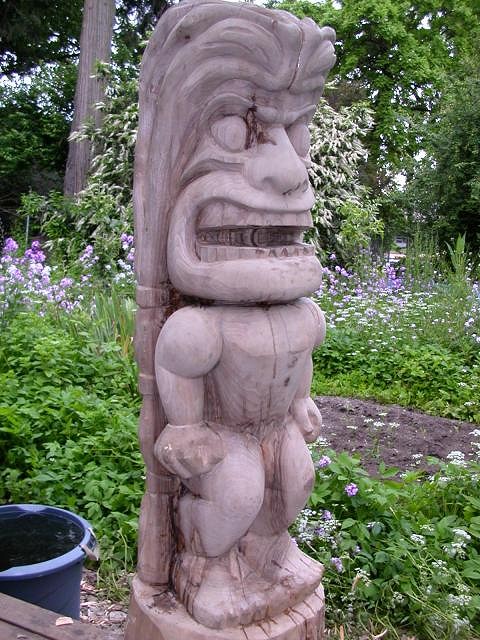
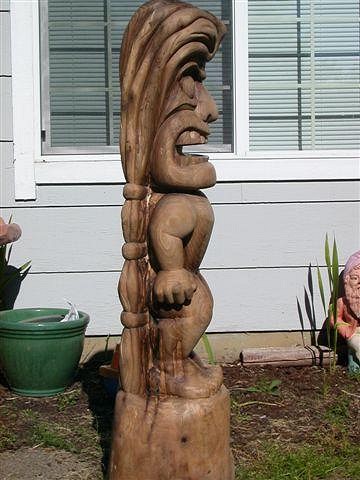
Having a hard time with this one. Was really trying not to go through on the legs, but it just wasn't giving me the image I am seeing. Decided to punch through and now it is starting to look the way I want it to. I haven't touched the head, with the exception of the braids, since my last post. Should be able to start working my way up now.
|
|
K

KAHAKA
Posted
posted
on
Sat, Mar 13, 2010 6:31 PM
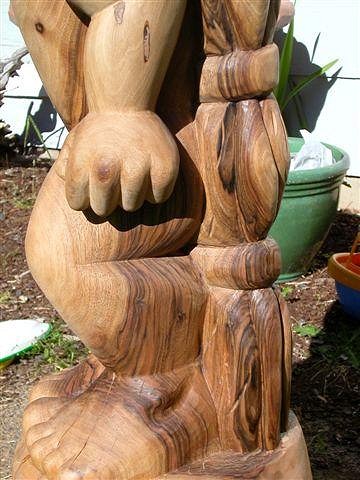
Look at the detail in them hands he's got. That takes some serious skill! Nice work on this dude. |
|
C
Customkiis
Posted
posted
on
Mon, Apr 12, 2010 8:24 AM
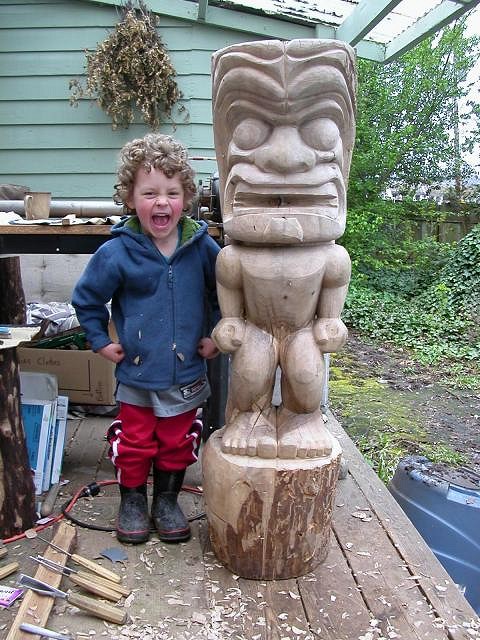
I had my nephew pose with this guy for size reference.
Starting to make some progress. Was really slow going at first, but it is starting to take shape. Leaving the braids big allow me to add depth and detail later on if I choose.
|
|
A

amate
Posted
posted
on
Mon, Apr 12, 2010 8:58 AM
VERY nicely done!! |
|
S

seeksurf
Posted
posted
on
Mon, Apr 12, 2010 1:43 PM
Wow great looking tikis! Fine work you look like a pro. |
|
CC

Creative Chimp
Posted
posted
on
Mon, Apr 12, 2010 1:45 PM
you do great work man!!!!! i love your style. im just starting out myself and it has taking me a year to finish my first but thats because im slow and lazy and dont really know what im doing yet........your patience shows in your work. cant wait to see your next progress shot |
|
C
Customkiis
Posted
posted
on
Sat, Apr 24, 2010 9:59 AM
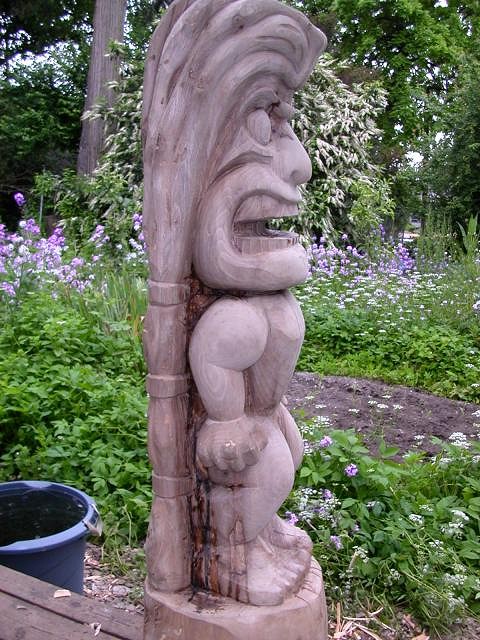
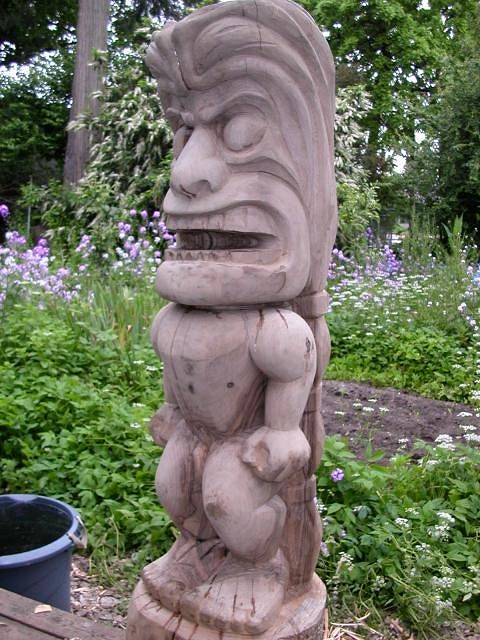
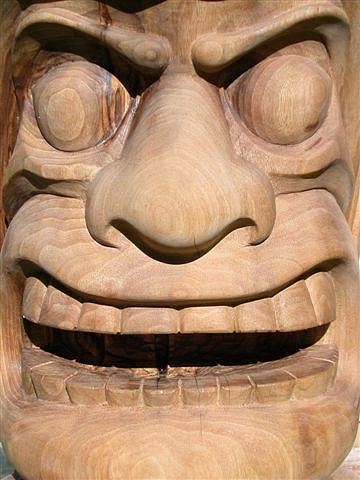
Starting to zero in on one side of the face. Once I get one side where I want it, then I will make the other side match.
Once I get the face where I want it, then I will finish the body and feet, then off to sanding. Still probably a month out. This carving is turning out to have a lot of depth, or layers. Can't wait to see what the finished product looks like.......patience.....patience......patience.....aaaargh! |
|
S
seeksurf
Posted
posted
on
Tue, Apr 27, 2010 10:10 PM
Very nice work. taking it nice and slow is working for ya. |
|
B
Benzart
Posted
posted
on
Sun, May 9, 2010 8:10 AM
Excellent work on this guy though I really Liked that wormy track surface of the log what you are doing is really Incredible. Just watch those bug holes going into the wood, if you haven't seen them yet they belong to a hammer-head kind of worm, probably a powderpost type beetle larvae and they will live in the wood until they mature and fly away. In the meantime if they get to the edge of the surface they will bore into an adjoining piece of wood like a wood floor or TV or whatever. De bug the log when you're done as this will be too beautiful to "Leave to the worms". |
|
C
Customkiis
Posted
posted
on
Wed, Jun 9, 2010 5:58 PM
Been a while since I posted an updated. So many of the changes are so subtle it almost looks as if I havemn't done anything. Thank you for all your kind words. Benzart - I have killed a number of these bugs, while I was carving. I am hoping that I have gotten most of them. I am filling alot of the cracks with epoxy, so hopefully that will take care of them. One of my first carvings had these bugs and my brother called asking sawdust was coming out of my carving. :). Ooops! Good thing he had it outside. That is a lathe, in the back ground. An old Craftsman that I scored for $80.00. I work at the Eugene, OR WoodCraft and have learned a lot about the different aspects of woodworking. A very valuable experience. I have only turned carving mallets and pens so far. I am basically done, except for the braids. They need a little fine tuning and some finishing touches. Fill some cracks, sand and finish! YEAH!!!
I will be moving back to Kauai June 27, 2010, to farm Koa trees and other crops in a remote location. (all of the crops are legal kine) I probably will not have much time to log on, however I will try to post pics. I have a 10ft Monkey Pod Ki'i that is half done, waiting for me. I just wanted to say thanks for all the aloha and for this wonderful site. If anyone every wanted to learn about carving Tikis, I don't know if there is a better resource. Thanks to all the beginners and pros for sharing your information, experience and artwork. I will post a pic once I get a finish on it. This time it won't be that High Gloss Spar Varnish, Benzart. :). |
|
D
drasticwagon
Posted
posted
on
Wed, Jun 9, 2010 7:05 PM
Great carve, best of luck with your new life. |
|
4

4WDtiki
Posted
posted
on
Wed, Jun 9, 2010 8:26 PM
Great carve! I vaguely recalled the piece before you started it, so I went back to the first page to see it, and decided to bring it up for a comparision!
Pretty amazing how you worked around that crack! Man, you're moving from one type of rainforest to another! I've been to both Eugene and Kauai, they're both special places. Be sure to post your work when you can. |
|
G

GROG
Posted
posted
on
Thu, Jun 10, 2010 12:38 AM
That's what SHE said! |
|
S
seeksurf
Posted
posted
on
Thu, Jun 10, 2010 6:17 PM
Outstanding! He looks great. |
|
C
Customkiis
Posted
posted
on
Tue, Aug 17, 2010 11:08 PM
I am now on Kauai,farming. Got a little distracted, but here are the finished pics. This piece will eventually end up in San Diego, at my sisters house. I had to use a butterfly patch (figured walnut) to stop the crack in the back and inlaid my logo (figured maple) in the front. I then finished it with a satin, oil based finish
|
|
N

nomolos
Posted
posted
on
Wed, Aug 18, 2010 2:25 AM
What a great tiki, love the grain of the wood and the smooth finish |
|
B
benella
Posted
posted
on
Fri, Aug 20, 2010 6:56 AM
Perfect ! |
|
C

claq50
Posted
posted
on
Tue, Aug 24, 2010 12:54 PM
Very cool how you worked with that giant split in the back. Came out looking awesome |
|
S

surfintiki
Posted
posted
on
Tue, Aug 24, 2010 1:54 PM
Yeah, nice grain and color. Beautiful finish! Kaui...JEALOUS! PLEASE feel free to spread as many photos as you wish!! :D |
|
B
Benzart
Posted
posted
on
Sat, Aug 28, 2010 7:28 AM
Tim, he finished up Beautifully. Excellent sanding and finishing, lots of sharp deep details. Excellent use of the log and lack there of. |
|
L
laojia
Posted
posted
on
Mon, Aug 30, 2010 7:25 AM
Impressive Tiki carving...Really! And very good finishing! Also the butterfly patch: astute and style! You know the work of Georges Nakashima? J. |
|
4
4WDtiki
Posted
posted
on
Sat, Mar 5, 2011 8:29 AM
Anything new from da island? |


Pages: 1 44 replies