Pages: 1 16 replies
|
N

notiki
Posted
posted
on
Wed, Mar 13, 2013 5:40 AM
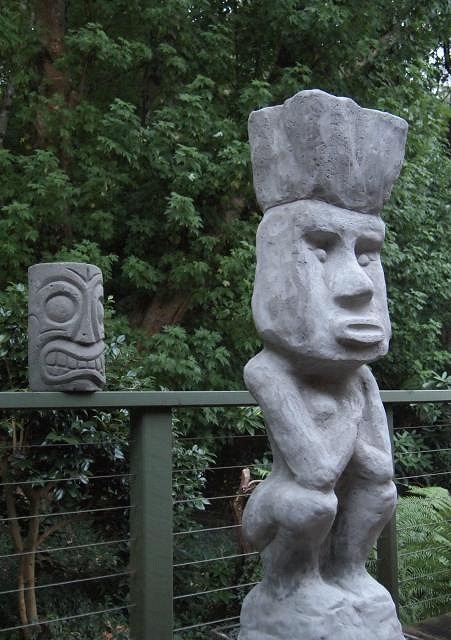
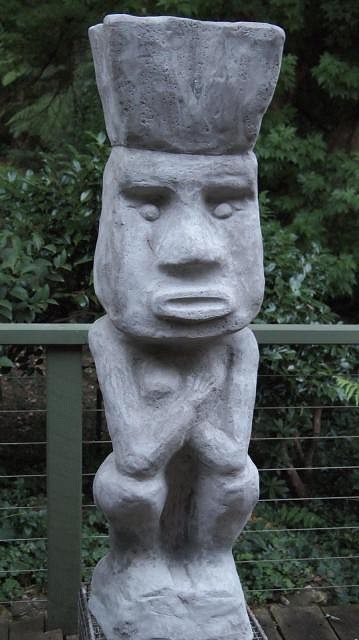
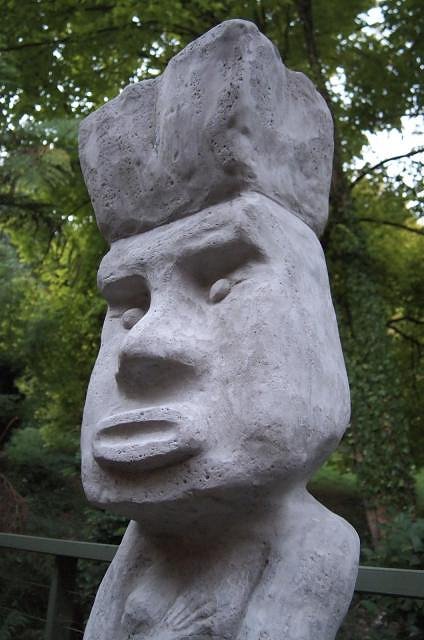
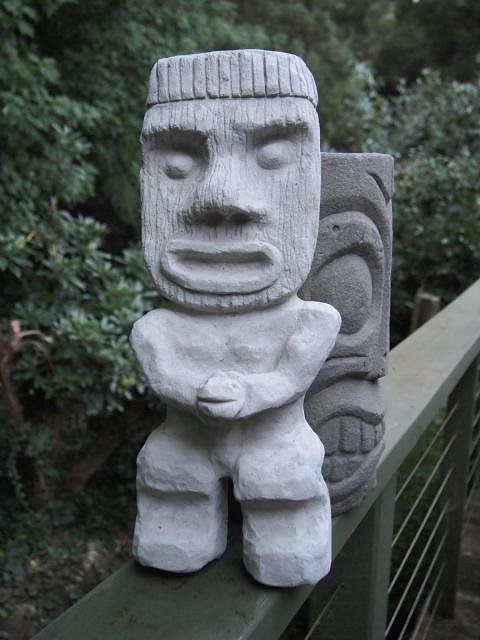
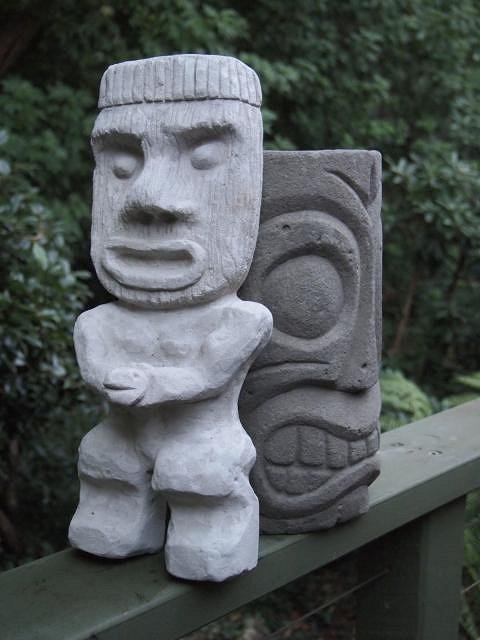
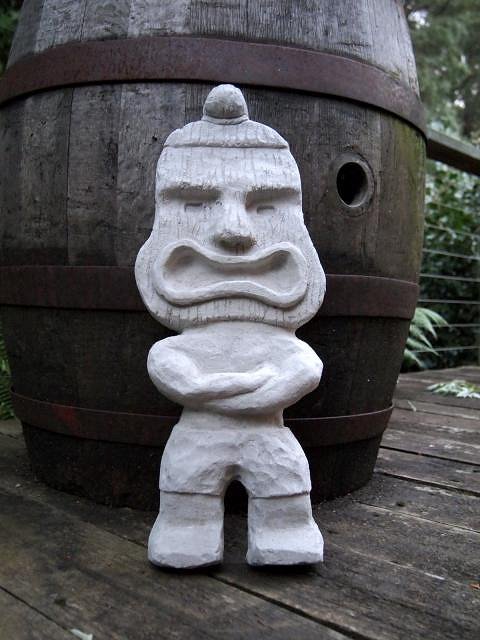
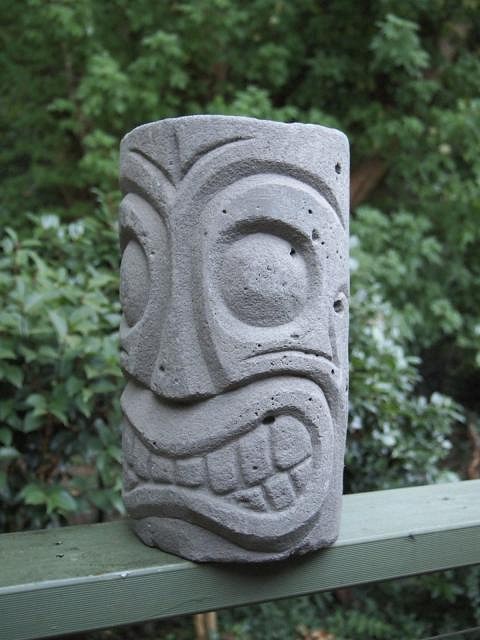
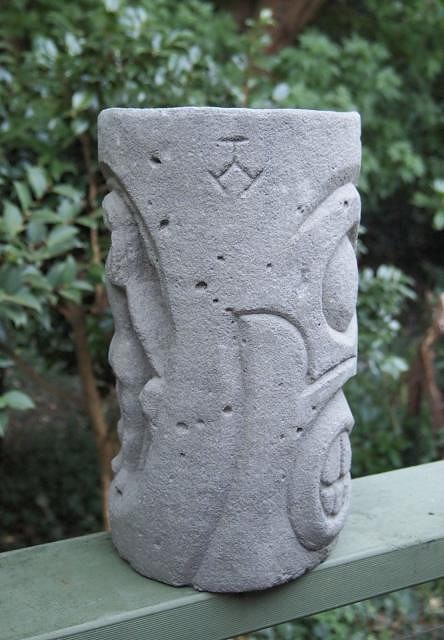
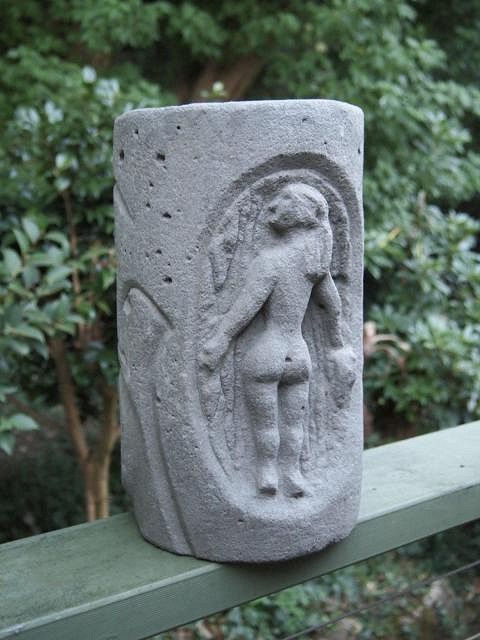
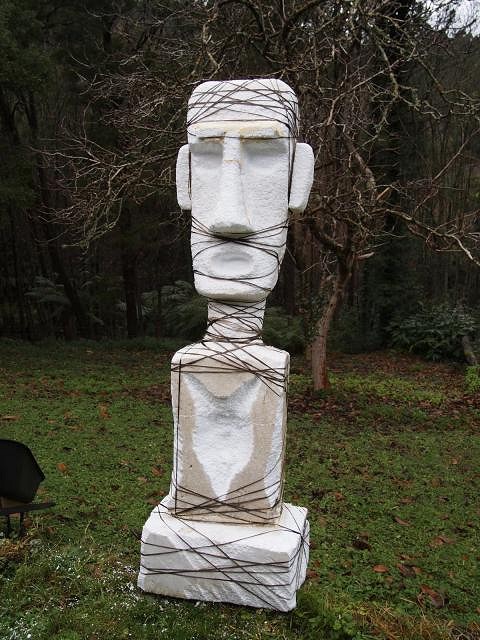
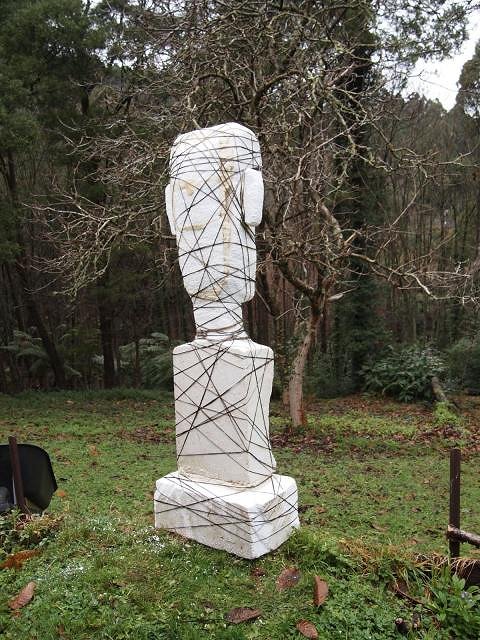
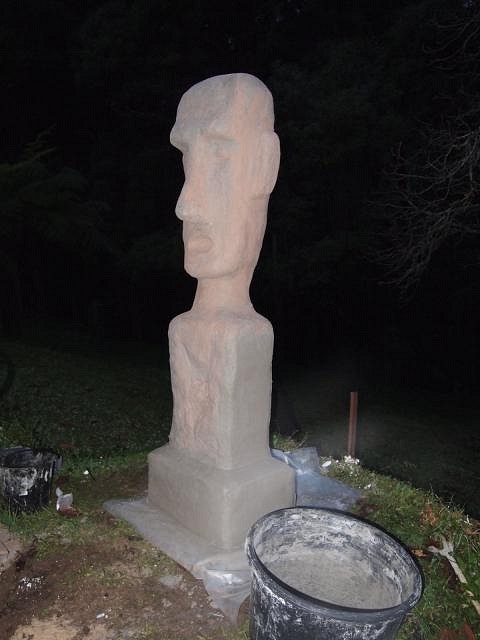
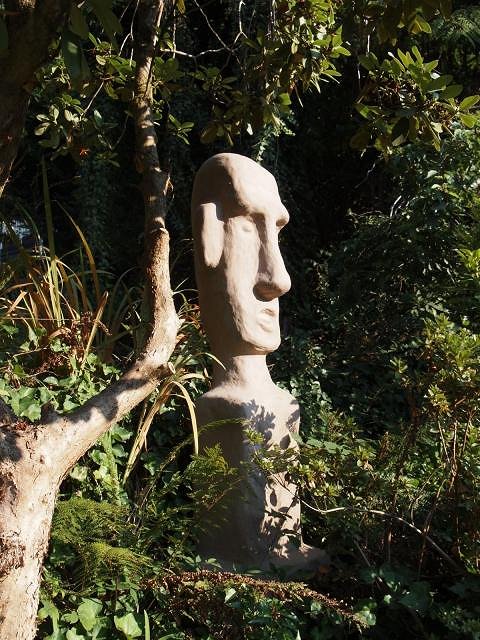
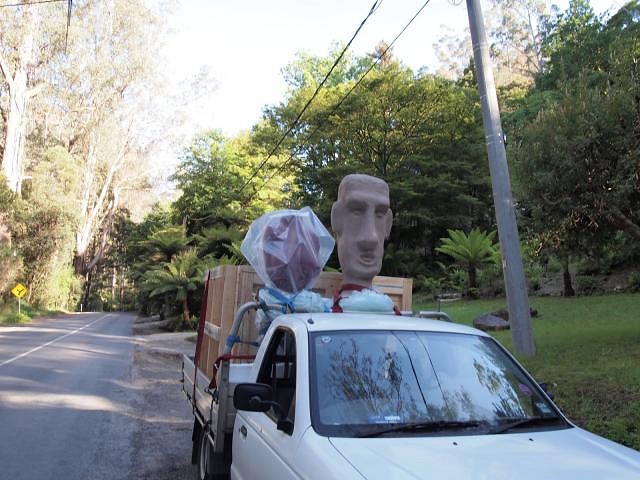
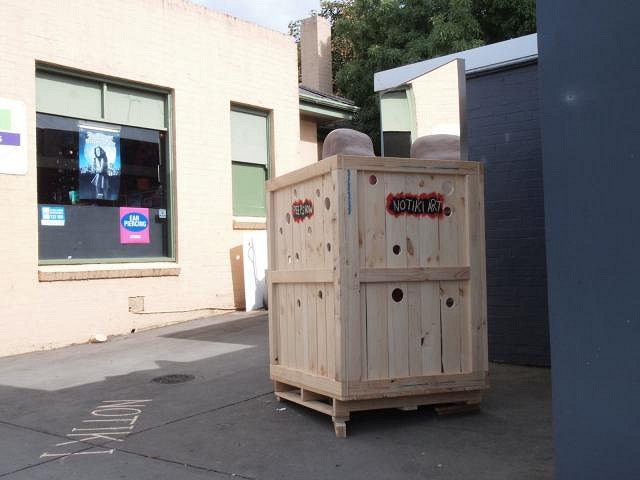
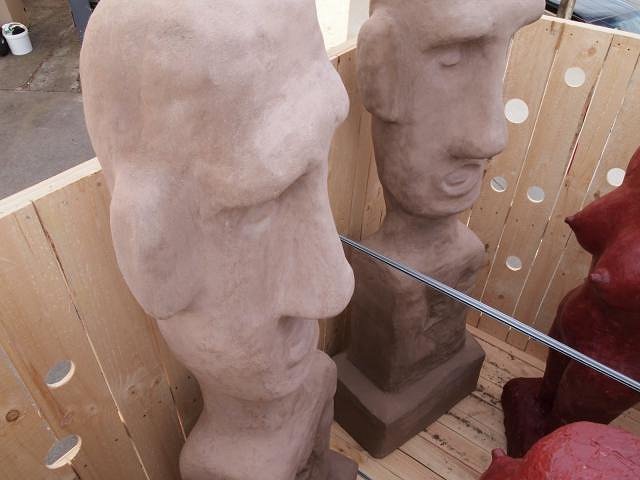
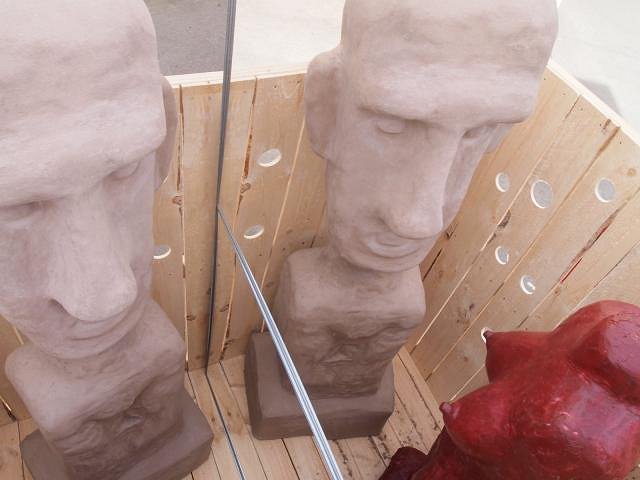
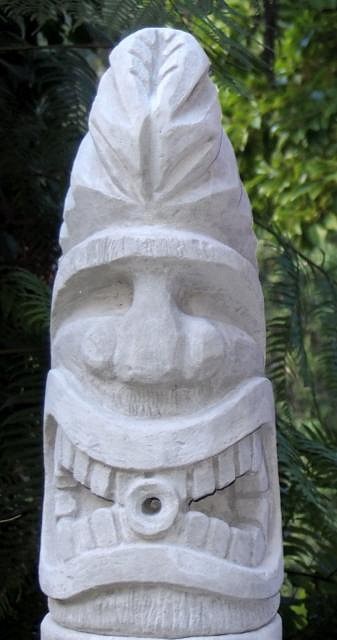
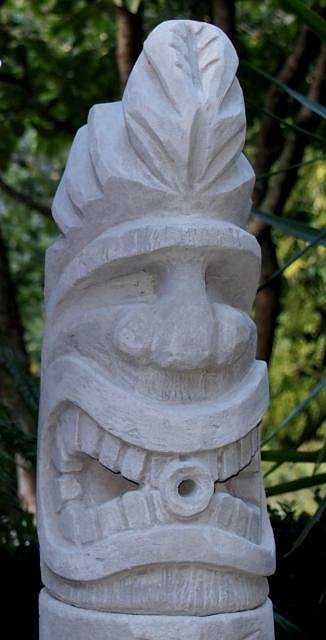
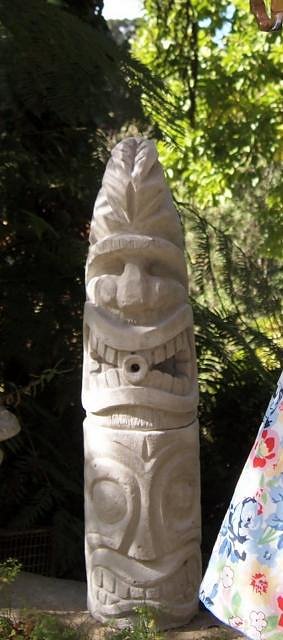
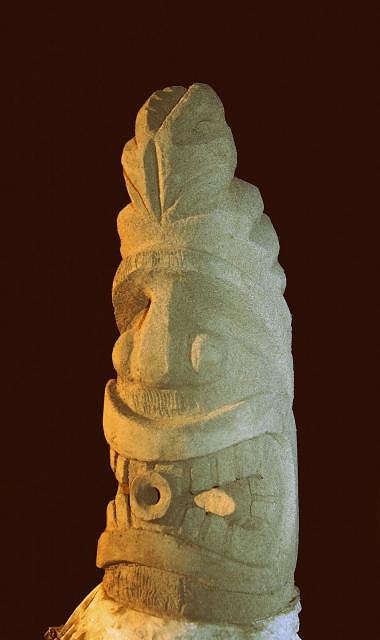
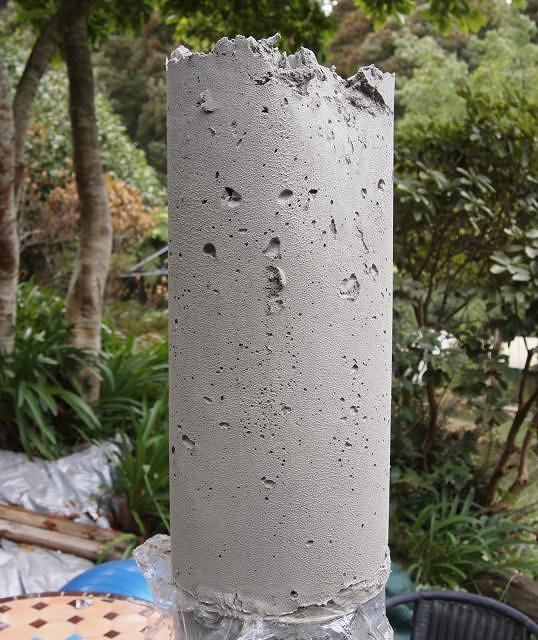
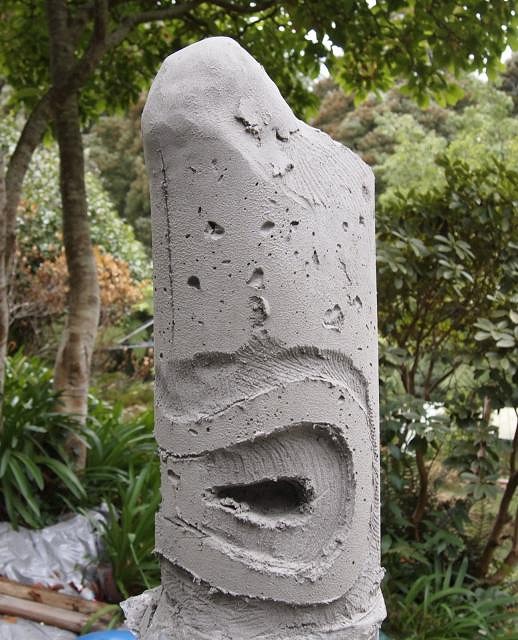
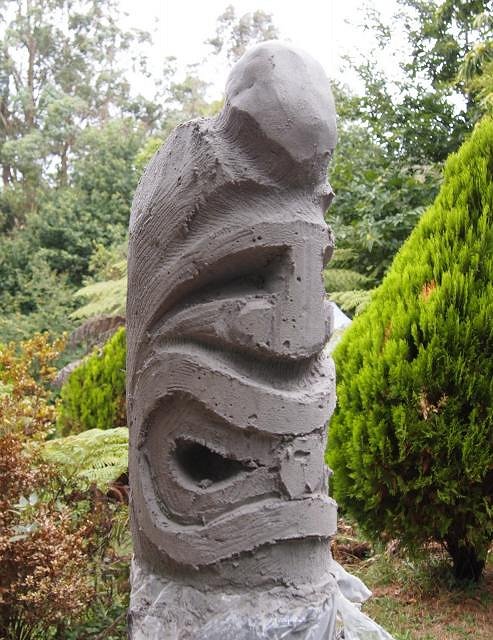
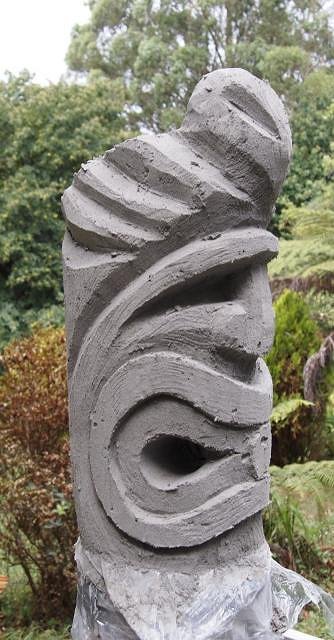
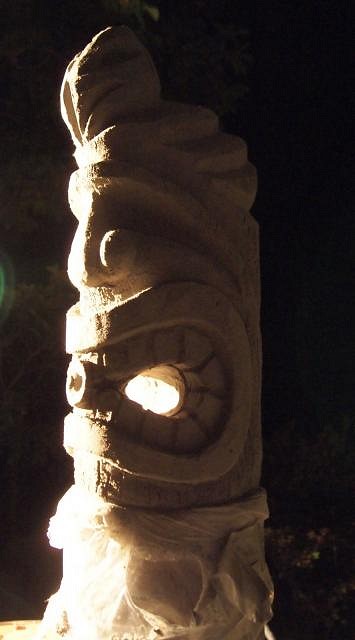
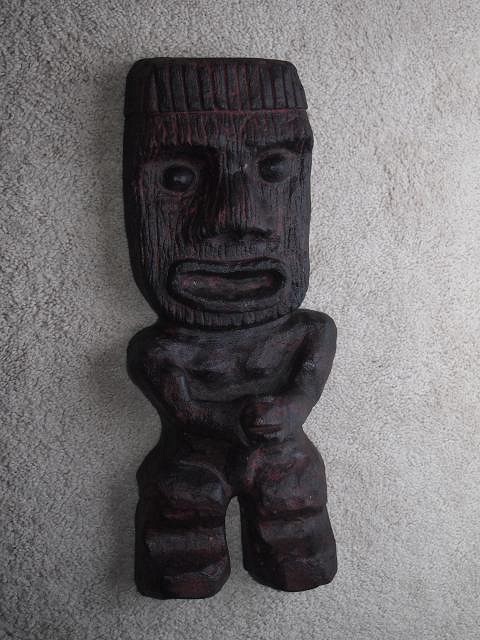
Hi All, For the big sculptures its a thin layer of cement over foam blocks that have been carved to shape. I wrap the foam with basalt roving which is a rather exotic Soviet aerospace material. Think of it as string made from molten basalt rock (yes lava). It provides some reinforcing and helps stops the cement falling off. A four to five foot carving weighs about 100lbs when finished. The smaller wall hanging guys are solid cement roughly shaped on a flat board. After about 2 hours of setting I carve in the details. As the cement gets harder you can carve in finer details and refine the finish a bit. They have a lot of lightweight aggregate which makes carving a bit easier than sand and cement type mixes. The cylindrical guy is more like a palm wood carving. I cast a cylinder of cement and let it set for 4 hours. Then I striped the form off and carved and scraped away. I did a relief sculpture on the flip side so you can see what he is smiling about. Its a mix with more sand and has a rougher finish than the others. Next step is staining to bring out the detail and get away from the pale cement look and a sealer to give a bit of shine. Cheers Thom
[ Edited by: notiki 2013-03-16 03:41 ] [ Edited by: notiki 2013-03-24 05:35 ] [ Edited by: notiki 2013-03-24 05:49 ] [ Edited by: notiki 2013-05-23 06:44 ] |
|
D

danlovestikis
Posted
posted
on
Wed, Mar 13, 2013 7:52 AM
Hi Thom, I really like your tikis and information. I've often thought of doing cement tikis for our yard but I always imagined using wire to support the cement. Your foam is such an excellent way to achieve your goals that now anything seems possible. Please show your step by steps with making these. You could start another thread for all those that you have completed on the Gallery page. Wendy |
|
T

TikiAno
Posted
posted
on
Wed, Mar 13, 2013 10:26 AM
These are all looking great. Fun and interesting pieces- since I don't work with those materials, I'd be curious to see how it all comes together as well. Look forward to seeing more. |
|
M

MadDogMike
Posted
posted
on
Wed, Mar 13, 2013 10:47 AM
"Basalt roving is bundle of continuous monodirectional complex basalt fibers." I had to check into Basalt Roving - very cool. Kind of like Kevlar? Welcome to TC Thom. Nice sculptures, I'm surprised at the amount of detail you are able to carve in. Clay, the oldest and most divine art media; [ Edited by: MadDogMike 2013-03-13 16:56 ] |
|
L

LoriLovesTiki
Posted
posted
on
Wed, Mar 13, 2013 3:42 PM
I'd like to see some step by step photos too! I need some concrete tikis for the backyard. You never know, you might inspire a bunch of us to follow in your footsteps. Welcome to TC, btw. |
|
N
notiki
Posted
posted
on
Sat, Mar 16, 2013 2:45 AM
Hi, Wendy and Lori. I will get together some in progress / how to photos. The foam works well as a core as it is light and easy to carve and shape. For some tips ; As a start look at http://sandpudding.com/ the method shown there is how I did the round dark grey tiki. Cheers Thom |
|
N
notiki
Posted
posted
on
Sat, Mar 16, 2013 3:39 AM
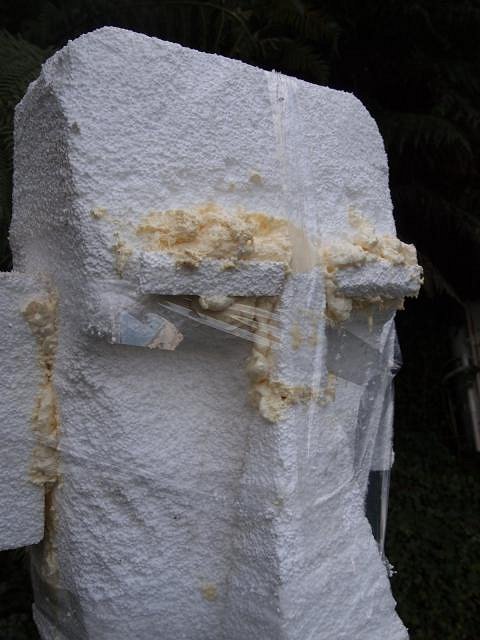
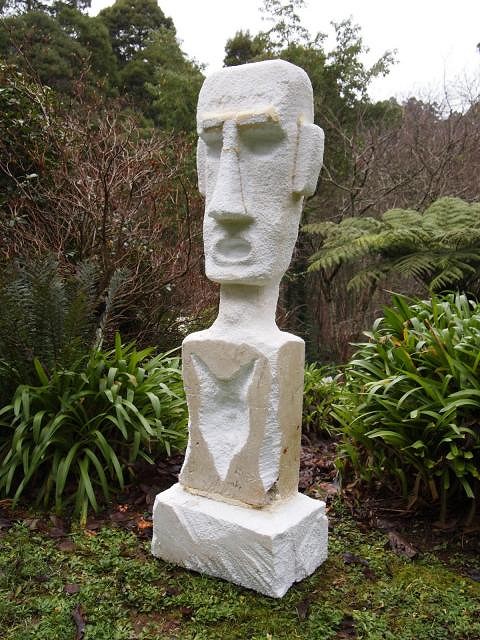
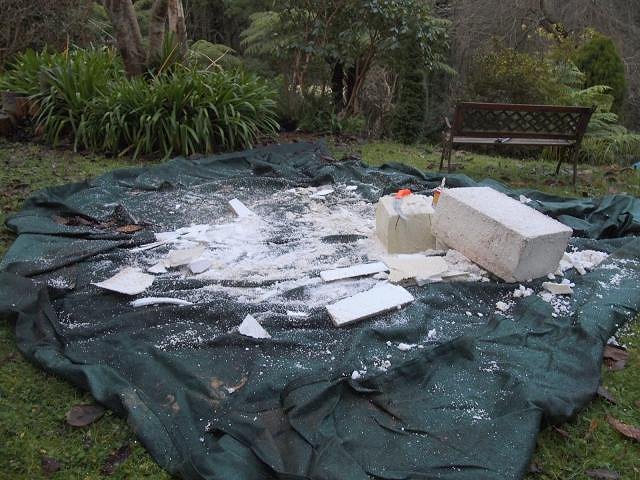
Here are some sequence photos of another work. Not pure Tiki but it shows the method. Rough In Foam Work Refine the Foam The foam sure makes a mess. The waste beads can be mixed with soil for plants to grow in! I use a pruning saw to carve of big blocks. A lot of chapping is just grating away with fingertips ( no tools ) Wrapping with the basalt roving. I use a big needle now to get the inside shapes/parts reinforced. More wrapping After cement is smoothed on. About 1/4" to 1/2" thick. This guy is not carved, just modelled in the wet cement. Finished with my fireplace ash finish. We burn a lot of recycled painted hardwood pallets that have a blue paint so the ash has white kaolin in it. The ash is rubbed on and "cemented" with diluted "Bondcrete" Off to a local arty show I made a fun "peep show" ... Inside the box The red lady is red cheese wax over cement over foam. Cheers Thom |
|
N
notiki
Posted
posted
on
Sun, Mar 24, 2013 5:49 AM
Hi, He is a lot more 3d than the last but still "from a log". The lightweight mix is a lot easier to carve and does not set as quickly as the more sand and cement mix of the the guy on the bottom of the totem. Hope you enjoy the photos.
My Cement "log"
|
|
D
danlovestikis
Posted
posted
on
Sun, Mar 24, 2013 9:40 AM
Thank you so much for posting these step by step photos. This is very interesting and creative. You are doing a fabulous job of making tikis. The peep show was very fun. I hope you continue to post so we can enjoy all your creations. Wendy |
|
L
LoriLovesTiki
Posted
posted
on
Sun, Mar 24, 2013 11:32 AM
I REALLY want to try this when it gets warmer outside! Thank you so much for posting the pictures, how to's and inspiration. Mahalo, :) Edited to ask: what's the recipe for lightweight mix? Do you use those cardboard tubes as your mold? How long do you all the concrete to set up before you remove the mold and start carving. Although you make it look easy I think there's a lot I need to know first. I guess I need even more step by step! LOL [ Edited by: LoriLovesTiki 2013-03-24 11:36 ] |
|
M
MadDogMike
Posted
posted
on
Sun, Mar 24, 2013 11:43 AM
"red cheese wax" !!!??? :o Do you eat a lot of Gouda? Why do you just happen to have 20 lbs of red cheese wax laying around? :lol: |
|
N
notiki
Posted
posted
on
Thu, May 23, 2013 6:43 AM
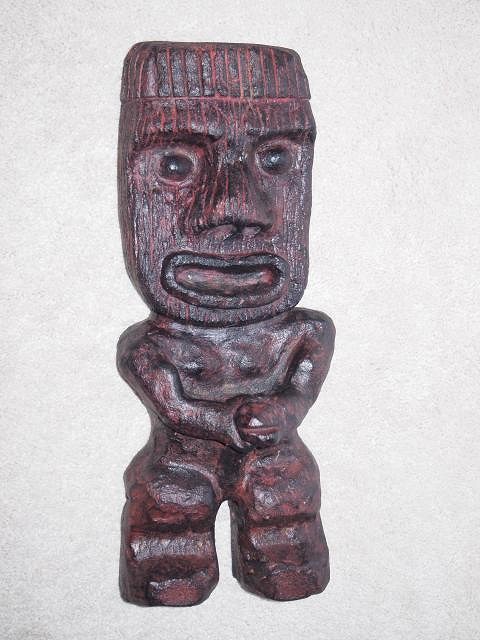
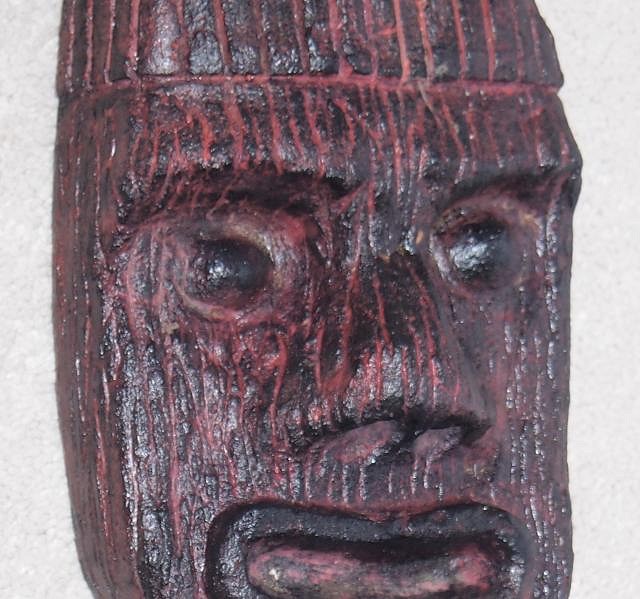
Here are some shots of one of "Taming of the Snake" wall hanging after some colour has been added. Hope you like it.
and some glossy, too much flash shots. It does show some of the technical detail though.
|
|
M
MadDogMike
Posted
posted
on
Thu, May 23, 2013 10:29 AM
Very nice NoTiki, great color and detail. |
|
S

SandraDee
Posted
posted
on
Thu, May 23, 2013 10:58 AM
Great to see a different take on tiki making. Really great to see you evolving already with your art and designs. Thanks for sharing and keep posting. (btw MadDogMike is a wizard with making just about anything out of styrofoam---I know you have his mind working overtime with ways he plans to try this technique out!) |
|
T
TikiAno
Posted
posted
on
Tue, May 28, 2013 11:22 PM
notiki, looking great. Love the original posts as well as the latest pieces. Like Mike, I'm curious how you came up with all of that cheese wax- impressive! Look forward to seeing more, and thanks for posting the step-by-steps! |
|
H

harro
Posted
posted
on
Wed, May 29, 2013 4:03 AM
Gday notiki, |
|
N
notiki
Posted
posted
on
Mon, Jun 3, 2013 4:45 AM
Hey thanks for the comments. A few answers and thoughts... Red cheese wax....came from...an auction at Cheese factory! I was going to use it for some other project. Lets say it was cheap and it is fun to carve with. Chicken wire over foam will work fine. Its just hard to manipulate the wire into the shape. If you don't need to move your 6' tiki afterwards you can use a thicker cement coating to cover any imperfections in the wire forming. My lightweight cement uses E spheres. These are a very fine filler made from fly ash floaters. These are from a coal fired powerstation. They are little hollow balls and are light and free flowing. They are used with normal cement in place of sand. As they comprise of flyash they do react a bit with the portland and make the cement stronger over a long curing period (like years). They are an industrial material and not readily available. I also mix in tiny basalt fibers. The cement part is about 10 percent silica fume and 90 percent portland. Cheers |


Pages: 1 16 replies