Tiki Central / Home Tiki Bars
Bula Bula Bar
Pages: 1 29 replies
|
S

Scaramouch
Posted
posted
on
Mon, Jun 15, 2015 8:49 PM
I wanted to share a start-to-finish tiki bar build I did over the last few weeks. I have been inspired by all the amazing work on this thread, and a lot of it contributed to my own build, so I only thought it fair to share. Having said that, this is a WAY smaller build than most of you have been posting, it's just a stand alone wet bar on a deck. My wife and I decided it would be nice to have a tiki bar on the deck to entertain over the summer, so I gave myself eight weeks to build one from scratch, and that's really just at weekends. It had to be small and portable so as not to take over the entire deck, but also very functional as an actual working bar, because we plan to have parties with many rum cocktails :) Couple of things to note. I am NOT a handyman in any real shape or form, I work a desk job in NYC, and have never done more than general house maintenance before. This is the first (and probably last) piece of furniture I'll ever build. Also, I just kind of made it up as I went along. I bought tools specifically to do this (wonderful excuse) so this project is the first time I ever used a router, or a nail gun, or a circular saw or... you get the picture. But hey, if I can do this in eight weeks of weekends, then anyone can, so if you've been thinking of a tiki build, just jump in and get it done :) Here we go...
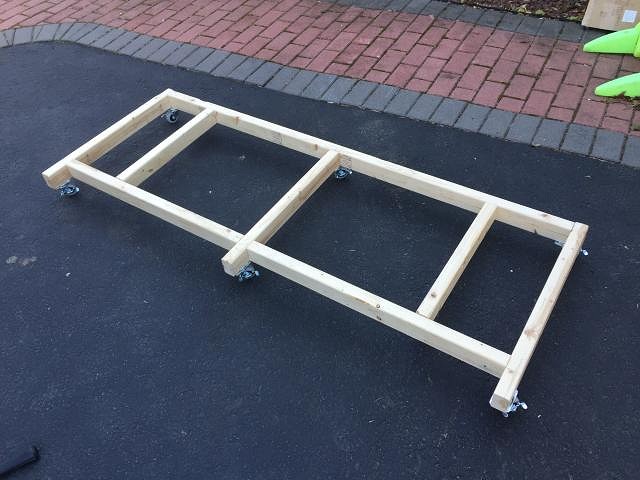
Framing out. I had made a plan on paper, but also a lot of this was figured out on the fly. The basic frame is cheap 2x3 timber.
I put it on wheels as I'm building it in my garage and will eventually put it up on the deck so this seemed like the easiest option to move it.
Upside down, building the skeleton. It's all nails and glue here.
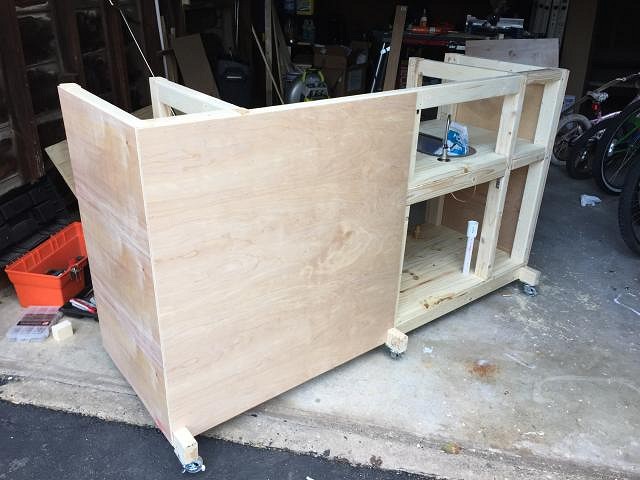
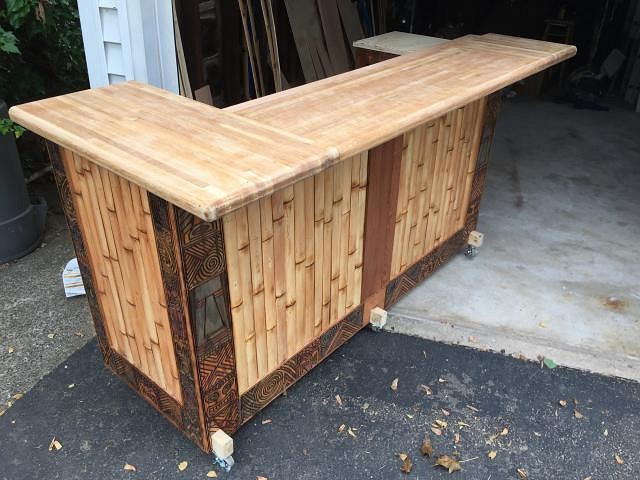
Right side up, and it's beginning to look like a bar.
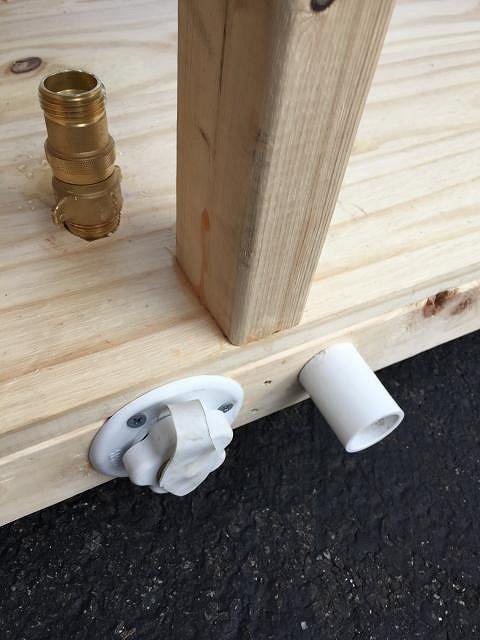
I added a sink even though it will never be permanently plumbed in, if only to act as a built-in ice bucket.
Water comes in via an RV socket and water-grade hose, sink comes out via a PVC pipe and drains off the side of the deck via an extension tube.
Cladding the bar, and i'm still using cheap wood wherever possible.
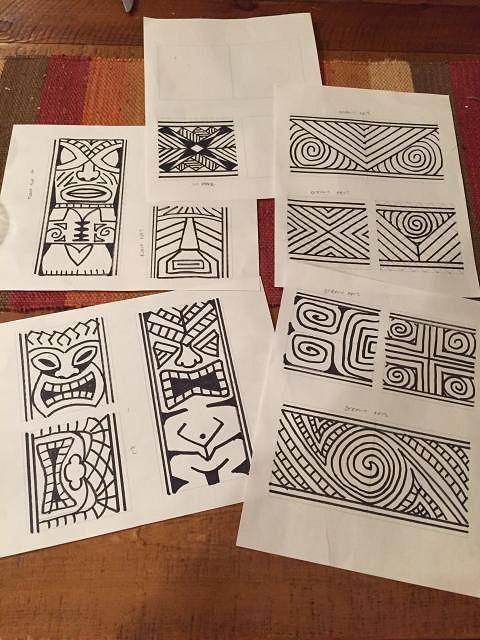
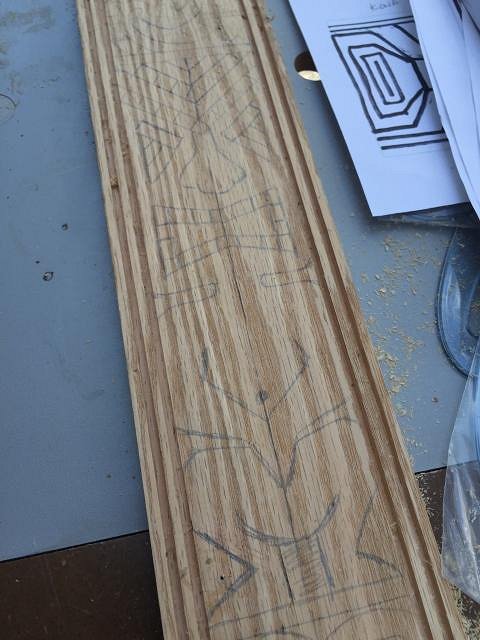
Time to start thinking about carving. I sketched these out drawing inspiration from across the web, threads here, and photos I've taken at the Mai Kai and various other bars.
Sketching patterns onto wood prior to using my router.
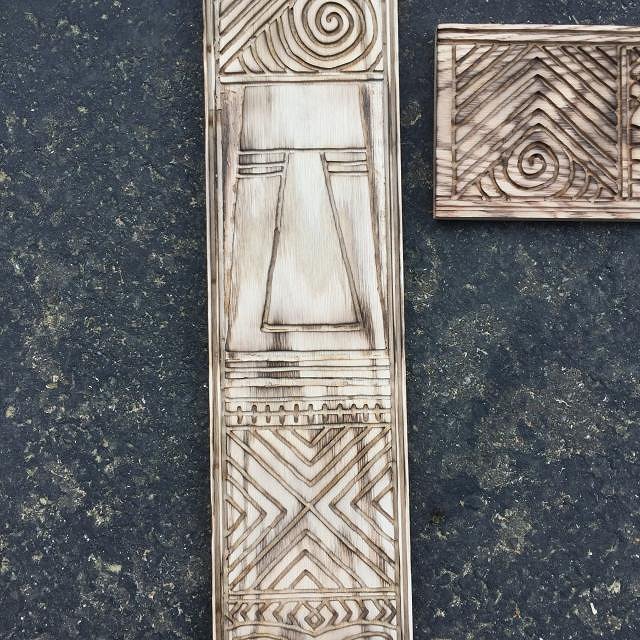
And here's my first attempt. This is routed using a small bit and a very small router (like a trim router). Then I sanded the surface and burned using a propane kitchen torch to bring out the grain and smooth off the edges.
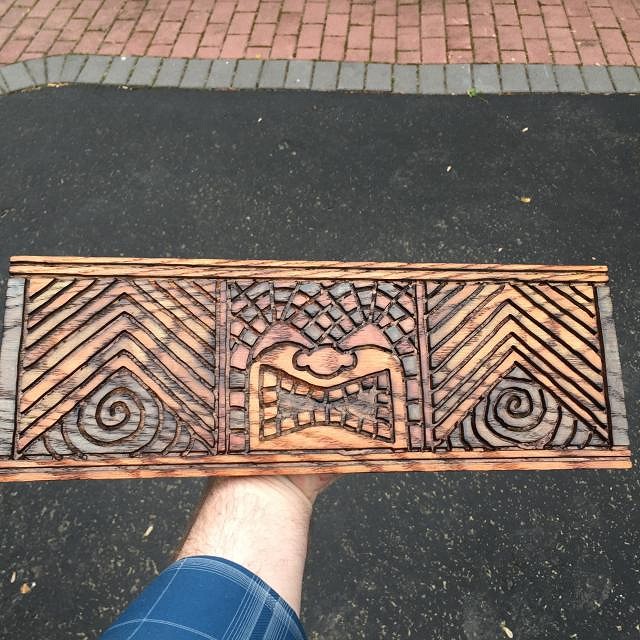
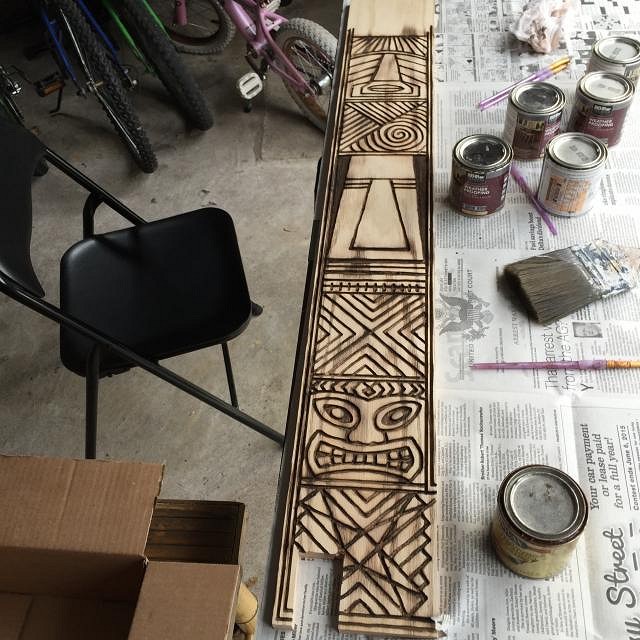
More carving. I'm going for a Trader Vics meets Trader Sam's vibe as I have four kids and I want them to see the fun side of tiki too :)
A friendly Ku.
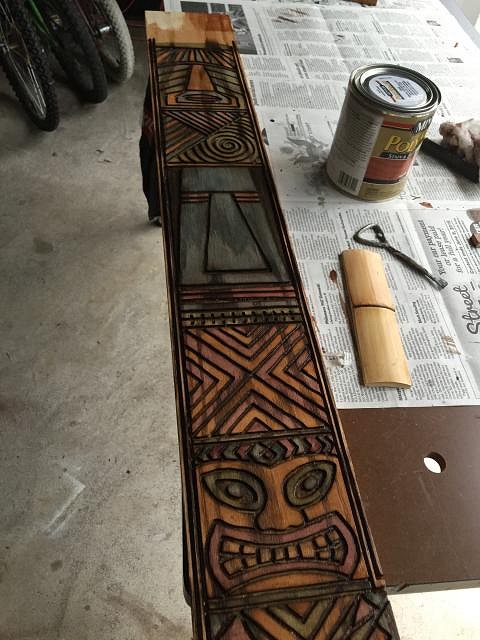
And here's the same thing stained. It's a combination of translucent wood stains, and a polyurethane with a golden stain in.
At this point I'm also working on bamboo slats. One of these is the bare version, which I then burnt, stained, and poly-stained.
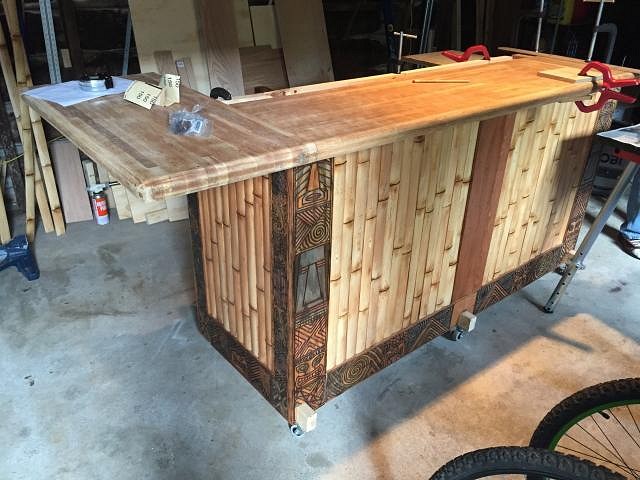
Time to start cladding.
You can see I decided on dark carving trim, contrasted with a light bamboo. As it'll be on a bright deck, I wanted a darker color than I would have chosen if I were in a dimly lit basement.
At this point, I'd also stained and poly'd the interior. That's just cheap pine, so I knew it was never going to look great. But it's functional, and you can see I routed out a space for a bar mat, and added electricals.
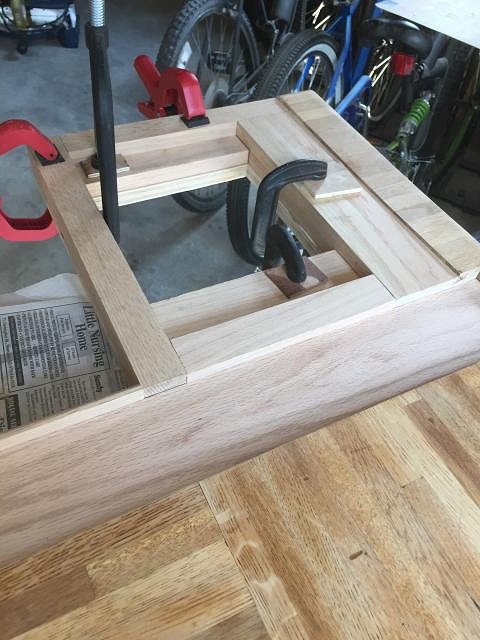
Time to work on the bar surface. When we moved into our house, I found this old tabletop hidden in the garage, so decided to recycle.
Starting to build up the top. This is off center, so the overhang will not be as great in the final version.
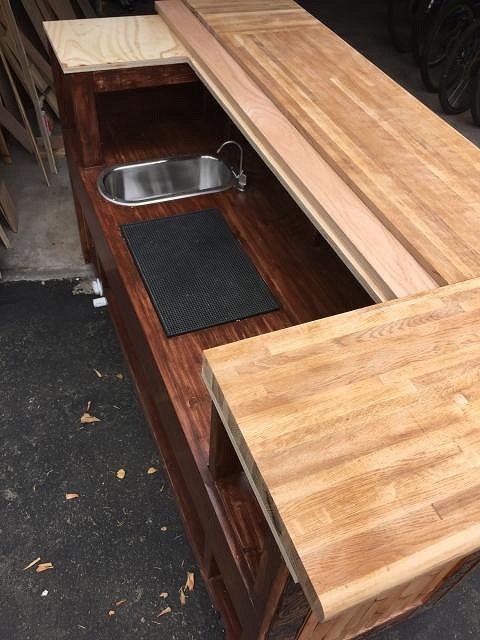
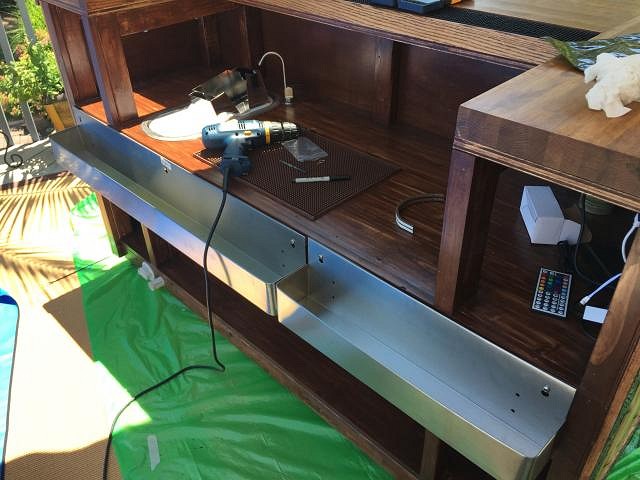
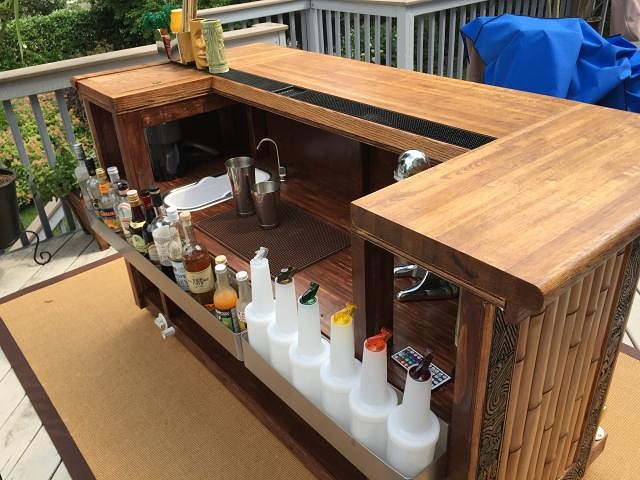
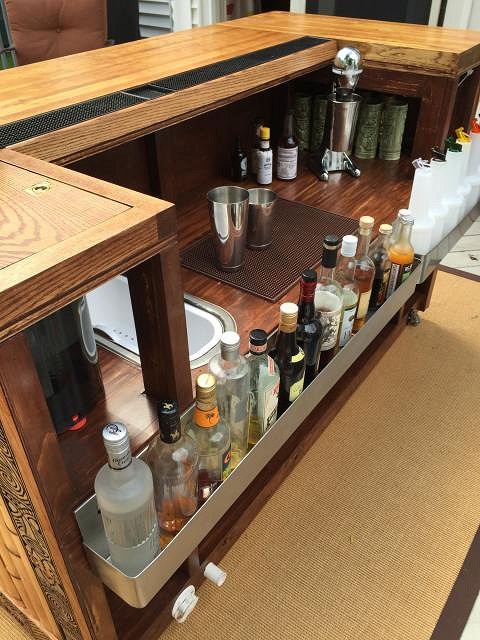
From the reverse, you can see the workspace, which was essential to me. i wanted a bar that is AWESOME to mix from. At the back of the bar, I'm constructing a bar rail, just like they have at Tiki Ti etc.
This was the point where i said "holy crap, this might just work".
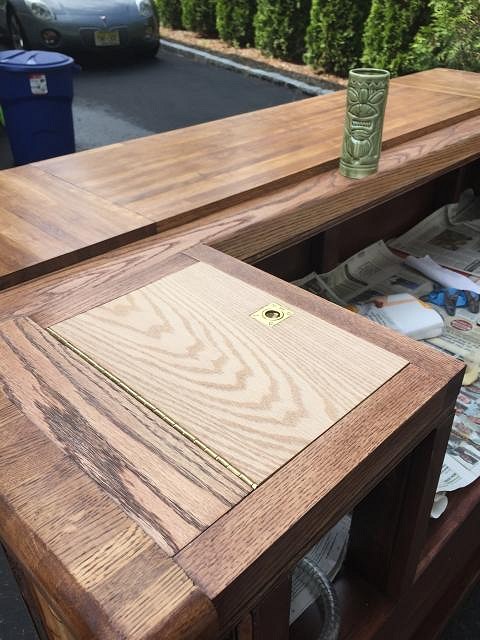
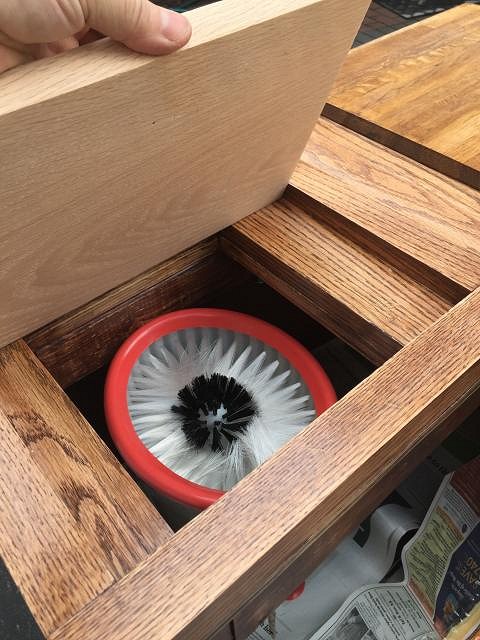
The only bit of real woodworking I did, an ambitious plan to include a trap at one end to conceal a glass/shaker washer.
Stain, poly, sand, poly, sand, poly x5 - oh god will this never end.
Now I'm getting thirsty!
Here you can see where the trap will be, and also the inset bar rail.
What lies beneath.
The bar rail was measured out so that when I put in a "biggie" bar mat, it all leveled out.
Speed rails. For, you know, all the BOOZE.
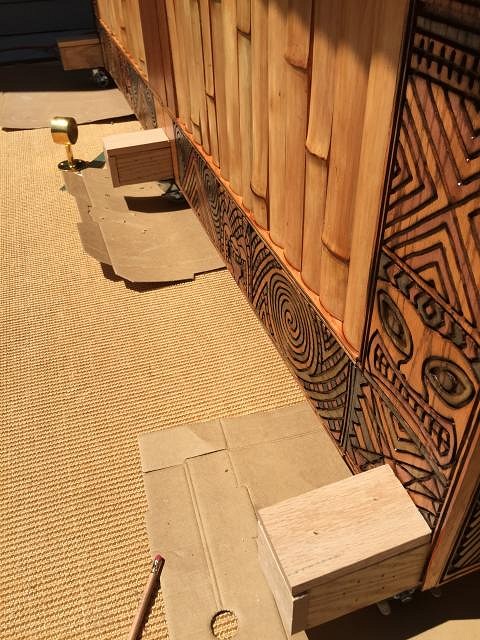
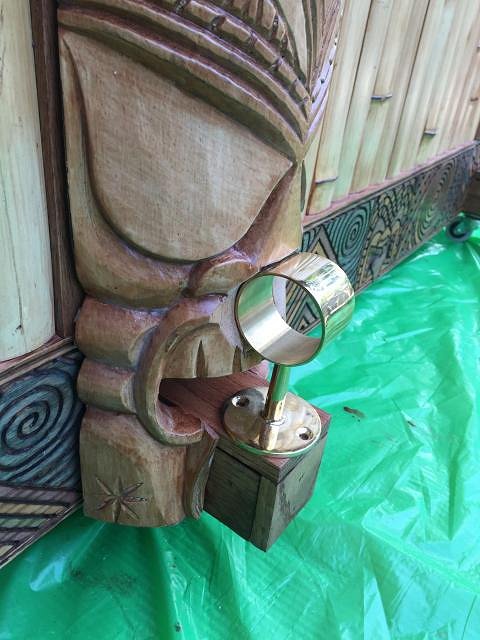
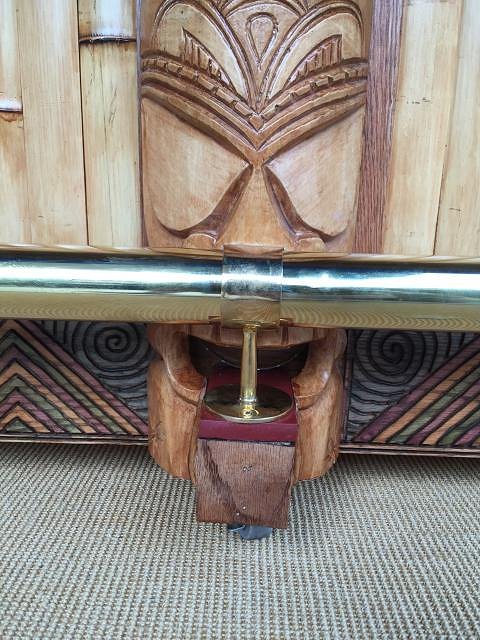
Building out the footings to hold the foot rail.
My schedule just wouldn't allow time to learn how to carve tiki masks (!) so this is a $50 ebay purchase.
This was the point where I said to myself "you know, that kind of looks like the foot rail is on it's tongue. A happy accident, so...
...a last minute paint job.
it probably doesn't look impressive, but this tongue thing makes me laugh every time I look at it :)
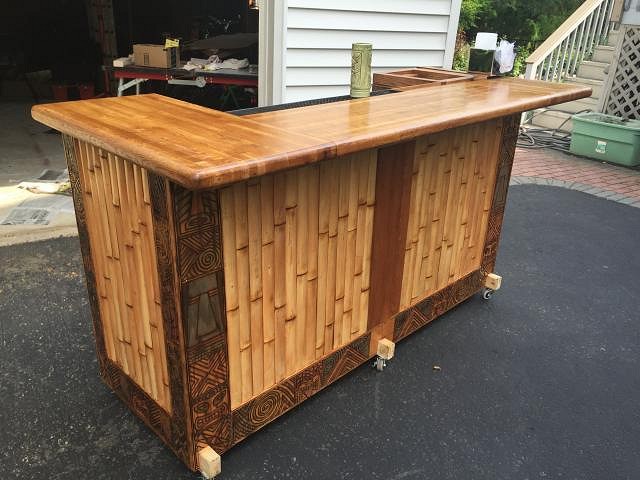
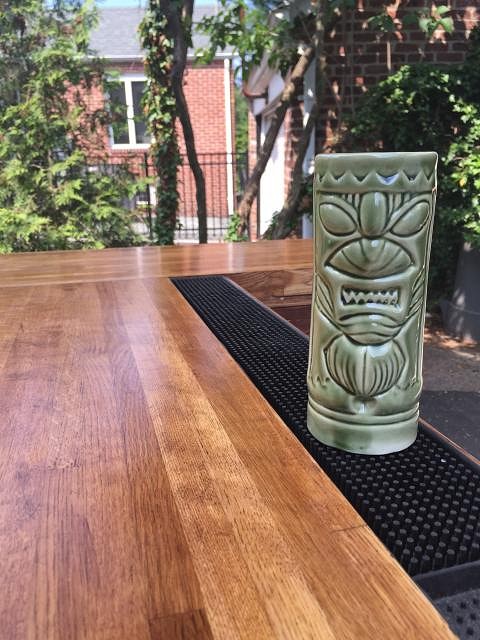
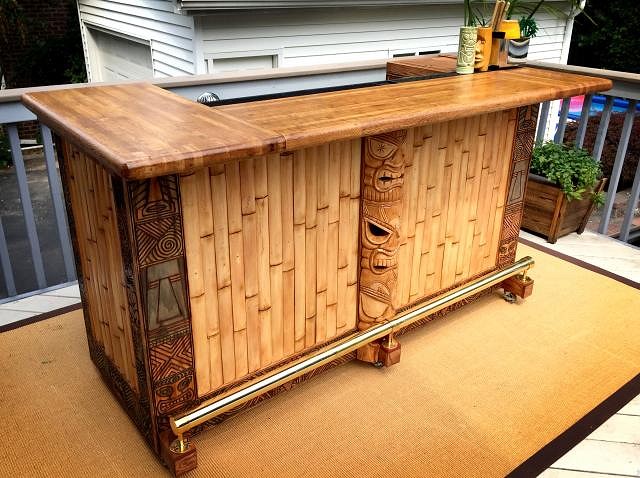
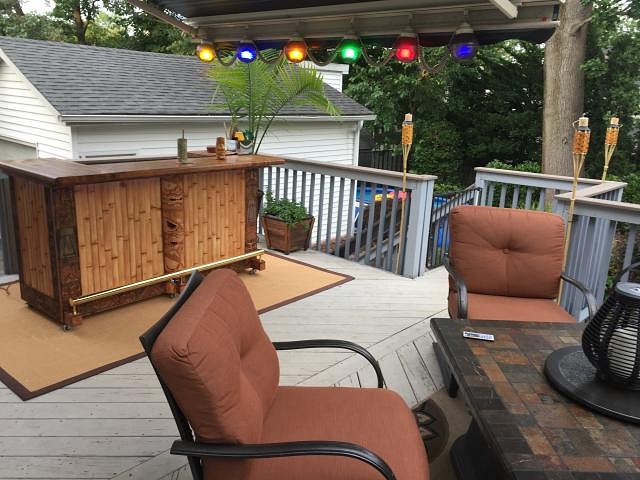
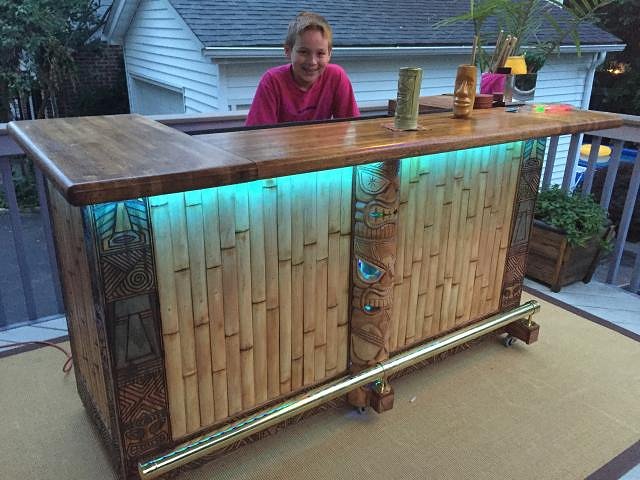
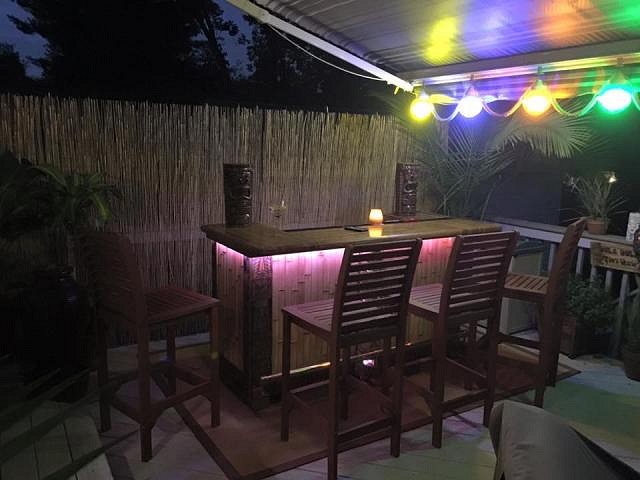
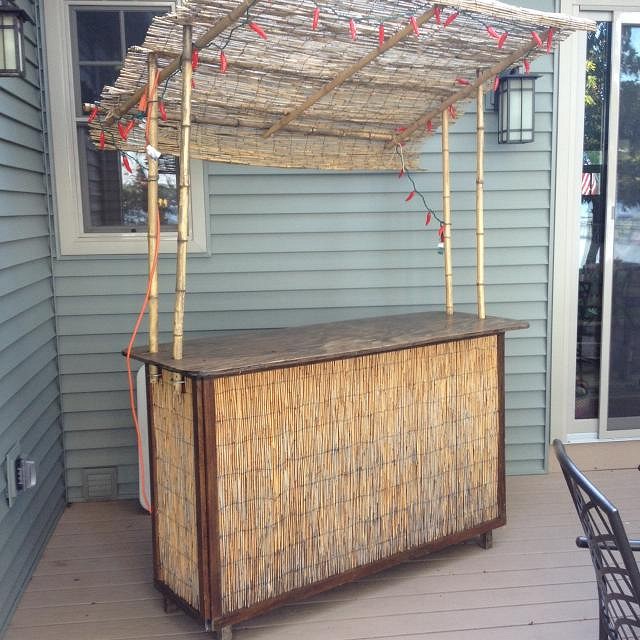
And here's some final pics of the bar on the deck. You can see it's pretty functional, while still not being overwhelming on our deck.
The running lights are cheap LEDs, $20 from Amazon, and my kids love how they change color.
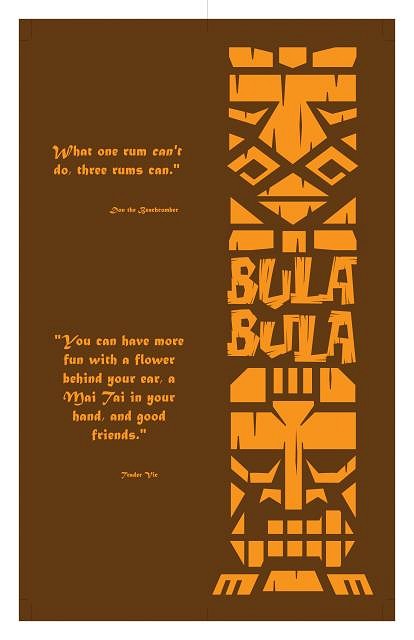
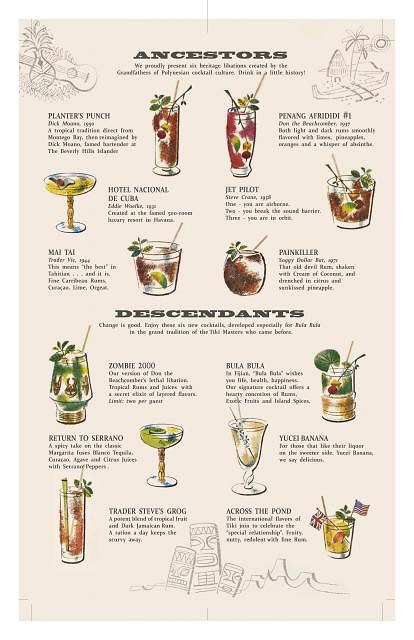
And that's it. Eight weekends, start to finish (and now I think about it, I attended Rum Renaissance in Miami during one weekend, so really, it's seven). Thanks to everyone here for posting pics that really inspired me to try my own small tribute to Tiki. Now, it's just a matter of printing the menus, which borrow very heavily on the tiki masters who went before :)
|
|
G

GROG
Posted
posted
on
Tue, Jun 16, 2015 12:28 AM
Masterfully done. GROG like. |
|
K

KonaKaiBaby
Posted
posted
on
Tue, Jun 16, 2015 3:11 AM
Beautiful! Very fun designs. I like the whimsy of the carvings and the tongue. Thanks so much for sharing! |
|
M

MaukaHale
Posted
posted
on
Tue, Jun 16, 2015 5:52 AM
For not being very handy you did some impressive work. Very well thought out and executed! |
|
B

Biotron2000
Posted
posted
on
Tue, Jun 16, 2015 6:03 AM
I love all the little details that make it a real, working bar. Nice job! |
|
J

jimsflies
Posted
posted
on
Tue, Jun 16, 2015 6:40 AM
Turned out great! |
|
MR

Matt Reese
Posted
posted
on
Tue, Jun 16, 2015 6:59 AM
I love the details on the bar. Yes that happy tongue accident is great! |
|
A

Anaki_kiapolo
Posted
posted
on
Tue, Jun 16, 2015 6:31 PM
Great routing work! Did you use a Dremel with a small bit? Very inspiring. Congrats! AK |
|
EJ

El Jefe
Posted
posted
on
Tue, Jun 16, 2015 7:23 PM
Can you give some more info on your process and use of the translucent stains? Thanks. |
|
T

tikiskip
Posted
posted
on
Tue, Jun 16, 2015 7:28 PM
Great job! |
|
V

VampiressRN
Posted
posted
on
Tue, Jun 16, 2015 9:36 PM
Very nice job! Great mix of textures and bet it is built to last. |
|
S
Scaramouch
Posted
posted
on
Wed, Jun 17, 2015 7:21 AM
Thanks so much for the nice comments, everyone. It's great to be able to share it with some tiki experts and got positive feedback :) To answer a couple of questions:
http://www.homedepot.com/p/RIDGID-1-1-2-HP-Compact-Router-R24012/100337039 It's not too powerful but I found it very easy to handle.
My first step was pencil drawings, and then routing with the straight edge bit to a depth of about 1/4". Then I sanded lightly with an orbital sander and lightly burned with a propane torch. This is the result:
Next, I took a small brush and laid dark outdoor stain into the groove - the "negative space" - to darken the actual image. It looks like this:
Then I added color stains to the rest of the images, usually a couple of coats as the translucent stain is very lightly colored. And a final coat of polyurethane on top:
All the stains were from Home Depot, Behr Semi-transparent, which I got in small sample sizes. They tint to your requirement: As this is an outdoor bar, it's got several lays of poly on it. I started in most cases with Polyshade to give the non-stained wood edges a golden tone, then followed up with Helmsman outdoor poly. http://www.homedepot.com/p/Minwax-Helmsman-1-gal-Satin-Spar-Urethane-13205/203003564 It took a long time, but it gives a rich layered look to the trim that doesn't really come over in the photos. the colors really pop in the sunlight. Hope that helps! |
|
G

gitiki
Posted
posted
on
Wed, Jun 17, 2015 8:06 AM
Very well done, looks like a professional job. You have too much talent to stop at just a bar! |
|
T
tikiskip
Posted
posted
on
Wed, Jun 17, 2015 8:28 AM
"2) The stain application was trial and error on a couple of early boards. I had tried some of the techniques posted here, including very dark all over stains, paints, and burning and wire brush, but none of them really achieved the look I wanted. So i kind of made up my own method. Here's a couple more pics:" It's that variation of colors that make that trim, This is why I flame things to get variation of colors Going to add this to... |
|
EJ
El Jefe
Posted
posted
on
Wed, Jun 17, 2015 3:34 PM
Thanks for sharing all the info. After the dark background stain how many different color tints of translucent stain did you use? I think I see at least three. Thanks again. |
|
S
Scaramouch
Posted
posted
on
Thu, Jun 18, 2015 8:03 AM
Five stains in total. The dark one is called Coffee, and then I also used Red, Green, Blue and Yellow. The colors were inspired by some of the colored carvings on the wall at the Mai Kai. |
|
A
Anaki_kiapolo
Posted
posted
on
Mon, Jun 29, 2015 9:23 PM
I'm still totally blown away by your routing! I have to confess that I completely plagiarized your routing work for my home bar. Not the multiple stains -- that's a bit too sophisticated for me. But got a small router and a 1/8 inch bit, some 1x4 select pine boards, and started work. Early on in the whole process, but the results to date are impressive! I hope you believe imitation is the sincerest form of flattery. AK |
|
SF

Slacks Ferret
Posted
posted
on
Mon, Jun 29, 2015 9:48 PM
That looks fantastic! Well done ol'chap! |
|
S
Scaramouch
Posted
posted
on
Tue, Jun 30, 2015 6:16 AM
Thanks AK - so happy that it inspired you to start your own project! Can't wait to see pics! |
|
L

LoriLovesTiki
Posted
posted
on
Tue, Jun 30, 2015 10:44 AM
Nicely done! I, too, am quite impressed with your efforts. I agree that you can do even more now. Whereabouts do you live? Since you work in NYC you can't be that far from me. I'm in Central NJ. (I'm always excited to find TCers anywhere around me!) Thanks for sharing! |
|
S
Scaramouch
Posted
posted
on
Tue, Jun 30, 2015 11:21 AM
I'm in NNJ - Nutley, to be precise - which means it's virtually rained non-stop since the day I put the tiki bar on the deck, and I haven't been able to use it much yet :) Roll on summer! |
|
L
LoriLovesTiki
Posted
posted
on
Wed, Jul 8, 2015 4:32 PM
Scarmouch, small world! I was born at Clara Maas, many moons ago. I live down in Monroe Township, near East Brunswick in Central NJ. Dealing with the limited nice weather we have here is always a challenge. Keep posting, I love following. |
|
BK

Big Kahuna
Posted
posted
on
Wed, Jul 8, 2015 7:35 PM
Outstanding! |
|
N''

nui 'umi 'umi
Posted
posted
on
Wed, Jul 8, 2015 9:04 PM
Very cool Scara! Tanks for sharing |
|
S
Scaramouch
Posted
posted
on
Sun, Jul 12, 2015 11:20 AM
Started to work on the deck around the bar - nothing too permanent, but chairs, outdoor speakers, fountain, reed mats and plants are helping to create a nice outdoor atmosphere.
|
|
V
VampiressRN
Posted
posted
on
Sun, Jul 12, 2015 4:50 PM
Wow...I am blown away since this is your first project...it looks like you have been doing this kind of stuff for years. Looks very user friendly. I am especially interested in how the sink works out. Nice design overall and great routing. CHEERS |
|
KG

Kahiki Guy
Posted
posted
on
Mon, Jul 13, 2015 5:13 AM
Really nice work. I like to see what other people have done to their bars and what I wish I'd done to mine. |
|
AD

Aloha Daddy
Posted
posted
on
Tue, Jul 14, 2015 10:32 PM
Very nice work!! You have created a very impressive bar, thank you for sharing with us. I am always inspired by others' work and it pushes me to always do better. Keep up the good work, what are you going to create next??? Aloha! |
|
T

TikiRenee
Posted
posted
on
Sun, Jul 19, 2015 5:24 PM
You must have spent a lot of hours on this. It looks incredible. |
|
P

pilotiki
Posted
posted
on
Tue, Jul 21, 2015 4:55 AM
What a beautiful piece! I built a simplified bar that all folds up for winter storage. |


Pages: 1 29 replies