Tiki Central / Other Crafts / Shake Yer Booty update Jan. 22 Materials: Where to get 'em!
Post #275959 by Bowana on Mon, Jan 1, 2007 7:18 PM
|
B

Bowana
Posted
posted
on
Mon, Jan 1, 2007 7:18 PM
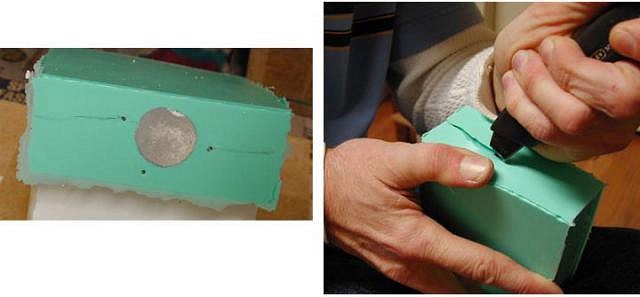
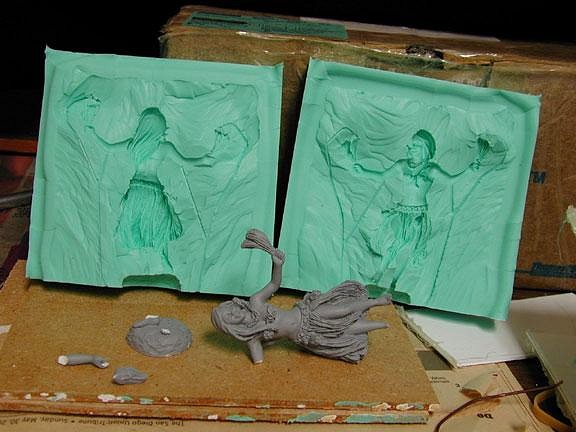
The silicone is set, so now it's time to open 'er up.
The plaster bandages, styrene box, and board are removed leaving the silicone by itself with the figure inside.
The picture on the left shows the bottom of the mold and how the pencil mark described earlier has transferred onto the silicone. This mark serves as a starting point and guide for where the separation line needs to be cut. Also visible are three small dots, which are the ends of the wire vents. These are also used in guiding the cuts. An initial cut with a key knife around the perimeter of the mold is the first cut to be made.
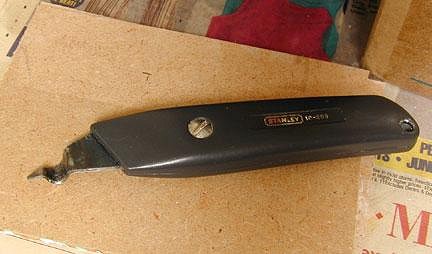
A key knife has a C-shaped, curved blade that will leave a channel in the silicone that will make the two halves of the mold re-align once separated in two. I got this key knife from a ceramics supply company.
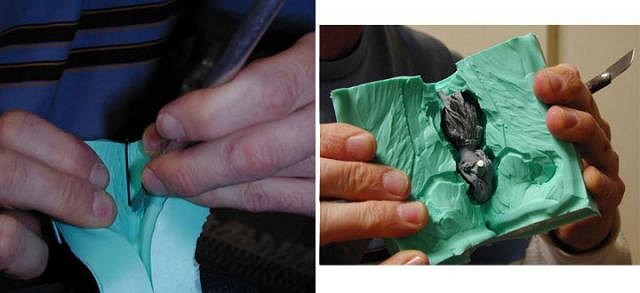
Once the key has been cut all the way around the mold, a deeper cut must be made by following the route of the key cut. This next cut will eventually go all the way to the figure inside. Using an X-Acto knife, the mold is very carefully cut a little bit at a time, while spreading the halves with your fingers. Make sure the cut goes directly (or as close as you can) down the center of every part of the figure, including the vents. Since they are so small, it's easy to cut right past a vent without seeing it. Take your time doing this part. This mold took me about half an hour to open.
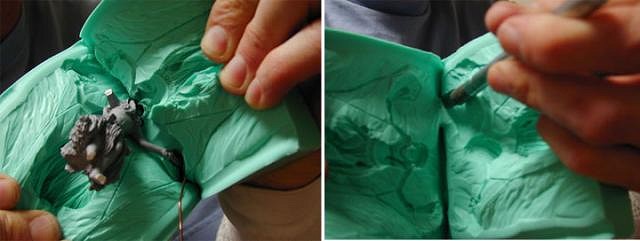
As the figure is slowly released from the mold, it will become easier to see where the cut line is to be made. Having a photo or a sketch of the figure is helpful because it's sometimes hard to remember where exactly everything inside the mold is. When molding a part made out of a hard material (in this case urethane resin) it is sometimes necessary to have to break off pieces of it as the mold is being cut open in order to see where you are going. If you can avoid it or if it's a piece that must not be broken, by all means try to work your way around it. With this figure, it was difficult to see around the base and the first arm as I was cutting, so I had to snap them off. (Sorry about that, Lil' Honey!)
Here is the opened mold and what was left of the master. |