Tiki Central / Home Tiki Bars / The Zombie Hideaway
Post #434803 by TabooDan on Tue, Feb 17, 2009 5:55 PM
|
T

TabooDan
Posted
posted
on
Tue, Feb 17, 2009 5:55 PM
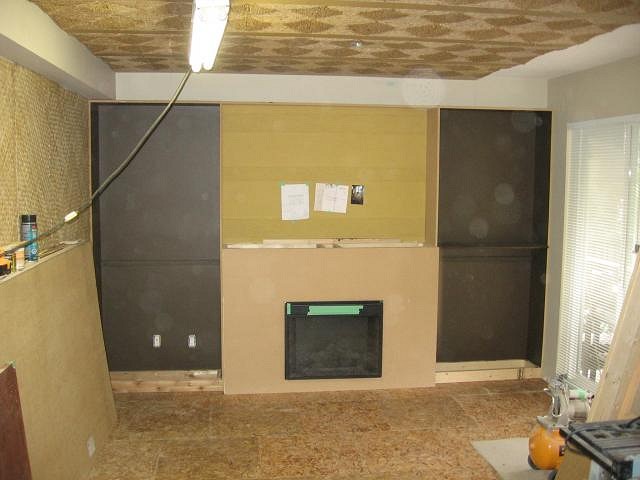
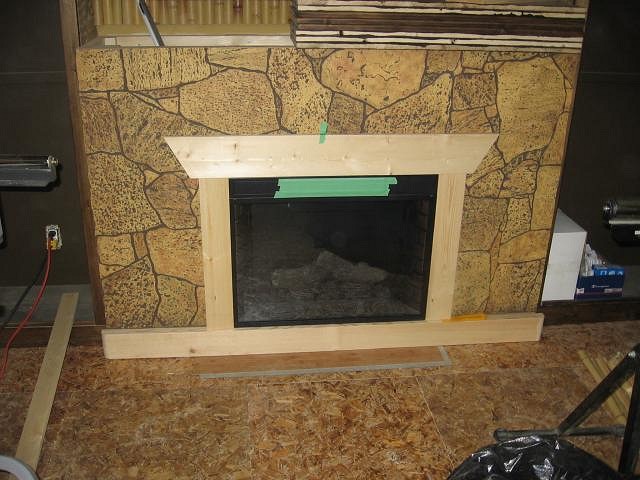
Okay, let's go back over to the fireplace I had been working on. Here is the fireplace after it was built:
This is what it was like when I just added the stone panel:
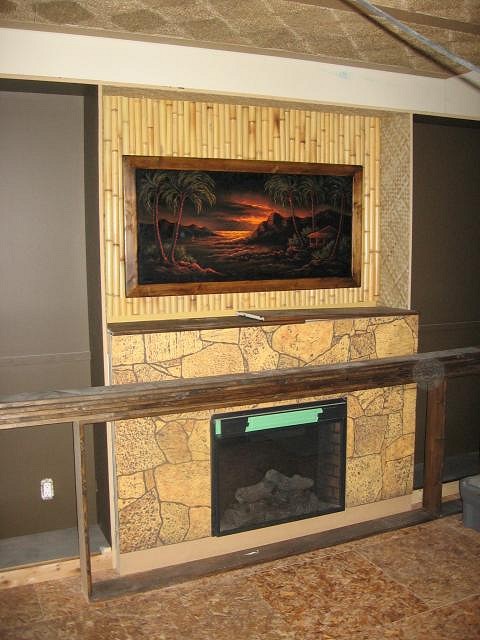
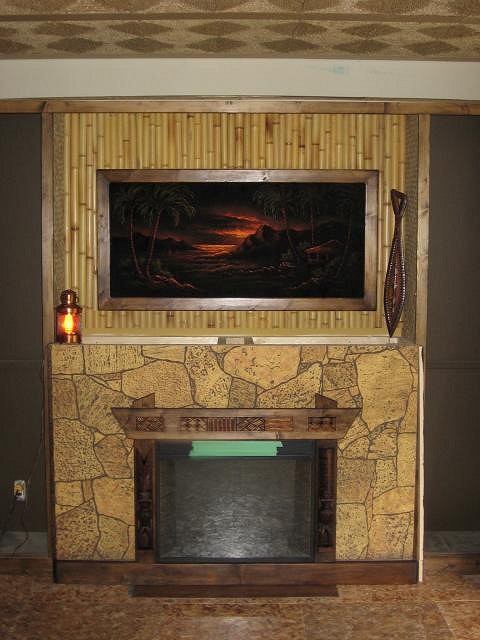
Here it is with the bamboo and vintage velvet (plus some crap in the way!):
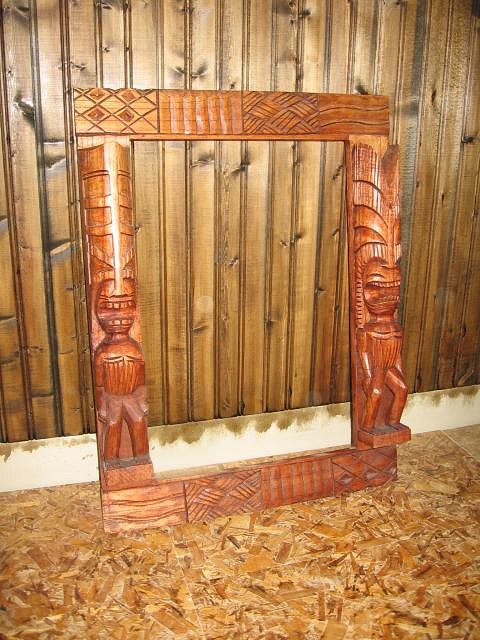
At first I was going to have Tiki carvings either side of the fireplace and then a hand carved molding all along the top, bottom and sides. Sure this would have looked great but I didn't really want to spend the time on it and have Reido spend the time on it. He will be doing carvings for other areas of the room so why don't I handle the fireplace? I am not a carver, by any means, so whatever I was going to do it would be more of using materials that I had or could get and using them in a way that was different but yet still be suitable for a fireplace. I also wanted to stay around or have a style of something that you might have seen back in the day. I decided on doing some moldings around the fire and then possibly adding bamboo or some decorative woodworking to the molding. Then I remembered I had an old frame from a mirror that was carved and I could probably put that to good use. We had imported a few of these framed mirrors from Bali and I had one left over as it had a broken mirror. Here's the frame, in the beginning, without the mirror:
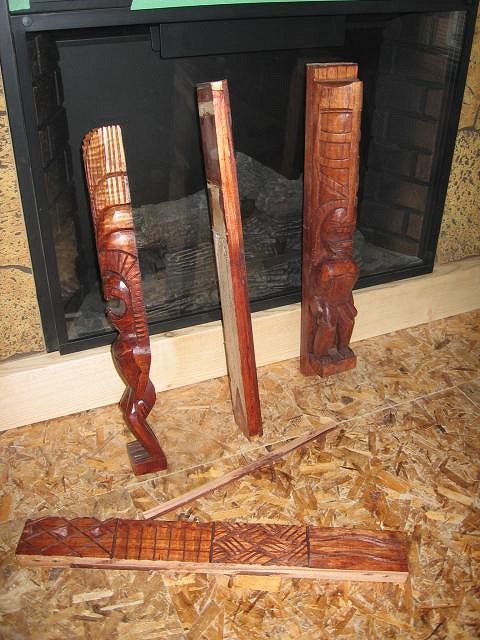
It was about 24"x20" or so. The whole frame together like this I didn't really like. It's not your traditional type of carving and something you would see a little more specifically catering to the tourist trade. I did not like the color or the frame as a whole, but I do think I can make them look better. Here it is in the four pieces, top, bottom and sides:
I pried, cut, pulled, bit, pinched and scraped the pieces apart!! They had made this to stay together forever and it was not easy!! It also sucked as I was trying not to damage anything and also make sure I could use the pieces again if I wanted. Once I had them to the stage in the photo above, I realized that they wouldn't really work for me because of the back piece (the frame) that they were mounted to. It would make it to thick for my plan and made it harder to deal with. So I decided to take them off the backing and have just the Tikis by themselves. Another pain in the butt but it in the end it worked. Here is a shot of the Tiki on the left, removed from the backing:
Now I can use it to mount to the molding I would make. Now to remove the other and hopefully not break or crack it at all. I wanted sort of a Polynesian/Oriental feel to the molding so I decided to angle the ends and have the top wood hang over the sides.
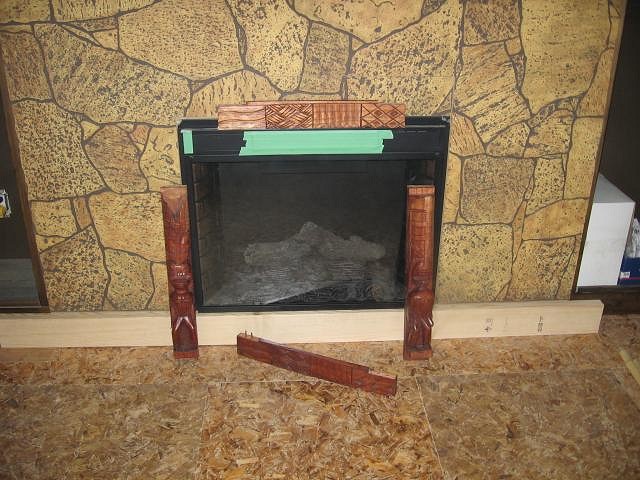
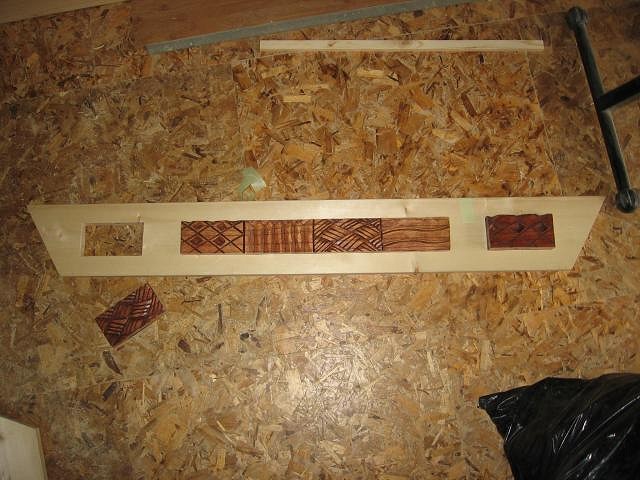
I would have two small angled pieces protruding up from the top as well which would line up with the sides. I also wanted to make use of the other carved pieces, besides the Tikis, so I figured I would mount the one section of carving to the center top and then add two others on the ends. Here is a picture of the pieces cut and taped to the base molding to see if I liked it:
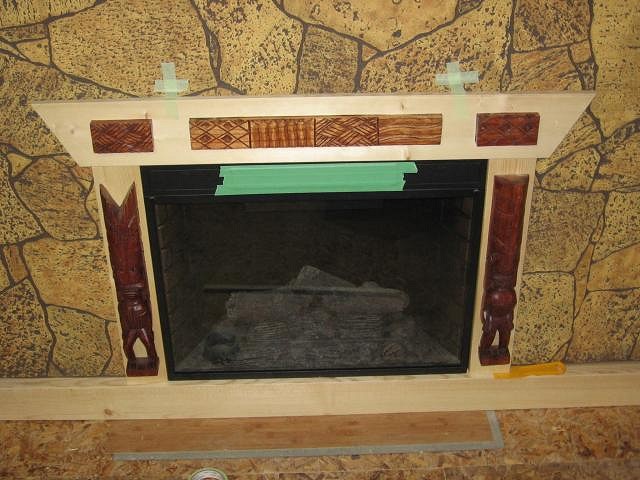
After doing this, I figured it would work but thought It would be much better to have them not stick away from the wood so far. I ran into troubles here as it would have been very difficult to cut their thickness down. Too tricky to put through the thickness planer, or band saw. I was going to sand them to the thickness I wanted but that would have been messy, taken a while and I wouldn't be able to guarantee they would all be the same. So I decided to cut out my back molding and actually recess the carvings into the wood. Here is one shot of them just fitted into the holes I cut:
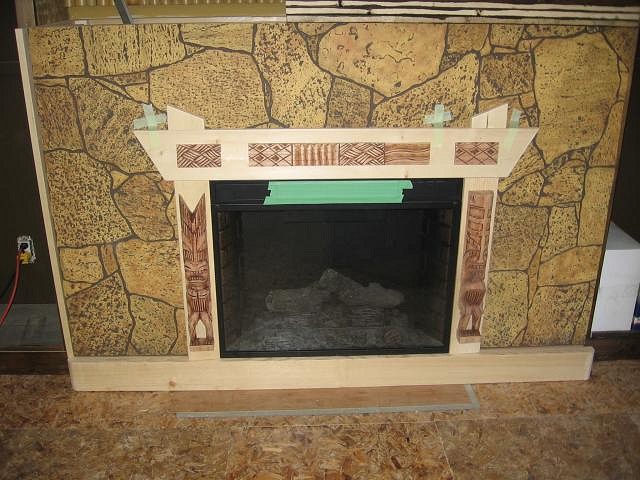
It gives them the thickness I want and this way they all stick out about a 1/4" from the molding. Here they are in place on the fireplace:
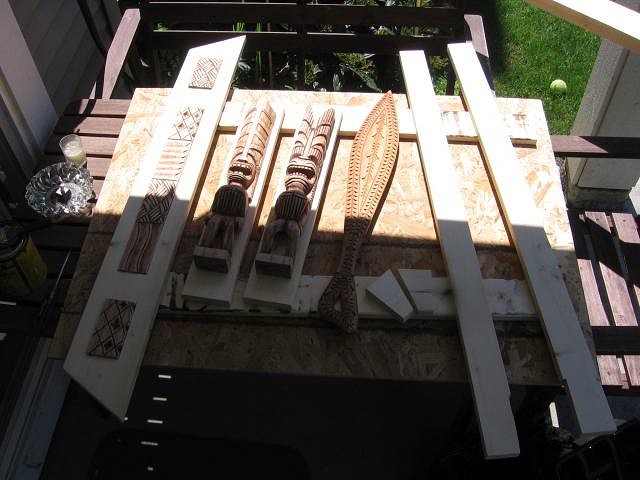
Now for the color. I sure don't like this sort of red/brown color so I gotta sand them down and they will be stained dark like the rest of my woodwork. Here is a shot of them sanded:
Sanding was a whole different ball game!! Really hard to sand them as they were finished quite well and I did not want to take any of the details away from the carvings. It took a few hours by hand to do all the pieces. I did use my power sanders when I could but alot of it was all hand. Here are the Tikis once they were sanded as well:
Next is shot of them all sanded and taped to where they will go on the fireplace:
Once the Tikis were mounted and the molding glued together, it was time to stain:
Here's me boy Bones checking on all the staining going on:
And now, after all the work, the pieces put together and around the fireplace:
I was quite happy with the outcome when I saw it all together. Once I stained the Tikis, the details really popped and they actually looked like a more vintage carving and really didn't look too bad anymore. They are not fastened yet as I will do that later. Here's one last shot of it all:
I still have the outer molding to do which will be a bit planer but they will seal the deal here. Thanks for looking and Mahalo!! [ Edited by: TabooDan 2009-02-17 18:17 ] |