Tiki Central / Home Tiki Bars / The Zombie Hideaway
Post #450564 by TabooDan on Wed, Apr 29, 2009 5:14 PM
|
T

TabooDan
Posted
posted
on
Wed, Apr 29, 2009 5:14 PM
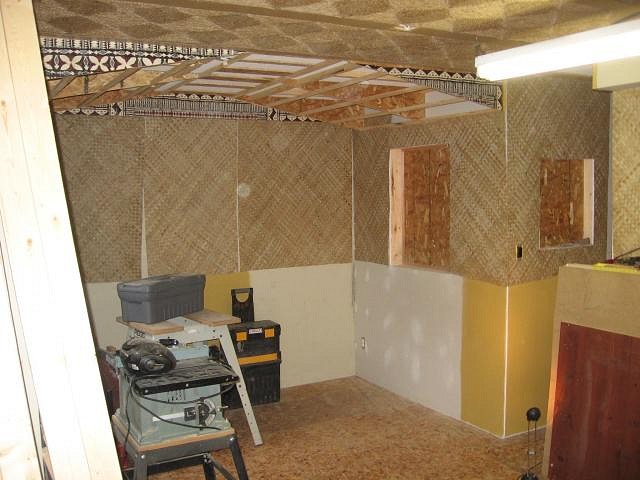
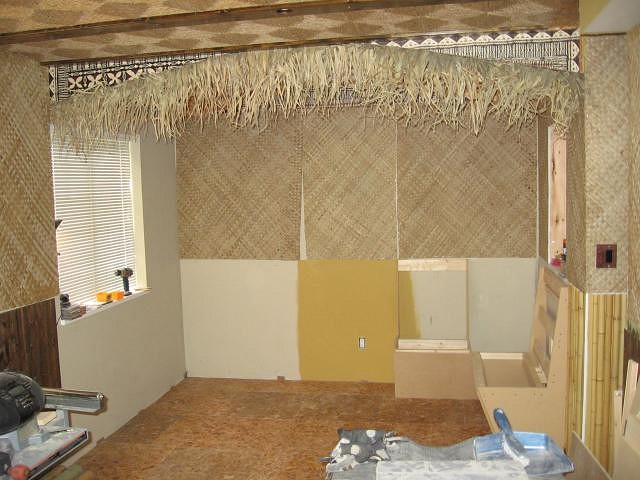
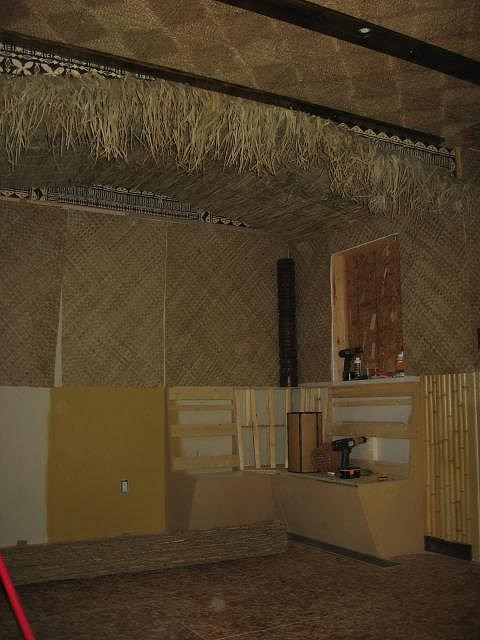
Okay, just to refresh us on the North side of the room where I built the angled ceiling and where the bar/bench area would be, here's an early one:
You can see the drop downs, matting up, cut outs in walls, Fijian Tapa Cloth up, and sea grass matting on ceiling. This one shows the first strip of thatching I added. This was mounted about 8" in on the ceiling side and then hangs over and down from the edge:
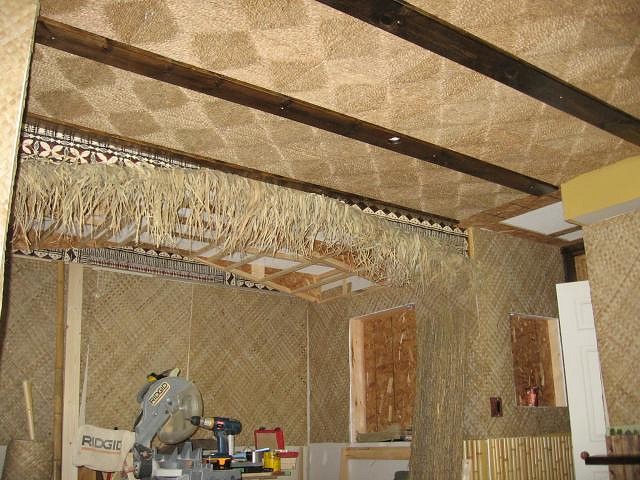
Here too, I have the dark stained beams up. To the right in this pictures, you can also see the material I will be using for the finished ceiling. At first I was going to use the same sea grass matting that was on the rest of the ceiling (as above). I had showed that style previously in the old restaurant postcards. Once I got going, I decided I wanted to use as many different materials as I could in this lounge so decided to change it up a bit. I went to our supplier and picked up some 'Heather' fencing. It is a really cool looking branch/bamboo fencing that is quite thick and is made up of lots of pieces woven together. The only problem with this (besides it being a real pain, messy and difficult to work with) is that there are small gaps between the pieces and I did not want to see the white ceiling above. I decided I would just attach regular thatching to the ceiling first and then cover it up with the Heather. It adds to the cost a little and is more work but it will really guarantee you will not see through the Heather. It will also prevent me from having to paint the ceiling which is fine with me. Overall, it will just make me feel better knowing it is there. Here's the left side with the sea grass up:
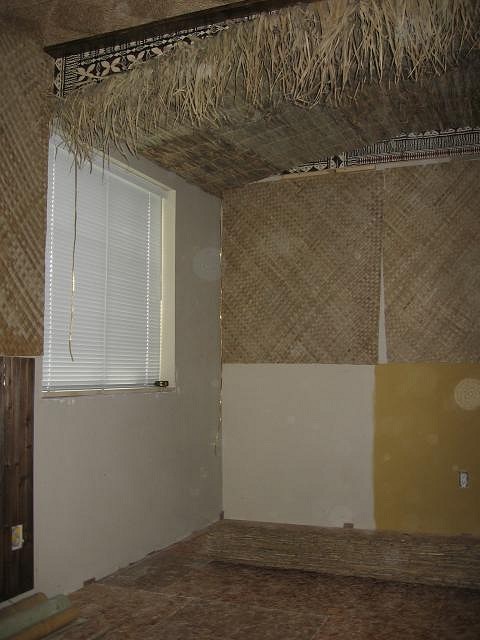
The next two photos kind of suck so I apologize ahead! Here it is from straight underneath, with the wall (with Tapa) on the left, looking straight up:
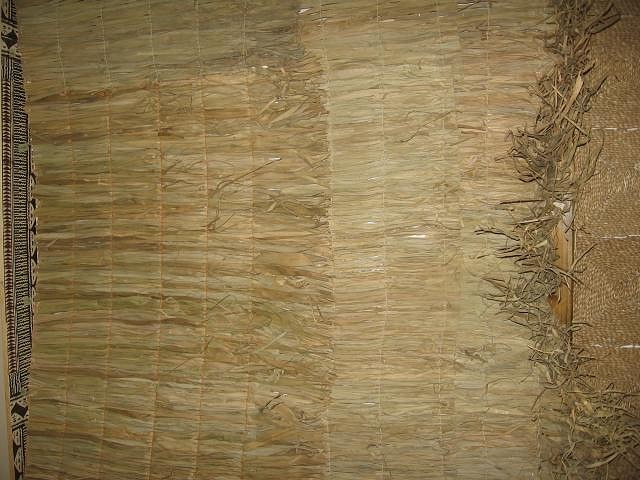
You can already see the white coming through in some spots. Once I'm done, these will be all gone and you won't see any white!! Here's one from underneath the roof looking out towards the rest of the Zombie Hideaway:
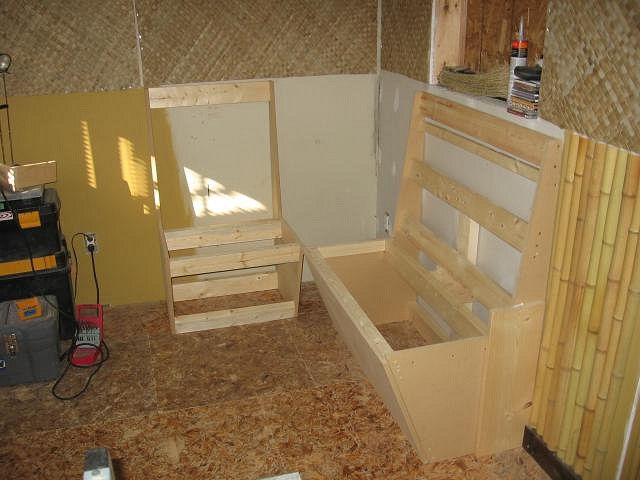
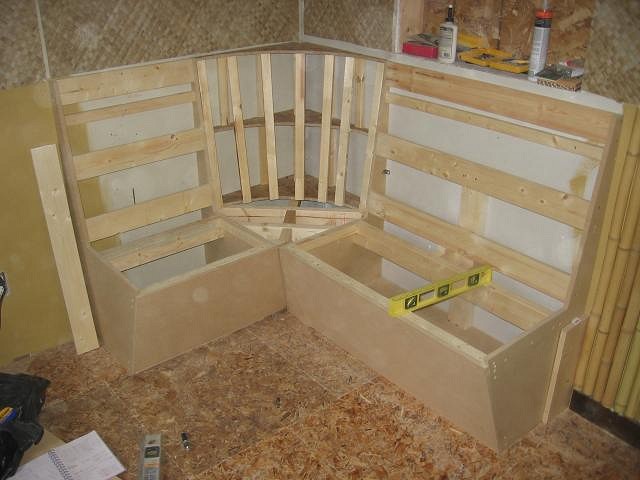
While all this is going on, I started to build the curved bench area that will be the booth area of the bar. I looked into purchasing one but they were quite expensive and the style, size and design, wasn't what I wanted so hell...if you can't get it, build it!! I started off with good old trusty 5/8" thick MDF. I cut the size and shape I wanted and then cut supports to hold it all together:
This was going to be a three part job. The two benches and then the curved corner area. I had not built this type before so knew it would be a bit challenging with design I wanted. It became a four part job after working on it!
Here is a little better shot as you can see the side and see my design a little better:
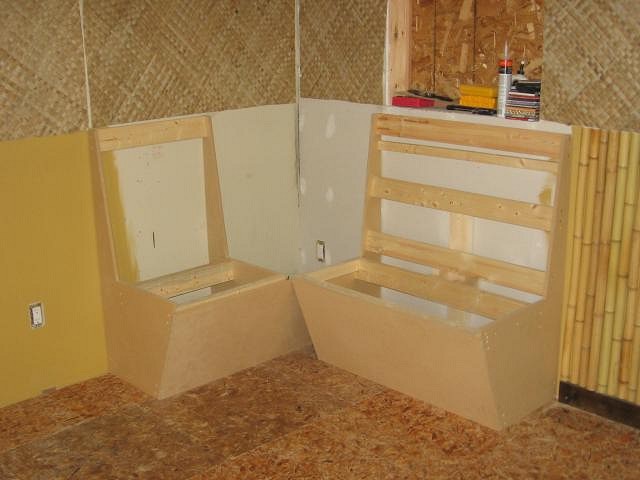
I wanted, from the seat, the front of the bench to taper in towards the floor. I also wanted the back rest to taper towards the wall from the seat. Here's one of the room so you can get an idea of the size/layout:
A closer view of the benches almost complete with their fronts on:
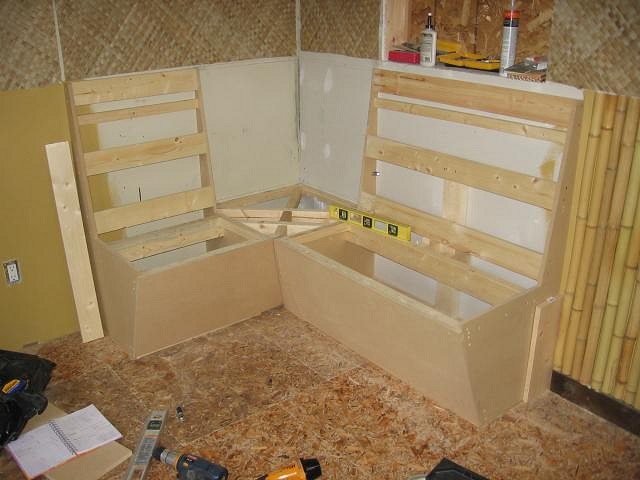
Here they are with the framing done and the lower corner area being added:
Next is with the curved upper framing done:
This was tricky as I have a 10 degree angle on the back support. Not only does the corner curve but but it has the sloped 10 degree's to it. Tricky but it worked out and will be really cool once the cushion is custom made. Next is a good side shot where you can see the idea of the design again:
I am sure I could have done this a hell of a lot more basic, like, minus the tapered pieces, just go build a straight box-like bench, but this is going to be a pretty important part of the room so it had to be done right. Alot of work but it should pay off. Here's looking from the left side:
You can see inside the benches here. I will have the surface piece, with the cushions, lift off and we'll have storage in both benches as well. This is kind of a cool shot showing the room:
In the corner, I made sure that I built the top corner section strong enough and the correct size as I have a specific Oceanic Arts Tiki Pole that will find it's home there. [ Edited by: TabooDan 2009-04-29 17:22 ] |