Tiki Central / Home Tiki Bars / The Zombie Hideaway
Post #570769 by TabooDan on Fri, Dec 31, 2010 4:42 PM
|
T

TabooDan
Posted
posted
on
Fri, Dec 31, 2010 4:42 PM
Thanks Big Kahuna! Hey Bamboo Stu, thanks! As for the bar you ask, well, I will be using an old vintage rattan one I have for now. It is a smaller one but the shape and size of it will fit my place pretty good. At first I was going to build a bar but as time went on I realized that I would actually like to use this room before we end up moving or something! And the way things look, that might have to come sooner than we had hoped. Next time I do a bar, I will for sure build my own. It is definitely a crucial part of any Lounge! Oh, and let me just say, I am no expert on these things. This is just the way that I have done it as I have gone along. I came up with a plan and tried to stick to it as I went along. There are many different ways to do the things I am showing you. These images and info. is just being shared so others can possibly get inspired or maybe see how some things can be done in there own place. Back to that recessed velvet I was doing. Here's what I did at the top:
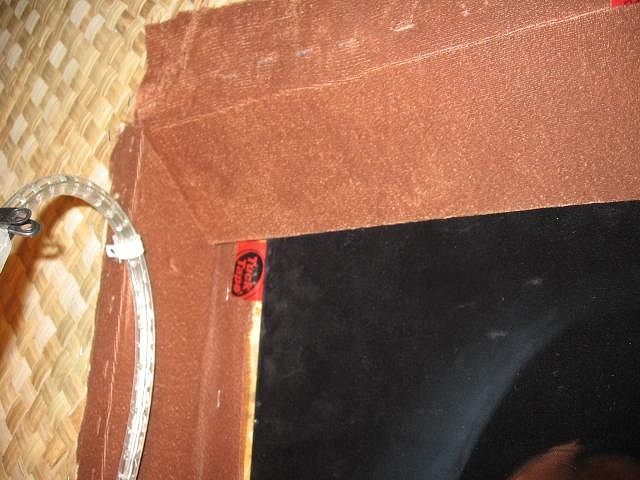
I used Red Tuck Tape (used for Poly) to seal over the exposed drywall edge, matting and wood. This will keep dust and any loose bits of material falling in between the velvet and finished frame. Just kind of seals it up. Here's the wrapped piece of foam going in:
This was cut to fit tight and was set in place with double sided tape. Then the velvet wrapped over and stapled:
The only real difference with the top over the rest is that I have the power point being hidden here for the rope lite. I just cut a channel for the wire in the foam and once in place and the frame mounted, you won't see it. A little close up of the top corner area:
For the frames I'm making them with pine:
For this velvet I basically built three frames, one with in the other, to give me two borders. This way, if I decide to add bamboo, matting or another material to the front face, it will have dark wood bordering it. I also did the interior frame not as high as the exterior edge frame to build it up a little and give a slightly different profile. Here's what that looks like:
All sanded and ready for it's dark stain bath:
Once I split, cut and aged some bamboo:
I wanted bamboo running vertically on the sides only so here's one being checked for fit:
Without flash:
This is what it looks like with both bamboo pieces and rope lite on:
Of course, you won't be able to the lite once it's hidden behind the frame. I am adding a thin strip of wood on the inside edge of the back of the frame so you can't see any of the lite at all. Because this wall opening is right at the doorway and on a small wall, you could stand in the middle of the room and see the lite itself. UNACCEPTABLE!! This strip will prevent any visible lite. Just the glow on the Wahine!! More to come soon!! TabooDan Edited to replace missing photos. [ Edited by: TabooDan 2011-03-19 08:25 ] |