Welcome to the Tiki Central 2.0 Beta. Read the announcement
Celebrating classic and modern Polynesian Pop

Tiki Central / Other Crafts / Maui Tiki Ceramics - by TikiRob

Post #578512 by MadDogMike on Wed, Mar 2, 2011 4:36 PM

You are viewing a single post. Click here to view the post in context.

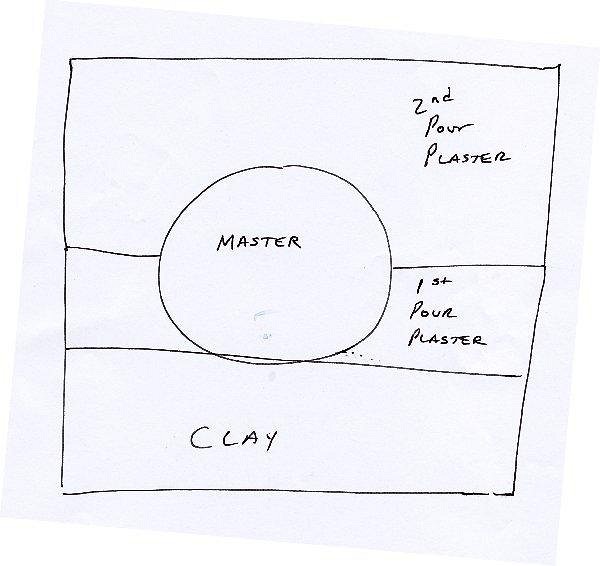
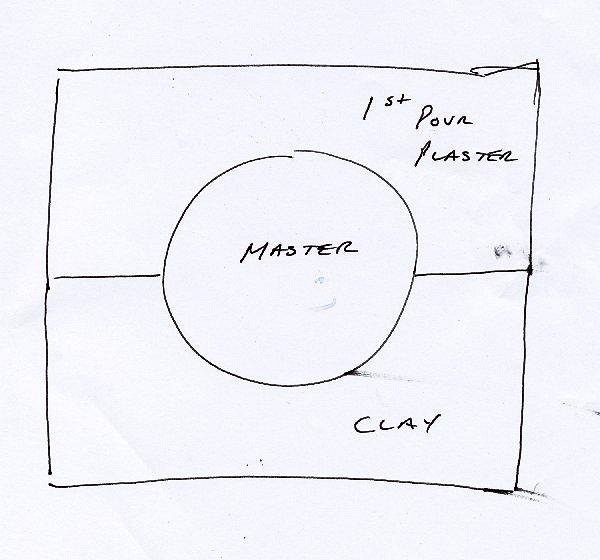
Here's what it looks like to me, Swizzle can correct me if I'm wrong.


The master is laid on a slab of clay and the plaster is poured in to cover the master half way. Next the top of the plaster is coated and the second half is poured. Finally, the mold is flipped over, the clay is removed, and the rest is poured. This time there is no coating used so that the 3rd pour becomes part of the first pour. There are a couple of potential problems with this method; the biggest is that it won't work with a complex form since the part line will always be straight (since the top surface of the poured plaster will be flat). In the first pour, you could also get bubbles trapped under the master since they can't rise.

Swizzle, I think this is how most molds are made.


After the first pour hardens, the mold is flipped over and the the clay is removed. The plaster is coated and the second half is poured. This allows bubbles to rise and escape, it also allows a curved part line if needed.

As far as mixing plaster by feel, it's the method I use :D It works fine if you are just making a mold to pull a limited number of casts. If you are doing mass production work, it's better to measure everything to produce the optimal quality mold.