Tiki Central / Other Crafts / Making Pendants on your computer
Post #643827 by Gene S Morgan on Thu, Jul 12, 2012 8:38 PM
|
GSM

Gene S Morgan
Posted
posted
on
Thu, Jul 12, 2012 8:38 PM
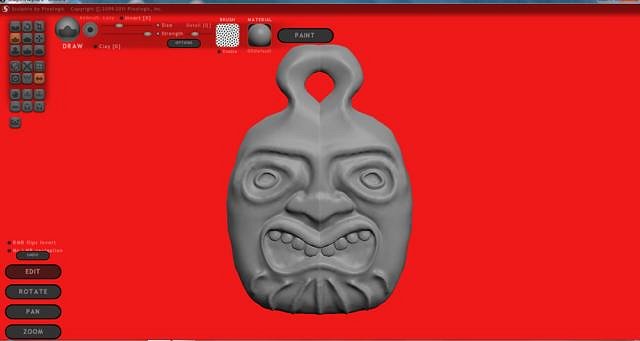
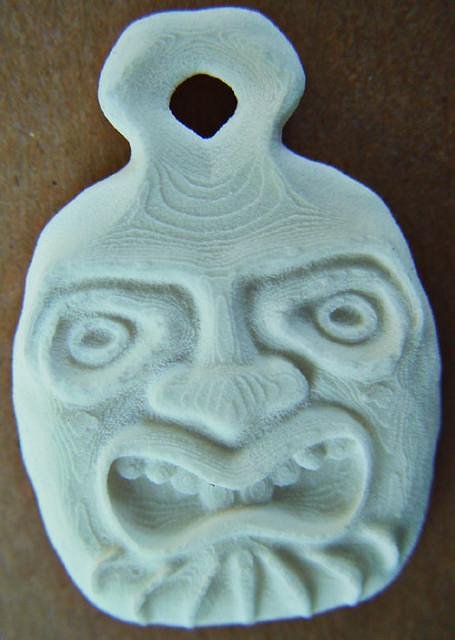
The first photo in this thread is of a number of pendants I have made in the manner I have demonstrated. But then again they are different. Those are made from the first sculpt that I had produced by ShapeWays. That sculpt was different in several ways. I was experimenting. There are several things to think of when sending to ShapeWays. As Whystler mentioned earlier in this thread, there is a cost consideration. ShapeWays charges by size and volume and what kind of material is used. Got to keep the price down, so keeping the thing as small as possible is what you gotta do. Also, ShapeWays has limits set on how thin they can be depending on the material used. I kept trying to make real thin ones to save money and kept getting them rejected by them. This image is of the first one they accepted.
You can see that this not as tiki looking as most tiki lovers would like. I was trying to be kinda tiki and experimenting with what could and couldn't be done. Some details like the small teeth and those thin ridges on the chin were added to test how well the 3D copy could produce small detail. Whystler mentioned in his thread about the difficulty of trying to reproduce deep cuts and overhangs. I made the mouth somewhat deep and the nose with a slight overhang.
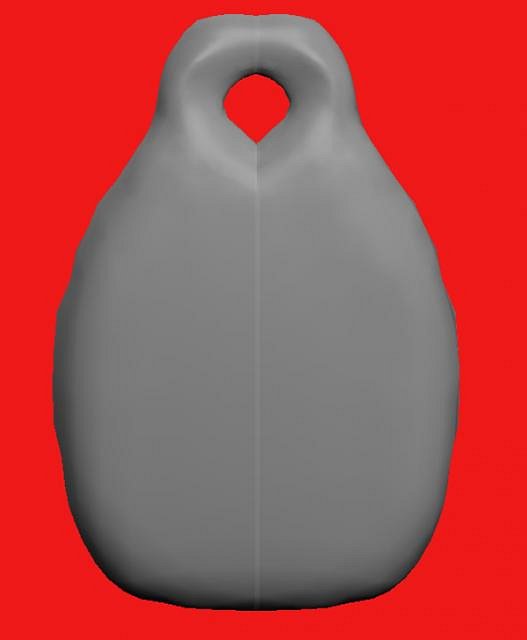
OK, I promised to talk about other easier ways to do this whole process. The way this pendant was done was by starting with something other that a sphere. It is easier if you start with a flat medallion like object. I have tried many ways and many other 3D programs to do this. Some worked, and some not so good. This one was produced on an Ipad app and transferred to my PC. It is a clunky app, but it does a nice job of producing a rough medallion.
As you can see, we already have a hole and a flat back. It makes all the sculpting easier and no cutting up in MeshMixer. The only trouble is the depth of your carving is kinda limited. You can see that my demo model has more form and shape than this one. It is a good way to start though.
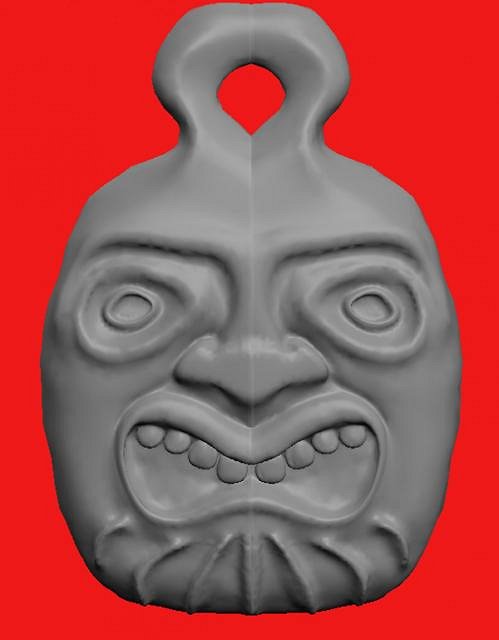
So I sent off my obj file and it was accepted and 10 days later this is what came in the mail. Nice detail. I liked it. It is a nice fairly hard surface white plastic. The surface is nice and would be perfect to paint as Whystler has demonstrated in his thread. You may notice there is a wavy texture on the surface. I do not know why, but after awhile I got to liking it. I thought it looked like wood grain. This model is 2 inches high and 1 inch wide. It cost me $11.24 to have made including shipping. I wanted to have a whole bunch and did not want to spend that kind of money. The obviously answer to my problem was to make copies.
|