Welcome to the Tiki Central 2.0 Beta. Read the announcement
Celebrating classic and modern Polynesian Pop

Tiki Central / Other Crafts / rvictor's tiki lab

Post #744078 by RVICTOR on Tue, Jun 2, 2015 11:51 AM

You are viewing a single post. Click here to view the post in context.
R

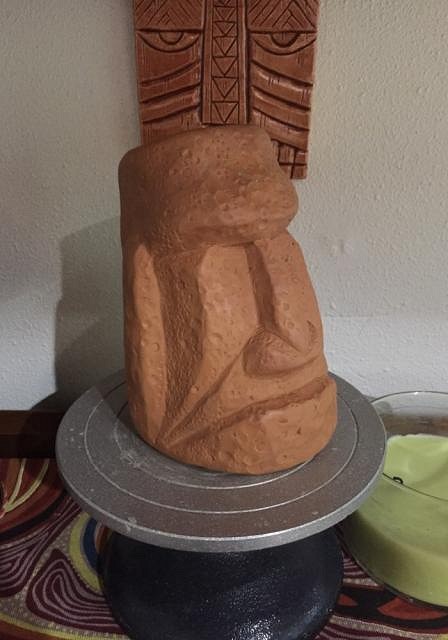
Wendy-Thanks, I think your posts are the best. I owe you allot already for providing such good guidance.

Today I am really happy to be finally able to post more work. The following photos are just a few points taken over several weeks. I didn't want to share anything until I knew that I had a working mold.

I actually injured myself over the memorial day weekend (pulled hamstring, broken elbow, bruised ribs...yeah, a real train wreck). This has slowed the process...but today I am finally able to share some of my work.

First, an experiment making a model and mold using oil clay...
I got some oil clay at a local craft store so that I could try out making an original sculpt from a block of it. I had to buy it in small chunks and when I opened the small packages, I found that the oil clay was quite hard and not easy to work with. So I put it on a pan covered with tin foil and stuck it in the oven at 200 degrees for several minutes and it turned to mush in no time. I was able to combine it all into one big block once it was warm very easily, which is a step I would highly recommend. However, I would recommend putting it in a small glass bread pan or one of those rubber bread molds you can put in the oven before hand just to avoid wasting oil clay like I did (hopelessly stuck to tin foil).
Once it started cooling down, it was really easy to work with for quite a while. It only hardened back up after sitting overnight.

So here is the oil clay sculpt I did with the intention of making a mold afterwards...Yet another moai.

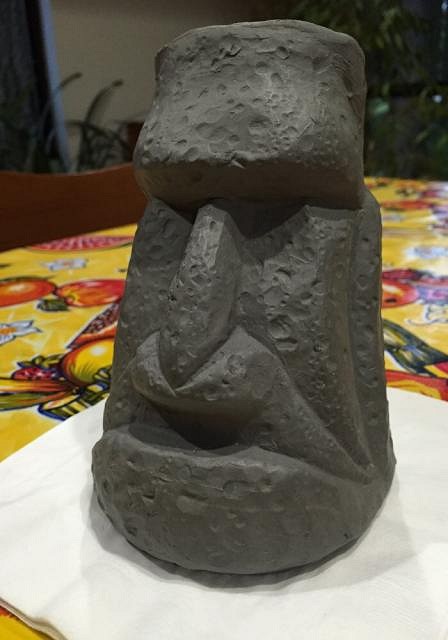
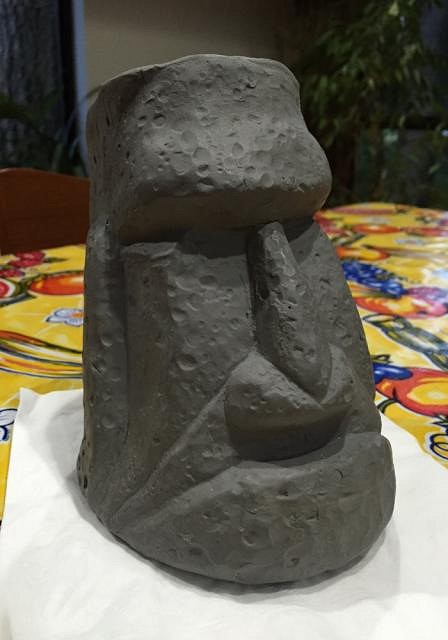
And here are pictures of the first cast from the mold (post initial clean up)

The hardest part of making this mold was getting the angled top right. The actual cast line moves from the midline of the ear (at the top of the ear) to the top of the forehead. This was so that it could be removed from the mold. It had to be planned ahead of time.

Lessons learned with this mold:
1.) I would have put on 5 layers of mold soap so that it would open up easier. (with the weird joint lines, this would have helped)
2.) I would let the mold dry longer before opening it up (lost a chunk of the base plate)
3.) I would have dried the sections strapped together after washing off the mold soap (there was some warping, the mold leaks and needs to be sealed because of it)
4.) I need to think about how to better make the transitions for the base plate and pouring cone at the top and bottom (large seamlines there)
5.) I would suggest 1-1/2" of cover vs. 2 or 2+ as the molds get to heavy to move.
6.) I would have made the top of the head wider so that the opening at the top would be bigger after firing. It may be OK but I wont know until after I use the mug a while.

I will post this one again later and try and give an idea of scale.