Tiki Central / Other Crafts / rvictor's tiki lab
Post #744216 by RVICTOR on Thu, Jun 4, 2015 9:44 AM
|
R

RVICTOR
Posted
posted
on
Thu, Jun 4, 2015 9:44 AM
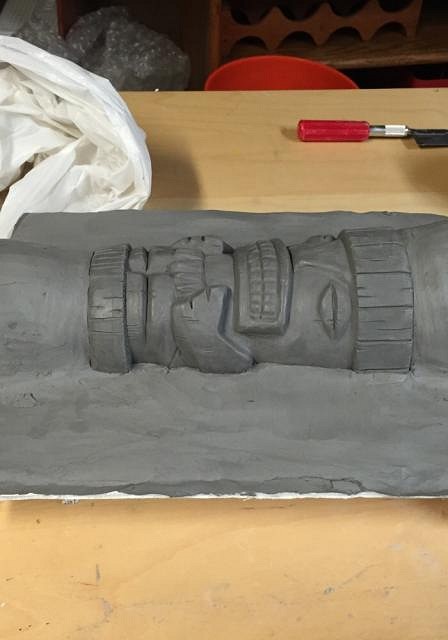
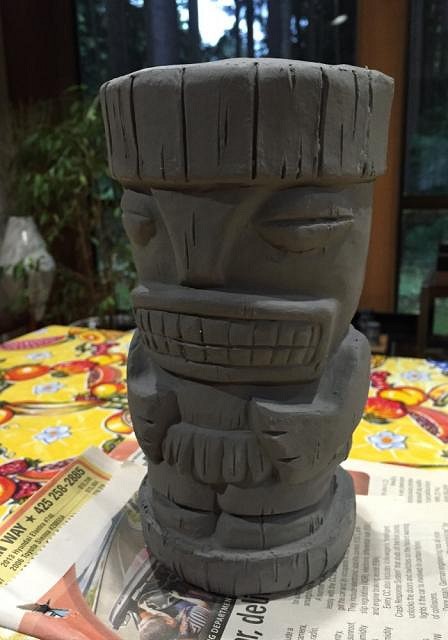
Aloha all - Posting photos of the mold making for the larger Taki Tiki. This one is being made for a local bar in Edmonds called the "A Very Taki Tiki Bar and Grill" in Edmonds, WA. It's our local tiki bar and part of the inspiration for me starting to make Tiki art in general. Several months ago the owner Brian and I had a conversation about tiki mugs in general and we found out that we both had a common interest in it. Over time we spoke more about how things were going and the idea of making a mug for the bar came up somehow. Anyways, I was planning on the first mug being for the bar...until after I learned about double shrinkage the hard way (original carve shrinks as it dries, you cast it, and the slip cast shrinks again). Anyways, once he asked me if I could do 10 mugs just to see if the loyal customers would be into it, I accepted the challenge and came up with a new mug design that was loosely based on the first. I was also inspired on the Cannibal mug idea that Wendy Cevola put in my head some time back... Anyways, enough of the storyline. Some photos of the bottom half of the mold making are attached. Mainly I took these photos to show the build up technique in casting the first half of the mold. I did this same construction with a bottle mold and had a blow out disaster that required me to start over, so I would definitely recommend that you take the time to assure that the object is both fully sealed and supported the first time. It worked just fine the second time when I was more attentive to those details. I think I am going to give Wendy's idea of foam blocks a try once I run out of foam board. Oh, and get the foam board that has the smooth, sealed surface if you have the choice. Here is how I supported the carving...with a wood block, foam pieces, and tape.
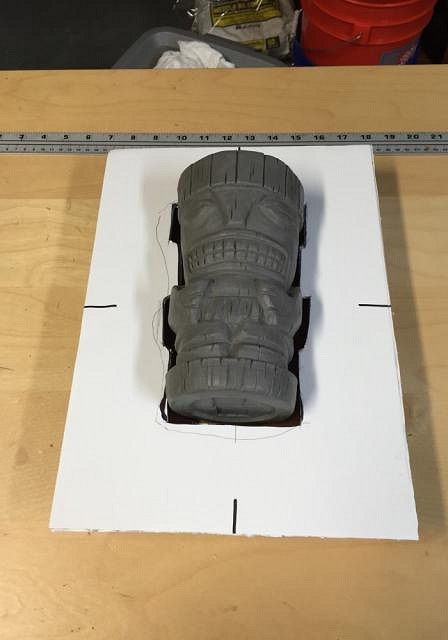
Then I build up the foam board build up platform. There are foam supports underneath the main platform. The platform height was set between 1/4-1/2" below the mold joint line I marked on the carving.
This next photo shows the clay build up on top of the platform to the joint line, the pouring cone at the top, and the base mold area at the bottom.
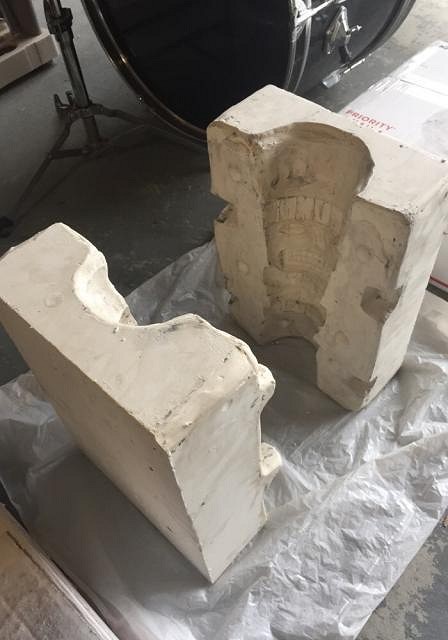
From this point, I made keyways/registers around the edges. I set up my cottle boards to pour the bottom half of the mold and sealed the board joints and perimeter edges with clay. After pouring the first half, I built up the top pouring cone and bottom base plate again and put three coats of mold soap on the plaster areas. I again sealed the boards and perimeter areas with clay to seal them and poured the second half. The resulting mold looked like this...It's sort of a heavy monster (another lesson learned?)...
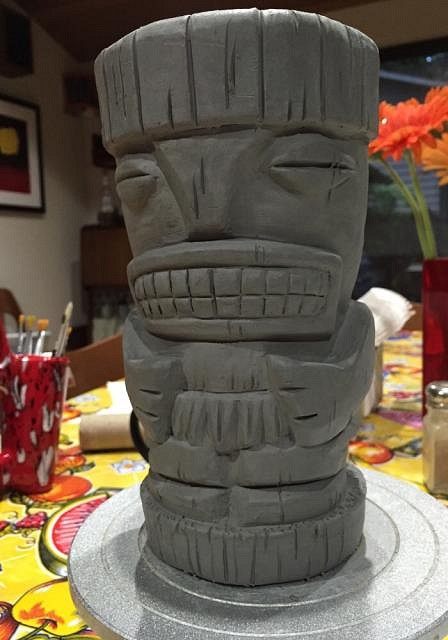
I wish we lived in a dryer climate. I let the mold dry for two weeks indoors (where there is heat) and I'm not too confident that it was as dry as I would have liked it to be. I think in the future I may want to bring my molds into the workshop to dry. The kilns make the room very dry and is probably a better place to let them cure. Wish I lived some place dryer like California or New Mexico...or maybe I just need to get a kiln. And finally, photos of the first casting out of the mold after minor trimming (needs clean up).
The mug is still rather large...so I am hoping I didn't overshoot with my sizing. I will only be able to tell after firing. Wish me luck? Mahalo for looking. |