Aloha Tiki Peeps!
Well, it's been awhile
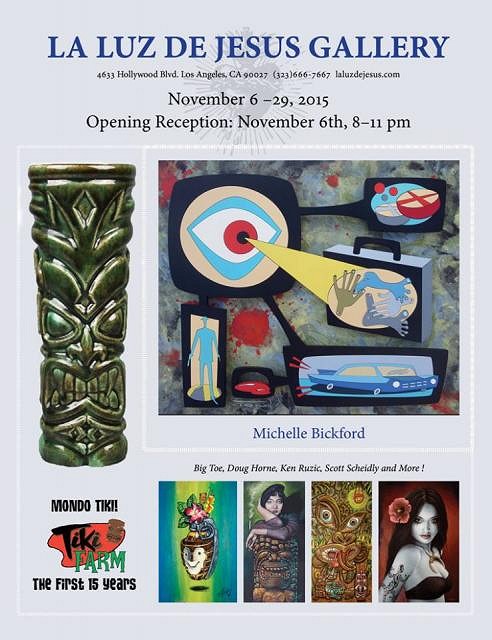
as i've been prepping for the BIG MONDO TIKI exhibition
in celebration of Tiki Farm's 15th year,as of late...
My Fellow Behemoth/Titan/Gargantuas are also cooking up some goodies!
Over 30 pieces between us to adorn the walls!
And BooBen is constructing the environment for the exhibit!
JOY!!!!!
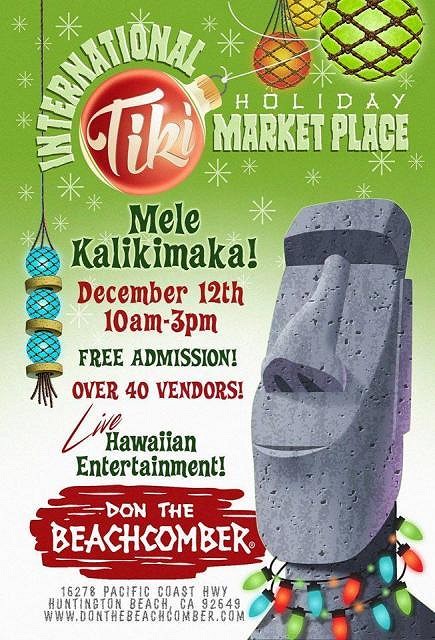
Got to work on some wood-burning at the last Don's International Tiki Marketplace
Got a lot of progress done,and got to teach a bunch of folks (big and little) the beauty of pyrography...Does it gt any better?
Well...it MAY GET BETTER because i will be wood-burning AGAIN in December at Don's!
Well, before we go exploring
Let's answer some of the nice comments y'alls left..
On 2015-09-28 05:46, Tiki Shark Art wrote:
AWESOME -SAUCE!
Mahalo Brad! Your Night Marchers are slowly solidifying and the stairs are finally perfect! You make da magic,brah! Here comes the fun part....if you manage to unpeel yourself from that gorgeous Fury Road book!
On 2015-09-28 11:59, Holler Waller wrote:
Wada Painting - Wada Frame!! Extra BeeeUtiful Together.
Thanks Holler! Finally finished the OOMPH! on the painting and began sealing it... There's something about sealing a piece that just brings out the luster! Can't wait to share it with y'alls! Soon.....
On 2015-09-28 12:24, danlovestikis wrote:
That whole deserves a SUPER WOW! Mouth Open, eyes wide. That's so incredibly special. Wendy
Thanks Wendy! It's always a thrill to have you come visit...PLUS,i am honored that you will be tackling that Kinnybowl! Sorry the first steps kind of went haywire,but i see a Beautiful Bowl just waiting to be born! Hugs and well wishes,Art-Sister!
On 2015-09-28 13:43, Atomic Tiki Punk wrote:
Loverly!
Many thanks Hot Topic!
:)
On 2015-09-28 14:45, tikiskip wrote:
Very, Very cool!
Great job both of you!
The fine detail in that frame, wow.
Tiki art duets are always fun to see.
Can we see a shot of the whole thing frame and all?
Hey Tikiskip!Many mahalos! Well, it was quite a fun and easy collaboration...Derek has a great ability to translate a piece of art to wood,thinking of it in 3-dimensional terms...
i just sent him the sketches and let him do what he had to do,not interrupting his creative path to make the bestest frame around,and as you saw,the results were Over-the-Top! Unfortunately,we can't reveal the final pieces until the show is up and ready for ogling...but believe you me...Doug,and Tommy,and myself have slaved over these to bring the Very Best to the walls of laLuz and to bring suitable respect to Tiki Farm during their 15 year anniversary exhibit.... Soon,Skip,soon.....
On 2015-09-29 06:33, swizzle wrote:
That frame is mad. Suits the painting perfectly.
Thank you,Swiz! Glad you're stoked with the results...i think the patrons will be quite amazed ....
On 2015-10-01 21:03, KAHAKA wrote:
Hurts my head with all this awesome. Two geniuses at work together. Much respect, tiki mastersons!!! Great tag teaming.
Cheers,
Woody
Sorry about the headache,Woody! Collabs are the BEST!
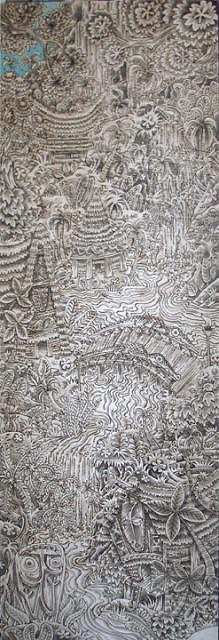
So...for today, i will take you thru the steps concerning how a Pyrographical work
is created....
Birch and basswood are the most suitable woods for my Colwood wood-burner
an extra hot tip is required so the pen can move as fast as the artist's hand..
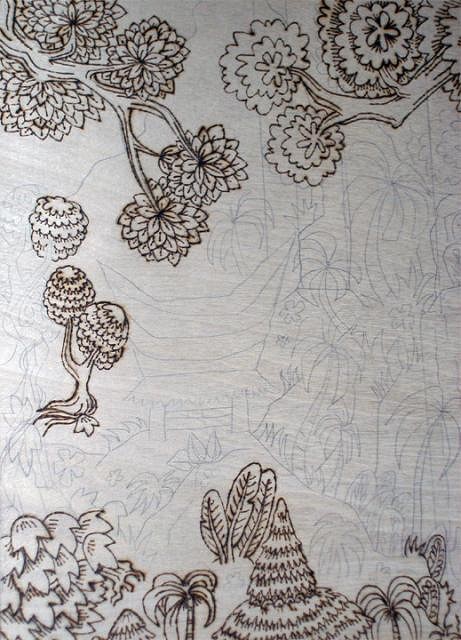
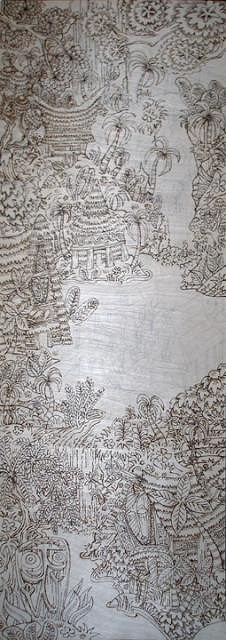
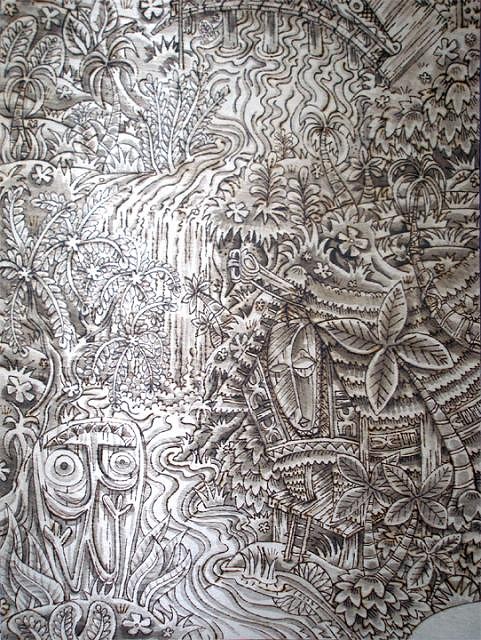
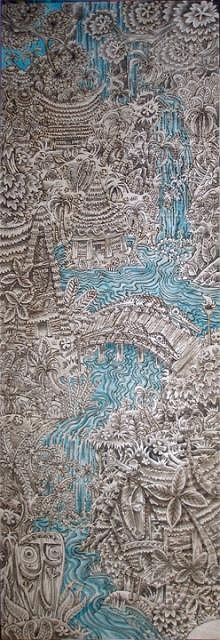
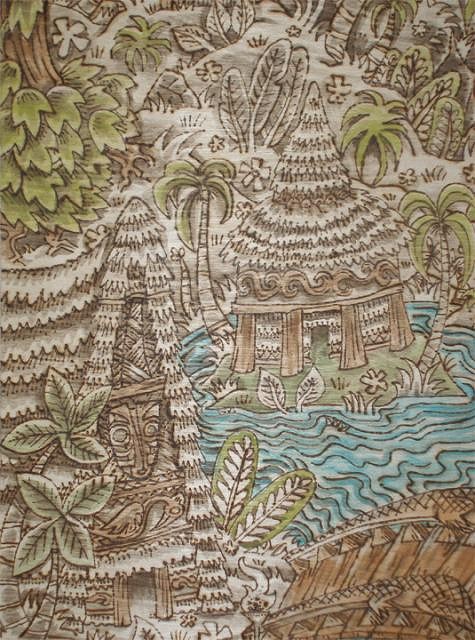
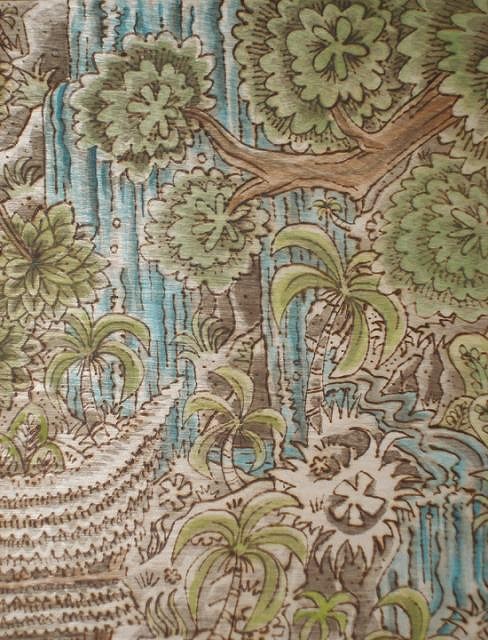
Starting with a 12 x 36" piece of wood,let us begin our journey here....
Sketching lightly in pencil,i establish the flow of the waterfall..
NOTE: use only light lead pencils-DO NOT use wax colored pencils-they will gum up your tip!
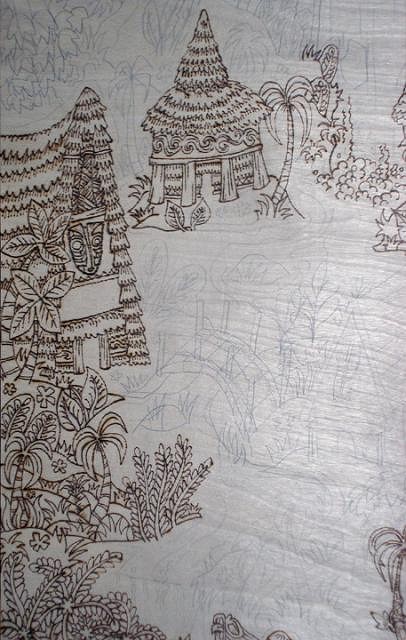
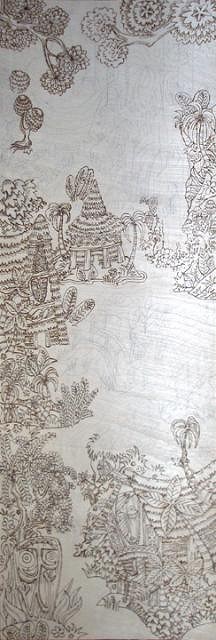
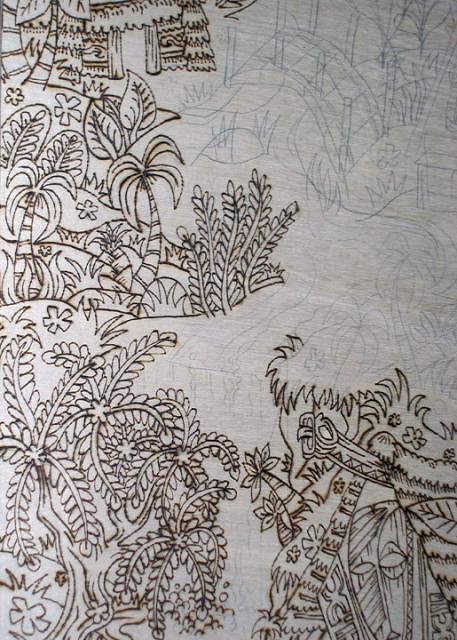
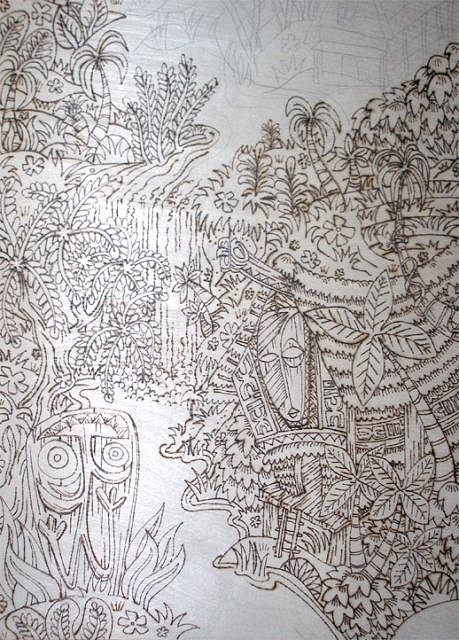
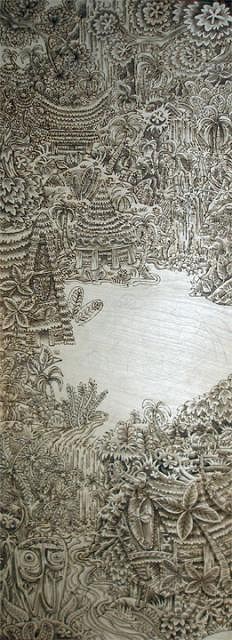
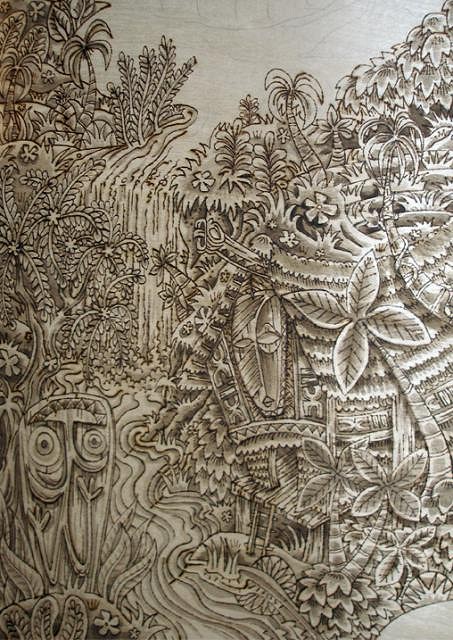
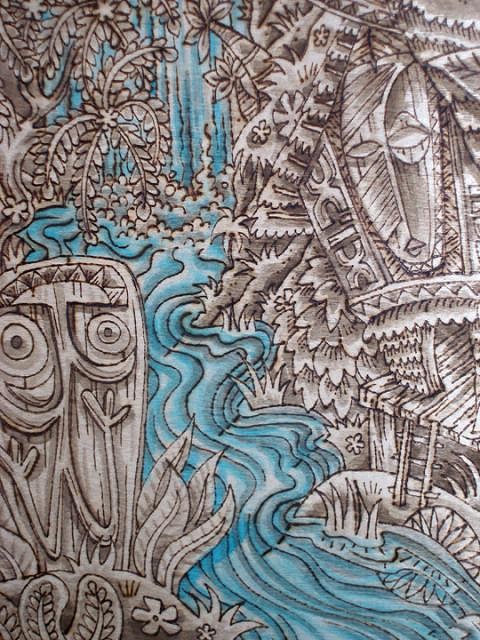
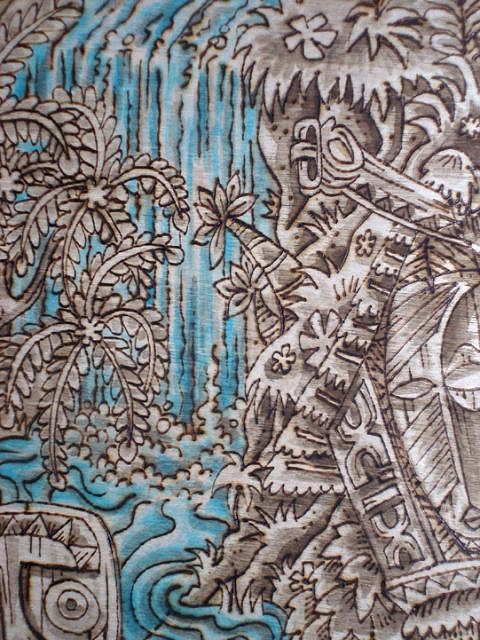
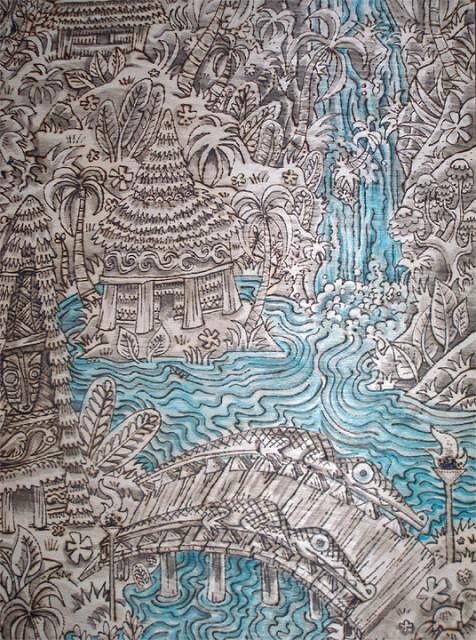
Here is a whole shot of session ONE-sketching and some burning started...
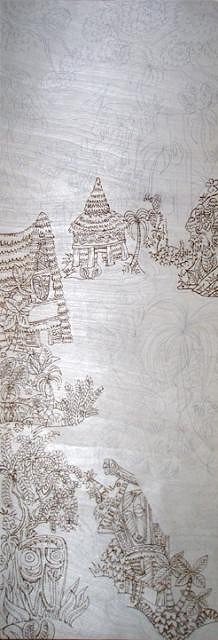
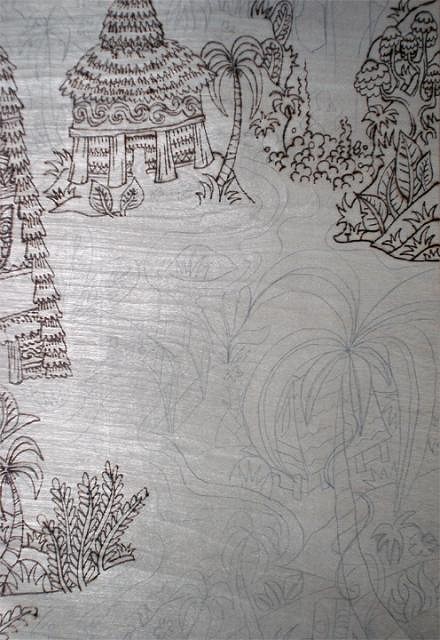
and here's some close-ups...
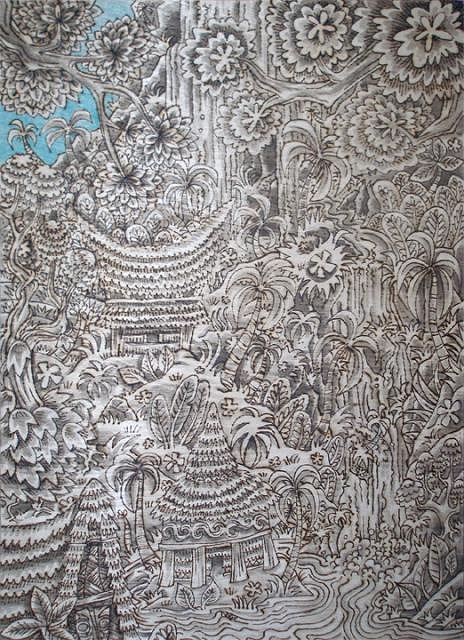
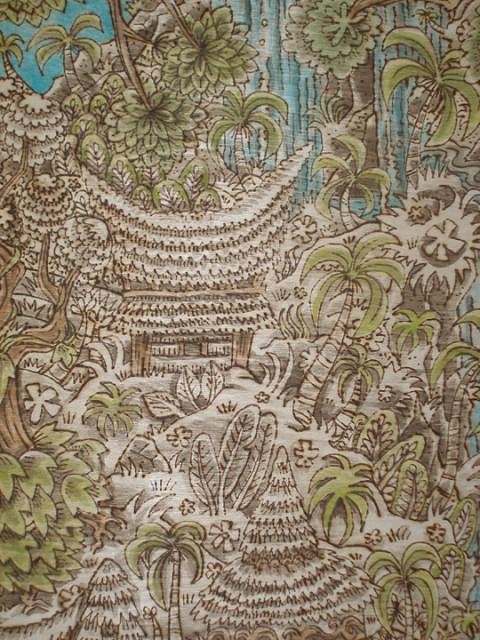
This part of the pyrography is mostly just to get the outlines and shapes of the objects....
the huts
the water
the vegetation...
The great part of this phase is that one can compare the already finished areas
with the pencil sketches...Do not be afraid to edit the pencil sketch.....THAT is how a piece Evolves!YOU WILL SEE THAT IN ACTION LATER
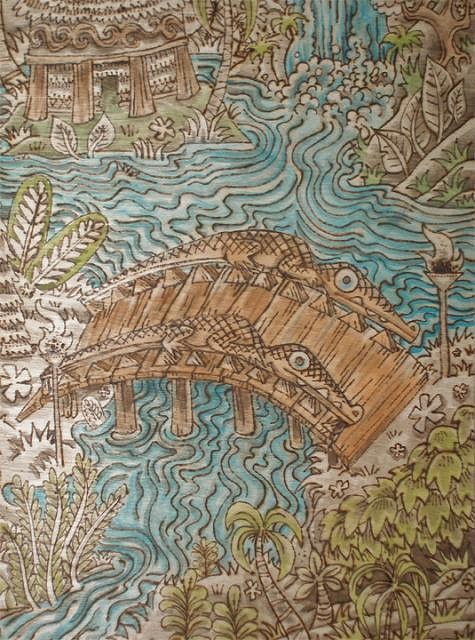
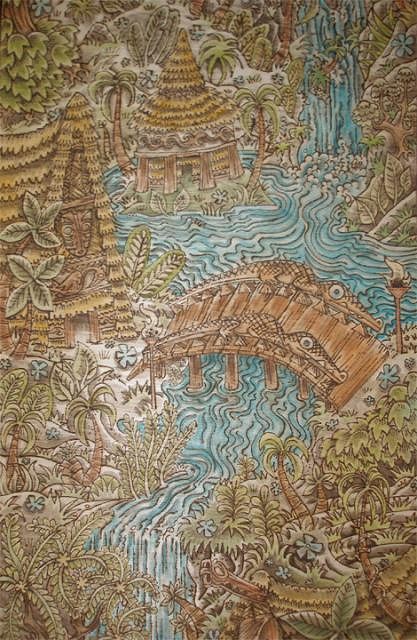
when i drop one hut and decide to go ALL OUT on the Bridge!
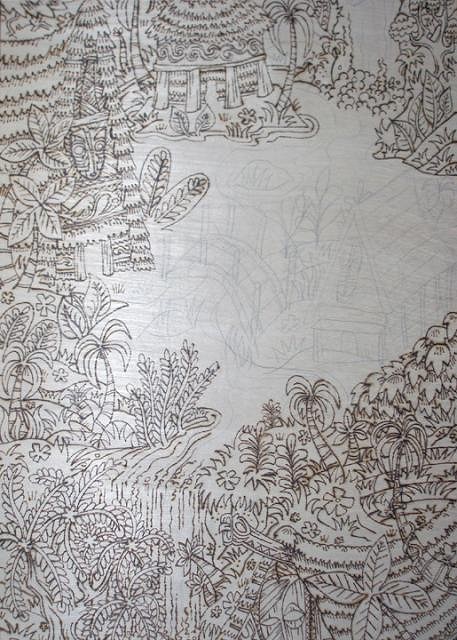
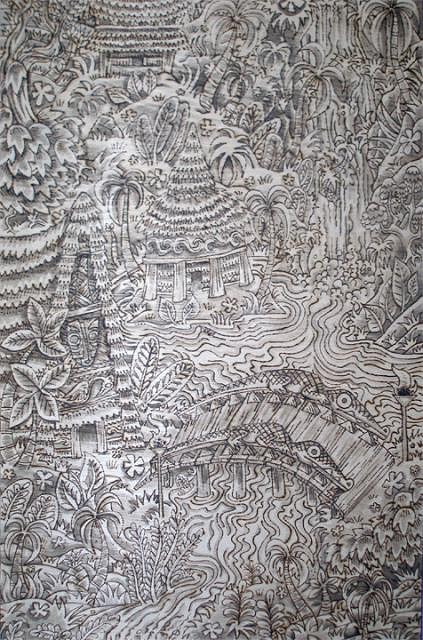
Here's the middle area,where the bridge will be placed...
unbeknowest to this artist.....
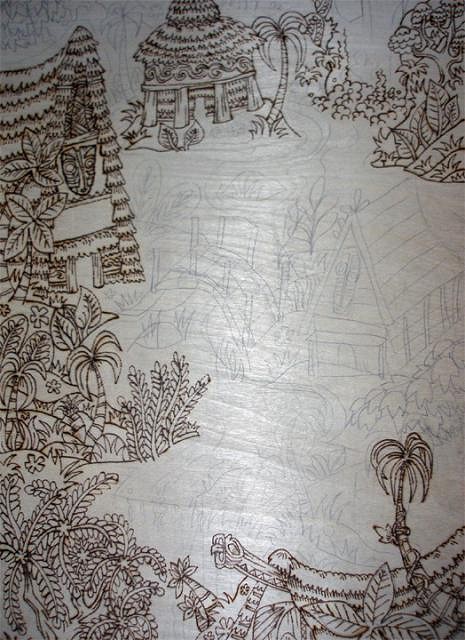
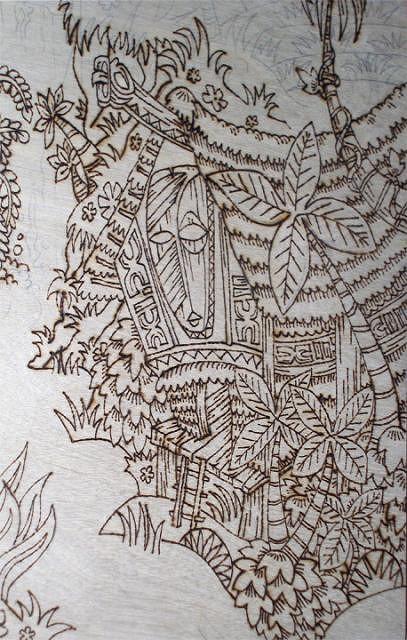
Here it is,with the top of the piece revealed in relation to that area...
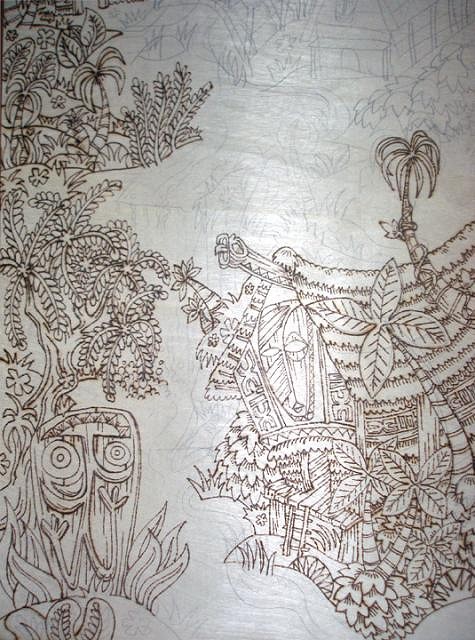
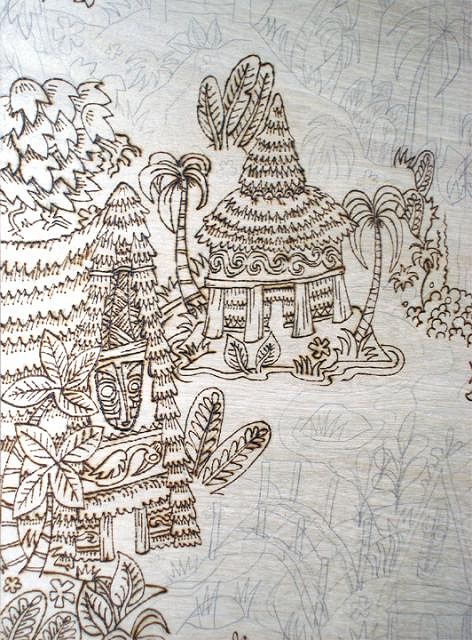
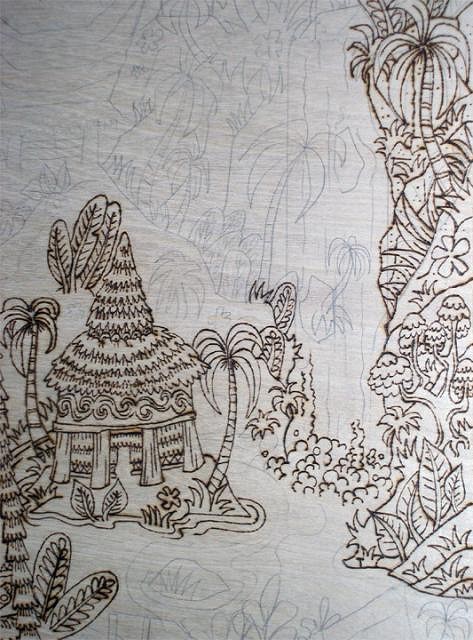
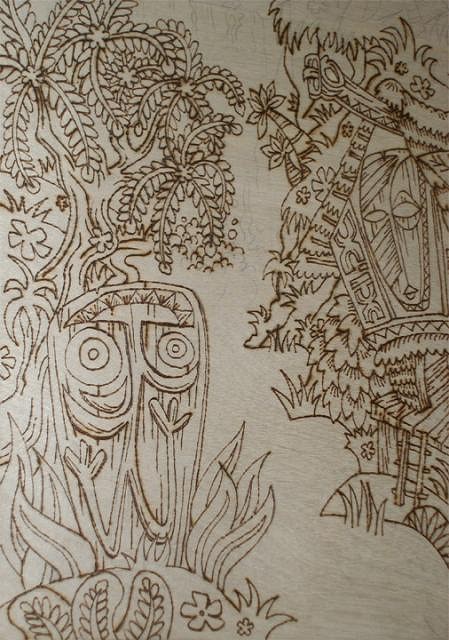
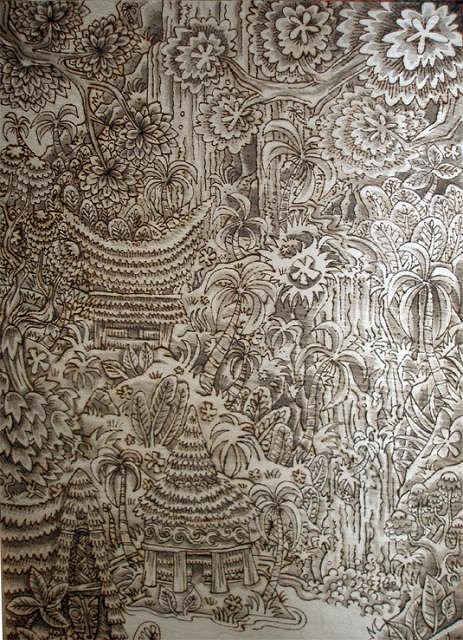
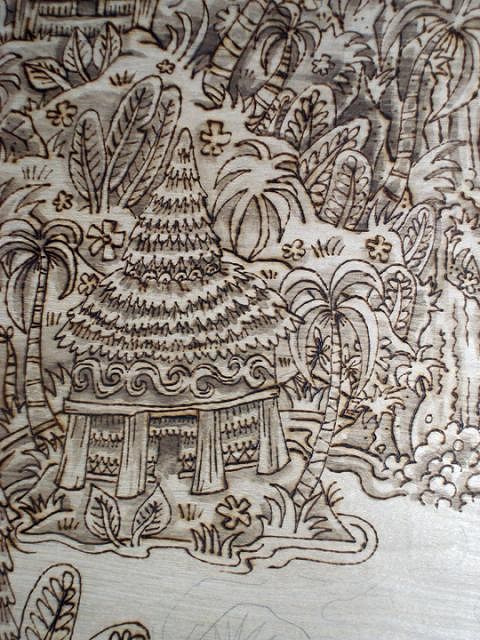
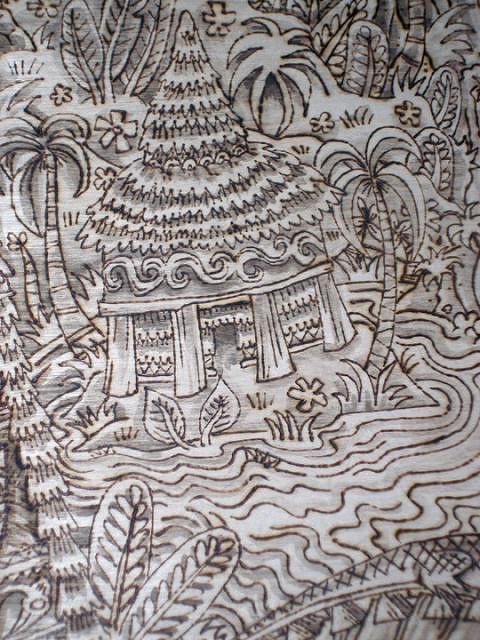
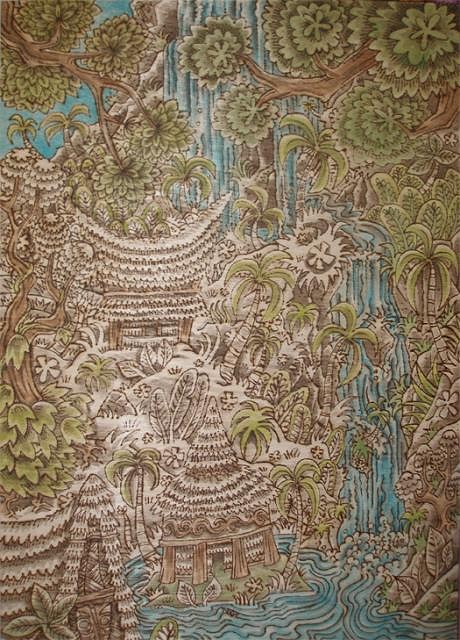
Here is the Hut on the small island in the middle...
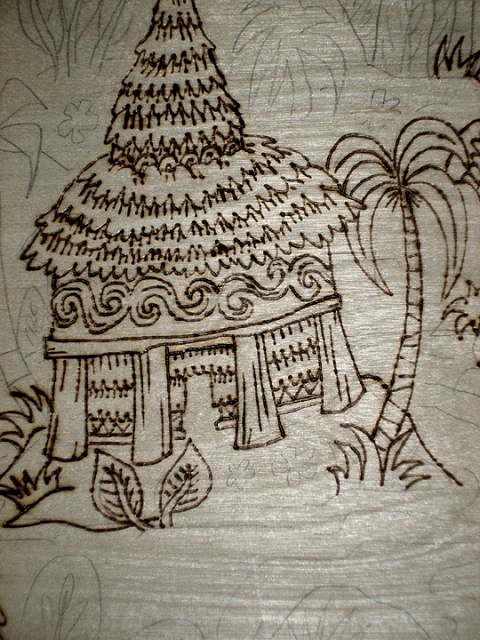
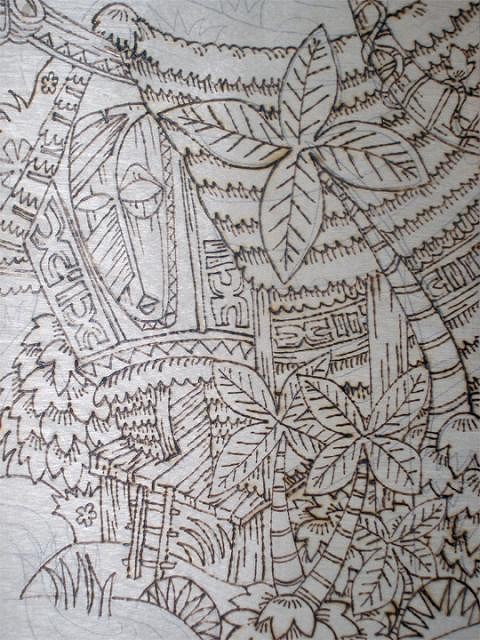
and some more details from this first session...
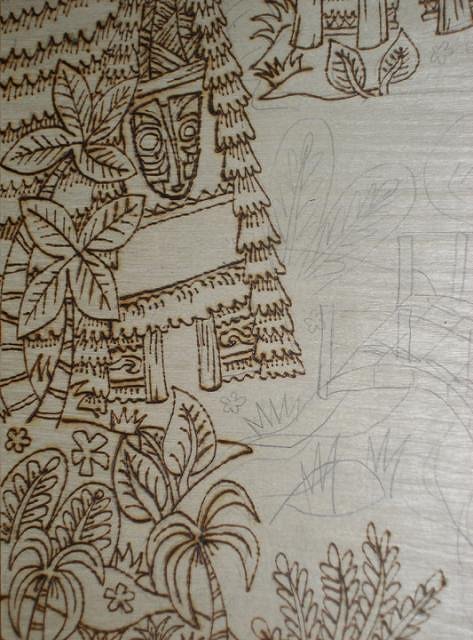
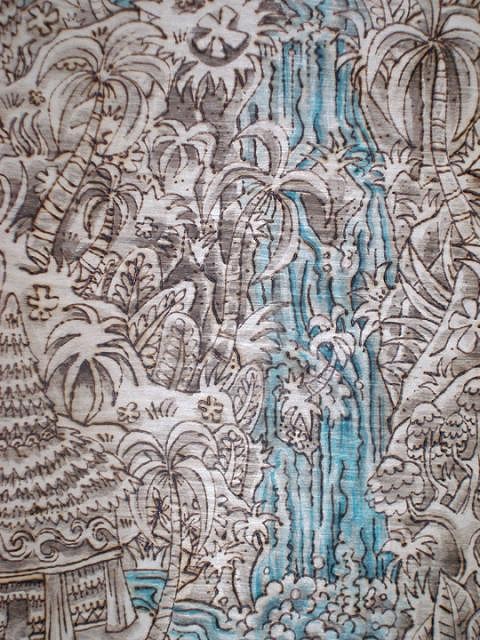
SECOND SESSION/DAY TWO
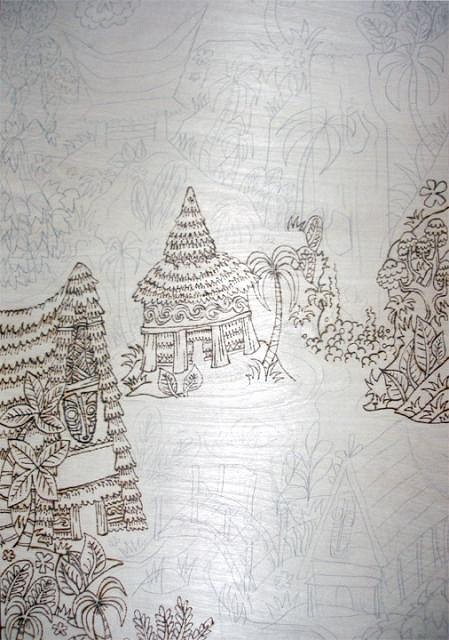
Got a lil bit more wood burnt...
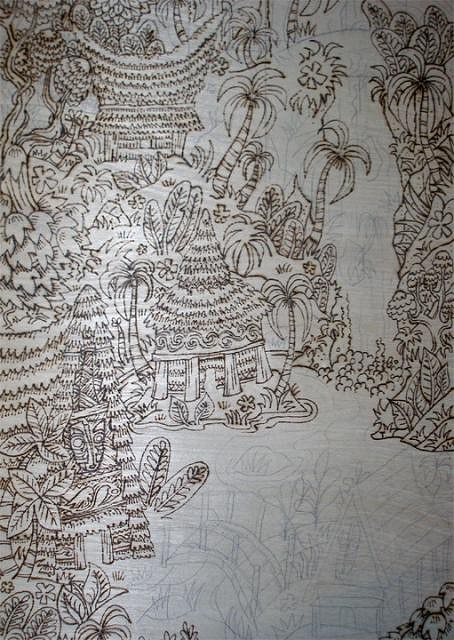
SESSION THREE/Day Three
Almost everything
except the middle "Bridge" area...
the bridge would be too small with that extra hut
so a lil bit of thinkin could come in handy.....
We'll review the Sketchbook musings in a minute....
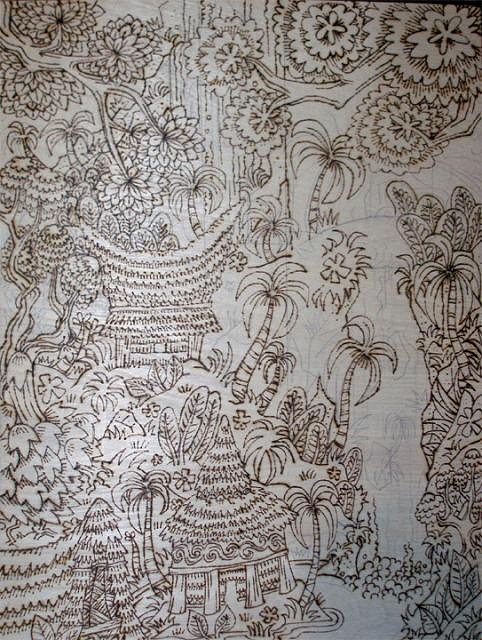

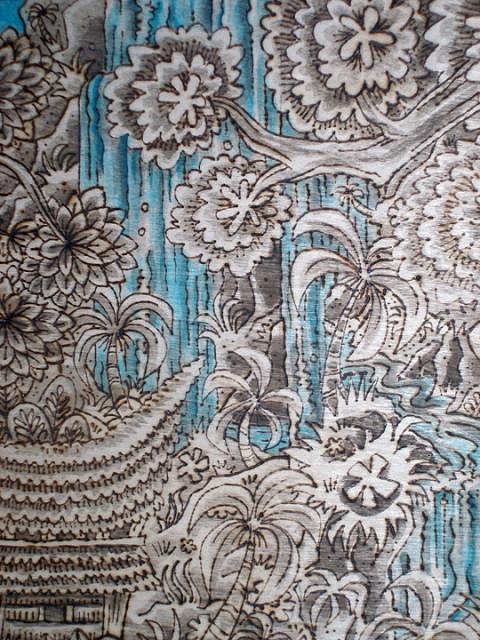
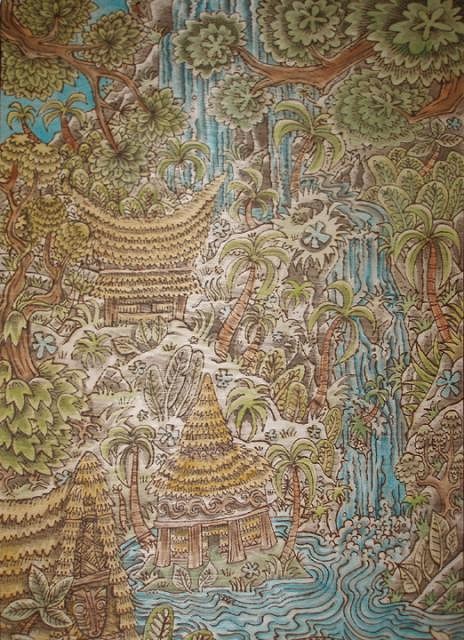
Session Four/Day Four
Time for tinting! Decided to break out the brush and begin the lighting and shading
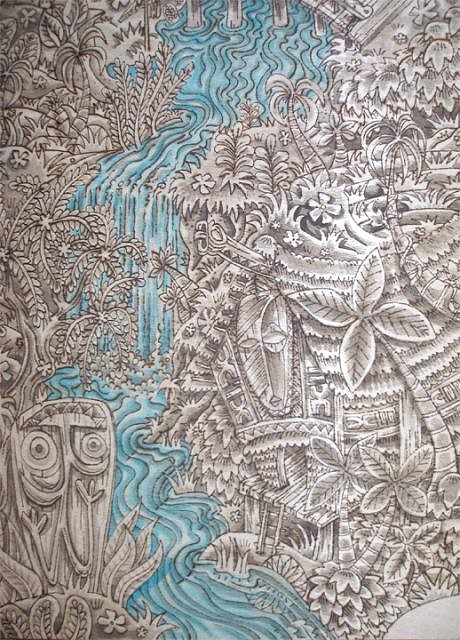
on this piece....after adding some of the rushing water
the bridge can wait....for now....
Here's some of the close-ups...Note-the pencil is erased BEFORE tinting with the Burnt umber...that way,the under drawing is hidden,and the believability of the world pictured is re-inforced...
Session Five/Day Five
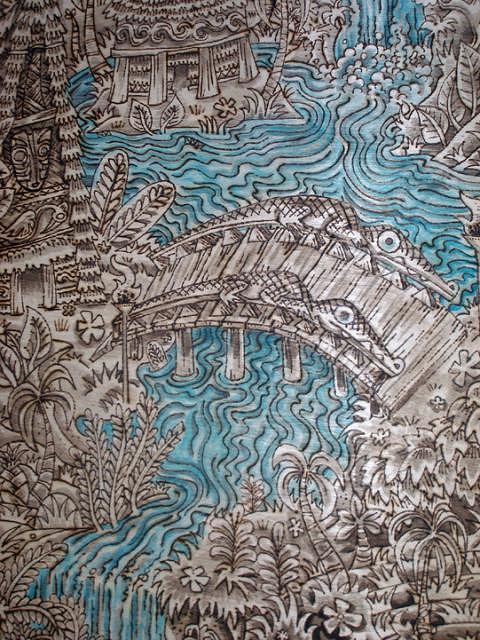
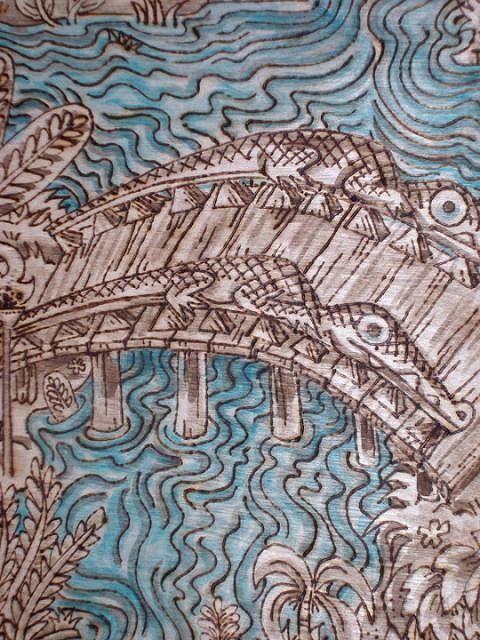
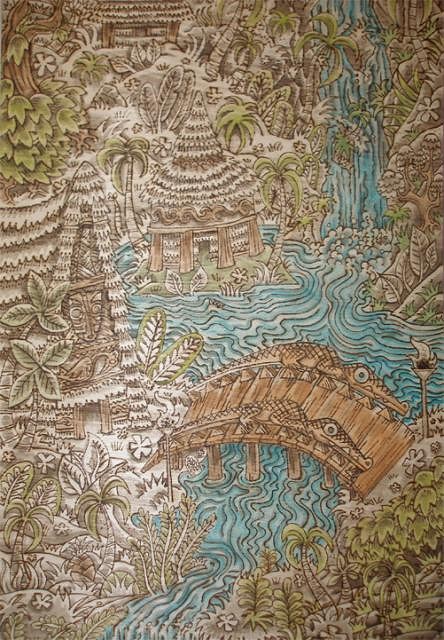
First,we'll try and figure out the Bridge..
the sketched one is small and not worthy of note....
If this piece is to be titled after a bridge-it better earn it!
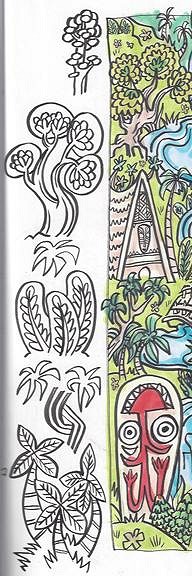
First off,Let me share the original sketch for this piece
Along with stylized vegetation,derived from many sources...
old sketchbooks,Balinese Paintings and Turkish miniatures.
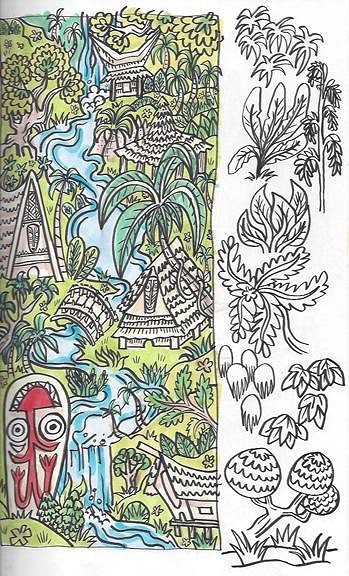
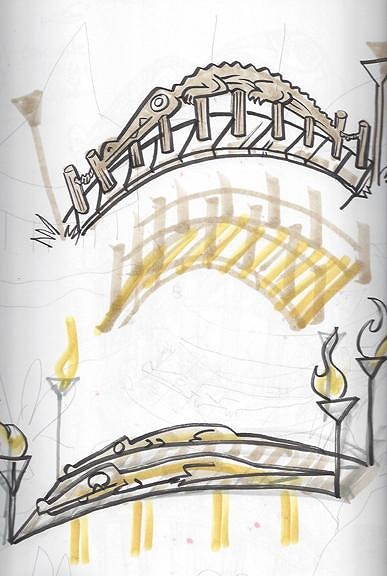
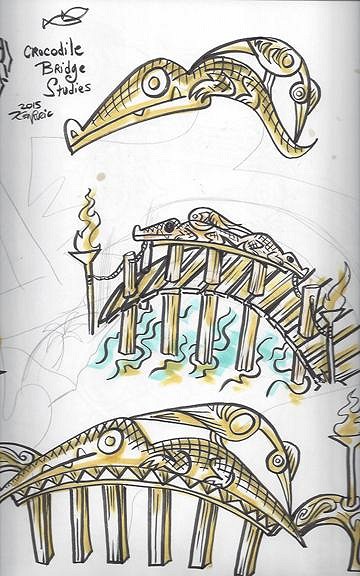
Arched Bridge or Suspension bridge?
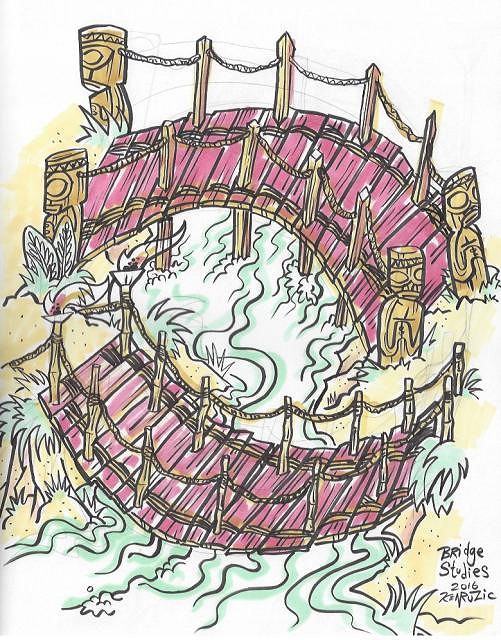
Some quick Croc Bridge studies and the vision is beheld!
Decided to woodburn this LIVE at Don's
during their International Tiki Marketplace
What a Blast!
Here is what i accomplished that day....
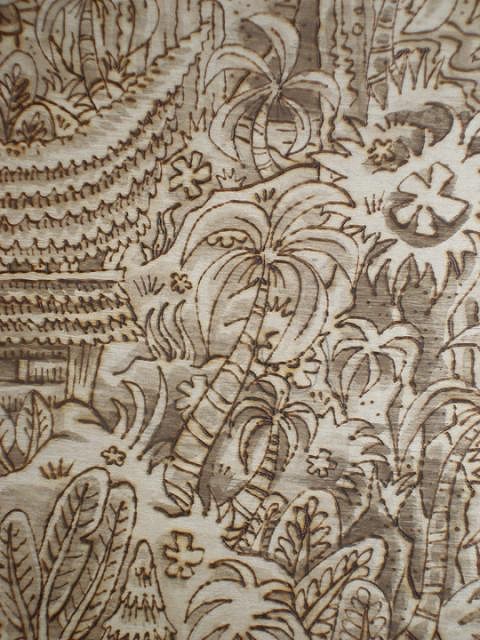
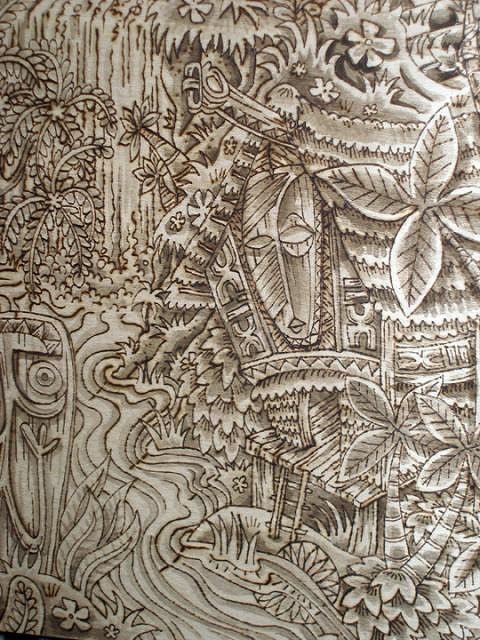
and here's the BRIDGE!
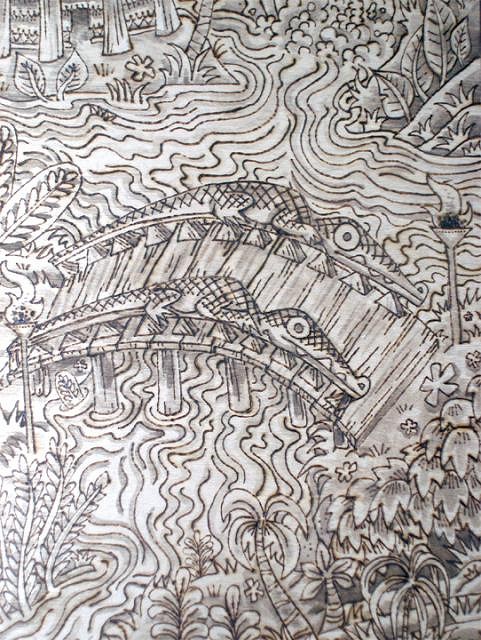
Session Six/Day Six
Time to tint the WATER!


Session Seven/Day Seven
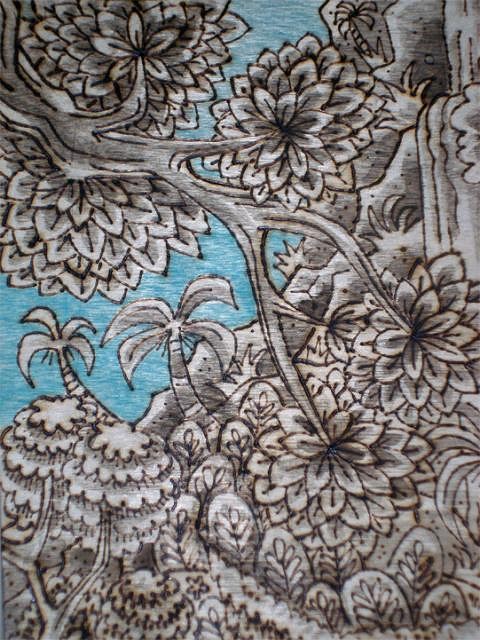
Tinting the Vegetation!
i used only two olives for the greenery,a brown,a light gold,and the turquoise
Also the Burnt umber for shading... i allowed the ground color of the wood to peek thru...
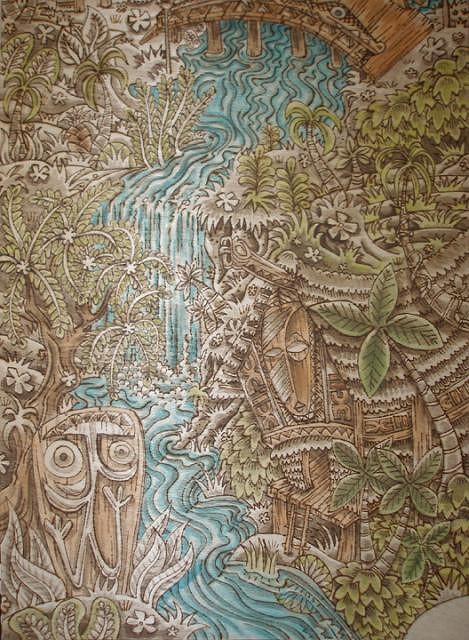

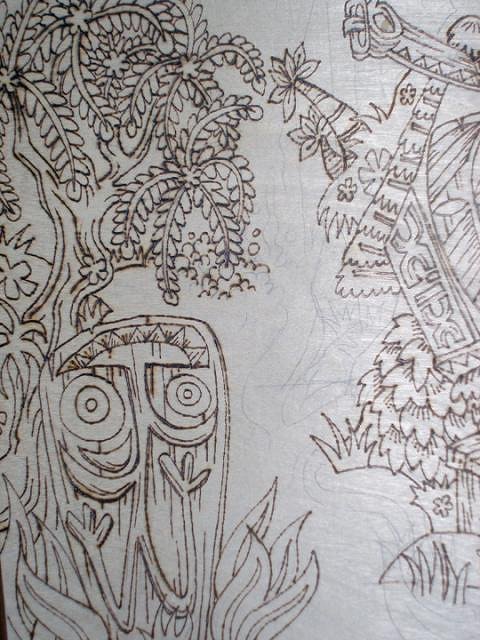
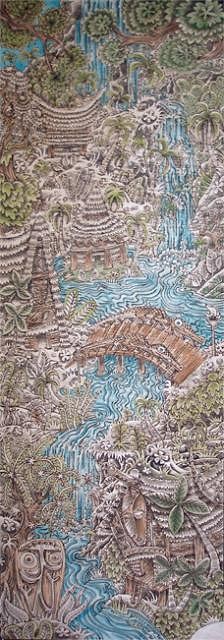
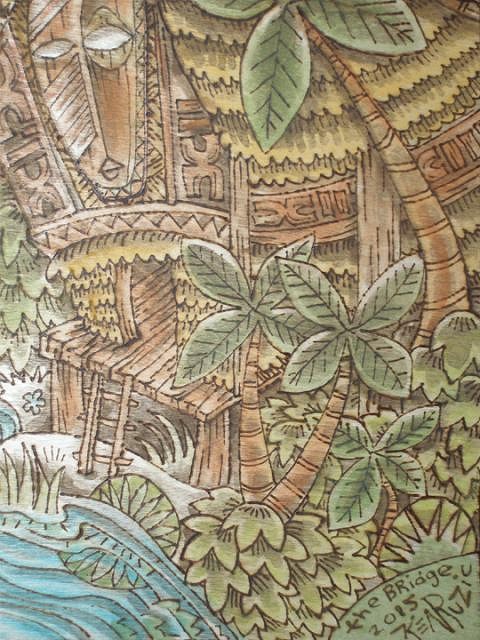
AND ,After one more session,it is finished....
While i can't show the piece in entirety yet..
i CAN show details..
So here they are!
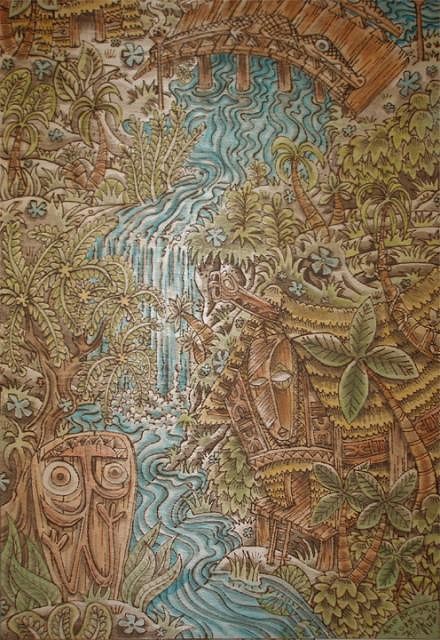
And here is an extreme close-up just for you!
Well, that's all i have the energy to share today...
i hope you enjoyed all the close-ups and a chance to hike around this
pyrographical Wonder!
Thanks for the visit and wonderful comments!
Aloha!
