Tiki Central / Tiki Carving / neo - gope
Post #770829 by ManoKoa on Sat, Dec 3, 2016 4:18 PM
|
M

ManoKoa
Posted
posted
on
Sat, Dec 3, 2016 4:18 PM
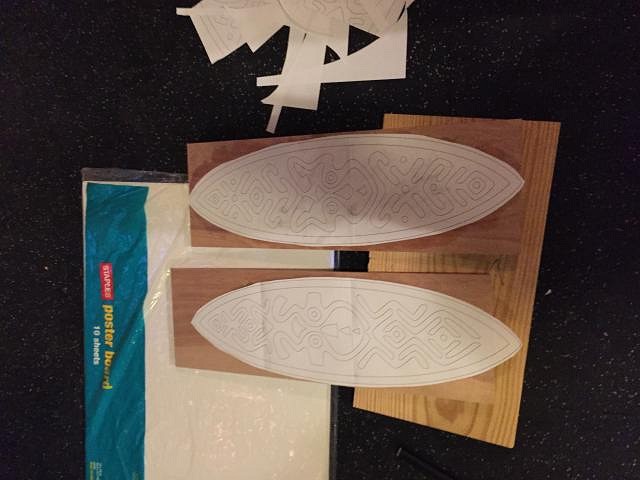
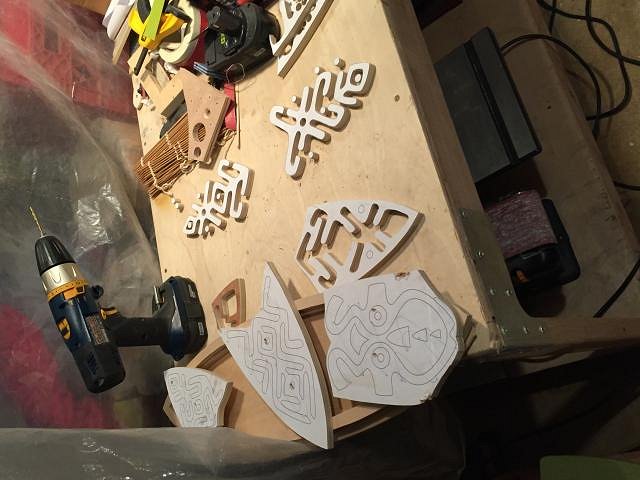
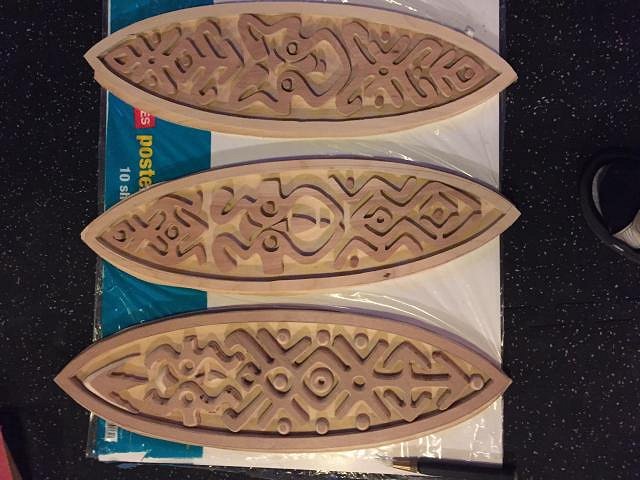
Here is what pics I have and a timeline. After many pages of drawings in the sketchbook, I settle on a design I am happy with, then I scan it into the pc and use Adobe illustrator to trace, make a vector file, then print it out. Since the idea was to make it 8"x24", I had 3 pages I spliced. Then I stuck the printout to the 1/2" plywood board using rubber cement. I used a bandsaw to cut the outside, jigsaw to cut out the inside, then scrollsaw to cut out the actual design pieces. I used another layer of 1/4" plywood as the background which I cut slightly larger than the board outline that the pieces and outline will be mounted to. Then you see it almost finished in my 1st post, I used 4 layers of black stain on the black parts. The red is a stain/sealer combo which I'm not happy with. For the next one I'll do, I'll look for a red stain and after I'm happy with the color, then use a gloss sealer. What's next I'll use a layer of gloss on everything except the white then attach all the pieces to the background then attach mounting hardware. For any further details or questions, please ask. I'm happy to share anything except the actual design and vector files. I encourage the creation of which to be made highly personal.
Be excellent to everyone . . . Mano |