Tiki Central / Home Tiki Bars / Lagoon of Mystery
Post #776967 by Prikli Pear on Wed, Jun 14, 2017 12:34 PM
|
PP

Prikli Pear
Posted
posted
on
Wed, Jun 14, 2017 12:34 PM
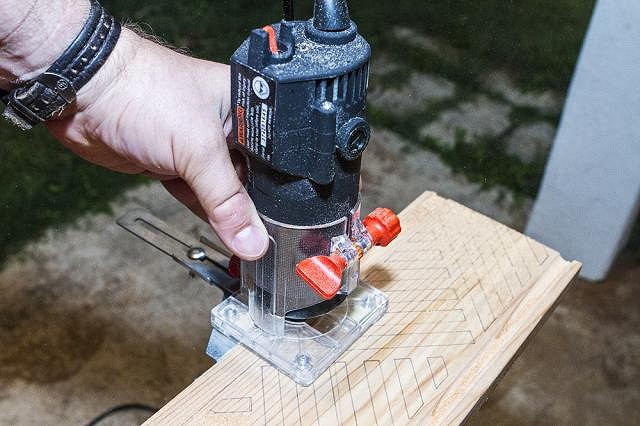
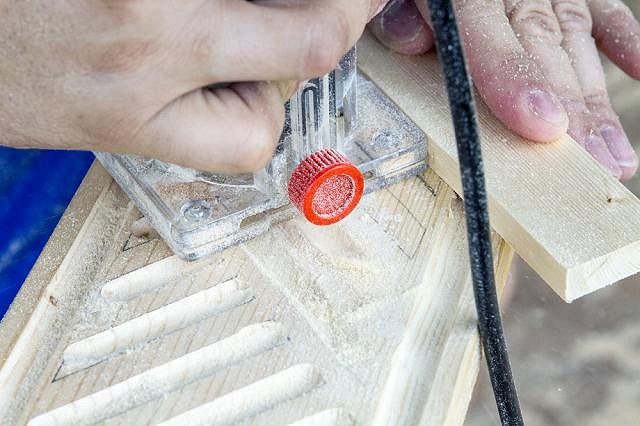
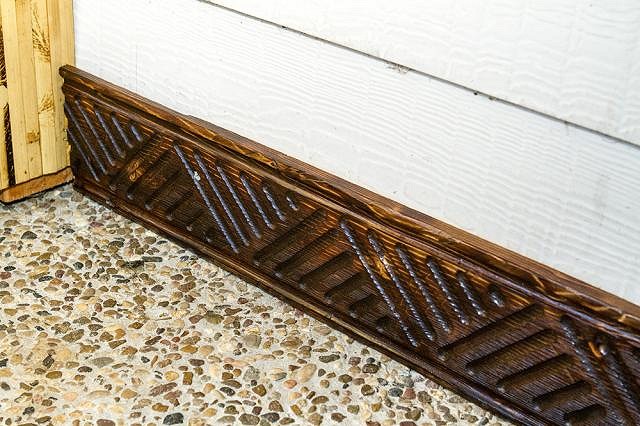
I've never done detailed router work before. I've routered dados and such, but nothing detailed like one would find in tiki builds. For baseboards, I didn't think my full-sized router would be easy to work with, so I sprang for a super-cheap trim router from Harbor Freight. I designed a basic triangle pattern on the computer, printed it out and transferred the design to posterboard, which I cut out with an Exacto knife to use as a pattern. I drew the pattern on the 6" Ponderosa pine boards I picked up from McCoy's and went to work.
I believe I used a quarter-inch half-round bit set at a depth of an eighth of an inch, if anyone's interested. I used a short, straight piece of scrap as a guide. This worked out better than my initial forays into freehand routing.
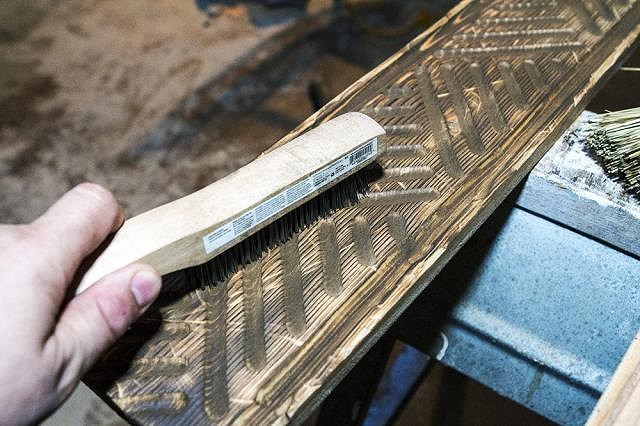
Then I roughed up the surface with an angle grinder to simulate age and abuse (as one does) and applied the butane torch for a good scorching. When I read here that folks burned the wood to "raise the grain" I didn't have a clear idea what that meant. Was it creating more dramatic color contrast? Or something else? Well, I wasn't expecting such a dramatic alteration of the texture. The "grain" of the wood now forms dramatic peaks interspersed with valleys, creating an undulating surface reminiscent of 30-year-old barn wood left exposed to the elements. Without all the rot and cracks, of course. Some things one just has to do to understand.
After that, I applied the wire brush to remove the carbonized soot, etc., and stained the boards with Minwax Special Walnut. Over the next few days I applied spar urethane to protect the wood from the elements. I'm not posting all those photos here, because that'd be boring. Just trust me when I say it happened. :)
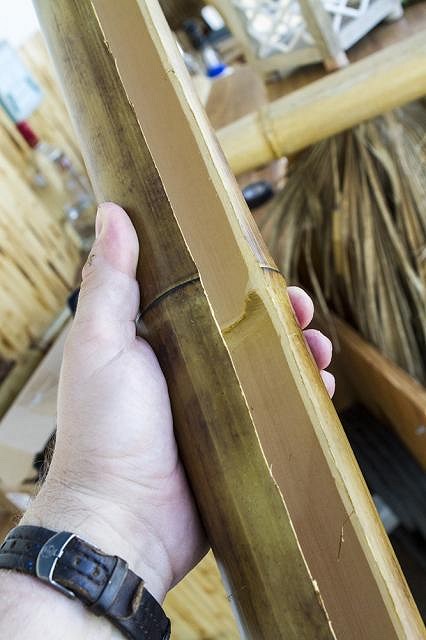
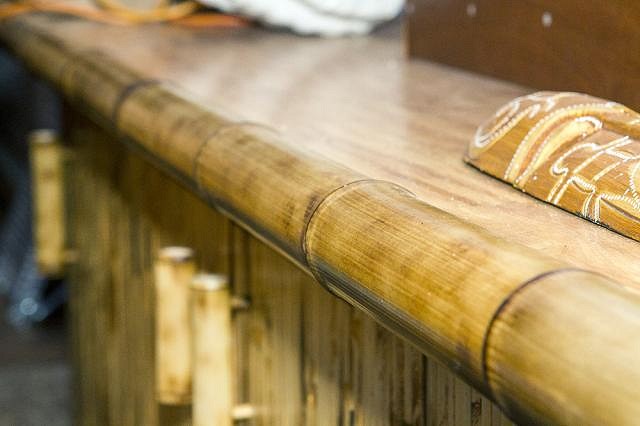
While waiting on the baseboards, I turned my attention to the back bar. I picked up some 3-inch moso bamboo culms from Bamboo Branch in Austin and torched them. Took a bit more effort than the smaller bamboo I'd previously heat treated. Then I used masking tape to lay out the jig saw cut I had to make so the culms would fit as edge trim on the back bar. I used a small hammer to knock out the remaining nodes.
I used outdoor rated wood screws to attach them to the bar top (after making the appropriate mitre saw cuts for the corners). I used finish nails to attach the bamboo trim to my original tiki bar, and those have proven not entirely up to the task, unfortunately, which is why I went with the more obtrusive screws. I drilled larger counter-sink holes over the pilot holes, and after inserting the screw, filled in with wood putty. After it dried, I sanded it down and applied Minwax Special Walnut stain. It's not a perfect match, but I'll tweak it more in the future. The real downside is that the back bar trim looks so good, it puts my original tiki bar to shame. I finished that one before I learned about torching bamboo to bring out color and contrast, so at some point I'm going to have to pull it apart, sand the bamboo down and torch it to more closely match the back bar. Nothing is ever easy... :roll:
The siding on the patio is overlapping fibercement boards. This is durable but not conducive to applying flush baseboards or veneer. The siding boards are around a quarter inch thick, so I measured the angle (about four degrees) and ran some furring strips through my table saw. I attached these to the siding with outdoor screws, giving me close to a vertical surface onto which I can attach baseboards and veneer. Note that I coated the cut furring strips with Flood CWF-UV so they don't rot out from under me. They won't be directly exposed to the elements, but still.
I attached the baseboards with the ubiquitous outdoor wood screws. The gray screw heads really stand out, so I'm going to go over them with dark paint. I'm making the wall covering so that it can be easily removed/replaced if necessary, which is why I'm not covering them with wood putty. In case you wondered. I also routered out a slot half an inch wide and an eighth of an inch deep along the top rear of the baseboard. You'll see why next.
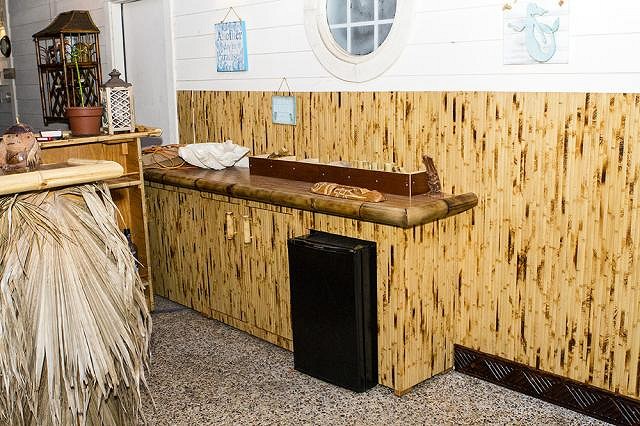
The tambour panel slips into the groove in the top of the baseboard, holding it in place without additional fasteners. I measured and cut the bamboo tambour panel to size, then did a test fitting. I'm glad I did. The bamboo slats are so thin that the panel bulged out in the middle. To compensate, I added an additional furring strip in the middle, in addition to the one at the top of the tambour panel.
I then stapled the tambour to the furring strips, taking care to place the staples between the vertical slats. This is the way I clad the back bar in tambour, although I used a lot of glue in that as well. I didn't use glue for the wall. The siding made that impractical. Eventually, I plan to go over the staples and disguise them with tan paint, but in all honesty, they not really noticeable unless someone's looking for them (of course, I can't help but see them). But aside from that, I'm happy to report that it's starting to actually look like something.
Obviously, that siding doesn't mesh with what I've done thus far. I have woven bamboo board panels I intend to install on the upper half of the wall. I'm also going to router/carve middle trim pieces to divide the tambour and woven panels, but I intend to get a little more artistic with these beyond the alternating triangle patterns. No telling how long that will take. The existing porthole (which we thought cool when we moved in ) is looking uglier and uglier every day, so I'll have to tackle that sooner rather than later. Unfortunately, it's quite large, so there are few fake or salvaged portholes available that are also affordable to replace it with. This will require some creativity, I'm sure. As always, I have a more thorough write-up, along with more photos, on my blog. [ Edited by: Prikli Pear 2017-06-14 13:46 ] |