Tiki Central / Other Crafts / Pele Tiki Mug - Molding - from Kilauea Cove
Post #777867 by bobtiki on Sat, Jul 15, 2017 12:32 PM
|
B

bobtiki
Posted
posted
on
Sat, Jul 15, 2017 12:32 PM
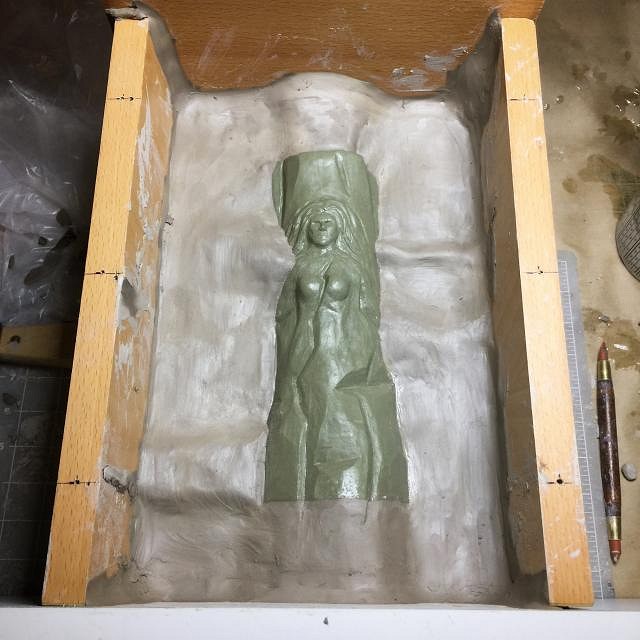
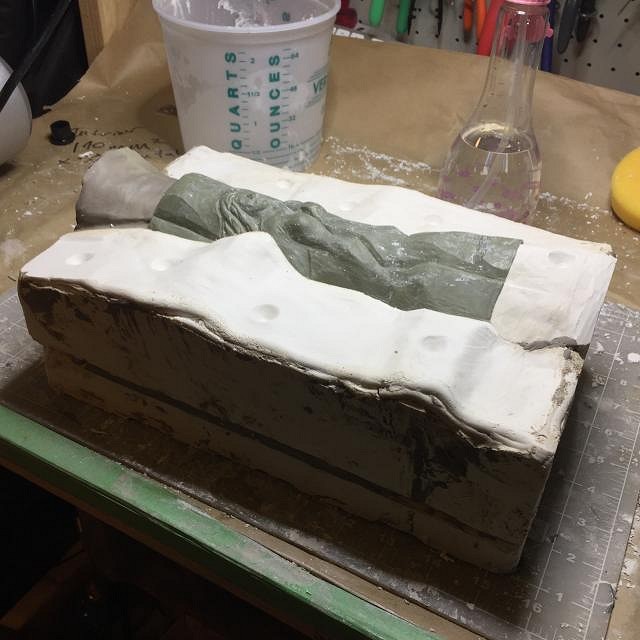
This week I've been pouring the plaster mold for the mug. First I put a wall of water clay around the mug to wall off the first piece of the mold. The wall is a bit of an irregular shape because there were some potential undercuts in Pele’s hair I was trying to avoid:
The very first piece was made with some older pottery plaster that had been in the workshop for a while, and it must have absorbed some moisture, because the plaster reaction kicked really fast, and it started getting to the thickness of sour cream halfway through my pour. It seemed like I had covered the surface of the sculpture before that happened, though, so I decided to move forward. I could always re-pour that piece once the others were done.
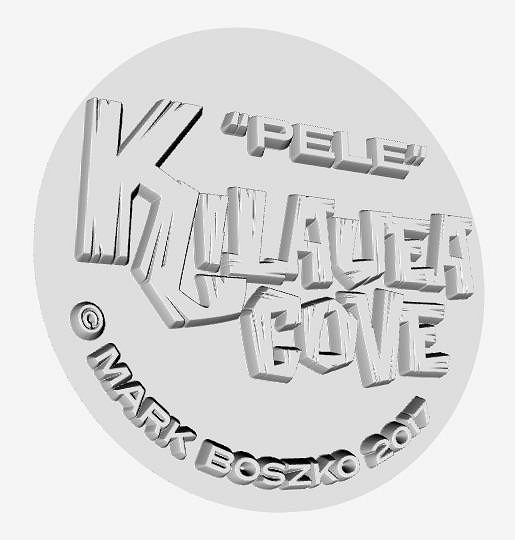
After pouring the four walls, I was ready for the base. I hadn't sculpted any detail in the base of the original sculpt, planning to address it when it was time to pour the last piece of plaster. I designed a 3D model of the Kilauea Cove logo and some other text.
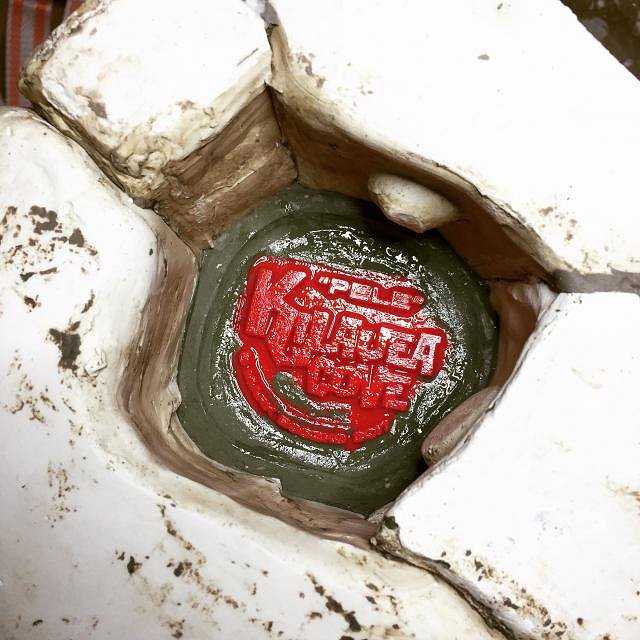
I then used a 3D printer to print a dimensional version of that model, and embedded that in the base of the mug. I have an FDM printer, which stands for Fused Deposition Modeling — basically it melts thin filaments of plastic and draws a layer at a time, building up the layers vertically. When you 3D-print this way, you end up with small ridges on the side of the model that are a little rough (at least on my printer), and would have made it hard to mold cleanly, so I used a resin called XTC-3D to help smooth out the edges and blend it into the base of the mug — which is why it looks so shiny in this photo:
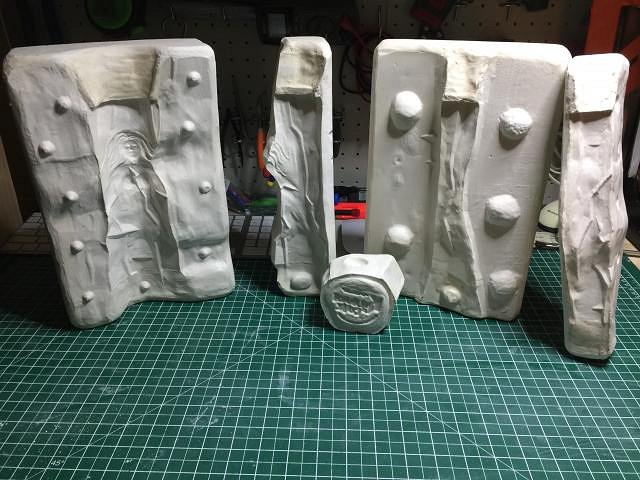
After that, I popped off the front piece of the mold, covering the Pele figure, to see how the sour cream plaster had fared. It was surprisingly not bad! But I decided to re-pour it anyway, to avoid having to clean up a few small bubbles, and make the mold surface cleaner. The original sculpt wasn't damaged from the mold, and required minimal clean-up to prepare for the re-mold.
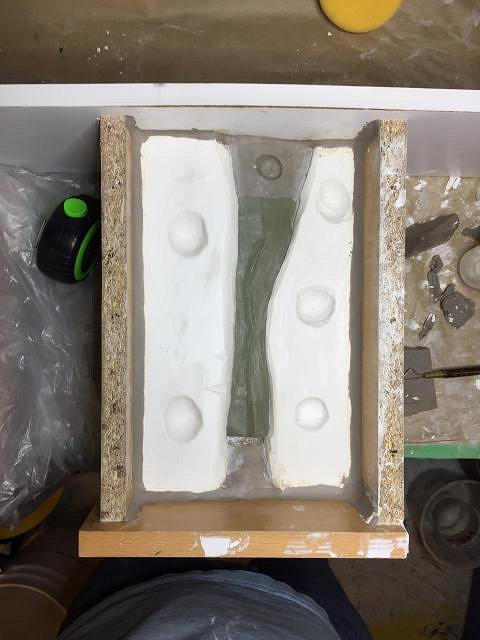
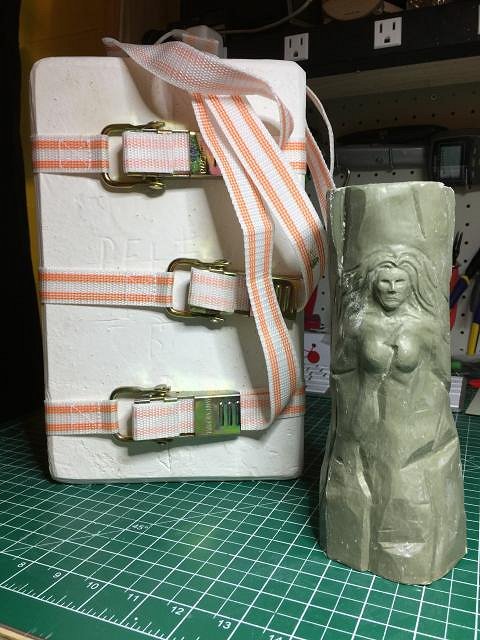
One of the side pieces also poured a little thick and there was a little water clay stuck in the edge that I didn't get out, so there was a thick gap between mold pieces right in Pele's hair. I re-poured that side piece too, and the match is much better now. I might not have bothered if I wasn't going to be making 75+ of these. Just trying to avoid more clean-up on the casts. After a little clean up, here's the entire finished mold! Now to just let it dry for about a week, and then I can start casting mugs out of it. :D
While that's drying, I need to work on some test tiles this week so that I can fire a few things next weekend. Oh, did I mention I bought a kiln?! :o Found a real beaut on Craigslist for only $150, and all it needed was one replacement coil, so at least now I can do some of this at my house, instead of carting them off to be fired elsewhere. So excited. :D Feeling pretty good about my progress, though. Experienced folks: See anything I could have done better? @bobtiki on TweetFace, et al. [ Edited by: bobtiki 2017-07-15 12:43 ] |