Tiki Central / Home Tiki Bars / Lagoon of Mystery
Post #780467 by Prikli Pear on Tue, Oct 10, 2017 10:59 AM
|
PP

Prikli Pear
Posted
posted
on
Tue, Oct 10, 2017 10:59 AM
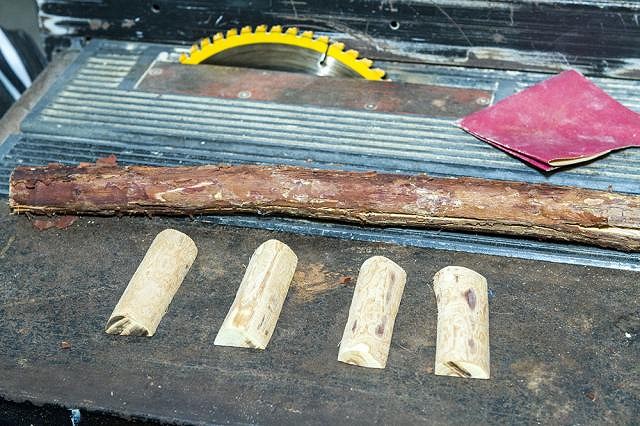
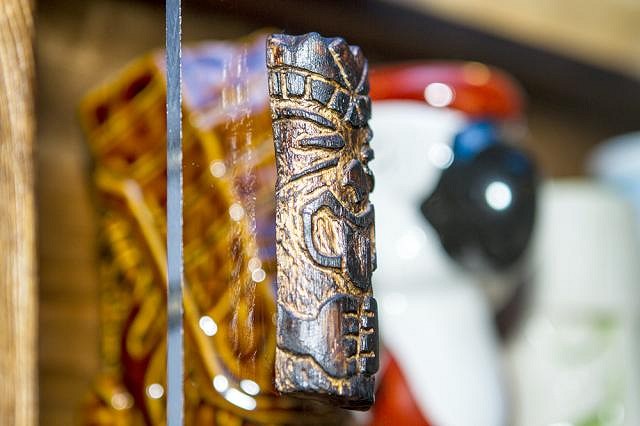
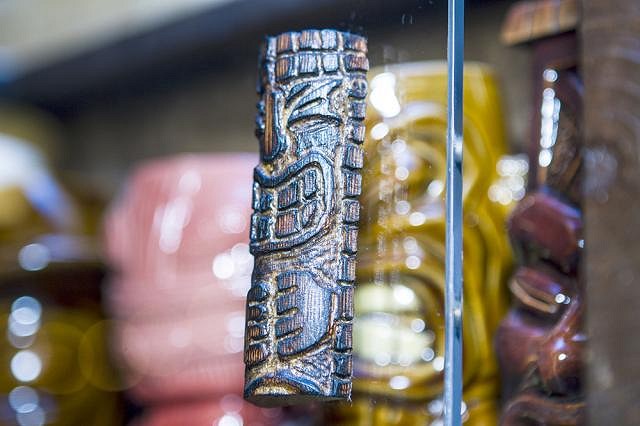
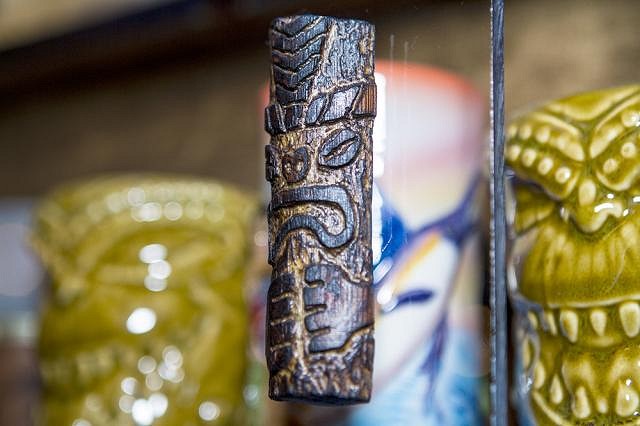
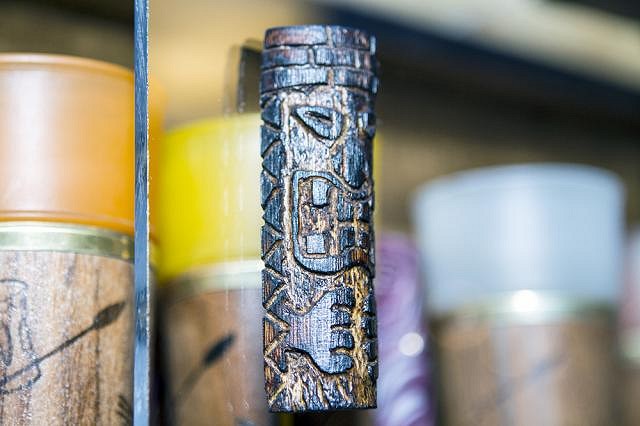
I had one remaining challenge. Those plexiglass doors slid open and shut just fine, especially once I sprayed the grooves with furniture wax. But fingerprints showed up readily. Fingerprints are ugly. I didn't want to have to spend all my time cleaning the doors, so I needed handles. I looked at building supply and home furnishing stores for something appropriate, but nothing seemed right. Then I thought to myself, "Why not make your own?" And that's what I did. I had a pine branch in the garage I'd picked up during one of my son's campouts last fall. I had a vague notion I'd carve something into it at the time, but I had no idea what. I cut two 3.5" sections from it, then split those lengthwise into halves. Then I ran then over my power sander to strip away the bark. Looking back, I should've sanded more to strip away all of the cambium as well, but live and learn.
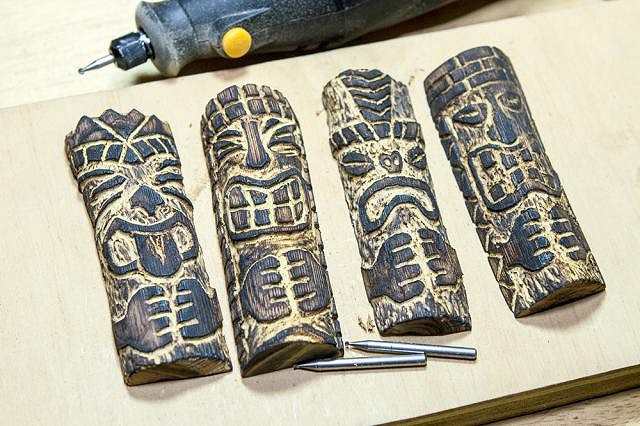
I took a pencil and sketched tiki faces on them. They're mostly inspired by Hawaiian tikis, but I mixed and matched different design elements and added some interpretations of my own. Alas, I don't seem to have taken any photos of the pencil sketches. They didn't last long once I attacked with the Dremel. This is where I found that the cambium fuzzed up and made a brittle, splintery mess. It was really hard to see what I was doing with that going on. Fortunately, all of that cleaned up nicely once I scorched them. Then, of course, came the obligatory "Special Walnut" stain and spar urethane coating.
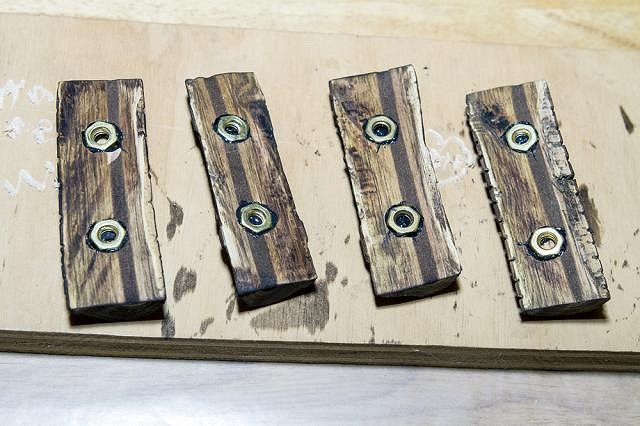
I wanted them attached to the plexiglass doors as a floating mount, so that meant more drilling. I cut out two holes in each tiki handle deep and wide enough for a brass nut, then set them in place with a dab of JB Weld epoxy. On a couple of these the epoxy oozed into the center, and I had to Dremel it out once it dried so the screw would fit properly.
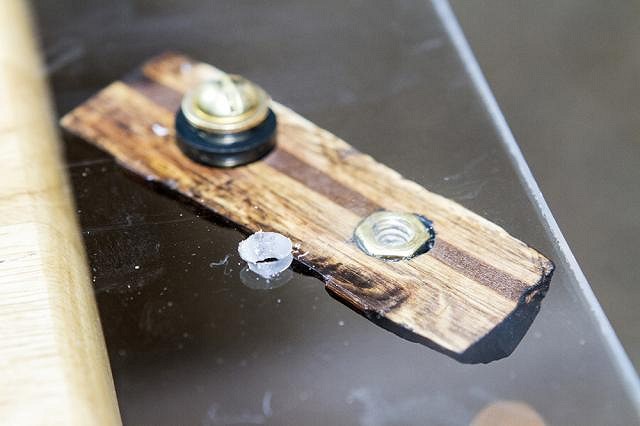
I drilled through the plexiglass with a bit large enough to accommodate the screw. Drilling plexiglass was challenging, because although it's soft, it'll melt if you drill too fast from friction. That doesn't sound terrible, but it slows the drilling and gums up the bit. So I had to drill through it like I was Goldilocks--not to fast, not too slow, not too hard, not too soft. Once I got the first hole through, I attached the handle using a rubber washer and brass washer on either side of the plexiglass. I recentered to make sure the original dot was still valid (it wasn't always) then drilled the second screw hole.
And here they are, in position and operational:
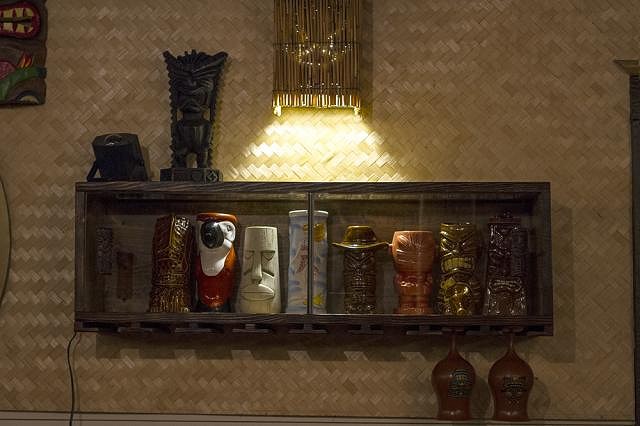
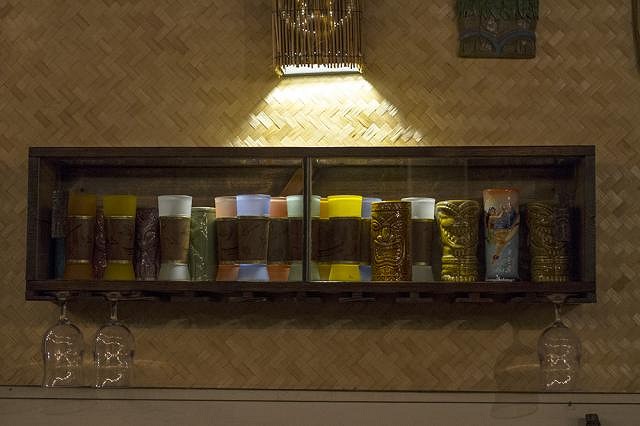
And the two display cabinets, under normal lighting conditions (tiki mugs sold separately).
That's all for this episode of the Lagoon of Mystery build-along. A more extensive writeup, with more extensive photos, may be found on my blog. As always, thanks for the encouragement and inspiration! |