Tiki Central / Home Tiki Bars / Lagoon of Mystery
Post #781726 by Prikli Pear on Tue, Nov 21, 2017 7:50 AM
|
PP

Prikli Pear
Posted
posted
on
Tue, Nov 21, 2017 7:50 AM
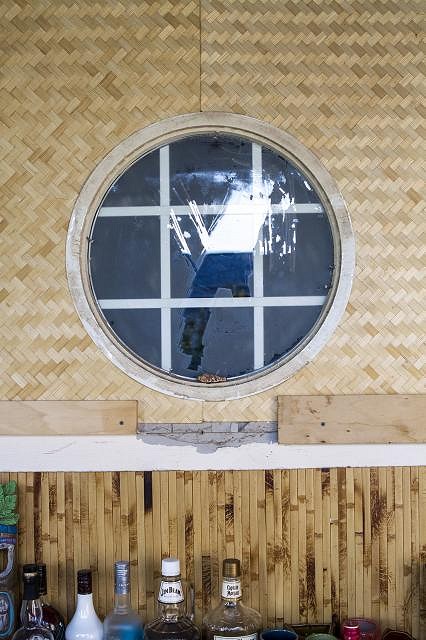
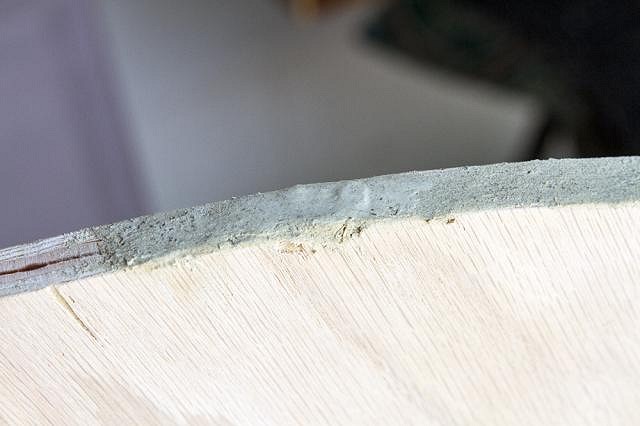
Time to bite the bullet. I've been avoiding that damn porthole window for the better part of a year because I knew it'd be a PITA to deal with. We thought the round window cool when we first moved in, but as I upgraded the patio, it looked shabbier and shabbier. Ideally, we'd have replaced it with an actual, for-real salvaged ship's porthole, but 1) the window's 31" across, which is HUGE for a porthole, 2) the few that exist are crazy expensive and 3) it'd be too heavy for the wall (at least for my comfort). So that left making one. Which I didn't want to do, because "cheap plywood painted in a half-assed attempt to look like metal" was the absolute last thing I wanted in my tiki bar.
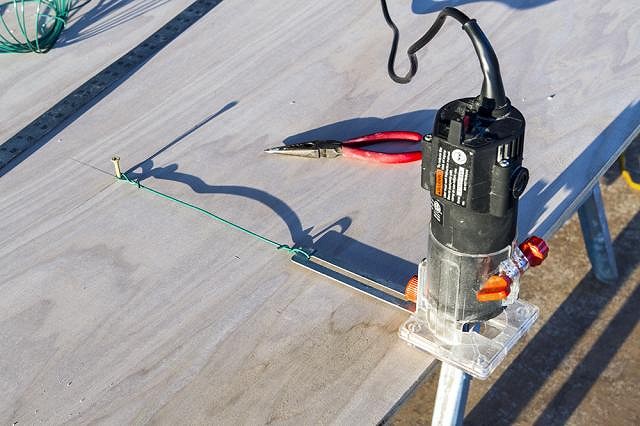
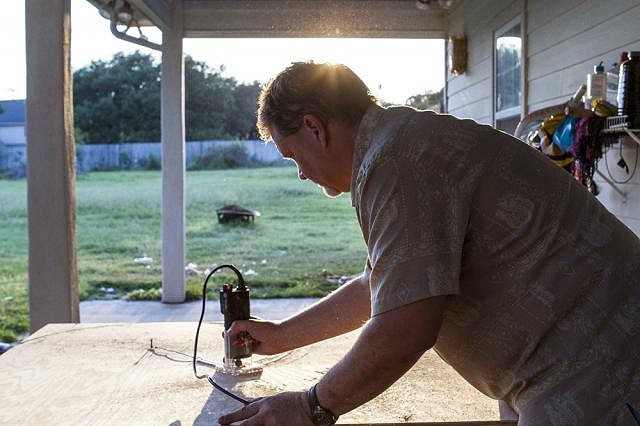
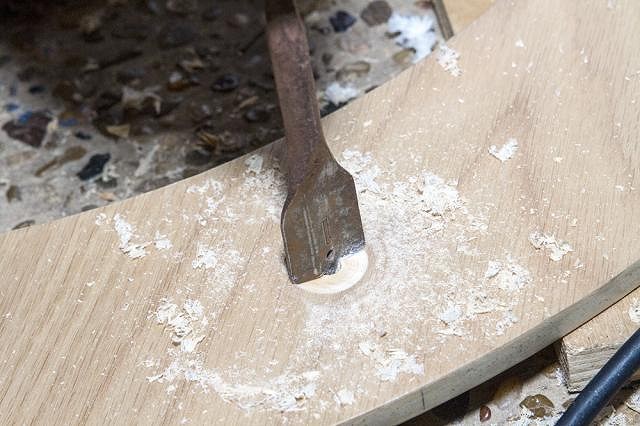
I got a nice piece of 4'x4' oak plywood. That was my first mistake. I thought the hardness of the oak would be preferable to pine or spruce, but I hadn't counted on the aggressive grain of the oak. Some routers come with a circle-cutting attachment, but these are only good for small circles of less than 12" diameter. As you can see, I came up with a highly technical substitute.
The Wife is an excellent photographer. She can even make it look like I know what I'm doing. All that's missing is a Wile E. Coyote "Genius At Work" sign.
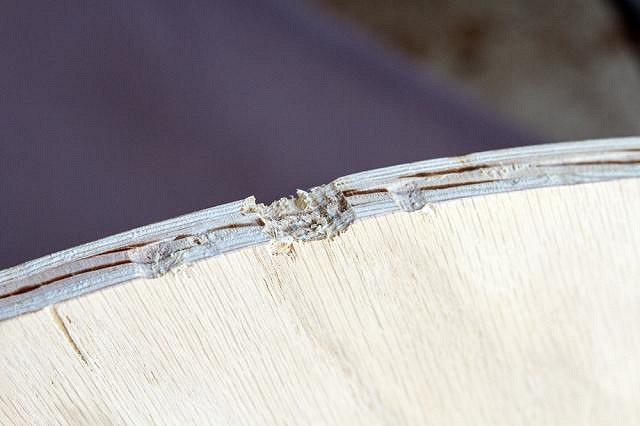
Another consequence of the hard oak--the router bit snagged and jumped repeatedly despite my best efforts, gouging sections of the wood. I have a hard time believing this would've happened with softwood.
I repaired the marred surfaces with basic wood putty. Had I been smart, I'd have coated the entire surface with the stuff. I'm not smart. As it was, the repaired sections sanded down nice and smooth, one of the few elements of this particular project that went as planned.
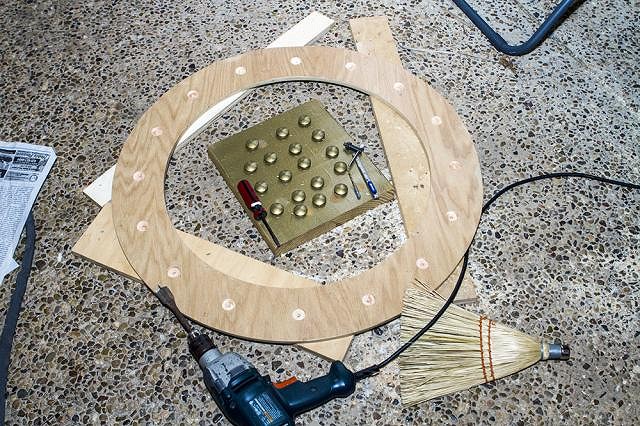
What's a porthole without rivets? A big wooden donut is what. To fake the rivets, I picked up several packets of 1" wooden mushroom buttons from Lowes. Then I marked the cardinal points on the wooden donut and drilled 1" holes in the center. Then I drilled four more holes at the quarter points. I'd hoped to stop there, but eight "rivets" looked sparse. I doubled it up, and finished with 16 rivet holes. That looked a lot better.
Then I started applying sanding sealer. I hadn't worked with sanding sealer for more than a decade, but I remembered it building up more quickly than this stuff did. The mushroom buttons smoothed out nicely, and I was able to paint them metallic brass early on. They looked good. The big wooden donut? Not so much. Apply sealer, sand, repeat. Over and over I did this, for several weeks. Some parts of the wooden donut got glossy smooth, which is what I wanted. Others, the grain stayed stubbornly visible. This became my personal Sysiphean stone. Ugh.
|