Tiki Central / Home Tiki Bars / Lagoon of Mystery
Post #786908 by Prikli Pear on Thu, May 17, 2018 12:12 PM
|
PP

Prikli Pear
Posted
posted
on
Thu, May 17, 2018 12:12 PM
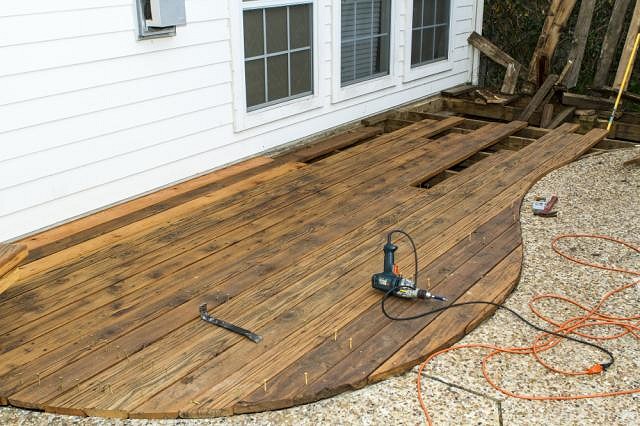
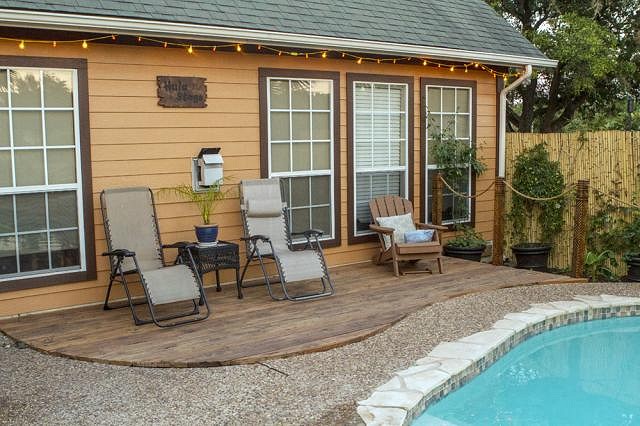
Our house has a deck that extended all the way to the fence I rebuilt with bamboo (see link above). The deck was of western red cedar, which is naturally decay-resistant and should last indefinitely if taken care of. Previous owners did not take care of. The deck had turned a dull gray, had water and UV damage and was occasionally splintery. Problematically, some of the nails were working themselves loose, to the extent my son cut his foot badly on one last fall. Clearly, something had to be done, so in January I began taking the deck apart to get an idea of what it would take to repair it to a usable state. A great number of the planks turned out to be rotten. Mold and fungus had turned sections brittle and spongy. Some sections literally crumbled as I pulled them up--it's a small miracle that the entire deck hadn't collapsed. So, this is what I did: I took each and every plank, determined what wood was salvageable and used a circle saw to cut off the rotten stuff. Then I took a belt sander and sanded down the UV-damaged wood, and sanded away any surface mold and fungus. Then I saturated the "clean" wood with Mold Armor. Once it dried, I applied several coats of Flood UV weathersealant.
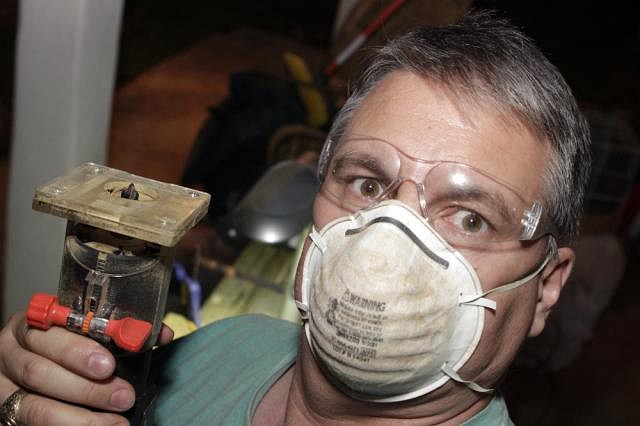
Here's where I pause to offer this public service announcement. If you ever have to sand wood that has mold or fungal issues, wear a breathing mask. Seriously. When I started this, I took one small section of wood to use as a test to see if any of it could be salvaged. I was outdoors in a well-ventilated area. The wood was in generally good condition, with just a little bit of mold. No problem, I thought. This'll take five minutes, I'll be fine. Wrong. I was ill for several days after, terrible congestion, watering eyes, headaches... it was pretty unpleasant. Lesson learned. I did not sand anything else without a mask on--safety glasses, either. I went through half a dozen masks. Look at the one below--see how brown that mask is? That's all the crap that didn't go down into my lungs.
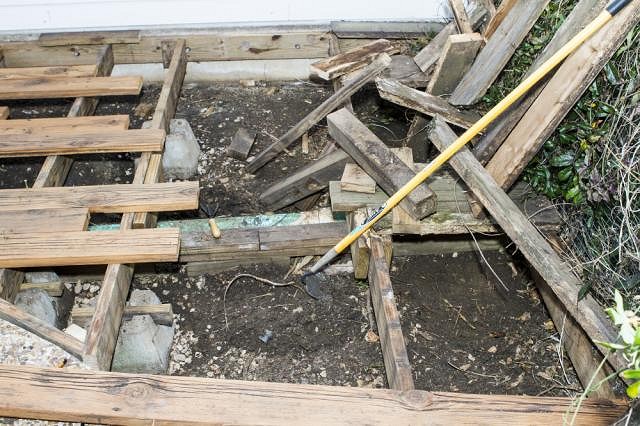
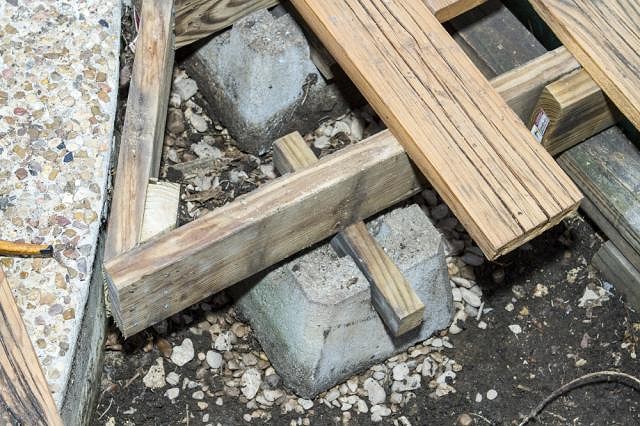
The more I pulled up, the grimmer it became. At some point, the previous owner effected some "repairs." Super-half-assed repairs. From what I can surmise, the concrete footers had subsided, resulting in a sagging deck. Rather than re-set them, the guy tossed them aside and piled up landscape timbers, 2x4s and 4x4 posts to support the deck. Honestly, it was a mess.
I had earlier decided the rebuilt deck would not extend all the way to the fence, and that was a fortuitous decision, because not nearly enough good wood remained to extend that far. In fact, I had to buy several new planks to even fill in the shortened deck. After ripping out all the cross-beams and ill-advised wood pile-ups supporting the deck, I leveled the ground then built up a layer of rocks/gravel as a foundation for those previously-discarded concrete footers. When I finished, I had a pretty solid deck frame in place.
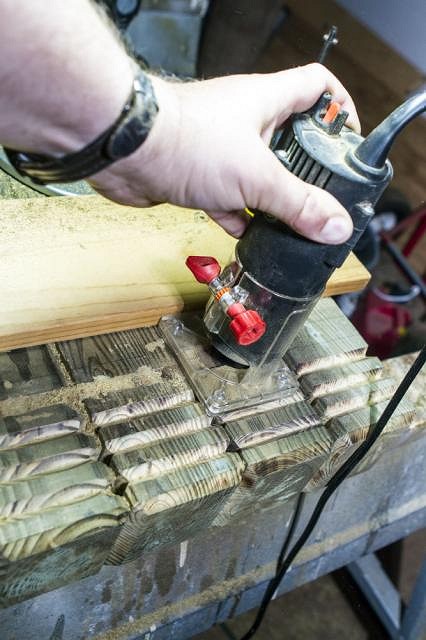
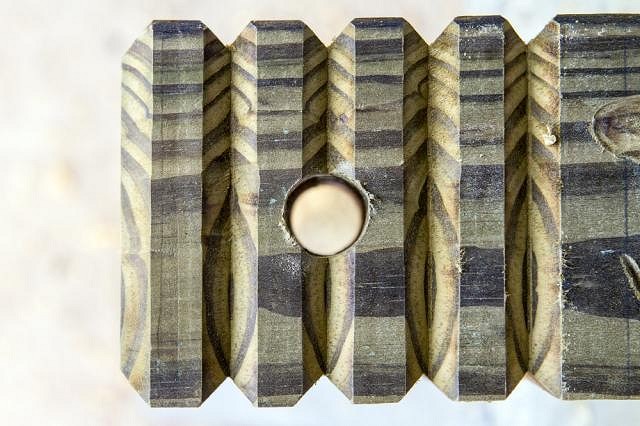
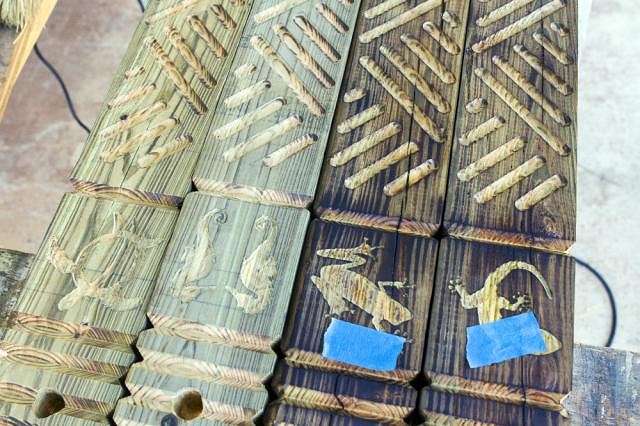
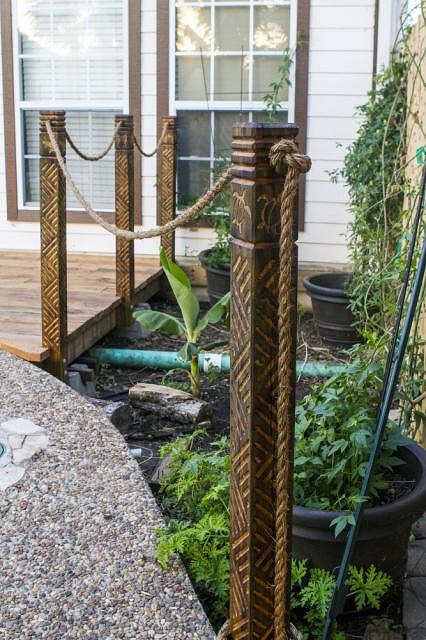
Now, for the railing. Initially I was just going to use some landscape timbers with rope wrapped around them, but insanity prevailed. Router work's fun, right? How about lots and lots of router work that'll take up a month of work when I'd originally planned for just a couple of days? Aces! I took two 8' long 4x4 posts (pressure treated) and cut them in half to make 4' railing posts.
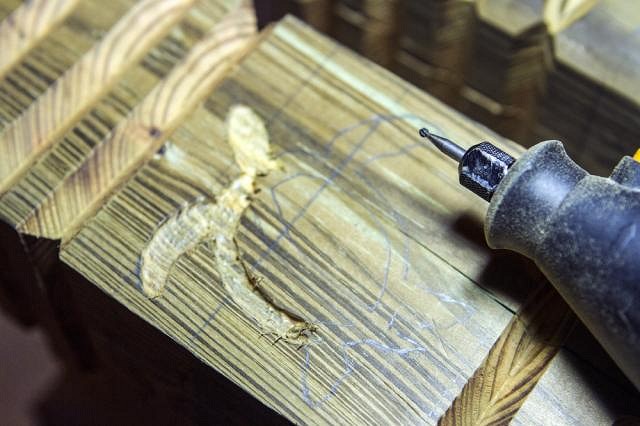
And don't forget detailed figures of sea turtles, geckos, sea horses and frogs that are small and detailed so they need to be carved out with a Dremel. That really makes the project go more quickly!
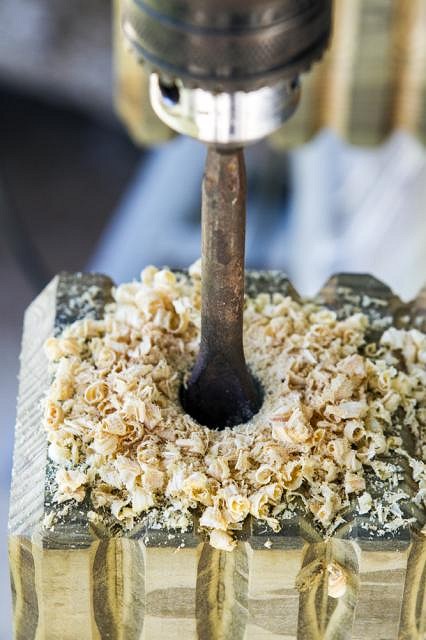
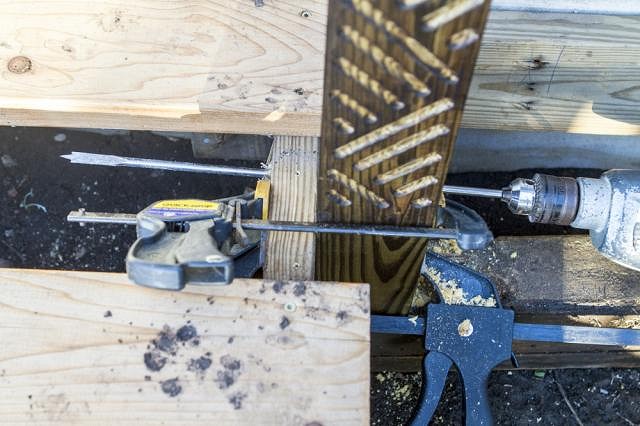
Note that when you plan to drill a 3/4" hole through each post for a rope, it's generally advisable to do so before routering out decorative V-grooves. That saves unnecessary complication. Ask me how I know.
Potential disaster did not manifest. Thank goodness. Note with all the drilling and routing, I work my breather mask. They don't use arsenic in pressure-treated lumber any more, but regular sawdust is bad enough to breathe in. After my experience with the mold dust, I wasn't taking chances.
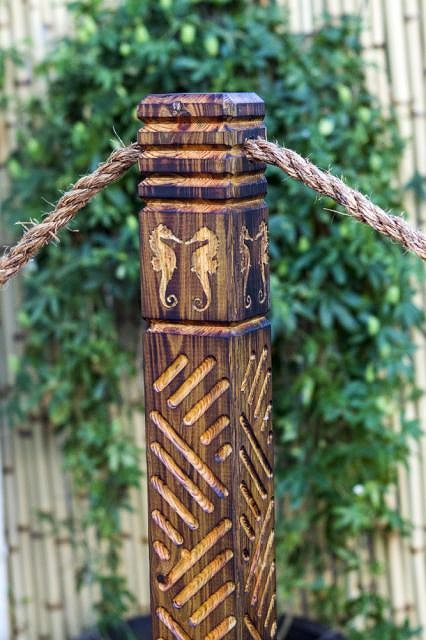
Pressure-treated wood is a funky greenish color, so I lightly scorched the posts with my little torch (not enough to really carbonize anything) to increase contrast a little and enhance the grain. Then I applied a coat of Flood UV (natural wood tint). This wasn't so much for protection (although there is that) but to help the posts blend more with the deck. They definitely looked better once I finished staining.
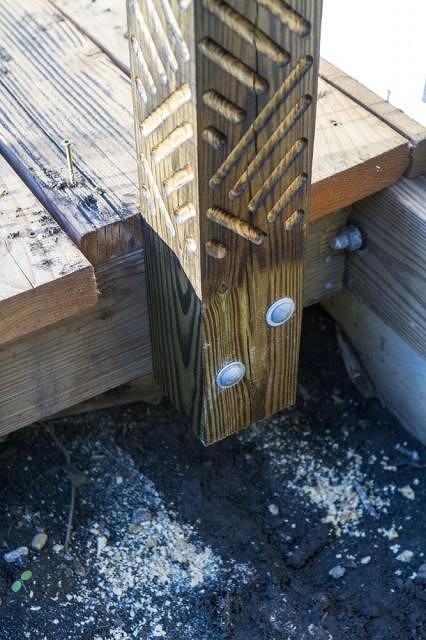
I positioned the posts, using a carpenter's level to ensure they were straight. I held them in place with clamps while I drilled through the posts and deck support beam. Two holes per post.
I used 6" carriage bolts, with washers and nuts (Tighten! Tighten! Tighten!) to secure the posts to the deck. I used a jig saw to trim the deck planks to fit around the posts.
Then I ran 3/4" Manila rope through the posts. Note that 3/4" Manila rope is significantly cheaper than 1" Manila rope, and looks just as good.
Honestly, I was surprise at how closely the final product matched the vision I had when I started.
There was just one remaining problem: White walls! The dull white/graying paint looked awful, so first I repainted the trim around the windows with Olympic One (Fudge Truffle) and the wall itself with the same type of paint (Doeskin or somesuch). I also took a piece of scrap wood and routered out that "Hula Stage" sign, because says tiki more, "Wooden deck" or "Hula stage"? Presentation is everything, amirite?
We're landscaping that area between the deck and bamboo fence. Right now there's a small banana, several citronella plants and some pots with passion flowers in them occupying the space, with landscape fabric and mulch down. I have plans to add more hardy tropicals and tiki decor, but that's a longer-term project. I'm just jazzed that was once pretty much an eyesore and foot hazard has now become an aesthetic plus for the Lagoon of Mystery. As always, there are more photos and descriptions (plus a short video) at my blog for those who can't get enough of my blather. ~Jayme Lagoon of Mystery [ Edited by: Prikli Pear 2018-05-17 12:13 ] |