Tiki Central / Home Tiki Bars / Lagoon of Mystery
Post #788278 by Prikli Pear on Tue, Jul 3, 2018 8:43 AM
|
PP

Prikli Pear
Posted
posted
on
Tue, Jul 3, 2018 8:43 AM
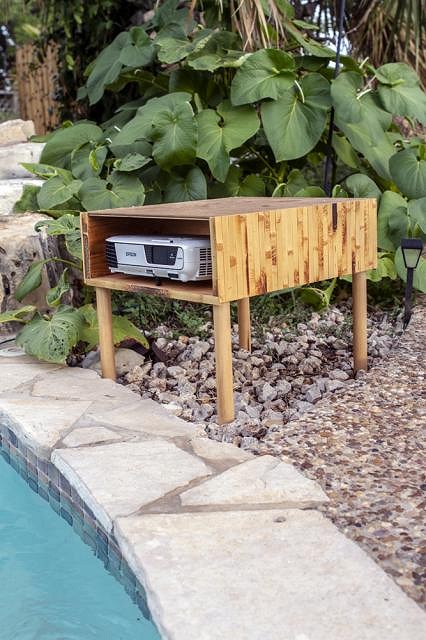
Work on the Lagoon of Mystery continues, but it's not terribly high-profile. These are projects that need to be done to enhance the experience. Like everything, they're all time-consuming projects, some moreso than others. I'm going to start with one that, surprisingly, wasn't a convoluted mess. As I posted above, we throw a series of Dive-In movies every summer. Trouble is, the projector is set up near the pool. All the electrical is safely out of the way so that stuff falling into the water isn't a concern, but the projector is within the splash zone. Sometimes our kids can get a bit rowdy even with warnings, and a blast of water woudn't be good for the projector. So I did what I intended to do last summer: Build a projector box/table to protect it from random splashes. I put it together in just a couple of hours, and scrap makes up 90 percent of the build. Once I put on the bamboo tambour paneling on the side, it took on a MCM vibe and blends in nicely with the bar. It's got plenty of airflow and works well. When not in use for movies, it makes a passable side table.
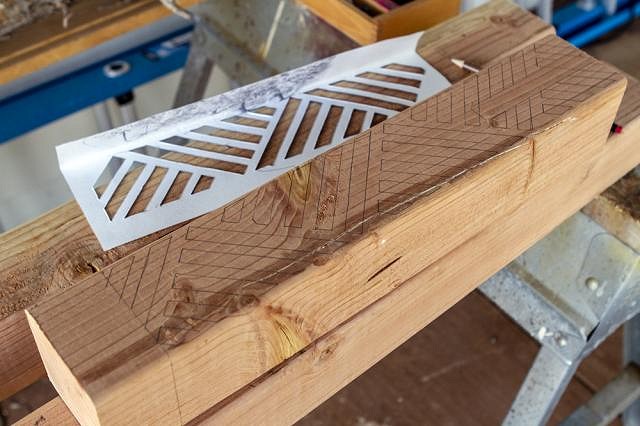
During the occasional shindigs we host, The Wife noticed guests will stand around, locked in deep discussion, but have no place to set their drinks whilst doing so. She's a professional photographer, and does a lot of weddings. "We need some upright cocktail tables," she said, noting that these are common at wedding venues and get a lot of use during the social hour. A quick search online revealed 1) that none of the commercially-available tables of this nature (which don't seem to have a uniform name--cocktail table is more likely to turn up old Ms. Pac-Man games than anything else) are tiki appropriate, and 2) are affordable. So I decided to make my own. How hard could it be? Not terribly hard, but very time consuming. I picked up a 4x4 post and cut it into two 38" lengths, with a 20" length left over. I stenciled that alternating triangle pattern on them, partly because that will link them aesthetically with the rest of the bar, and partly because I already had the stencil available.
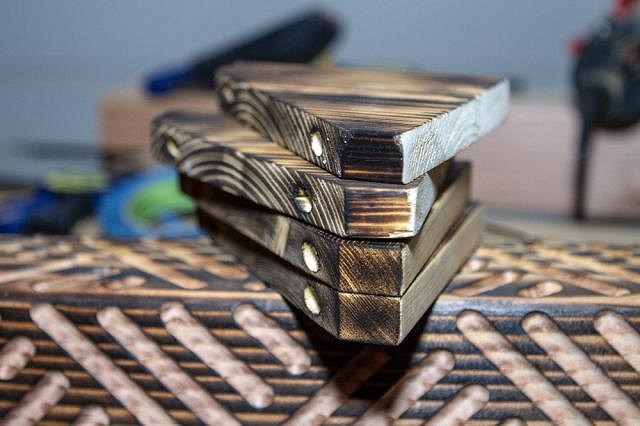
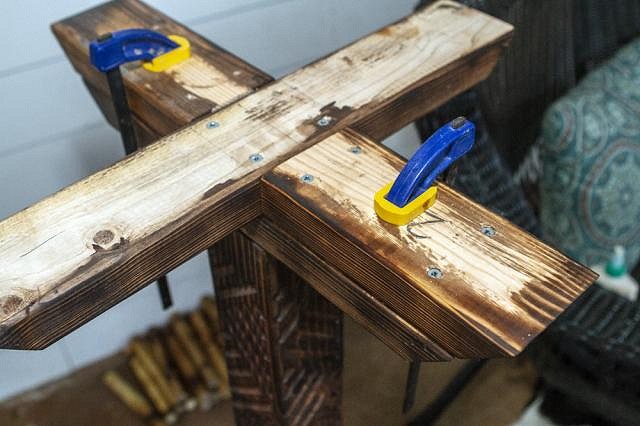
I routered the pattern out on the post/pedestal. Then I cut four triangular buttresses from a 1x6 board. I'll use these (plus pocket holes-with-screws) to attach the table top. Then I flame-treated everything. I normally hit it with a wire brush afterward, but this time I chose to leave the scorched wood untouched. Let's see how that turns out.
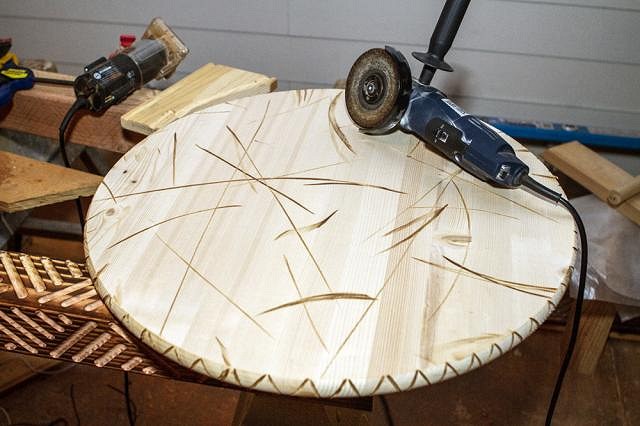
The table top is a 24" circular pine piece from Lowe's. I took the grinder to it to distress the wood. Then I lightly flamed and applied the wire brush to create the illusion of age. All the wood them got a coat of Minwax Special Walnut, and the distressed table top got a second coat of Minwax Dark Walnut for added contrast and deeper color in the gouges and grooves.
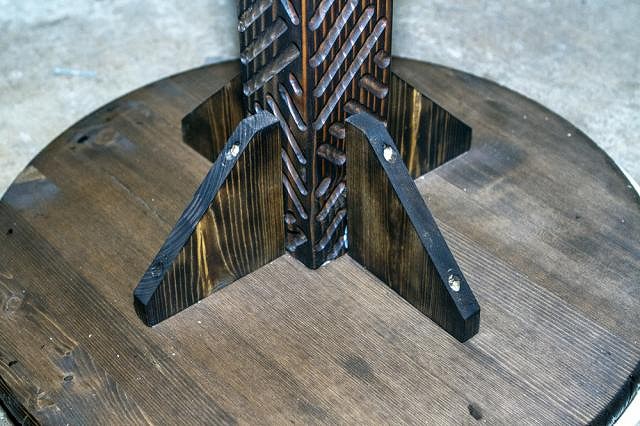
The base is pretty solid. It's made from two layers of 2x4, cut to fit crosswise. Each main cross piece is glued and screwed to the pedestal, then smaller pieces are cut, glued and screwed to the cross pieces to even everything out. It's a little clunky, but super-solid. These being outside most of the time, I thought that an effective approach.
I attached the table top to the pedestal with glue and screws through pocket holes in the pillar. Then I reinforced that with the buttresses I'd cut earlier, attaching those with glue and screws. The buttresses cover up the pocket holes in the pedestal.
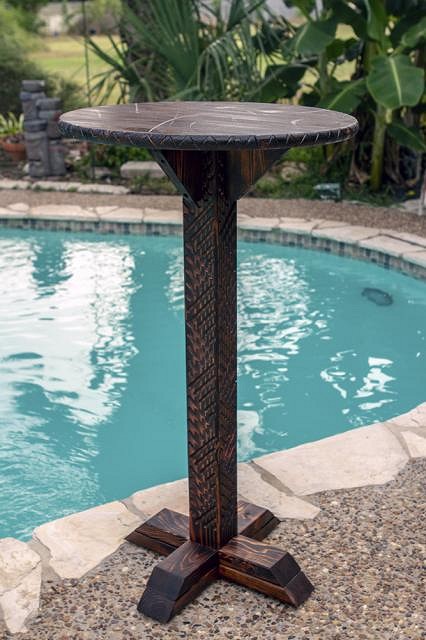
And the final product. I was quite surprised with how well it turned out. Even The Wife allowed that it was far nicer than she'd envisioned. I'm currently finishing up two more with the other wood pieces cut from the original 4x4 post. One will be identical to this, and the other, from the 20" piece, will be a short table for our rattan peacock chairs.
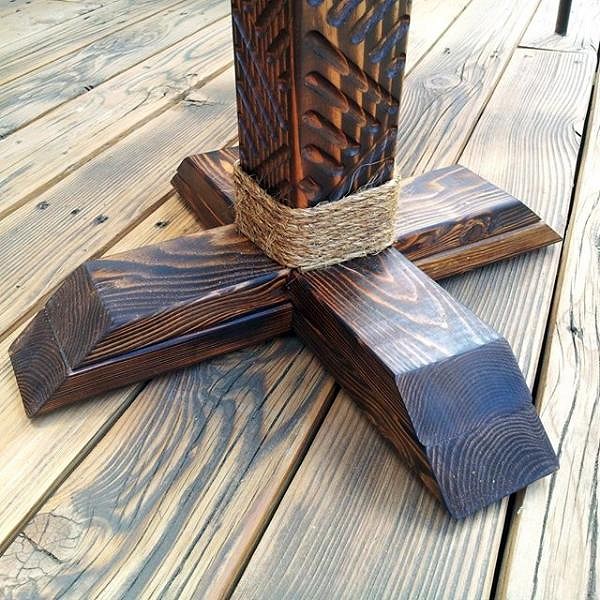
I didn't realize it until after I took the previous photo, but I forgot to apply the final piece of trim--Manila rope wrapped around the base. I think it's a nice accent.
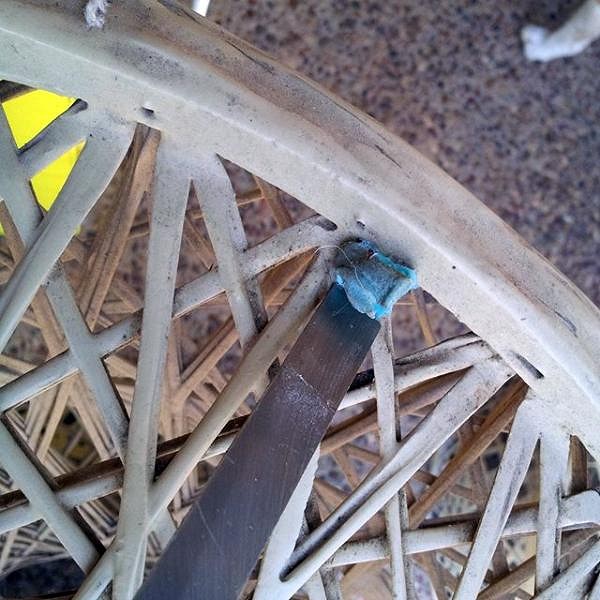
One more project before I let you go. It's an overlooked fact that my bar had no barstools. That's not been a huge issue, but still. Most barstools I've seen are either too expensive, not tiki enough, or I just didn't like. A couple of months ago, two vintage Russell Woodard spun fiberglass barstools showed up on Facebook Marketplace for cheap. Real cheap. And they were in the town I live. I saw them, but was unfamiliar with Woodard pieces at the time. They were listed as wicker barstools. I took one look at them and dismissed them as being fragile and on their last legs. It was Mike Hooker who messaged me and suggested I take a closer look, that he suspected they weren't wicker, but rather fiberglass. That changed the calculus considerably. Turns out they were indeed spun fiberglass, and a tenth the price these usually go for. I snatched them up. They were filthy, though. Not sure what they were used for, or where they were stored. It took me quite a bit of effort to remove all the caked-on gum, paint and glue globs. They were so grimy even power-washing struggled to remove some of the crap.
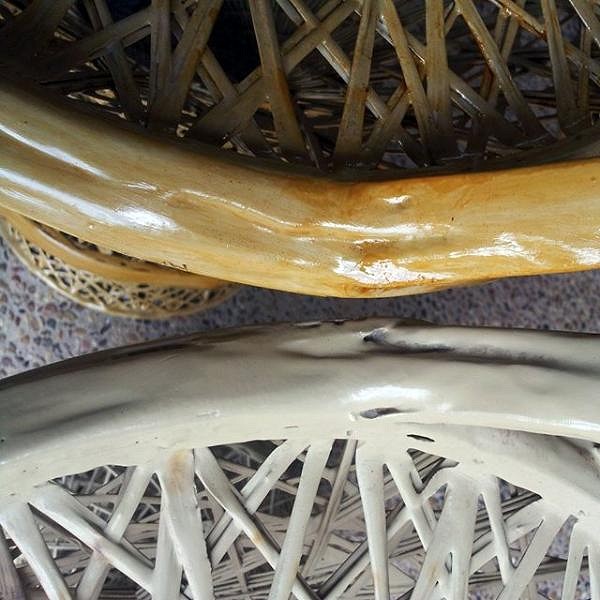
Eventually, I got them clean. The dull gray paint was super-ugly, and not tiki approved. This was a job for amber shellac!
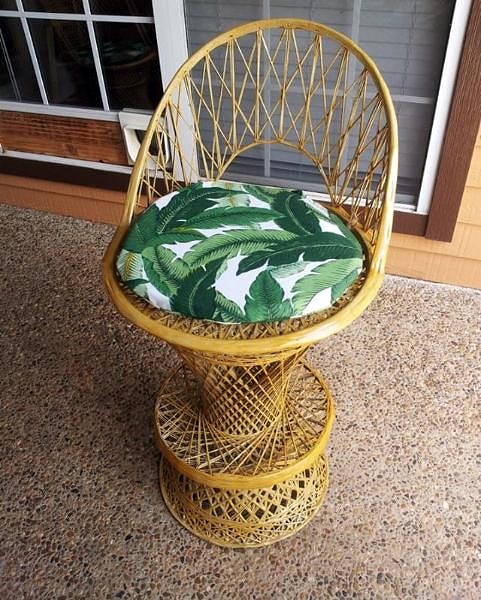
Amber shellac's not the easiest thing to work with, especially when it's super-hot out and the stuff dries on the brush as fast as you can apply it. But for giving something a tikified bamboo/rattan appearance, there's nothing better. The Wife sewed the cool tropical cushion with some outdoor fabric I picked up, and voila! we have a pair of MCM tiki barstools!
A more detailed writeup may be found on my blog. ~Jayme Lagoon of Mystery [ Edited by: Prikli Pear 2018-07-03 08:46 ] |