Tiki Central / Home Tiki Bars / Lagoon of Mystery
Post #794529 by Prikli Pear on Wed, Apr 17, 2019 2:17 PM
|
PP

Prikli Pear
Posted
posted
on
Wed, Apr 17, 2019 2:17 PM
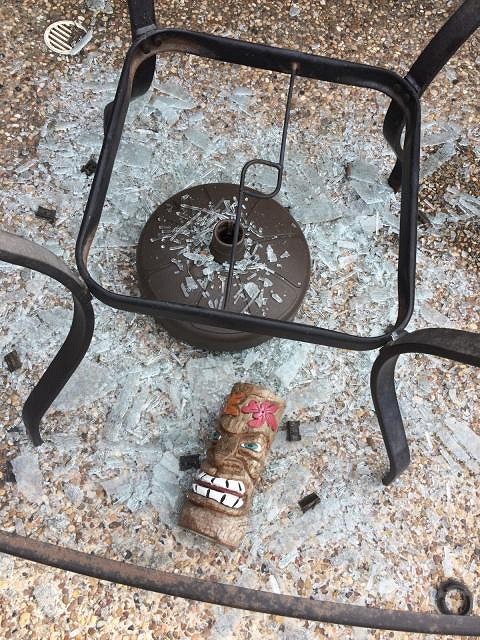
There's a reason why we don't allow glass in the Lagoon of Mystery. Last fall, a thunderstorm with gusty wind picked up our patio table via the big umbrella, then slammed it back down, shattering the tempered glass top. Glass pellets were everywhere, even the pool. It took far too long to clean that mess up. Afterward, we were lacking a table, and we used that table a lot.
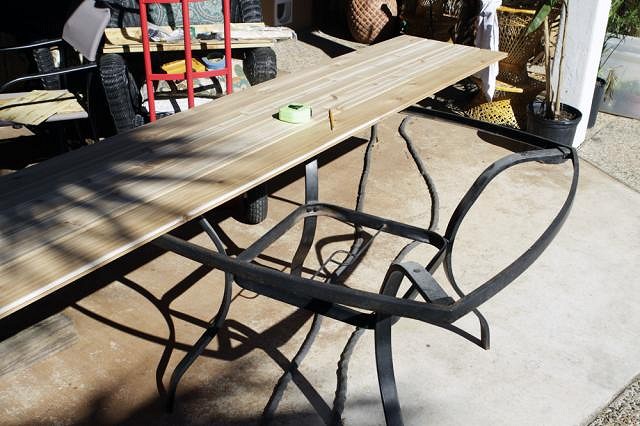
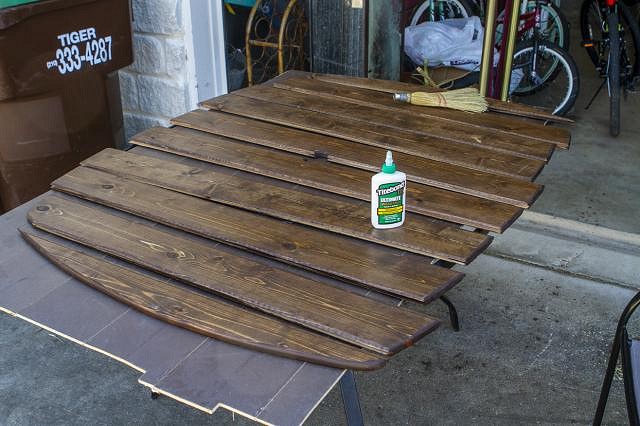
We weren't thrilled with the idea of shelling out a lot of cash for a replacement, so I did what I always do--figure out a slightly-less-expensive-but-way-more-time-consuming alternative. The table's metal frame remained intact, so all I needed was a new top. My primary concern was that the replacement table be shatterproof, with "filling into the tiki vibe" a close second. After some thought and price shopping, I settled on tongue-and-groove western red cedar planking. The tongue-and-groove would offer stability and the western red cedar is fairly light and resistant to decay.
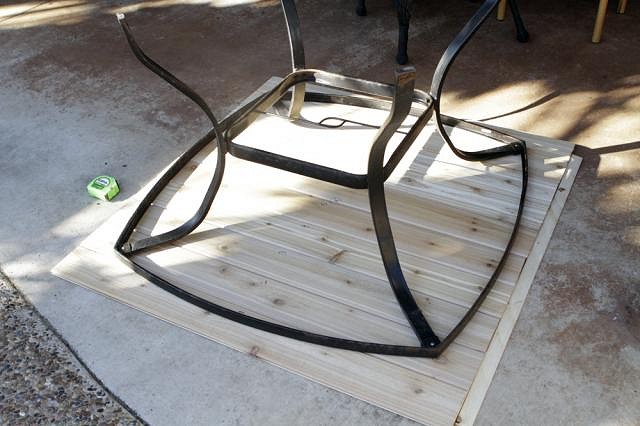
Since the cedar planks were 8' long and the table less than 4' across, I cut the planks in half then used a jig to trace a 2" (give or take) lip around the frame. The glass set within the circumference of the frame, but making the wood fit inside would be nightmarish. My solution would be to set the wood on top of the frame.
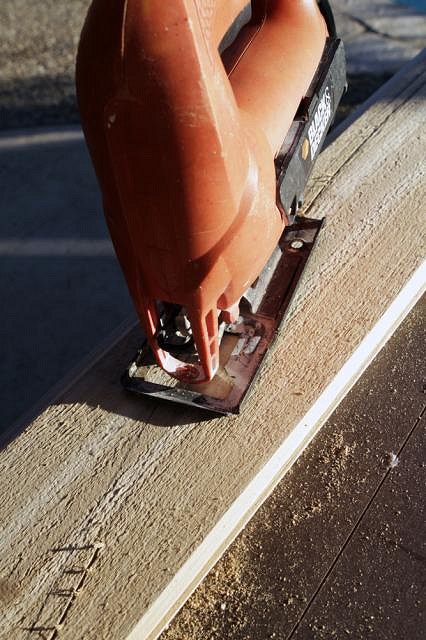
I cut the boards to shape with a jig saw, then used a router to bevel the edges. I learned from my porthole build that beveled edges make things look less "slapped together."
I stained the wood using Minwax special walnut, my go-to stain for most applications. Once dried, I applied several coats of Flood UV, because the table's going to be outside 365 and although cedar is decay resistant, it's not invulnerable.
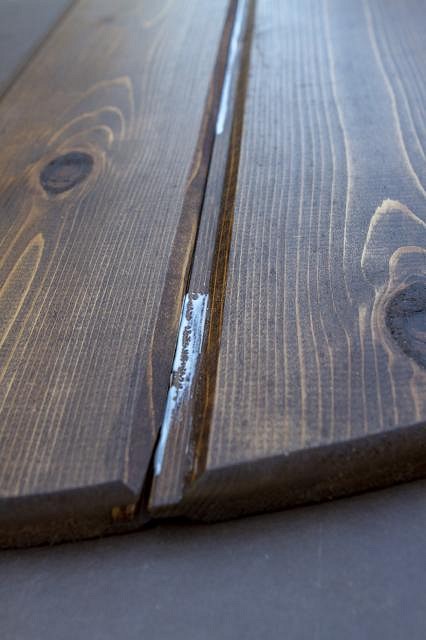
Next, I used Titebond III to glue the tongues into the grooves. Because the planks, when fitted together, were a lot looser than I was comfortable with.
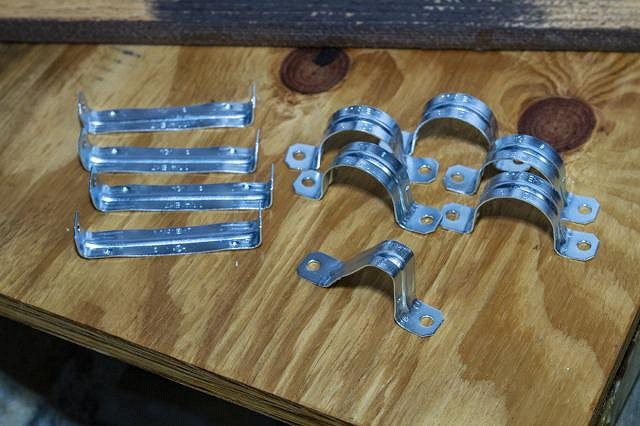
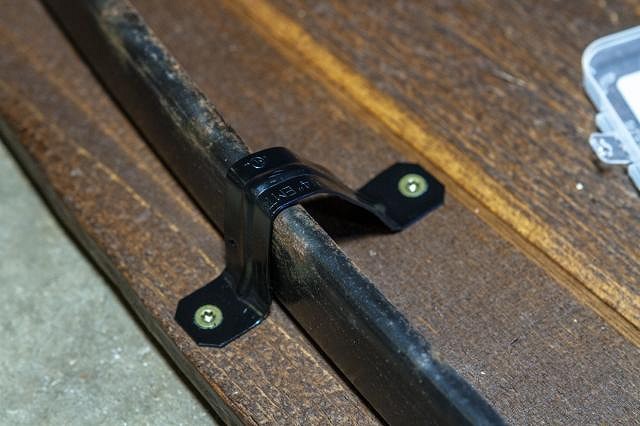
But now the $64 question: How to anchor the wooden top to the steel frame? I hit upon using brackets--conduit straps--to attach the top to the frame. The brackets didn't come in the proper shape, but they were easy enough to hammer flat, then use pliers to work them into the proper angles.
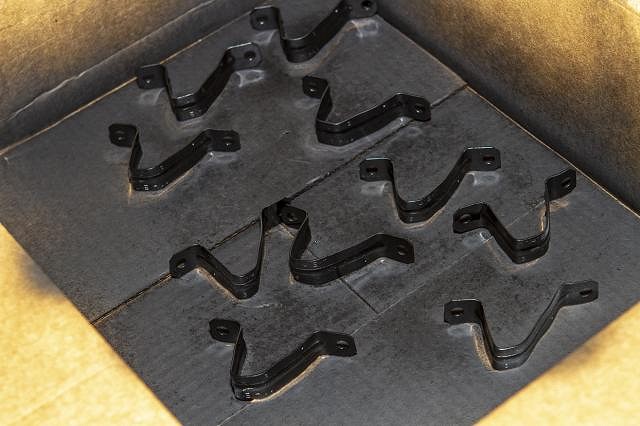
As I didn't want shiny silver metal (or even dull silver metal) attracting attention, I put the brackets into a box and spray painted them matte black.
Much to my surprise, my bracket scheme worked pretty well. Using a power drill, I quickly went around the table and had it solidly secured in no time. In fact, I moved a little too quickly--you can see some rust spots on the frame. I'd intended to sand those spots down and apply a new coat of paint. That would've been the responsible thing to do. But I just wanted to get the darn table fixed, so I skipped that part. Maybe I'll get back to it someday.
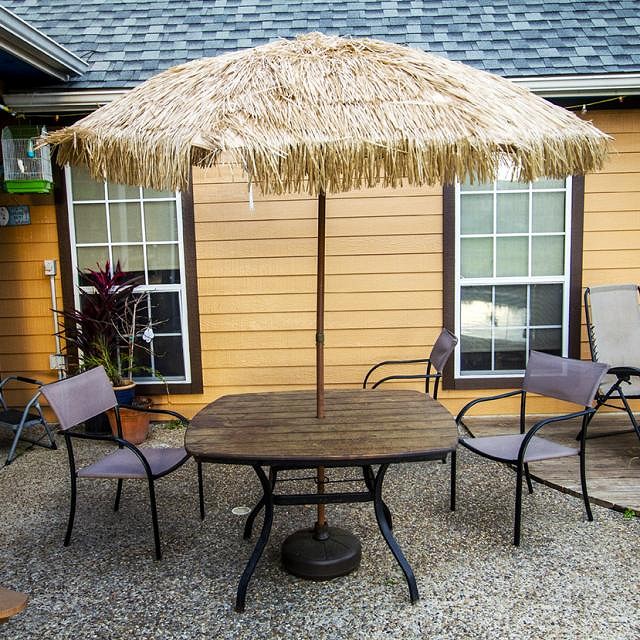
Once I got it back out by the pool, it only took a few moments to position the umbrella base and slot the tiki umbrella through the center hole. It turned out better than I expected, although the grooves where the planks come together seem to be dust magnets. This is more tangential to my bar build than most of my posts, but it needed to be done and someone might find something useful here. I've got more interesting stuff coming soon.
|