Tiki Central / Home Tiki Bars / Lagoon of Mystery
Post #794540 by Prikli Pear on Wed, Apr 17, 2019 9:31 PM
|
PP

Prikli Pear
Posted
posted
on
Wed, Apr 17, 2019 9:31 PM
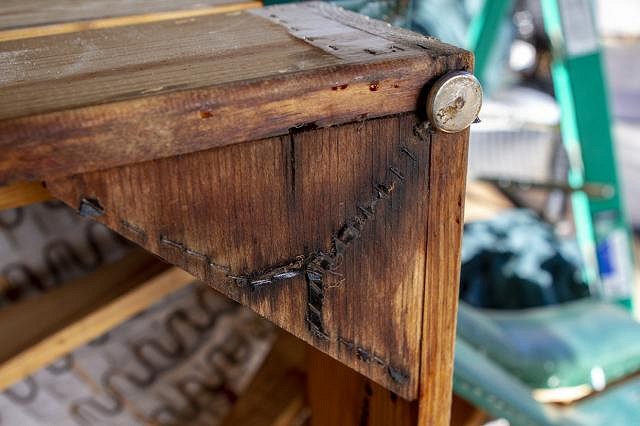
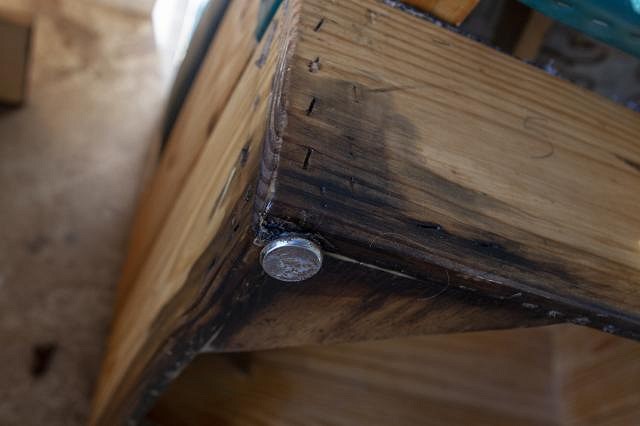
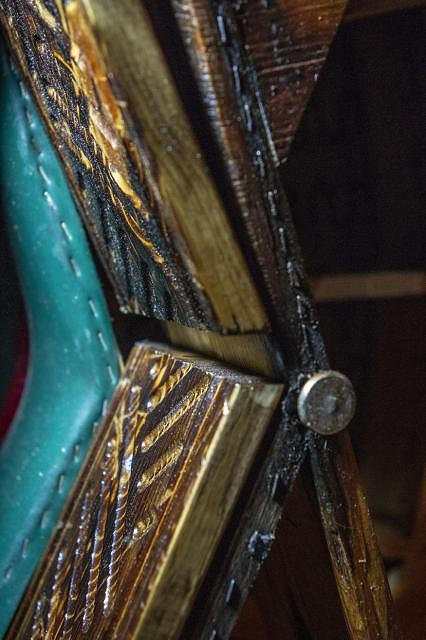
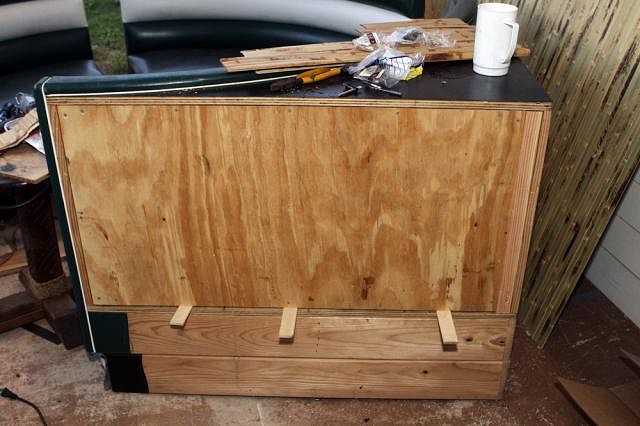
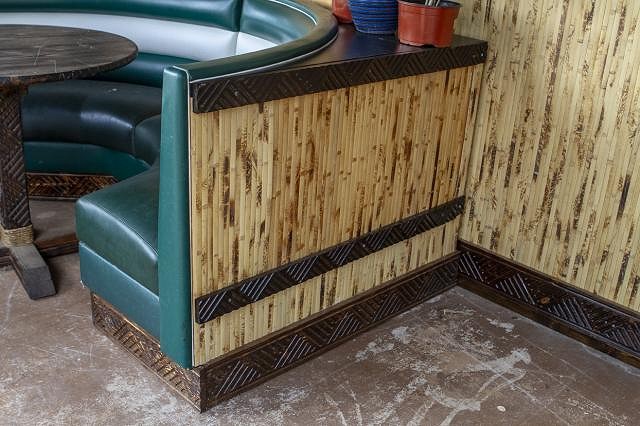
Here's where TikiSkip gets to tell me "I told you so." My booth I got from Fuddrucker's back in September? I made a mistake. A big mistake. Remember how nasty the booth sections were back when I got it? There was grease and grime and food particles all over that I spent a day hosing off and scrubbing down. The bottom most section of the booth had old, black vinyl covering it, and at the time I decided to leave that intact, thinking the vinyl offered some degree of protection to the wood. Wrong! What I failed to take into account was how ripped and damaged that vinyl was, and in fact, it had been catching grease, dirt and--worst of all--moisture and holding it there against the wood. When I finally peeled away that old vinyl months later, I found a disgusting, moldy mess. I'm telling you folks, it was bad. The photos below are the after shots, once I'd hit the fuzzy stuff with multiple waves of Mold Armor and bleach, and exposed it to the cleansing UV rays of the sun. And attacked it with a wire brush. I wasn't playing around, working on this problem off and on for a week. A lot of bleach went into this. A lot of Mold Armor.
But I got them cleaned up, and sealed against mold and wet and other environmental disasters with Flood UV. That allowed me to replace that nasty vinyl with wooden trim pieces, routed, burned, stained and sealed to match the baseboards I made for my tiki bar. The booth sections have two 45 degree angles on the interior, so I measured and made 22 degree cuts in the baseboard sections. The pieces fit perfectly, although 22+22 does not equal 45.
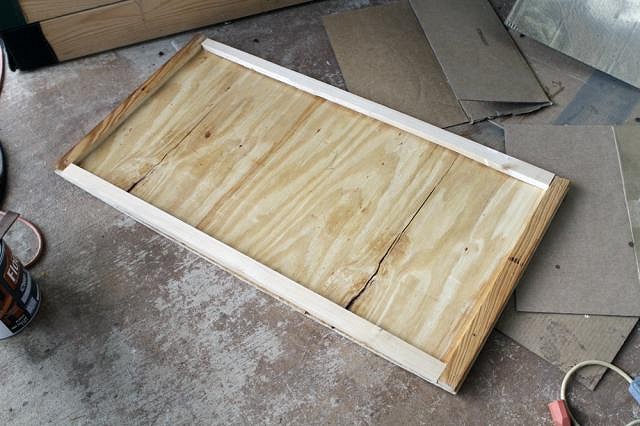
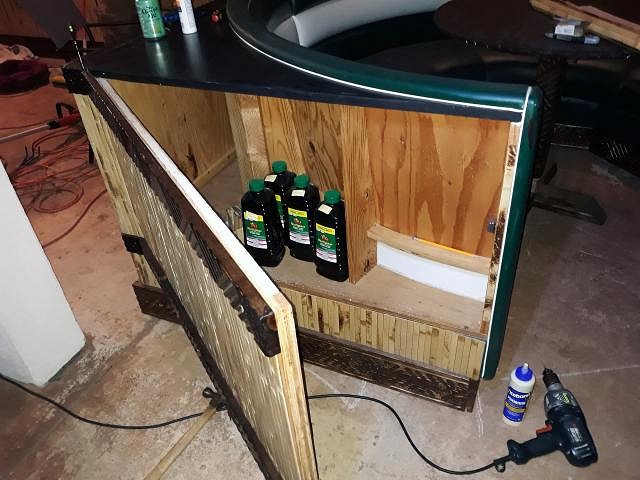
The booth sections were never meant to be free-standing, so I had to shore up the thin boards supporting the back corners. For this I used basic 2x4s, weather treated, anchored to the bottom with screws through pocket holes. On top, I peeled back the laminate and drilled straight through the plywood.
I cut thin sheets of plywood to fit the openings in the sides, them framed them with scrap wood to give them rigidity.
The easy thing to do would be to seal off the back, but in my outdoor tiki bar, storage is scarce. I decided to turn the empty space in the booth into storage. I used shims to position the door while I marked the position of the hinges. I also installed magnetic cabinet latches to ensure the doors stayed closed.
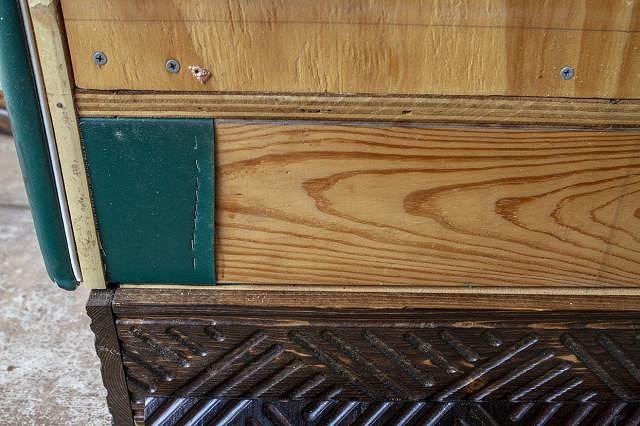
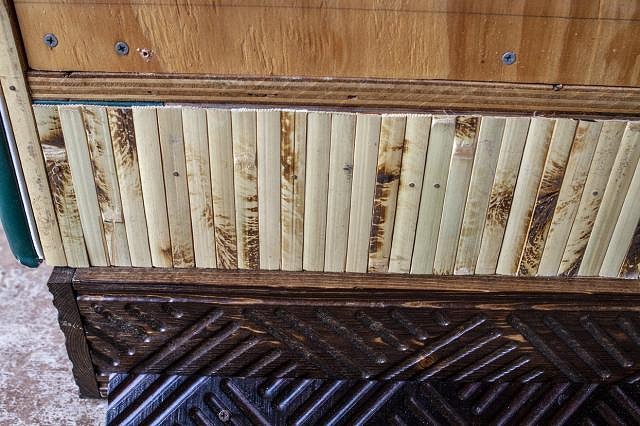
Once all the baseboards were screwed into place (countersunk and camouflaged with a drop of brown paint applied with a Q-tip) I had to address the bare wood. Very untiki. I had some tortoise shell bamboo tambour panels left over from covering the wall, so I decided to use that. This, coupled with the baseboards, would give a coordinated appearance--as opposed to random and haphazard--and create the illusion that I planned all of this from the beginning.
I cut the tambour to the appropriate height then applied Titebond to the backs. I attached it to the booth section using small paneling nails, which would hold the bamboo tight against the booth until the glue set.
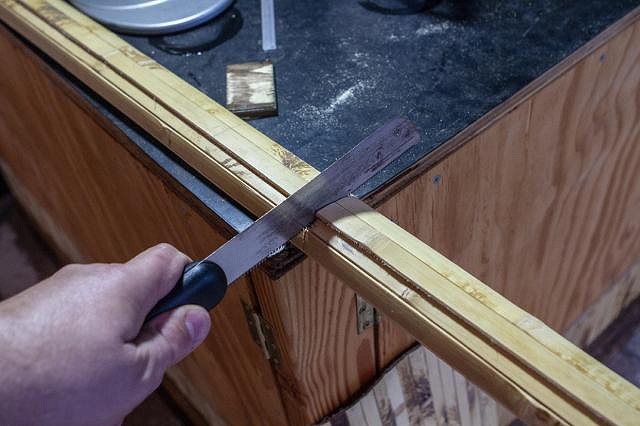
For the storage doors, I rolled up my largest remaining sections of tambour, measured the proper length, then used a fine-tooth saw to cut to size. Yeah, elbow grease. Using a jig saw or table saw causes the bamboo to splinter. My band saw works well, but unfortunately these pieces were too big to fit into it. Fortunatley, bamboo cuts easily so this didn't take terribly long.
I applied glue, then attached the sections to the doors by first drilling pilot holes then anchoring the tambour using paneling nails. Here's something I don't see mentioned online about bamboo tambour--it bows outward. I had to go through my wall covering and add a bunch of nails because the tambour started sagging badly. It looked like a pot belly sticking out. To prevent that from happening on the cabinet doors, I rigged up this scaffolding of boards and clamps to press the center strip of tambour tight against the plywood door until the glue set. If you think it looks inelegant, trust me, it's far more clumsy in reality. It did not get easier with each subsequent door.
To finish off the doors, I added routered trim half the width of the baseboards, still using the alternating triangles pattern. These serve as both a stop to keep the door from going in too far, and a convenient handle for opening.
Look! I'm already putting that new storage space to use!
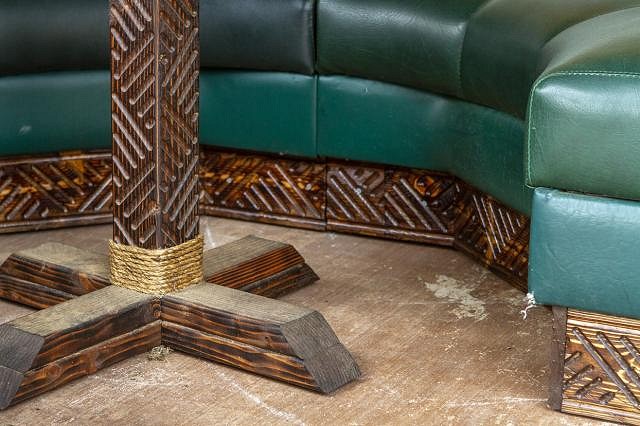
Cunningly, the booth also matches the motif of the cocktail tables I made for the Lagoon.
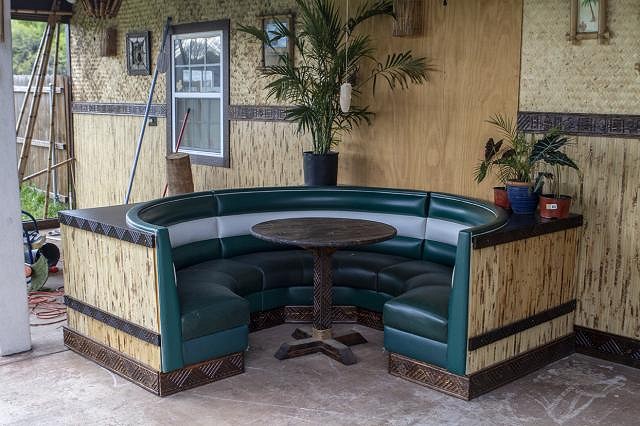
And the finished product. I'm very happy with how it turned out. The white stripe is a little off-putting and I haven't decided what to do with it yet. I have many options. Eventually I expect we'll re-upholster the entire seating area with some sort of tapa pattern, but for now I am content with what I have.
As always, I have a more detailed build-along post available on my blog. Mahalo! |