Tiki Central / Other Crafts / Trader Sam's Enchanted Tiki Bar In-A-Box
Post #801211 by TheLuckyParrot on Mon, Mar 9, 2020 8:16 PM
|
T

TheLuckyParrot
Posted
posted
on
Mon, Mar 9, 2020 8:16 PM
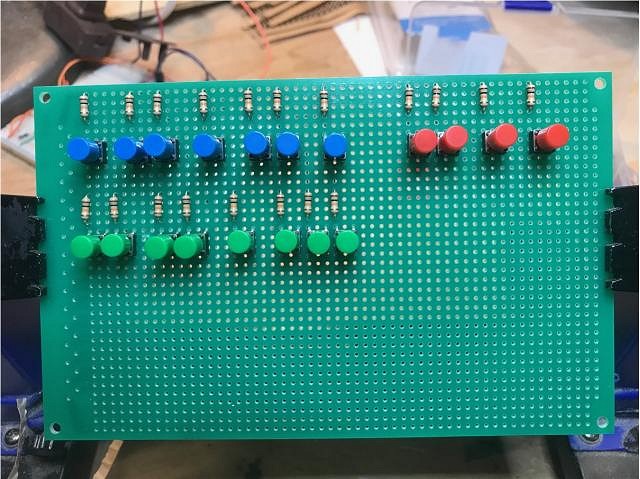
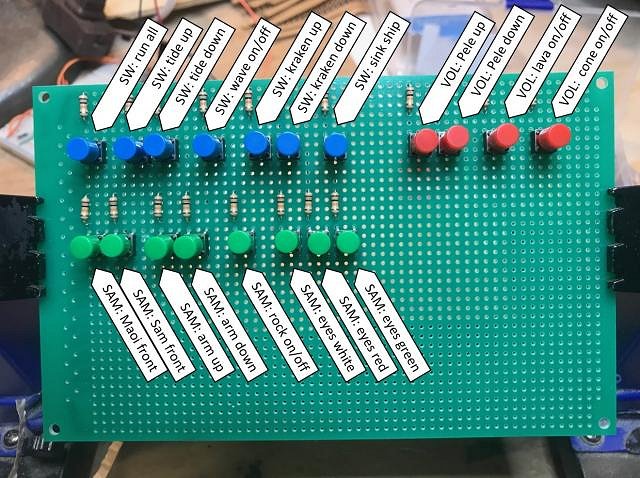
STAGE ASSEMBLY, PART 5 Let's partake in a slight digression, shall we? While the work goes on in the arts and crafts department for this project, the magic itself comes from all the electro-mechanical stuff that will be hidden from the world. This is no different from the ETB experience itself. Only if you are sitting at the bar, and only if you are paying close attention, will you catch one of the skippers reach under the bar counter to push a button and launch one of the entertainment events associated with one of their signature cocktails. And is you REALLY want to understand the level of fun the skippers have with this secrecy of all this, try to chat one of them up about the 2 bar stools that drop! We are not going to be like that here. I am sharing with you everything, soup to nuts. You have seen much of the electronics already done but here is one item that is being developed in parallel with the work I am doing on the main stage. A couple of challenges I wish to conquer are: [list=A] [] the ability to test the system without taking it back apart, AND [] the ability to alter the programming within the system without taking it back apart. [list] Below are three photos of a test panel I am putting together which will solve my desire to test things. This first photo is the front of the panel so far. It is all going on what is called a "proto board" (for those not into home electronic projects). Yes, "proto" is short for "prototyping" but since this is a one-off and I won't be mass producing this project, ALL of my work on this project is using proto boards. For one off work, these are perfectly acceptable. There will be more buttons for testing lighting and audio and wifi, but this is a start: To give you an idea as to what the buttons will be used for, I added the labels to the photo, below: The holder tool used for soldering allows the board to be rotated, and here is a photo of the backside so that you can see the first soldering work: This will be enclosed in a box I will build from scratch that will have its own power supply, and will connect to a port I will create on the back of the completed TV. The connection cable will be extra long so that I can plug my testing control panel into wall power, connect to the test port in back, and then place myself in the front and push the various buttons to confirm that everything is working inside. And I will be able to test things independently without having to run through an entire performance. |