Tiki Central / Home Tiki Bars / Lagoon of Mystery
Post #801346 by Prikli Pear on Sun, Mar 15, 2020 8:11 PM
|
PP

Prikli Pear
Posted
posted
on
Sun, Mar 15, 2020 8:11 PM
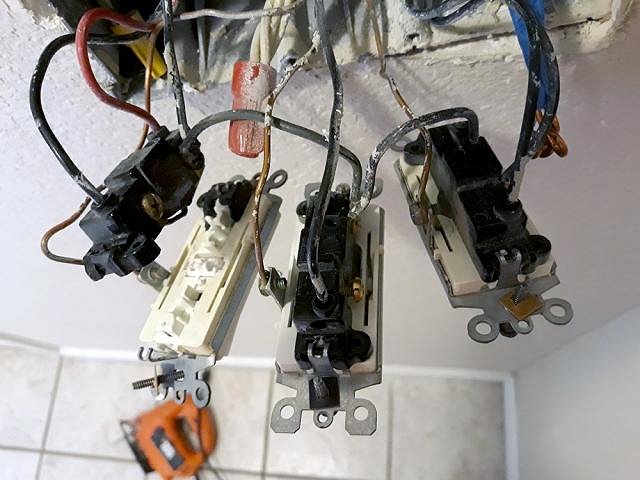
I've been futzing around with the lighting in the Lagoon of Mystery since day one, practically, but by late last fall it was time to bite the bullet and abandon my ad hoc setups and get everything hardwired in. Inside the house, next to the doors outside, was a bank of four switches, one of which we could not figure out what it controlled. I climbed into the attic, found its wire, and followed it all the way back to the secondary fuse box in The Wife's studio, where it simply ended. At some point it had controlled something, but the previous owners simply cut it and let it dangle, unconnected to any circuit. This suited my purposes just fine. I installed a new breaker and now had a dedicated switch for the majority of the lighting in the Lagoon.
Of course, that meant I had to actually wire everything. October in Texas is supposed to be cool, but working in the attic was brutally hot. For each light in the bar below, I had to install a junction box and wire in a pigtail connection. With frequent breaks, this took several days.
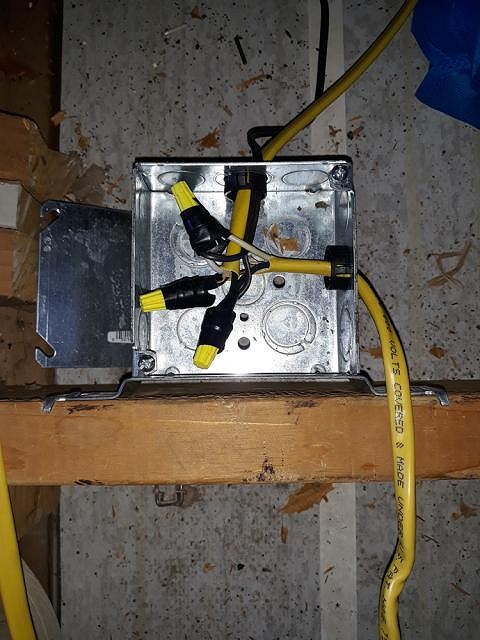
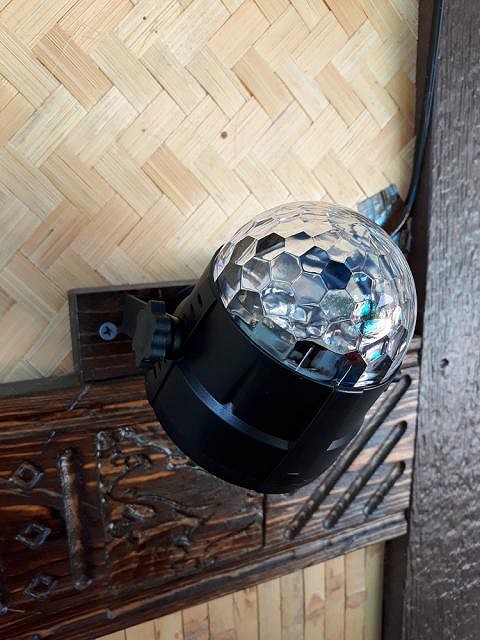
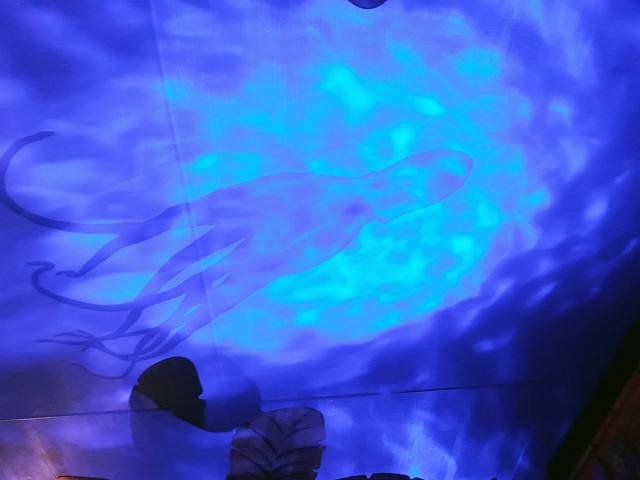
The LED wave projectors were simple plug-in models, so I cut off the plug and spliced the cord to a longer wire to get the necessary length for each unit. I used multiple layers of heat-shrink insulation sleeves. I'd never worked with this stuff before, but it didn't take long to get the hang of it. Now, the whole cord was protected from the elements.
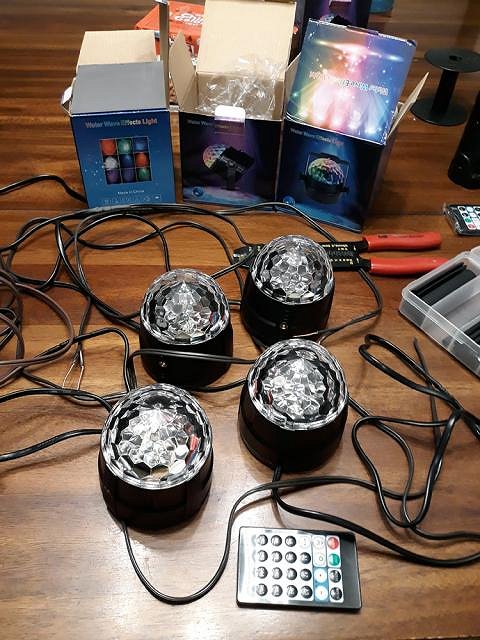
At this point, I ran into the biggest drawback to my piecemeal build-along approach. I'd bought three LED projectors two years back, when I was first getting started and only had a 20' section of the Lagoon built out. I needed six more to finish, but that model had been discontinued and replaced by an "improved" version. The new version was problematic for me for many reasons, but the biggest was that they were now DC, and used an AC adapter that I couldn't hardwire. This led to my ordering from Amazon, Ebay and AliExpress a number of different LED projector models to test out their suitability. I'd thought I'd found a perfect solution from China, with a model almost identical to my existing one that only projected blue light. Since I'm simulating waves/ripples on the ceiling, this would be perfect. Alas, their "blue" turned out to actually be purple. I finally found the dome models, below, which projected a light color and wave pattern close enough to my existing projectors to work. But guess what? These have been replaced by an "improved" model as well that is unsuitable for my needs. This means if any go out, I've got to start the whole process over again to find a replacement. Sheesh.
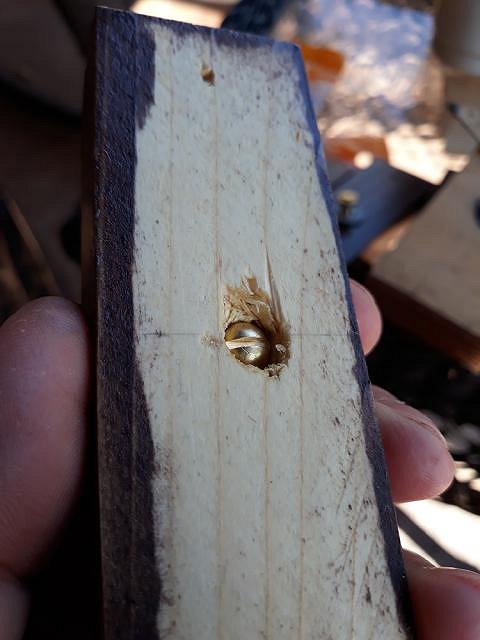
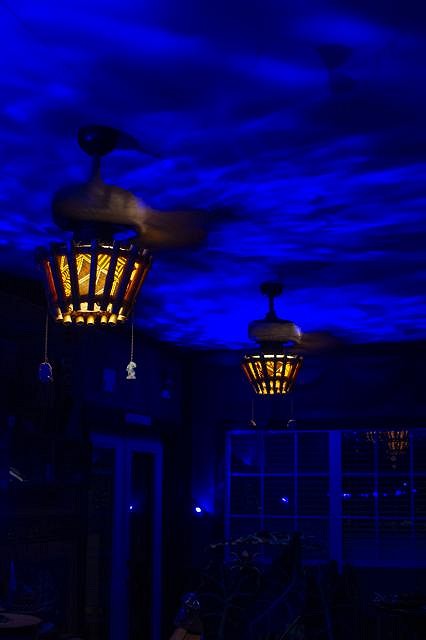
To mount the projectors, I cut some scrap boards into 4" lengths, stained them dark and drilled a hole in the center for a screw, which I secured with epoxy.
I then mounted the base to the wall with screws, and used washers and a nut to fasten the projectors in place via the mounting brackets they came with. The power cord was subsequently hidden beneath a half-round piece of bamboo trim. The classics never go out of style!
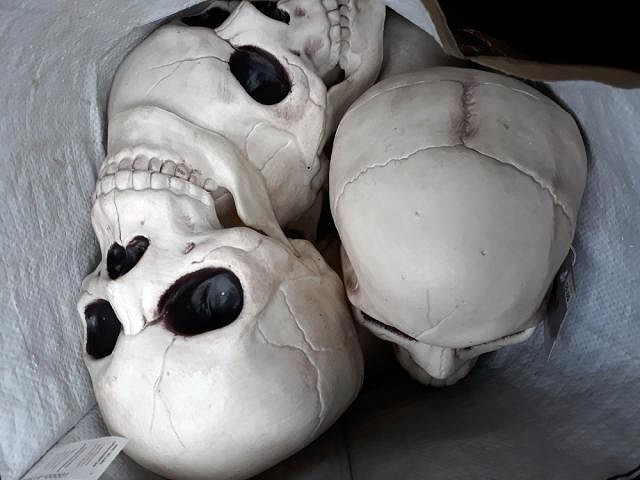
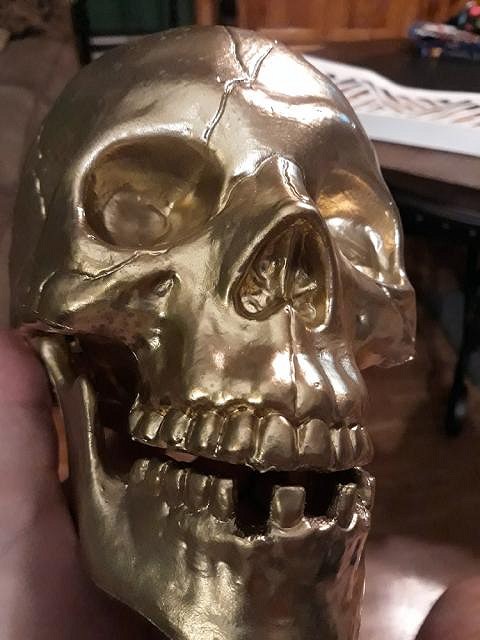
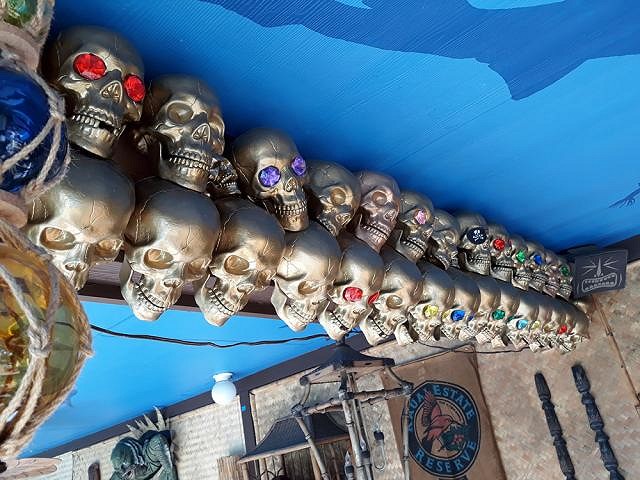
My lighting ambitions weren't limited to the projectors, though. The first tiki bar I ever visited was Pilikia in Dallas. It was mediocre at best, and there's a reason it is now gone. But they had some decent decor, and one thing that impressed me was the wall of golden skulls they had. I thought that was cool. So I decided to make my own version to cover a beam that interrupted the ceiling. For two consecutive Halloweens I raided the clearance bins, buying up a certain type of plastic skull from area stores.
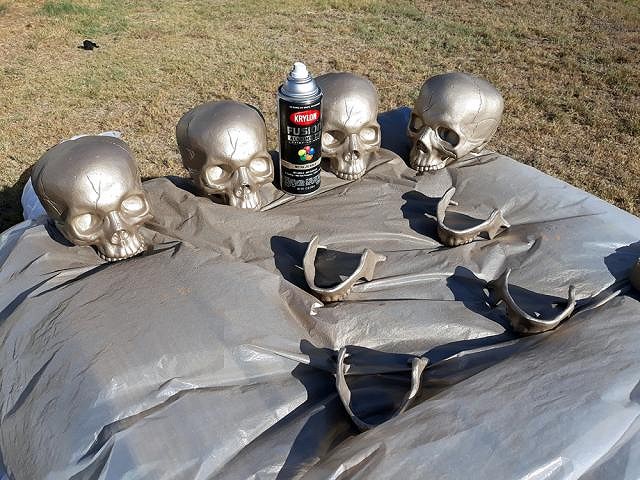
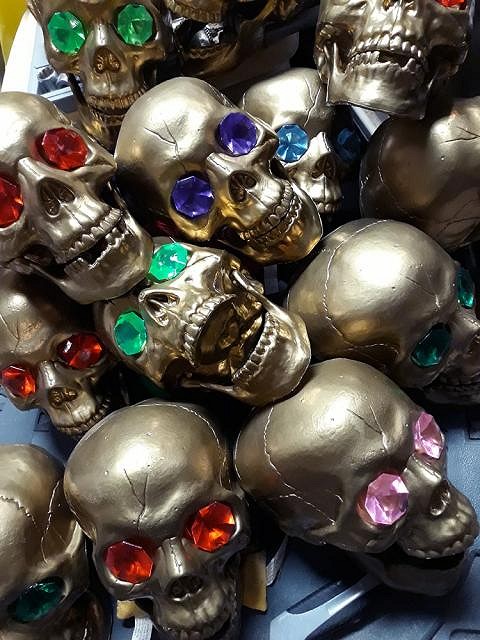
I amassed something like 35 before I was done. Then I spray painted them all gold. I actually used two different shades of gold, one of which was somewhat brassier, for variety. Since the skulls would be outdoors, painting them also had the added bonus of protecting the plastic from UV damage.
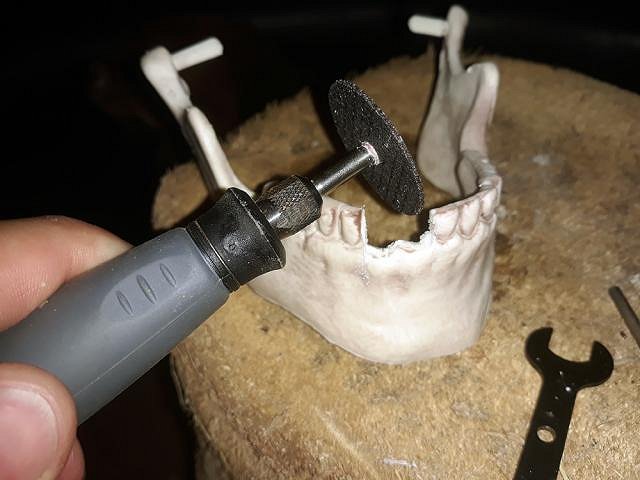
They skulls had detachable jaws. I used my Dremel to cut away random teeth, adding additional variety to them.
Smile!
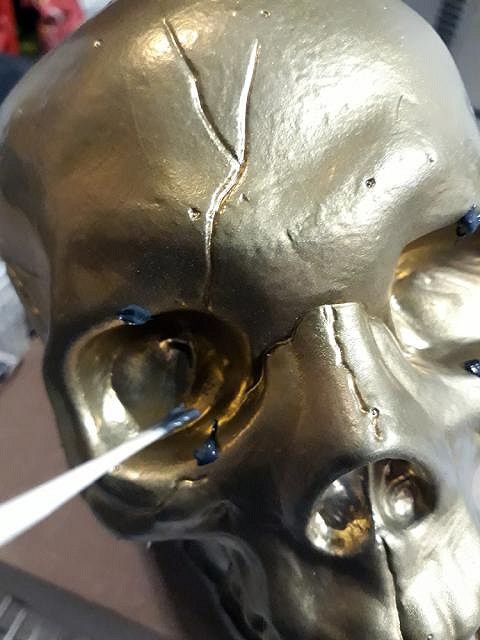
Gold skulls were cool and all, but I wanted a little extra. I applied some epoxy to the eye sockets.
Then I inserted plastic gemstones for eyes. There's a bit of Goonies here I suppose, but the real influence is that 1977 Disney movie The Rescuers. Remember the big ruby the little girl was forced to retrieve from that skull in the cave? I guess it made an impression on younger me. Anyway, I think the end result looks pretty cool.
I drilled holes in the backs of the skulls, then epoxied eye rings in place. There were a lot of them to do.
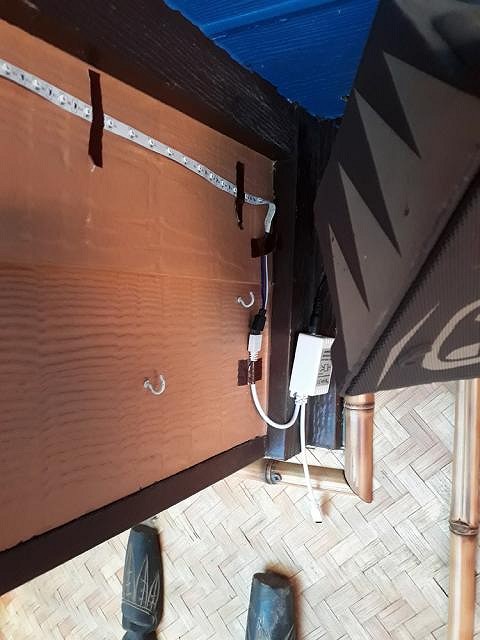
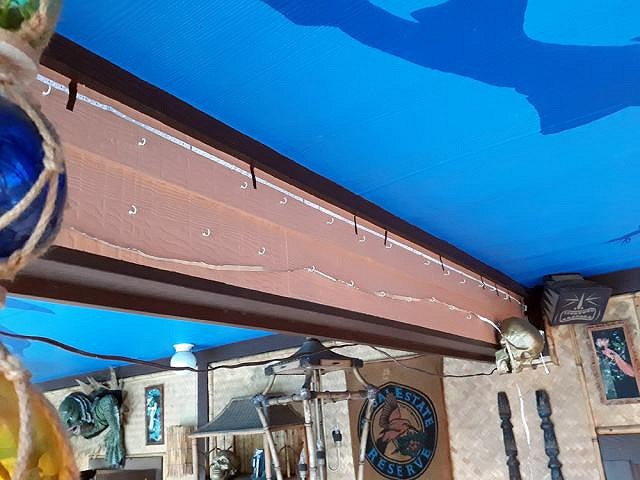
Next, I wired the LED strip lights into the main lighting circuit in the attic. The LED strip light was actually had an AC to DC converter plug that gave me trouble with the projectors, so I couldn't actually hard wire it. Since this was right up against the ceiling, I was able to install a wall socket in the attic and the plug was long enough to reach. Inelegant, but it worked.
The LED tape light had "adhesive backing" that was so weak I ended up using pieces of brown duct tape to hold it in place. The LED strip was long enough to stretch the length of the bean all the way across and back again. I installed two rows of cup hooks from which to hang the skulls.
Then I hung the skulls in place. There were a few gaps, so I took a few miniature skulls I had, painted them gold as well, and stuck them in the gaps. What I'd really like to do is get some fake monkey skulls, paint gold, and set them in the gaps. Alas, monkey skulls aren't that popular outside of VanTiki mugs, so I'm going to have to pass on that idea until more affordable options come my way.
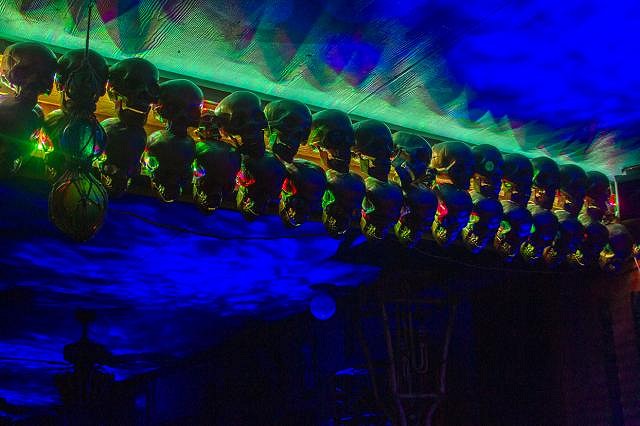
And here is what the skulls look like with the color changing LEDs backlighting them at night.
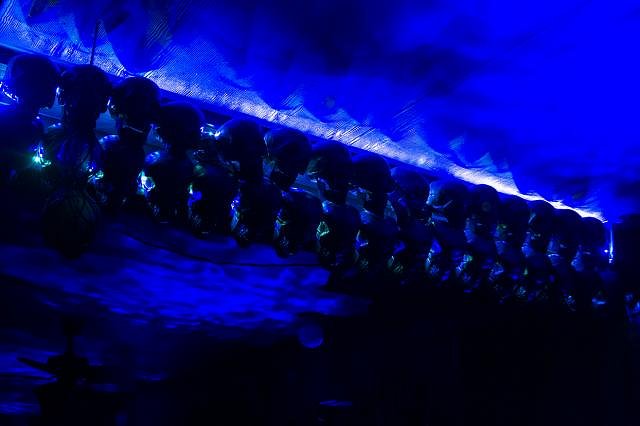
Here is the effect the LED projectors have on the ceiling. Try to imagine this ripple pattern in continuous motion.
And the ripple projectors juxtaposed with my pans and tapa light covers.
Thanks for checking out my work! A more exhaustive writeup may be found on my blog for those interested in such things. |