Tiki Central / Other Crafts / Trader Sam's Enchanted Tiki Bar In-A-Box
Post #801350 by TheLuckyParrot on Sun, Mar 15, 2020 11:33 PM
|
T

TheLuckyParrot
Posted
posted
on
Sun, Mar 15, 2020 11:33 PM
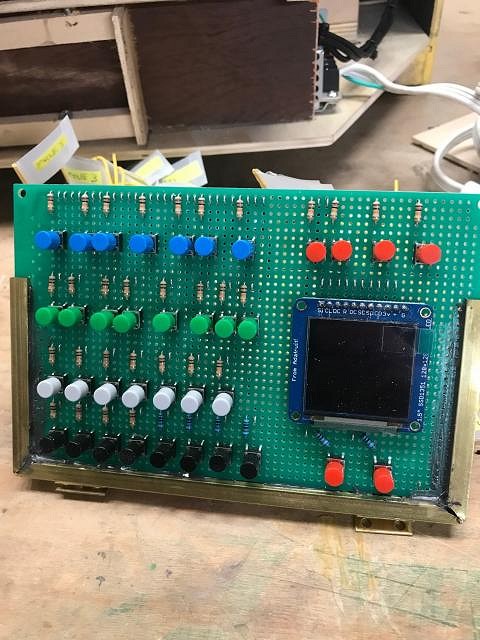
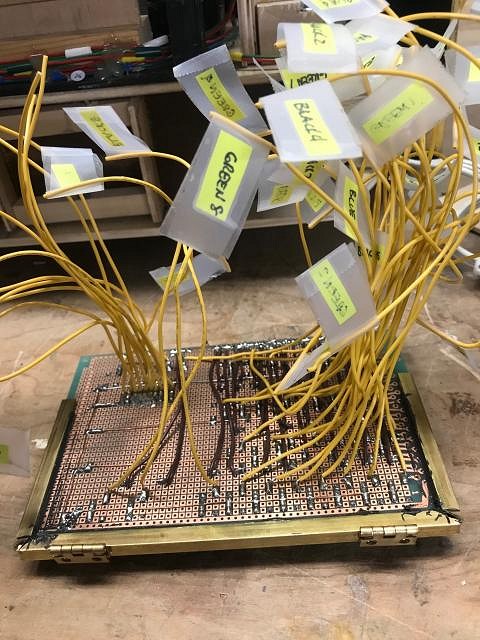
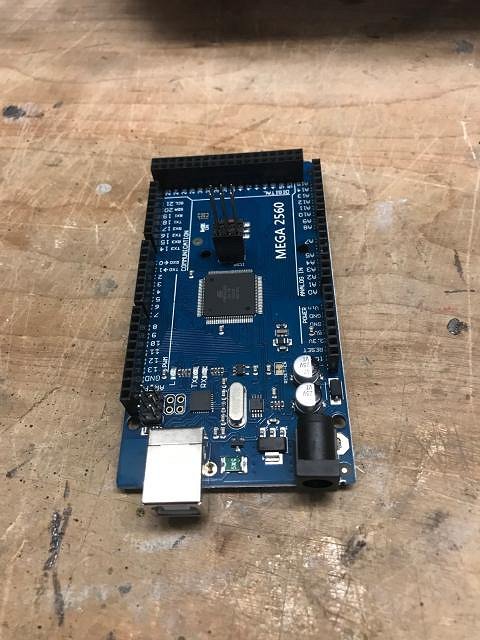
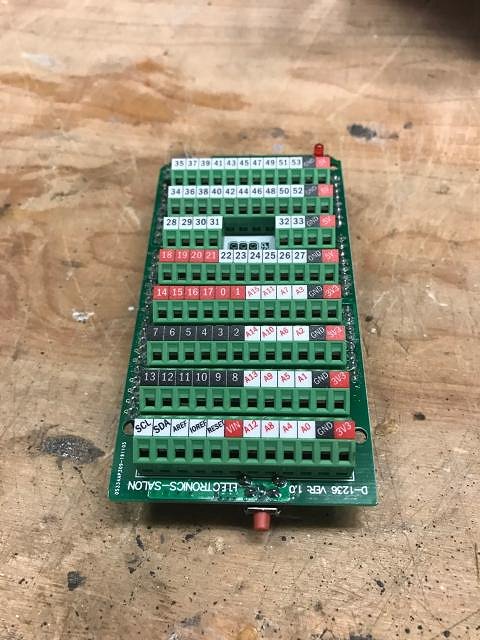
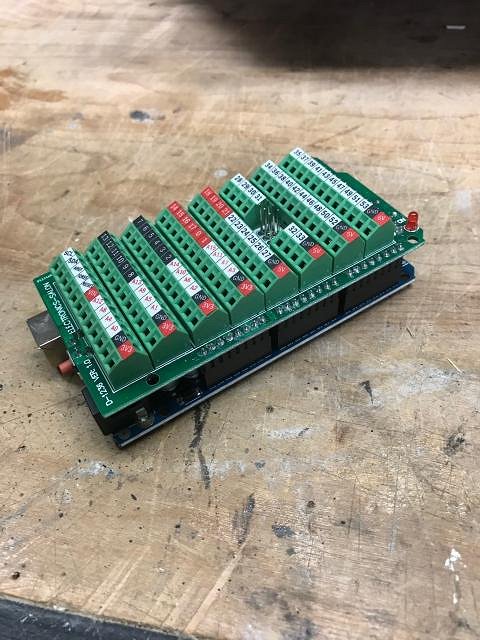
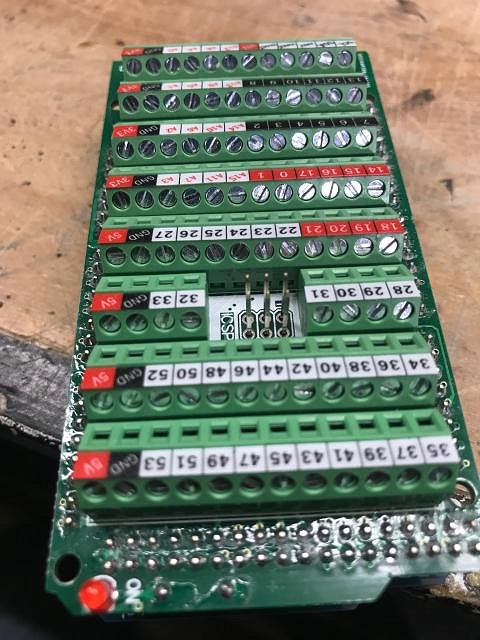
STAGE ASSEMBLY, PART 11 It was not real noticeable in the photos I posted in the previous update, but this most recent dry fit test did not go so well. I am off by about a full inch. If I attempt to force the fit back into alignment the cover bottle and box for the shipwreck feature gets compressed and the shipwreck parts that need to move all start rubbing together. That's bad. Can't have that. I ended up pulling the system back out of the TV cabinet and taking off the back panel and speakers. I am going to have to cut and re-fit that back panel so that I have a different geometry between the speakers and the shipwreck feature. It should be easy, just tedious. So while that is going on let's divert and show some pics about all that electronics work I keep hinting at. You saw an earlier photo of the test panel in progress. Here is that panel with all of the buttons soldered in. It's important to have the panel ready soon so that I can do testing of the internal electro-mechanics once I assemble things for what I would hop to be the final time. Notice that it ALSO includes a small video screen. This will help simplify the method for providing feedback to the person pushing test buttons: The back side of this panel looks like a mess now. But don't panic. I will admit that in hind-sight it would have been smarter to design a true printed circuit board for this, pay the $30 to order it online and have it shipped to the house, and waited the 2 weeks for the turnaround. But what the heck, it's been raining and the garage time was pretty peaceful: This is the micontroller device that I will be using to drive the test panel. It's an Arduino Mega 2560 R3. It's really useful because of all the Input/Output (I/O) ports that can be connected to. I need those for all the buttons and and the video screen.: The problem with these things is that the I/O port connections are built for prototype experiments. There are other makers of this same devise that come in different forms that allow for soldering but they can be costly, require more work, and take time to ship. The Arduino Mega that I have was purchased locally at the sweet price of only $9. So how do I solve that problem of connecting all those wires to all those ports, with reliable connections that are easy to use? With this sweet device: What is very sweet is that I already owned one! The thing is simply pushed into the Arduino Mega. Zero soldering. And then here is a close-up, where you can see that the wires can be connected by inserting into connection points that can then be secured by tightening down a screw. Oh happy days! So now you have a sneak peek at the test control box. And you have an update on the dry fitting. Those two things are being worked on in parallel. In fact, I am also starting to work on audio, which I will revel in an update post soon. And I have ordered the last of the lighting material so I can start on that next week. And I am taking the first steps to finish the ETB diorama by creating the walls upon which will be all sorts of oddities - all in miniature! |