Tiki Central / Other Crafts / Little lost Tiki's Art Chronicles and Stuffs! Page 70!A brief Return,BUT! Some new pieces to Delight YOU!!!
Post #803565 by little lost tiki on Tue, May 17, 2022 10:05 AM
|
LLT

little lost tiki
Posted
posted
on
Tue, May 17, 2022 10:05 AM
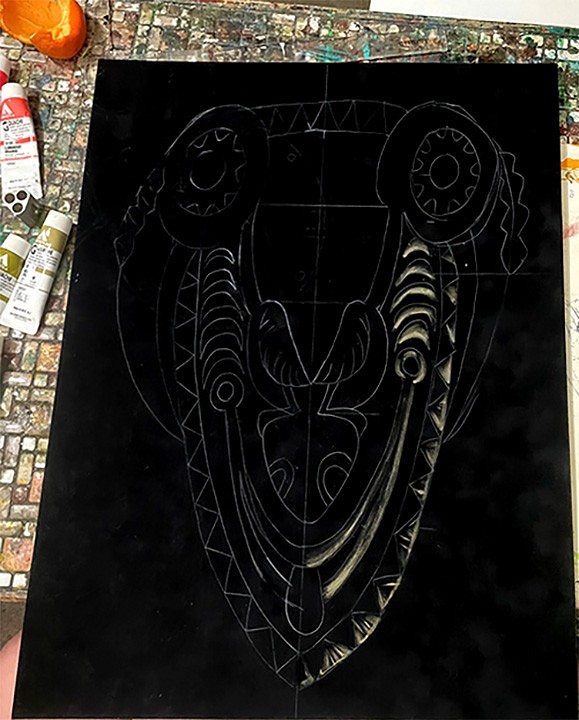
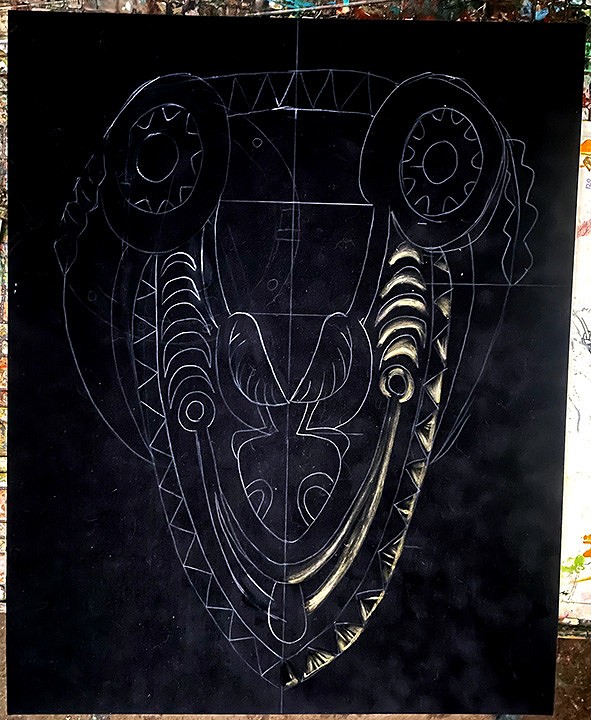
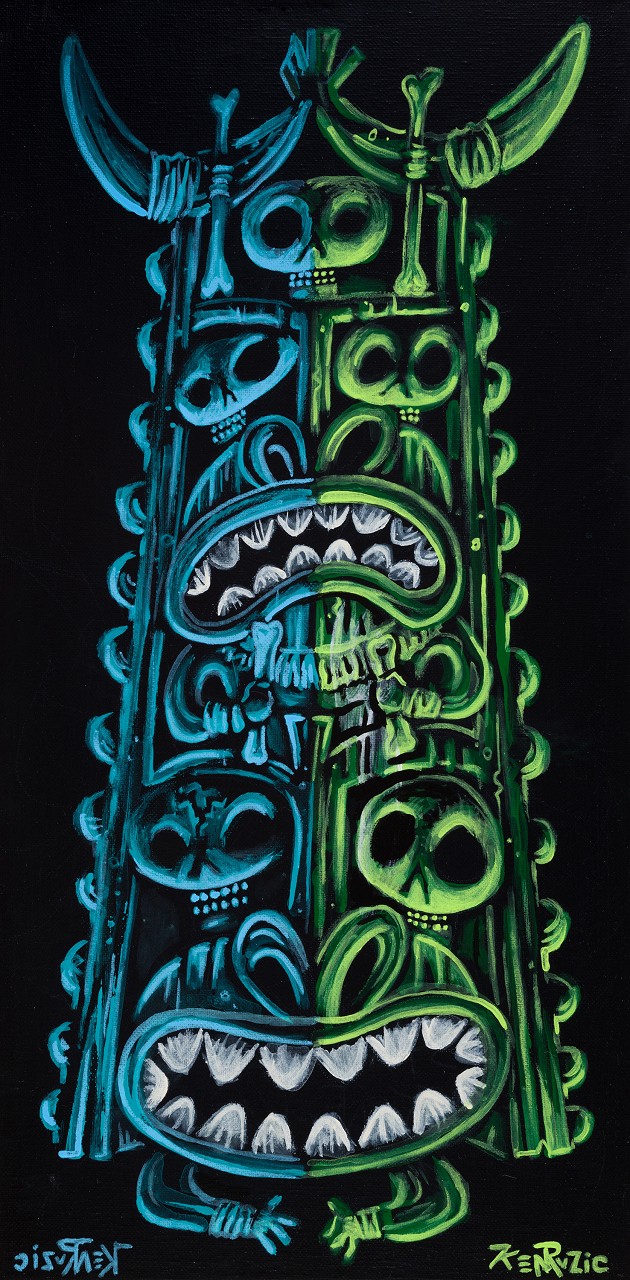
Acrylic on matte suede matboard-the poor man's velvets I like to call it... (actually,the more forgiving velvet would be a more accurate term....) We're going to make a PNG Hornbill mask today! YAY!
Step One! Pick an Image!
Got to work on my 104th-5th and 6th sketchbooks during the lockdowns there were plenty of images to draw on.....
These 2 doodles of a Hornbill and a croc mask fit the bill!
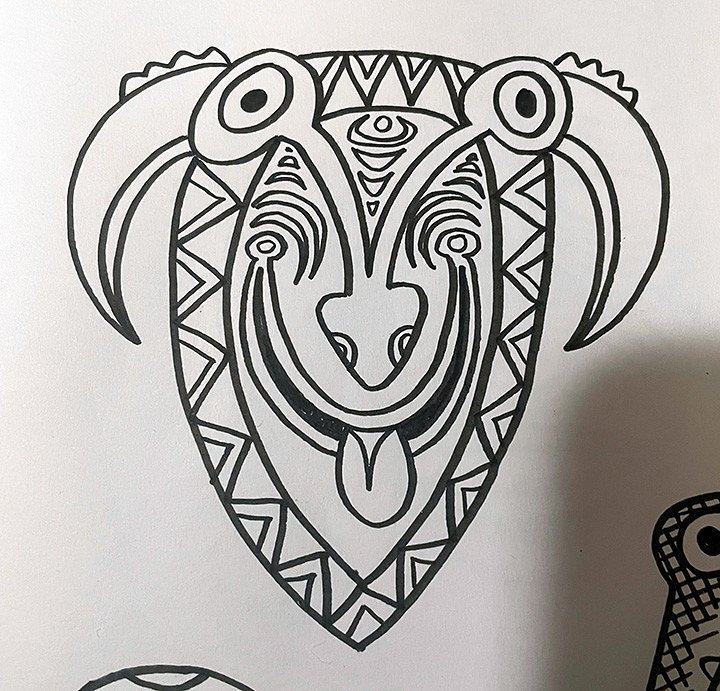
Let's start with the Hornbill mask first!
I stumbled across this wonderful color way and design conceived by Alex Steinweiss (look him up!)
and decided to try a color way similar,but more toned down and not as intense...
That way, the design won't be TOO in your face and still has the intensity of color upon a black surface...
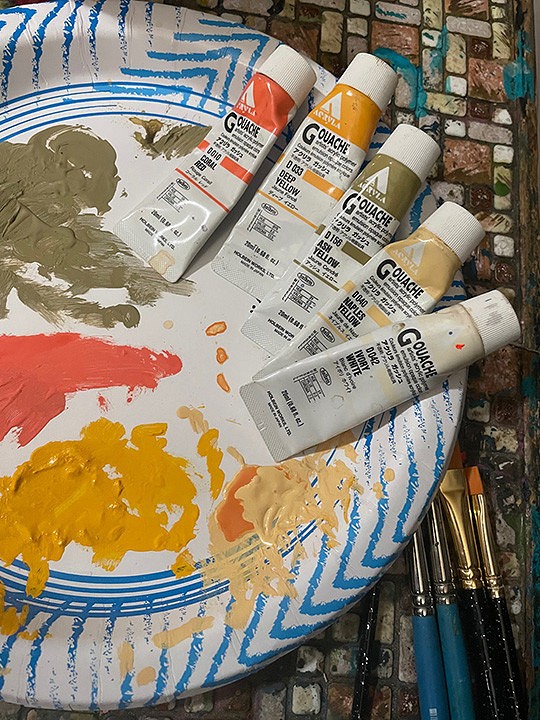
Here are the colors I chose... it helps to use acrylics for these pieces,as you really don't want to try to seal it,because of the surface you're working on.... If this is bound for a well occupied Tiki Bar, I would suggest it being framed in glass....... cuz....drunk people! lol I've used acrylics, cel vinyl, leather paint, and acrylic gouache for these forgiving velvets. This one we'll be using acrylic gouache.... Gouache is an opaque watercolor,and is available as an acrylic. The real gouache is such a great consistency for blending etc... it's like painting with toothpaste with a slight gritty texture... the acrylic gouache is smoooooother... Gouache was the go-to medium for all those men magazine covers from the 50's/6o's
easy to blend/fast drying.....the perfect medium for the job!
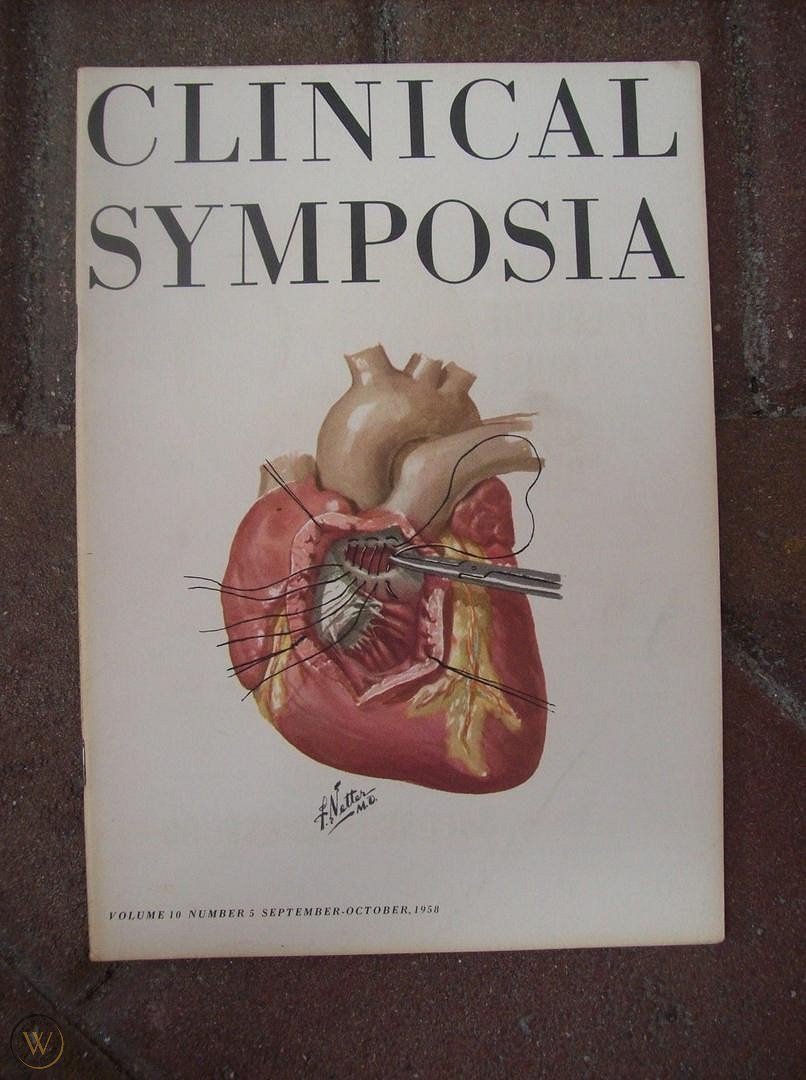
I first discovered gouache while leafing thru an ephemera box at the local thrift Store
here's the cover.....
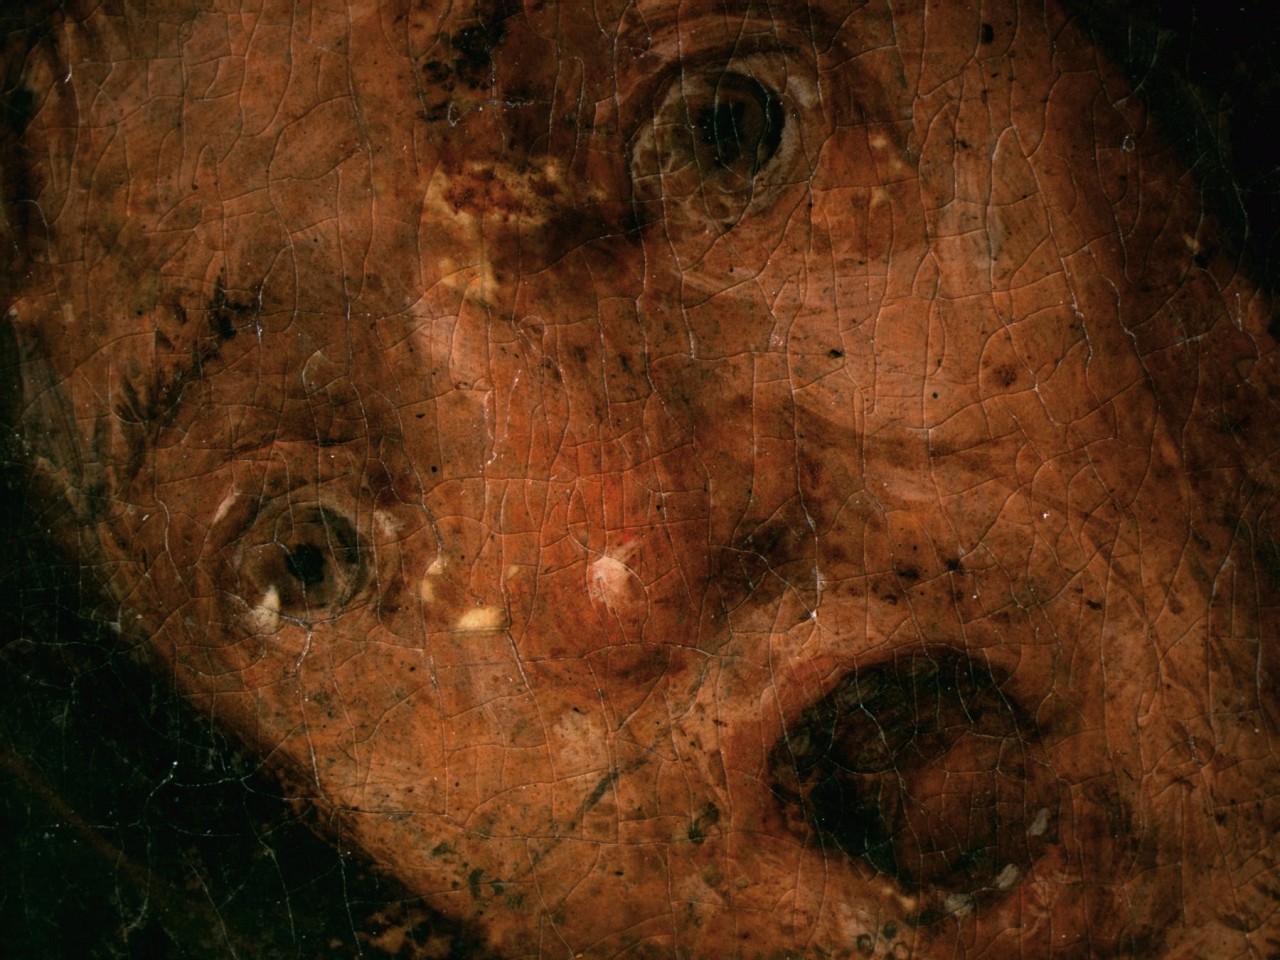
fascinated by these gorgeous illustrations of surgical procedures' sought out what was used to render these and the rest is trivial artistic development history! So what have we learned so far today? Regular Gouache on watercolor paper is DIVINE! has a toothpaste slightly gritty feel that is a joy to play with....please try it... Acrylic Gouache... smoother than the regular gouache texture Alrighty! We've covered the visual inspiration for the piece the medium to paint it on and now for the surface.... Black Suede matboard... the forgiving velvet... Woody miller was kind enough to share that tid-bit when I was bemoaning how difficult velvet painting was, and how I was intimidated and discouraged by the surface. be sure and check out his wonderful paintings! The boy is Master of Many Disciplines and All around FAIRLY Cool guy! :) https://www.woodymillerart.com Here's where I get Black Suede matboard (which...I think comes in other colors too! but more of that later....) I go to the local frame shop and order two pieces I have them cut one into 4 16 x 20" pieces and the other into 16 8 x 10's or 8-8x10's and 2 16x20" pieces always remember to cut these into standard frame sizes...or you'll have to custom frame it or exhaust yourself finsding a frame.... Where velvet is "bushier" and a fabric, it bows when you press the velvet with a paint filled brush While a soft hands good for velvet painting, I prefer to ground myself by tackling harder surfaces... wood/masonite-artboards/panels....canvas in a pinch, but again... the surface reacts with the brush as it slides and it's no longer a straight solid surface..... SOLID is my jam, tho a soft feathery hand is good for detailed shading, don't get me wrong... I got a little ahead of myself and forgot to show a picture of the initial underdrawing /paint guide I lightly sketch the image with a white PASTEL pencil.... DONT use a regular colored pencil.....just DON'T and don't go gettin all clever and try a Water-soluble white pencil.... Because you'll have a BAAAAAAAD time trying to remove it after your painting is finished. and while getting peeks at the underpainting is acceptable
like Bruegel ...and he's a real artist who knows exactly what is necessary for the work....
One thing to consider is that there is going to be an initial SHOCK when you first lay paint down....
the contrast is something to be tamed and utilized as you start giving it dimension thru the illusion of light...kinda.
And you'll also see why I held back on the intensity of the colors
(Hint: it makes it a little more moody and ...classy! lol
one thing with both velvet AND black suede velvet... you're gonna need to stay in One Direction with your brushstrokes... for now...this is how to get a smooth color fill and blends flik-flik-flik and lightly pull it in one direction... If you don't .... you get the TAPIOCA! the DIVIT! the PROBLEM AREA! the GLARING ERROR! amongst other names for this cursed malady that I still encounter on occasion if you go the wrong direction (especially before the paint is dry/cured) or push around too much paint you're gonna have a BAAAAAAD time.. The Saving grace of these masks are that they are made of wood! so I can apply cracks and grains and specks in order to distract or camouflage these wretched mistakes (also, when dry, these can be remedied by pulling a thin blanket of paint over the area just tuck it in ,say goodnight and voila! with some practice, these speed bumps can be disappeared!
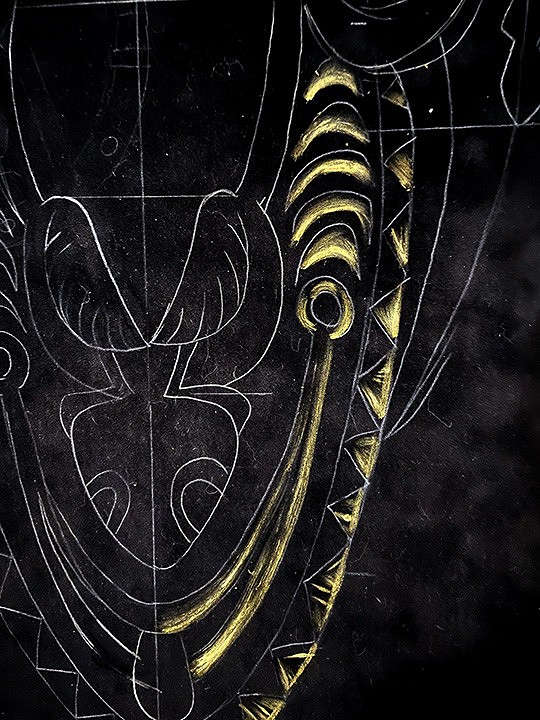
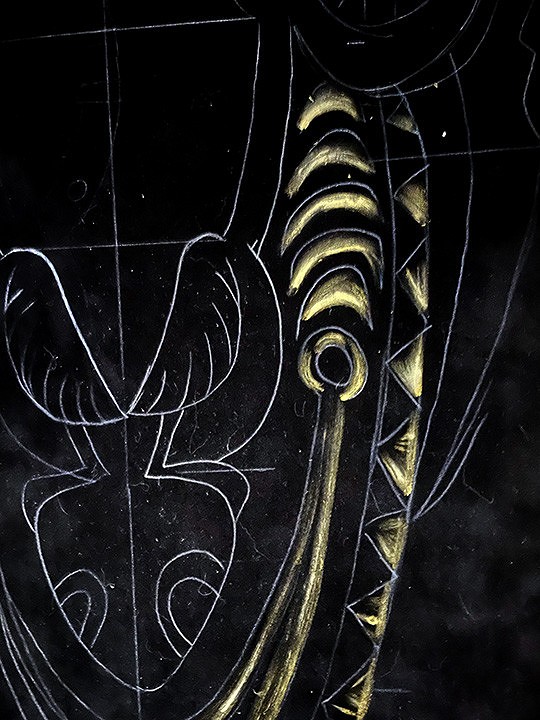
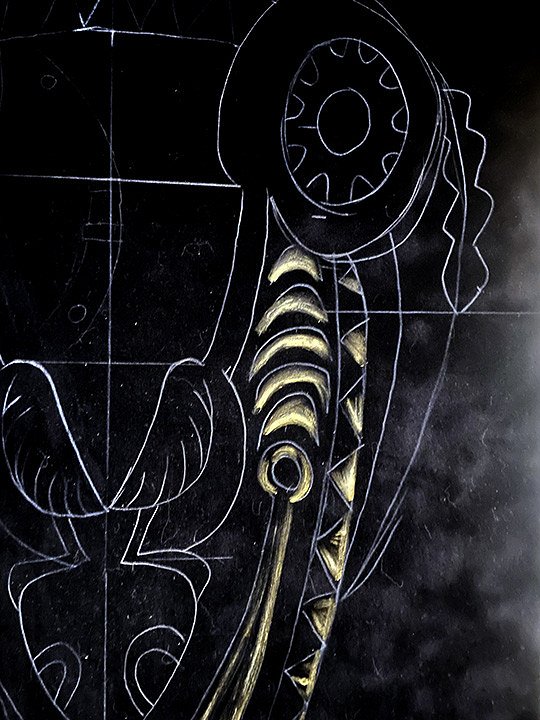
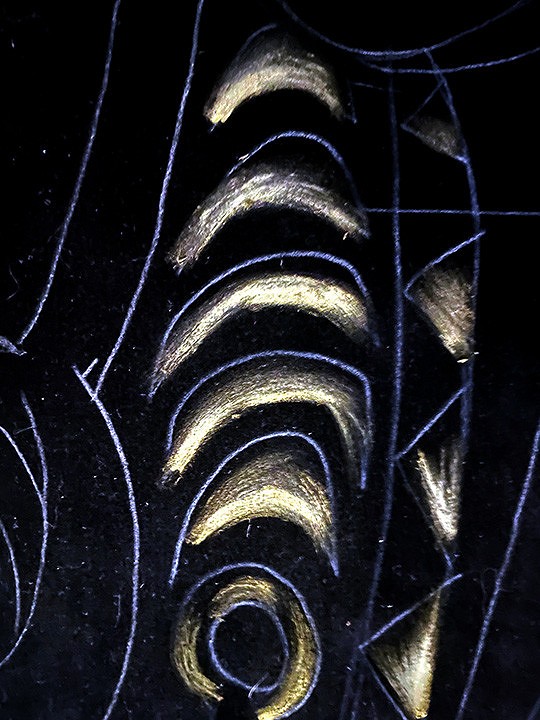
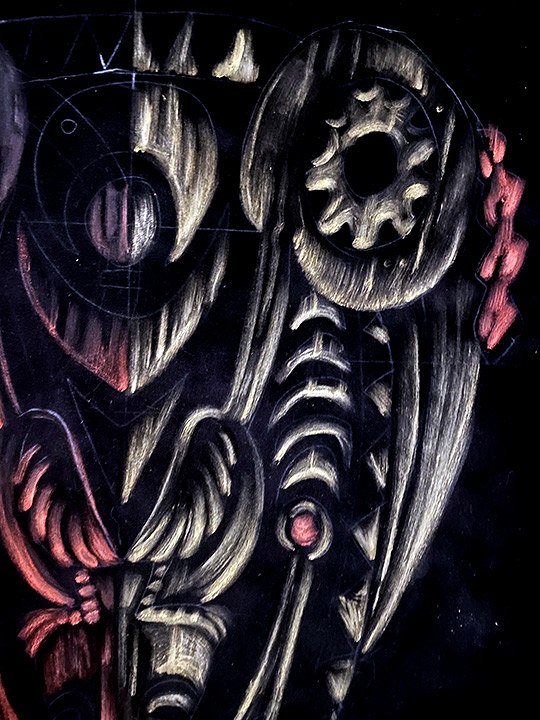
I'm using the Ash Yellow,a green/brown it looks a bit bright because I upped the contrast to make the pencil stand out...
more paint applications for the areas where you WANT more of that color the areas where the light is illuminating the surface more True Velvet painters are much more careful and take time to seamlessly blend the colors to accurately capture the perfect rim lighting and atmosphere to practice economy of details to achieve both place and time.... Not this guy...this is more of a punk rock approach a means to an end and attempt to adapt my personal style of painting to this still unfamiliar medium. Which might be a cop-out,but it's been fun as the technique gets easier...
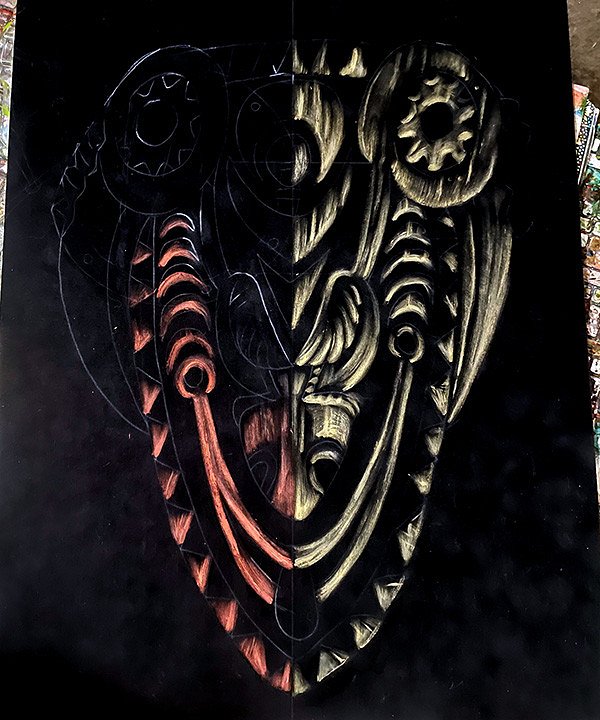
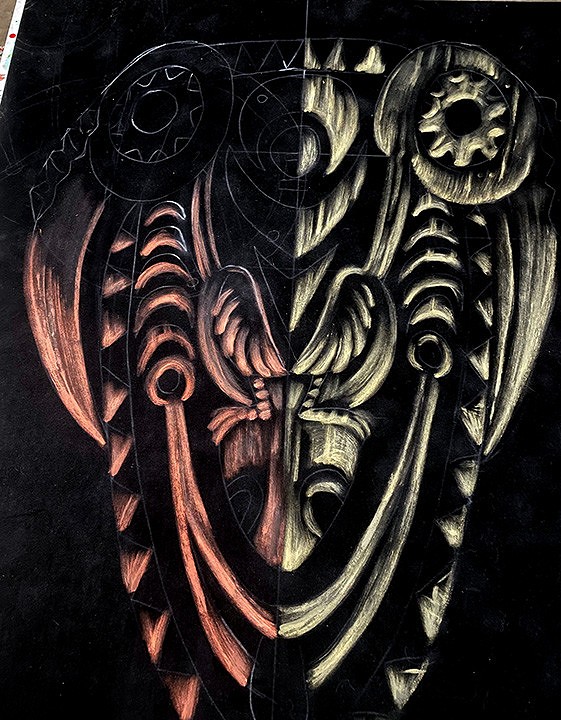
For this piece I was going to play with a concept from some black gessoed canvas paintings splitting it down the middle with 2 different colors and then lighting it from there.... these paintings on black gessoed canvas are a LOT easier than our current challenge but what's life without some adversity?
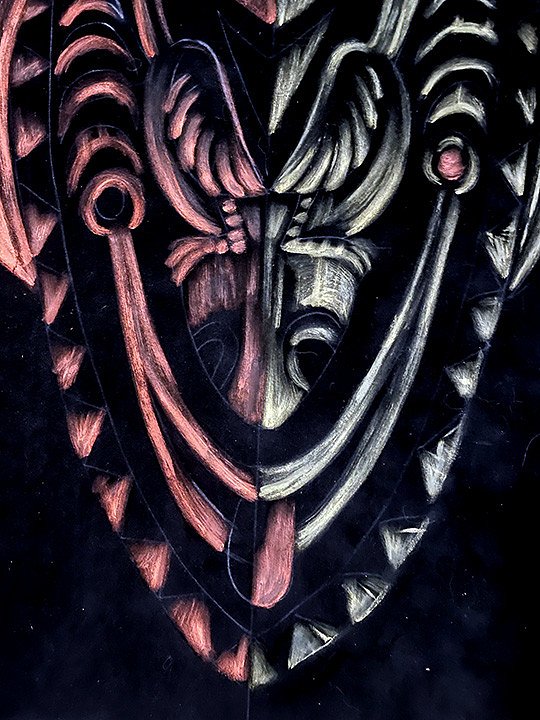
and with that info....here is the other side with Coral Red started
The Right side already has about 4 hours of building up the colors working on one area while another area dries enough to slowly add more color layering ONE DIRECTION! the trick is to create that illusion of a bright area where the light hits it and then to slowly fade that light as it spreads across that surface. if you have a dramatically lit tiki in your home bar
try a life study in this medium
by sitting there and looking at the way light hits some objects and the shadow of those objects
you'll get a clearer understanding and that helps immensely!
and below you can see some problem areas...
No One is Immune! it's meant to humble you That's where the dedication and perseverance should kick in! Six Hours in....
Then I did some color swapping for the hornbill part of the beaks a lil switcheroo! Also layers and layers are paying off and the semi illusion of cartoonish realism is coming into view....
Below is an example of going against the grain going in the wrong direction.. the thing is .... it was done after the paint was dry so it can be used in a cross hatchy textural application here and there
like scuffs on a weathered wood shield or mask....
Also notice that the white pastel pencil is disappearing!
NOT a paper towel! it will leave little nubbiest all over the place
at least if the towel or tee leaves a few post lightly scrub nubs
they can be brushed off or lifted off with a lint brush later
paper towel nubs....BAD and hard to completely remove...
.
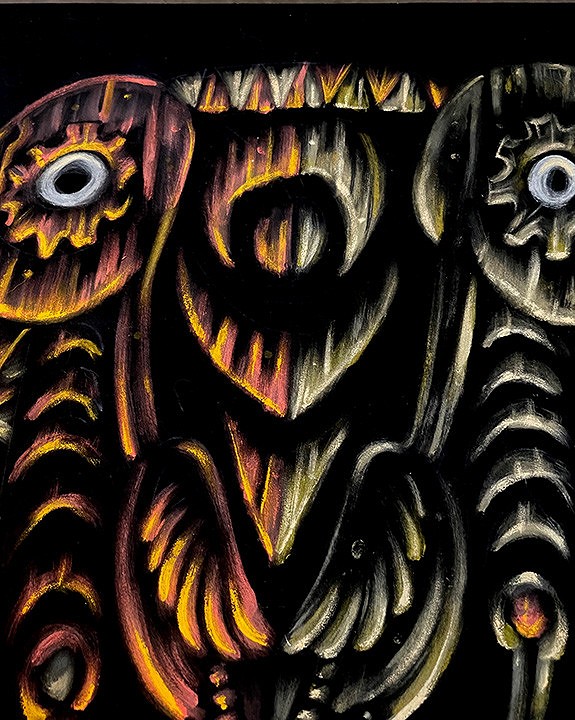
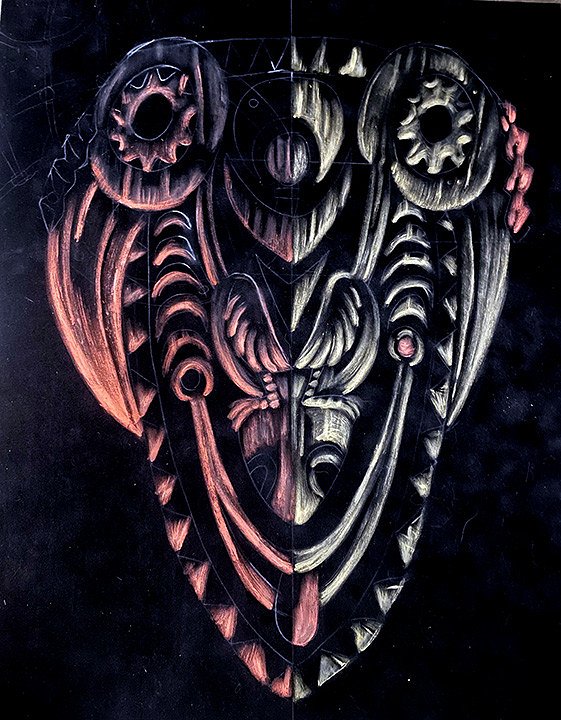
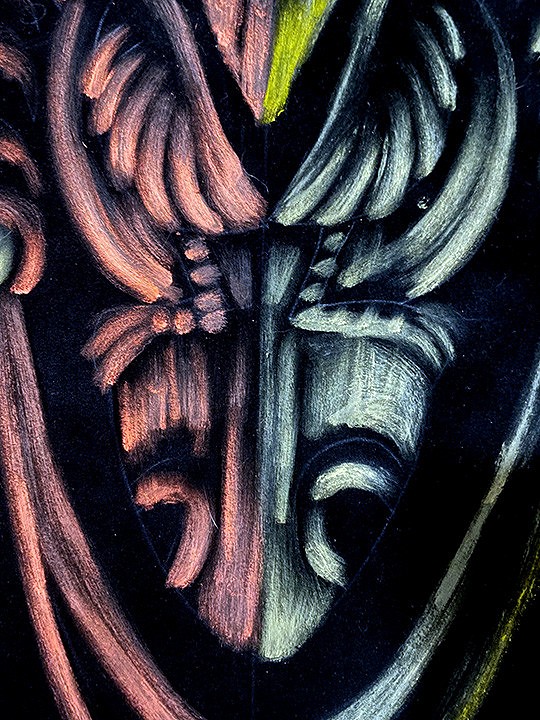
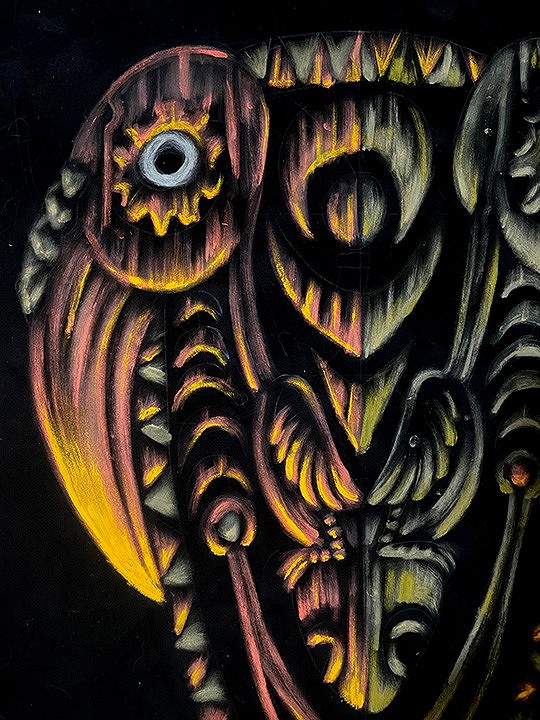
Also did some switcheroo colors on the tongue and cheek circle by the bird's chest.. And while we're here... we haven't discussed how clever the pair of Hornbills are!
They perched back to back so the their eyes
also act as the mask's eyes! MIND BLOWN!
Now here's a bit of a happy accident... After painting for hours amongst a table of colors for the painting and the ones that were close... but didnt make the grade. I accidentally grabbed and used the NOT ASH YELLOW... Mistakes...
the great Equalizer...
and a moment to pause to slow down
to problem solve....
and so I had to go over more edges to distribute the newer tone and make it into part of the beak colors a good save, but even if the viewer never notices the artist ALWAYS does! Like a non verbal taunt...lol Also notice please the switcheroo in the coral red hornbill also the cheek circle and tongue,... Something about the velvet style of painting, but with the dual color approach and the muted colors helps to give it a bit of a Retro Moderne feel... at least that's what I'm striving for despite the stumbles....
So... Seeing as the Ash Yellow Right Side has an extra color.... the Coral Red side needed sumptin....
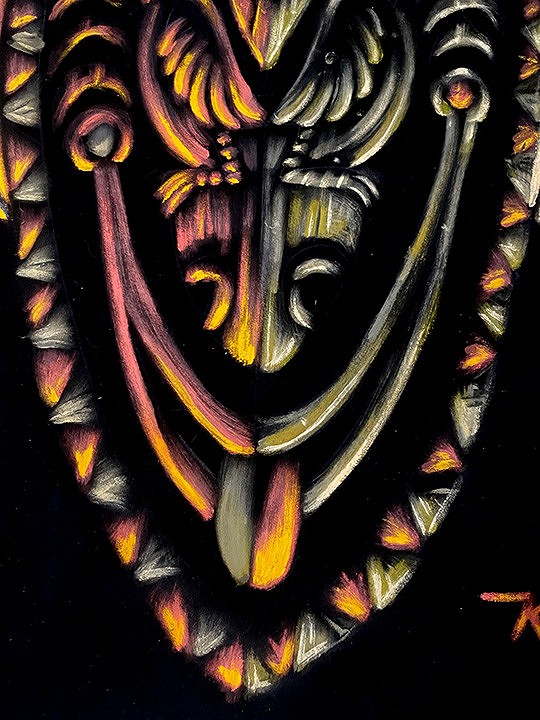
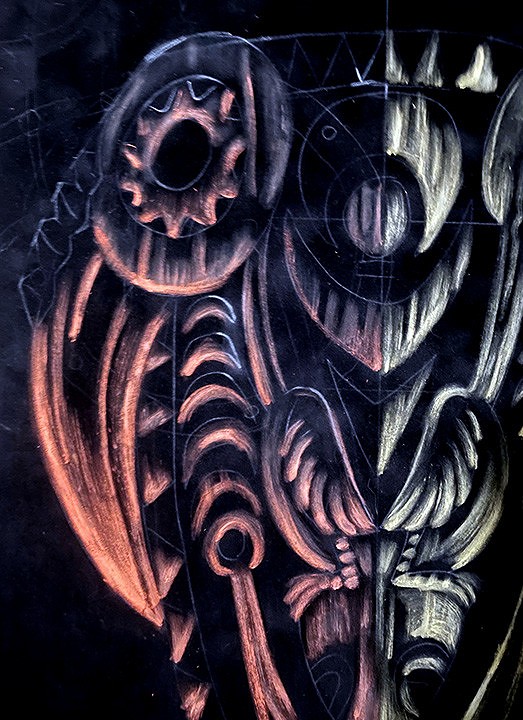
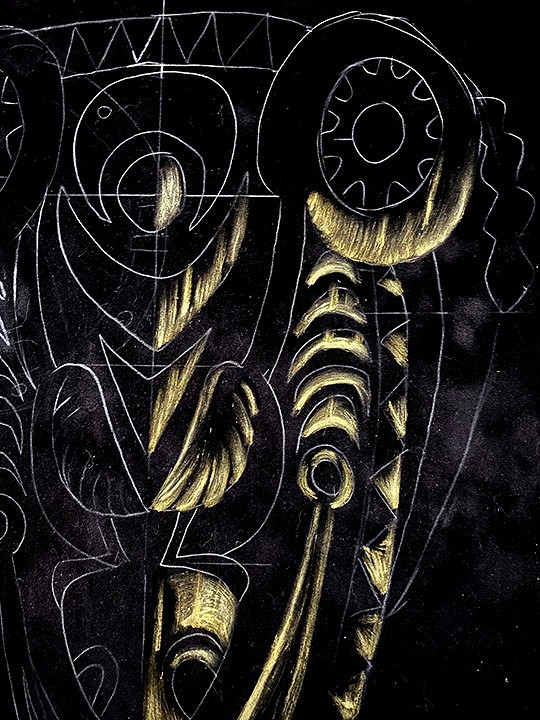
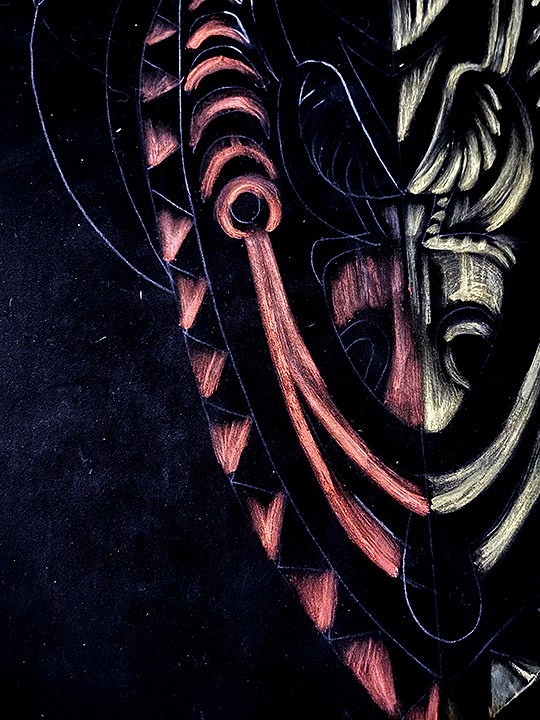
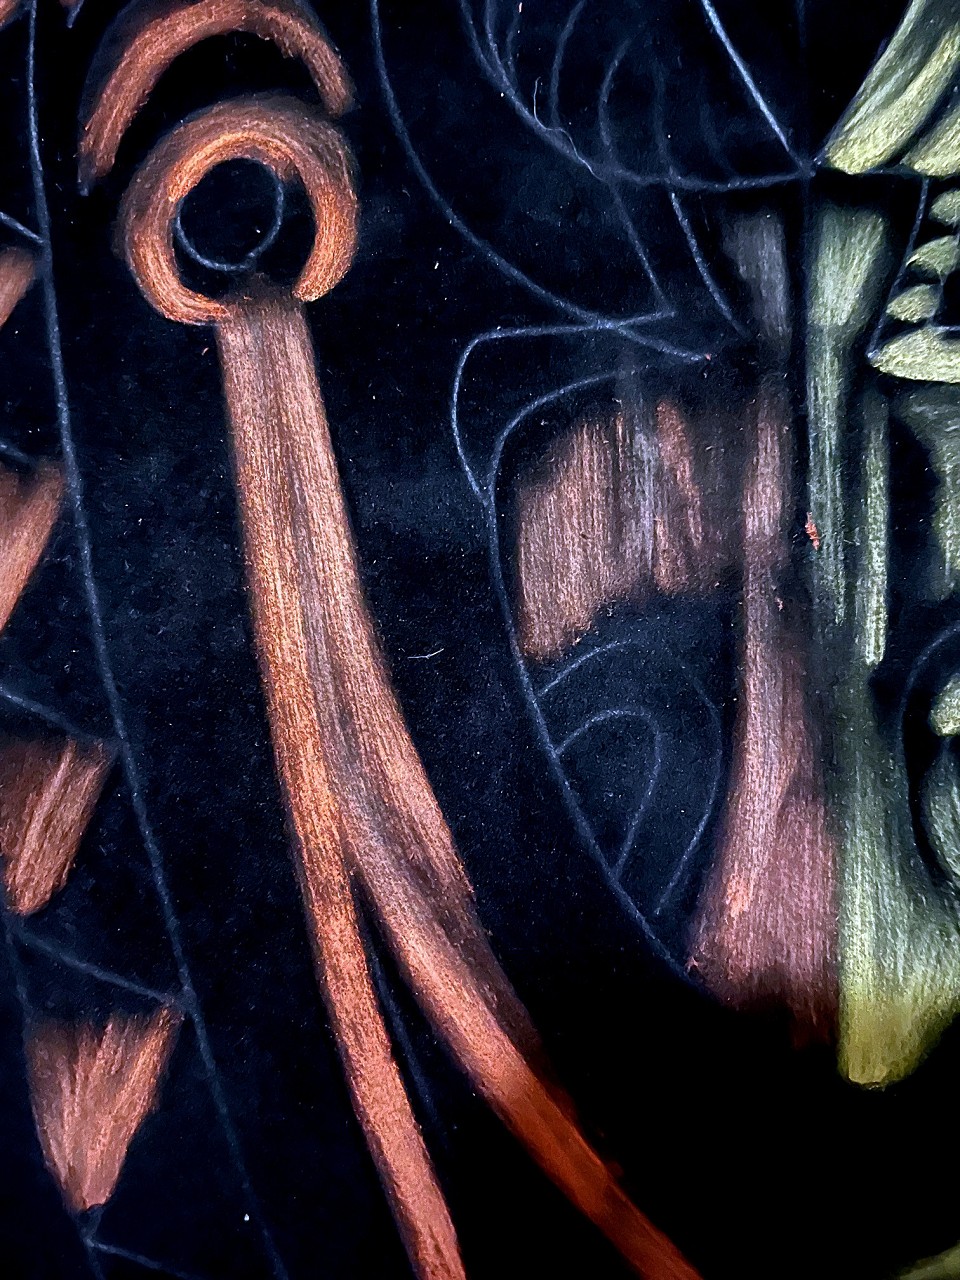
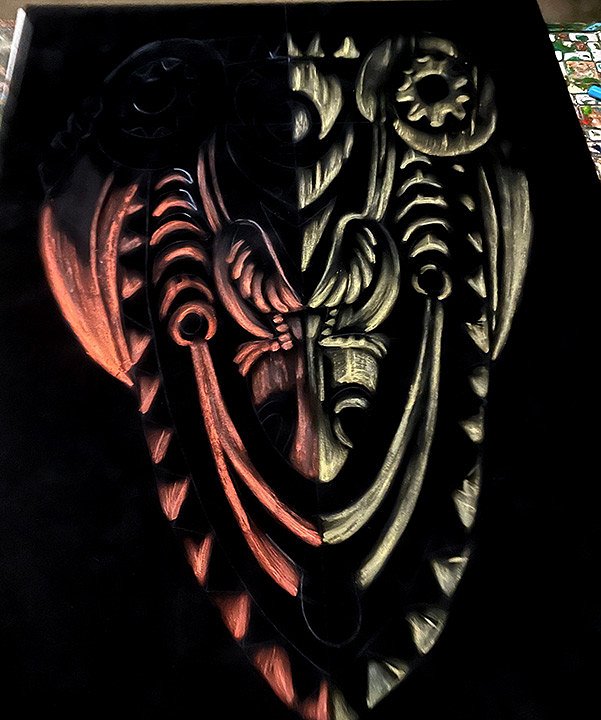
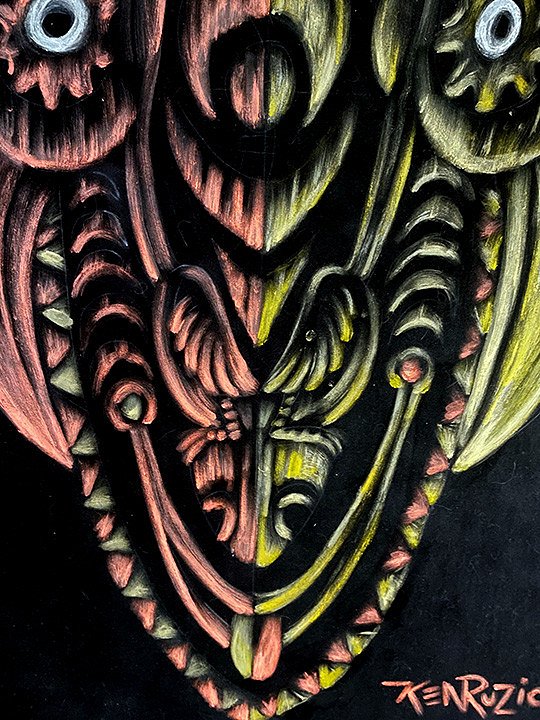
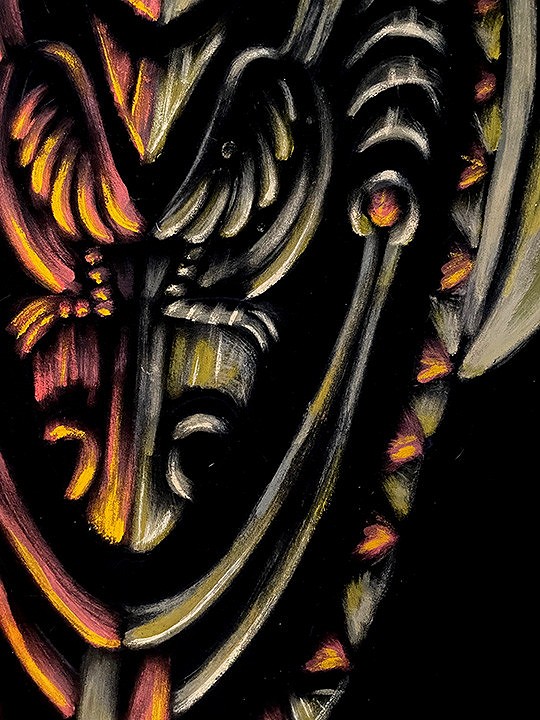
Here's a closeup and you can see the color buildup and the handling of the wood texture with little tics and grains and weathering....
if I didnt do would have saved me a lot of time and still would have ended up a fine piece... But I sometimes like to develop an idea before weighing those things out. Artistic instinct is mostly a tame and gracious creature but pitted against curiosity .... Since the deep yellow added to the coral red, the Ash yellow side needed to be balanced so I used Naples yellow and did a stipple gradation up the beak to mimic the deep yellow on the opposite side.... Also spiced up the signature with some deep yellow.... just because... and Naples yellow on the Ash yellow side for hi lights and a nice warm ivory white for the eyes
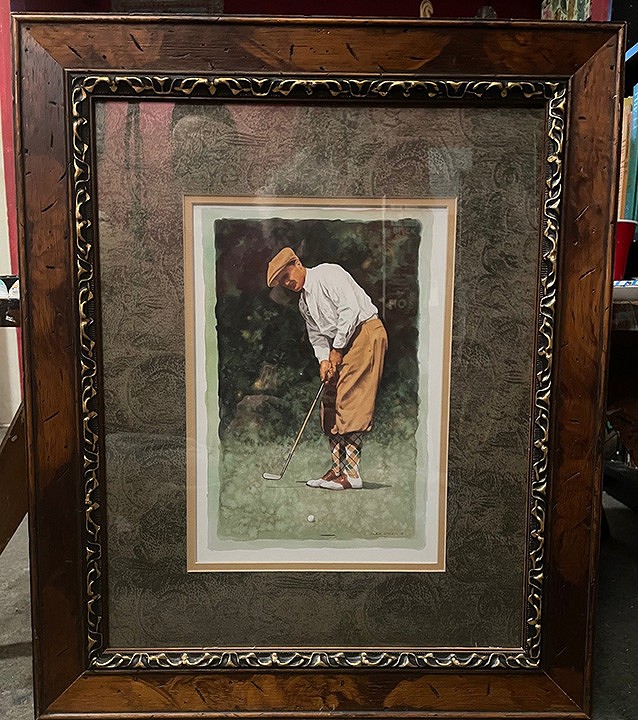
So here is the frame for it FOOOOOOOOORE! I need a pair of them little Rascal pants and a matching hat! Tho McBiff would look better in such attire, to be honest.... Got 2 of these frames for 20 bucks apiece..fair but not like the thrift store glory days of the late 80's/early 90's quality oddities and inexpensive! :)
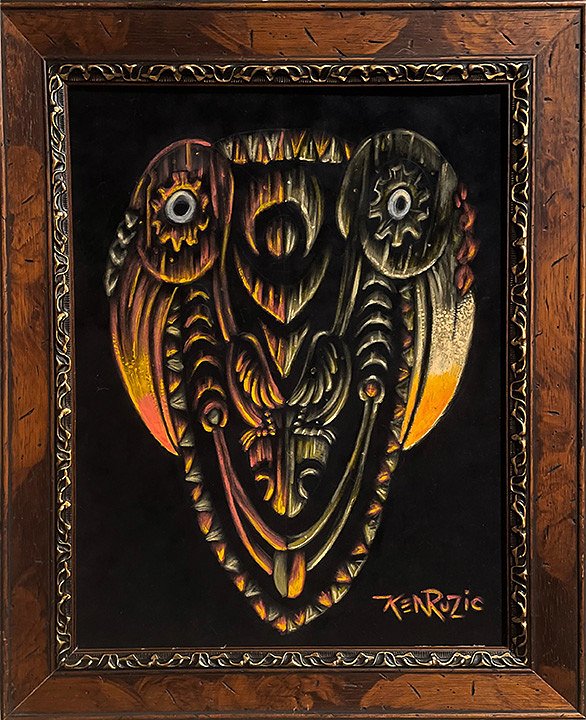
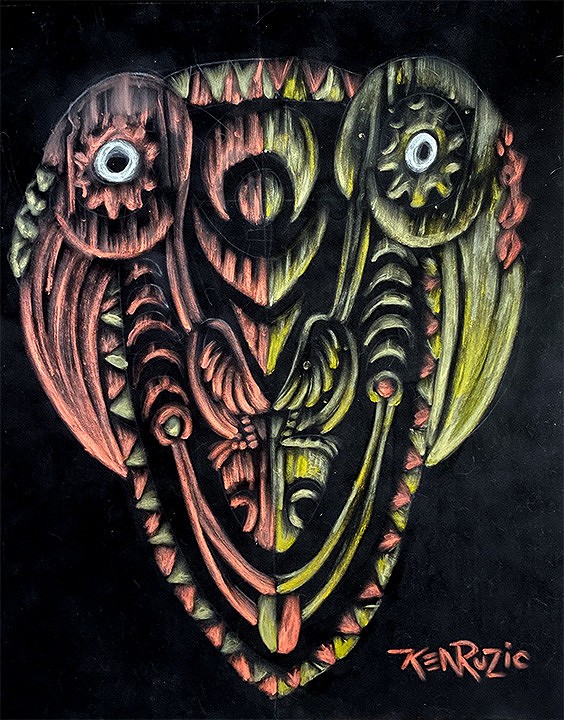
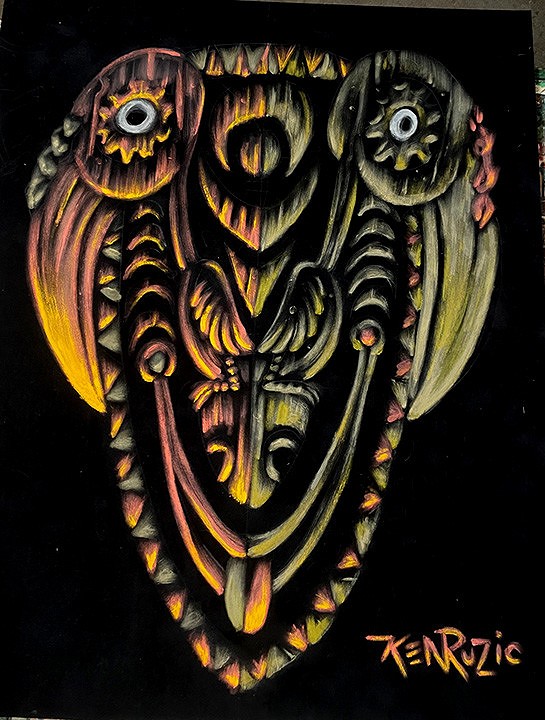
And here is the final finished piece
the expanse of color on the bills of the birds was too much I may have made an error so I tipped income color like actual jungle bird beaks.... which I half like and half don't... But... the next one will be better and I'll have learned not to rush with these things....
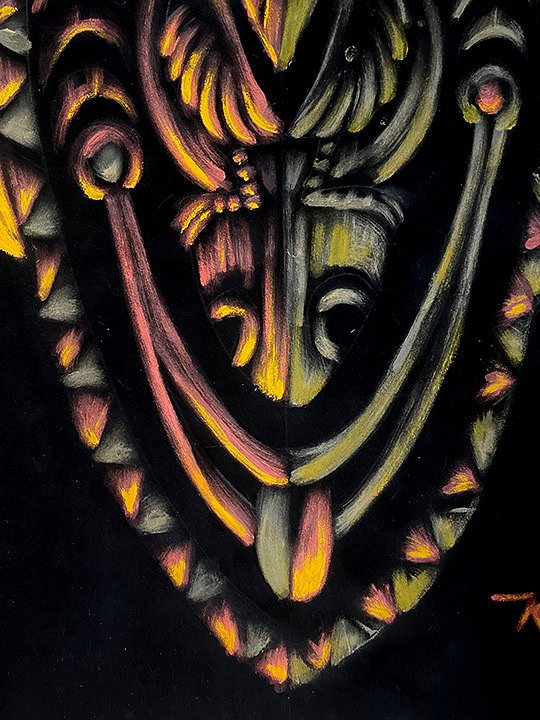
And here it is in this frame...
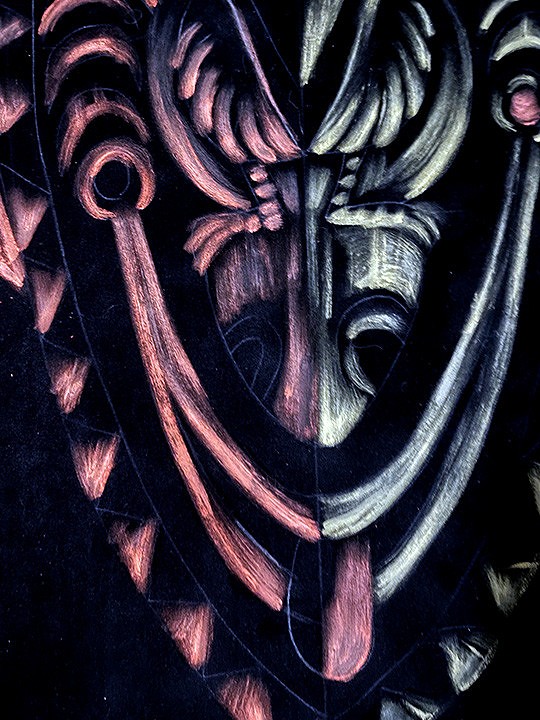
the pits and gouges in the wood
mixed with the weathered Nouveau trim
on the inside
when placed into a different context
begins to resemble jungle vines and growth
or those Thai lion Tail motifs
with their organic movement...
Anyways....
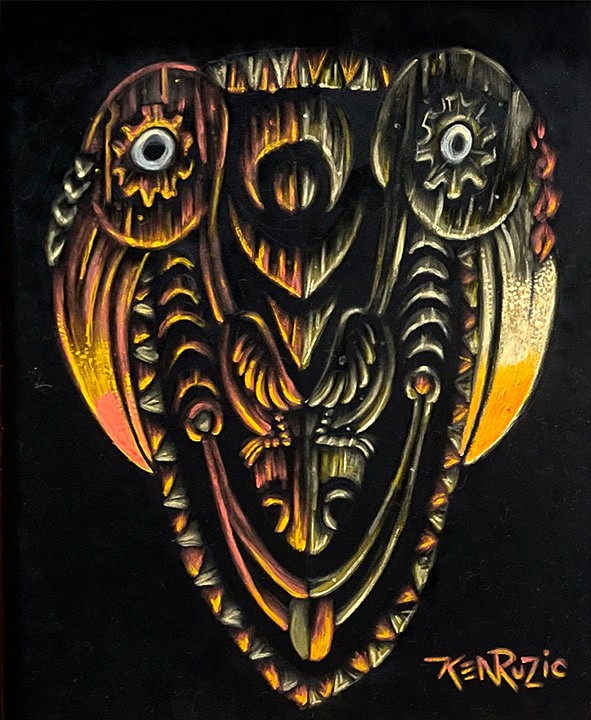
Here is the first of a pair..
"Hornbill Mask"
16 x 20" unframed
acrylic gouache on Black Suede matboard
I hope you enjoyed this little Rantutorial and hope you all give it a try! Bet you can coax a masterpiece outta that cranium of yours! I will have another one shortly this time a cooler choice of colors to mimic the cold waters of the Sepik River with a Crocodile mask! Thanks for wading thru this and I hope it was enjoyable in some degree. I'll be vending at tiki oasis in August this year
and I have lotsa goodies available on Etsy,
So Give them a visit if that's your thing!
Thank you!
[ Edited by little lost tiki on 2022-05-17 10:20:14 ] |
 Aloha kiddies!
Time for another stoogetorial from yours truly....
this time we'll be working on a surface most are unfamiliar with....
Aloha kiddies!
Time for another stoogetorial from yours truly....
this time we'll be working on a surface most are unfamiliar with....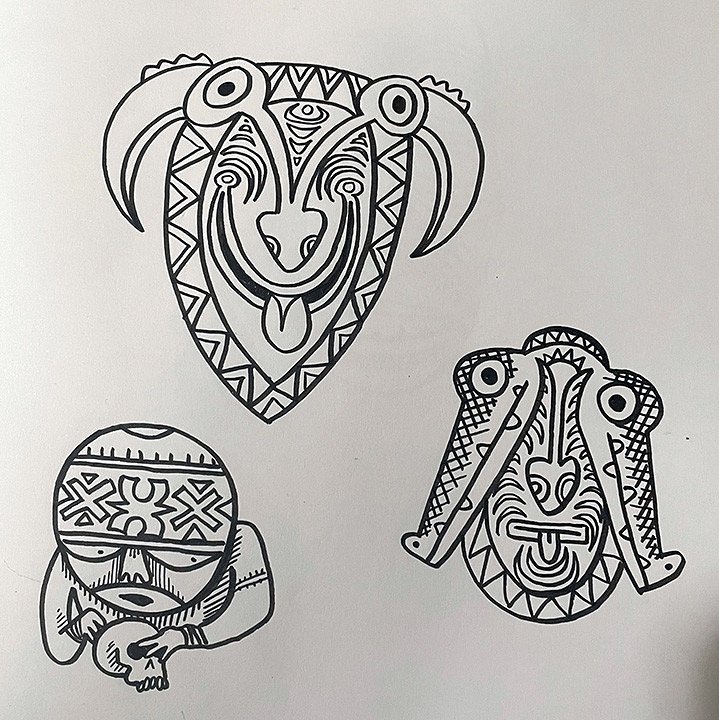


 light pastel pencil can be brushed off lightly and will not affect the surface black
and here's the colors again to give you a refresher....
light pastel pencil can be brushed off lightly and will not affect the surface black
and here's the colors again to give you a refresher.... and the original color way inspiration by Alex Steinweiss (Go buy his affordable, informative and inspiring TASCHEN book!)
NOW!
and the original color way inspiration by Alex Steinweiss (Go buy his affordable, informative and inspiring TASCHEN book!)
NOW!

 Here you can seethe rough building up of the colors
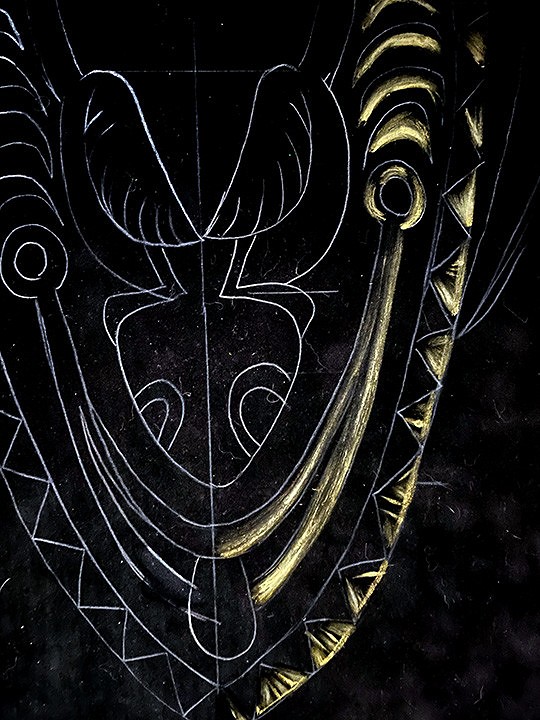


 Then I went and did something that