Tiki Central / Home Tiki Bars / Lagoon of Mystery
Post #807189 by Prikli Pear on Thu, Jan 5, 2023 9:09 AM
|
PP

Prikli Pear
Posted
posted
on
Thu, Jan 5, 2023 9:09 AM
First time attempting to post images via phone. Let's see how this works... Yikes! Way too big. Okay, Noted for the future. Quick edits on the desktop and here we are with something more reasonable. Although I'm still doing stuff with the Lagoon, The Wife and I made the decision during pandemic (well, she made the decision and I wisely declined to argue) to convert the loft area in our home--which was previously used as a media room--into an indoor tiki space. Although Central Texas winters are relatively mild, December through February is not generally a pleasant time to hang out in the Lagoon and weatherizing it with portable heaters, etc., would be more trouble (and expense) that I really wanted to invest. So an indoor tiki annex it was. I've been collecting materials and prepping for the past couple of years, but over the Christmas break I took the big step of mounting lauhala matting to the walls (well, one wall thus far, but you get the idea.
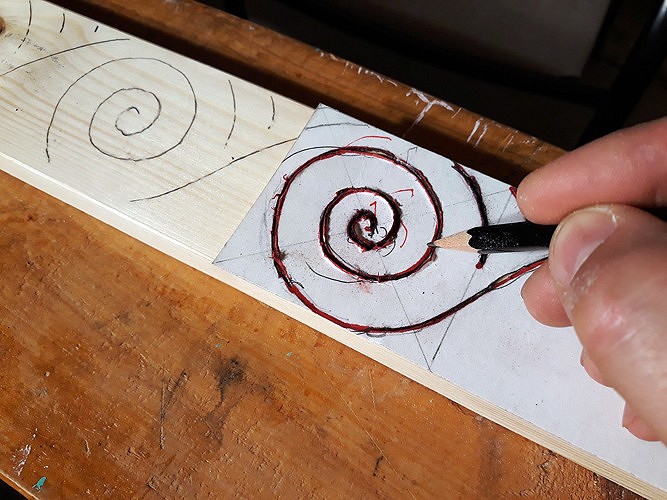
Folks who complain about the irregularity of lauhala aren't lying. I got this roll of matting more than a year ago and every dimension is "-ish." Nothing is square. Nothing is straight. It's very different to work with than the bamboo weave panels I'd used outdoors. Nothing quite looks like lauhala tho. Or bac bac. And I'm not using bac bac (yet). To cover the irregular seams I am power carving trim pieces. I did triangular patterns for the baseboards of the Lagoon and also this room, so am pretty sick of doing triangle patterns. Instead, I've opted for tiki spiral patterns. I've always loved this aesthetic but have avoided doing them because there's plenty of room for error as you can't cheat with a straight edge. I tried practicing some years back and the results were disappointing. This time I was determined to make it work, so I took a piece of cardstock, drew a freehand spiral pattern until I approximated what I wanted, then used a chip carving knife to slice holes through the pattern so I could use it as a stencil. I run a pencil through it and the marks on the wood give me a reference guide. It's not a rigid stencil so there's variation to the guide lines, but the important thing is the reference so my spirals aren't lopsided or bunched up. The proportions are consistent, and that's what matters to me.
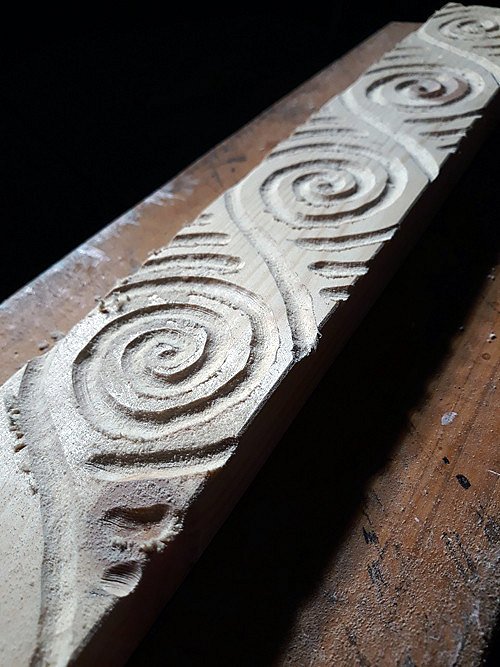
These are narrower pieces of wood I'm using for the trim, 1"x3"x8', so instead of the routers I've used for the baseboards I'm using my Dremel with a sphere burr from Kutzall to make the carvings. So far, so good. I've timed myself and learned that it takes roughly four minutes for me to power carve one full spiral. There are 27 of these per 8' board. You do the math. I am not fast. I am using the cheapest pine boards I can find. Knots are fine. Blemishes are okay. They just have to be straight--no hockey sticks. Finding those is more challenging than one might think.
Next, I will be applying the torch and wire brush, so stay tuned! [ Edited by Prikli Pear on 2023-01-05 09:33:20 ] |