Tiki Central / Tiki Carving
new tikiville light fixture therapy ! pg 6
|
T

TIKIVILLE
Posted
posted
on
Wed, Jul 22, 2009 11:29 AM
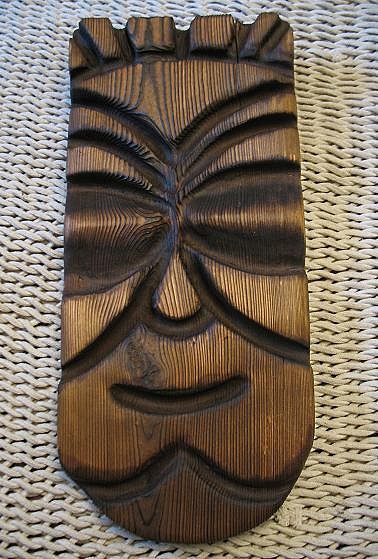
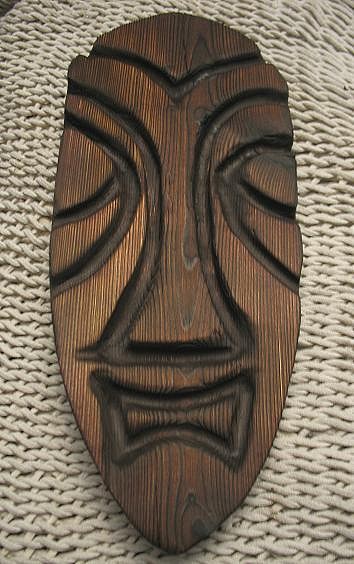
ok, thought I'd update this ....reworked some old pieces and added a couple new ones! [ Edited by: TIKIVILLE 2009-10-06 11:35 ] |
|
LLT

little lost tiki
Posted
posted
on
Wed, Jul 22, 2009 11:52 AM
PNG on a placemat .. |
|
B

Benzart
Posted
posted
on
Wed, Jul 22, 2009 11:59 AM
T-ville, Your tikis are looking Much better these dasys, Keep up the good work! |
|
T
TIKIVILLE
Posted
posted
on
Sun, Jul 26, 2009 11:16 AM
Mahalo for the big compliments! |
|
T
TIKIVILLE
Posted
posted
on
Tue, Jul 28, 2009 3:42 PM
[ Edited by: TIKIVILLE 2009-10-06 11:36 ] |
|
LLT
little lost tiki
Posted
posted
on
Tue, Jul 28, 2009 4:09 PM
HE'S SMILING! |
|
WP

Watango productions
Posted
posted
on
Tue, Jul 28, 2009 8:31 PM
Kool stuff,PNG mask looks great,I think I might |
|
L

laojia
Posted
posted
on
Tue, Jul 28, 2009 9:55 PM
PNG stuff is like a drug, when you start a piece you're quickly addict! :lol: Very good work on the last one Paul! J. |
|
T
TIKIVILLE
Posted
posted
on
Wed, Jul 29, 2009 12:10 PM
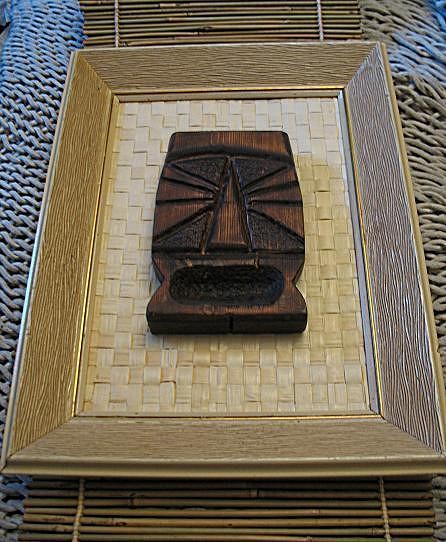
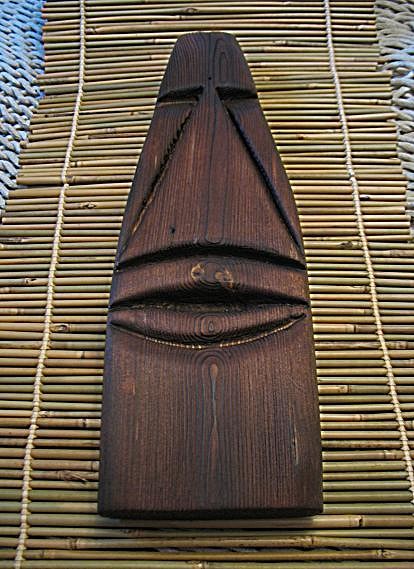
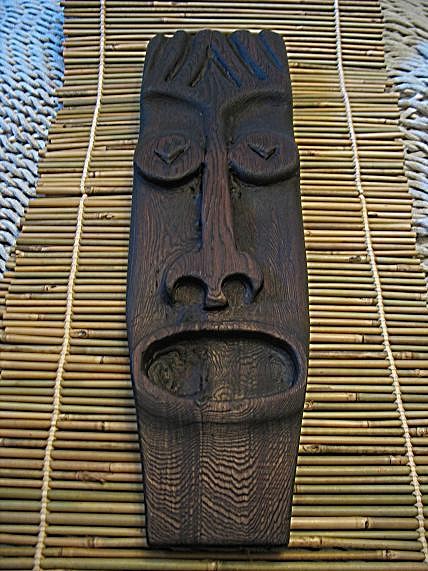
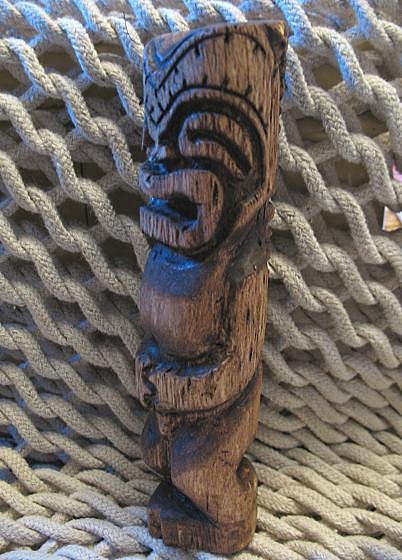
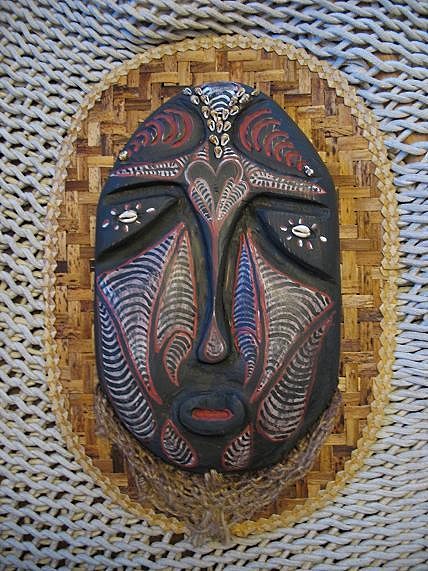
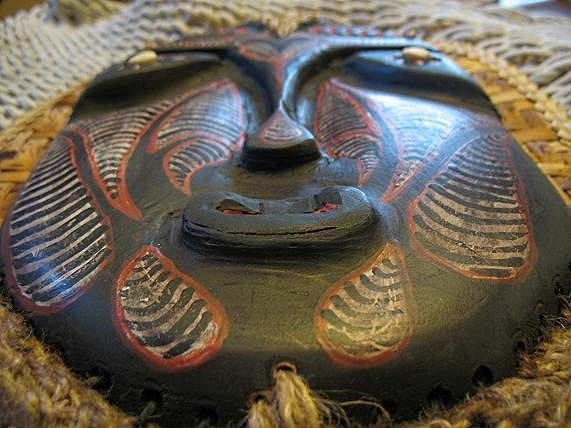
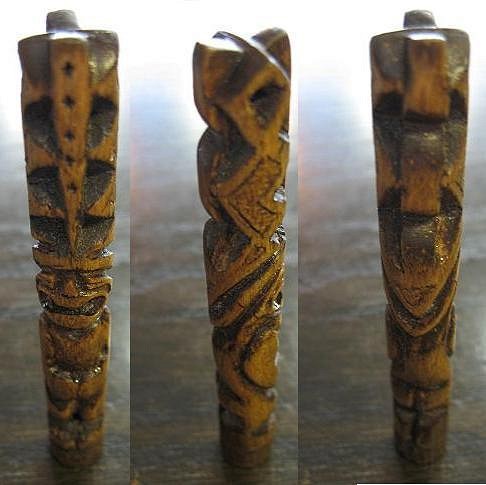
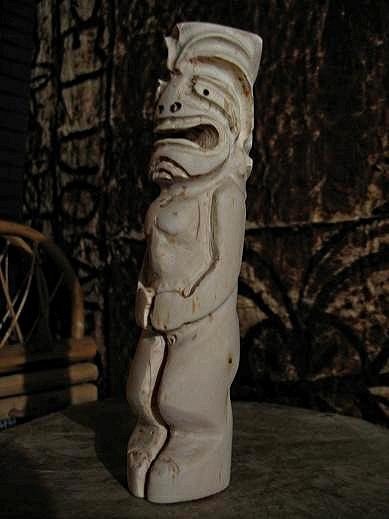
here is a couple detail shots of the finished piece ( the full shot is above with my other works ) |
|
C

congatiki
Posted
posted
on
Wed, Jul 29, 2009 12:46 PM
Tikiville...I love your PNG mask. Nothing to be fearful about, looks to me |
|
T

tikisbytyler
Posted
posted
on
Wed, Jul 29, 2009 1:33 PM
Great work, T'VILLE!!! Really like that PNG, but its all looking good! |
|
T

TheBigT
Posted
posted
on
Tue, Aug 4, 2009 12:22 PM
Just saw this! That is very cool. How did you figure out the weaving part? Nice work. |
|
T
TIKIVILLE
Posted
posted
on
Tue, Aug 4, 2009 1:57 PM
I got lucky with that ...just did a sort of round and round thing and it worked ( not much of a braider ) Thanks for the compliments ! |
|
T
TIKIVILLE
Posted
posted
on
Thu, Oct 1, 2009 10:50 AM
in the mean time ..... |
|
T
TIKIVILLE
Posted
posted
on
Tue, Oct 6, 2009 11:40 AM
a couple new ones that have been sitting unfinished for far too long, now back to the one that has been staring at me every morning with that "WELL?" expression... |
|
T
TheBigT
Posted
posted
on
Tue, Oct 6, 2009 1:02 PM
Nice. I like it. What kind of what is that? It's got some kind of dark spots in it or blemishes that give is a lot of character. |
|
T
TIKIVILLE
Posted
posted
on
Tue, Oct 6, 2009 1:15 PM
That I do not know ,it was in a pile of branches cut for fire wood ...cant be too exotic though it was very light in color before the stain ( maybe birch? poplar? ,it's a small 6" tall . |
|
T
TIKIVILLE
Posted
posted
on
Mon, Oct 19, 2009 1:21 PM
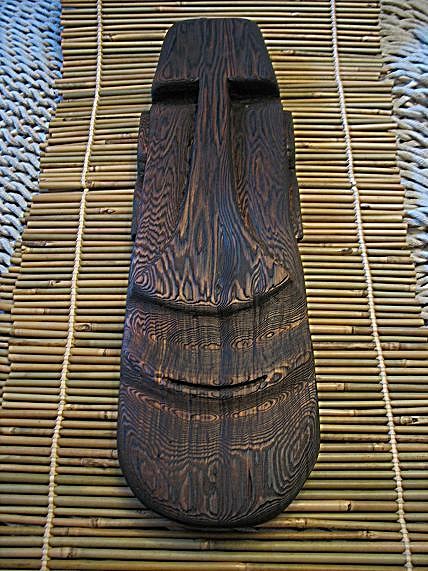
My latest work ....just started a few months ago lol
[ Edited by: TIKIVILLE 2009-11-09 11:02 ] |
|
L
laojia
Posted
posted
on
Tue, Oct 20, 2009 11:02 AM
Hey Paul! Thank's to sharing your work! I stay tuned for the finished pics... J. |
|
T
TIKIVILLE
Posted
posted
on
Wed, Nov 4, 2009 2:11 PM
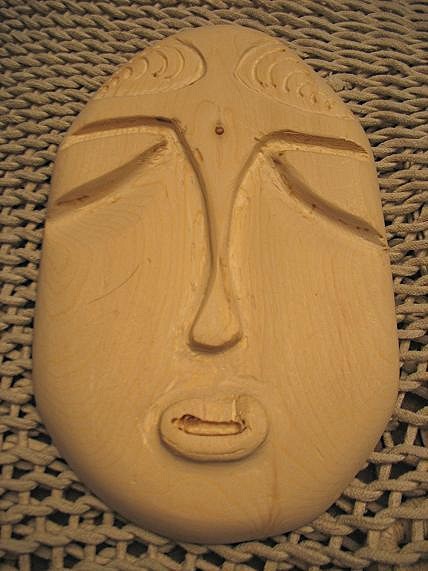
here is one I made while my laptop was on the fritz... 4" tall! |
|
T
TIKIVILLE
Posted
posted
on
Mon, Nov 9, 2009 1:01 PM
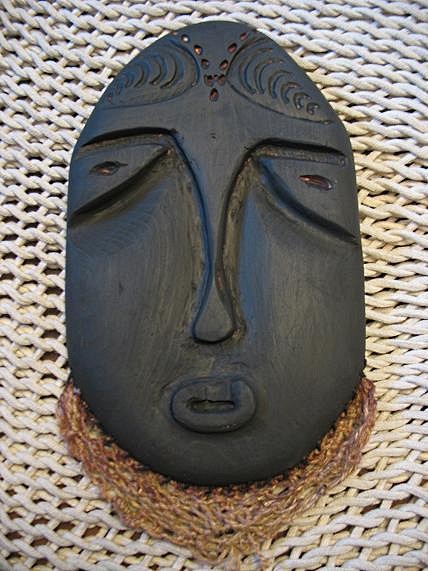
Well the PNG piece is done ( pictures in previous post) |
|
LLT
little lost tiki
Posted
posted
on
Mon, Nov 9, 2009 1:18 PM
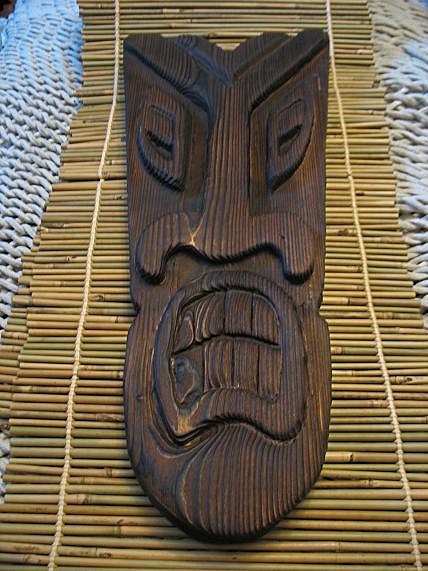
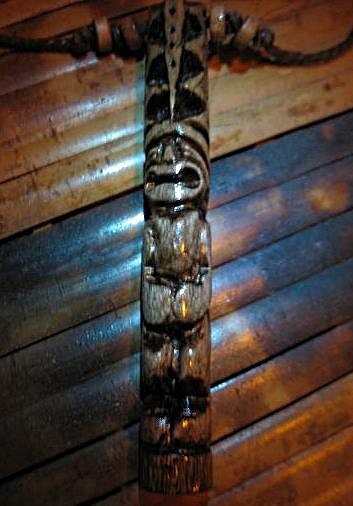
That PNG piece with the cowrie shell eyes is a Bullseye TV! |
|
T
TIKIVILLE
Posted
posted
on
Mon, Dec 28, 2009 11:28 AM
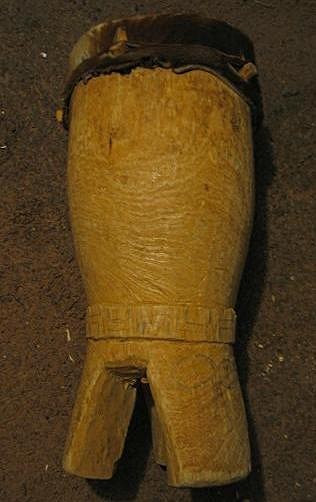
Found this drum ... |
|
T
TheBigT
Posted
posted
on
Mon, Dec 28, 2009 12:42 PM
I like this. See, laptop broken, productivity goes up! :P |
|
T
TheBigT
Posted
posted
on
Mon, Dec 28, 2009 12:44 PM
U mean somebody else made the drum? |
|
T
TIKIVILLE
Posted
posted
on
Mon, Dec 28, 2009 2:19 PM
yup ...found it al a goodwill for 10 bucks ( I think , it was a while ago ) |
|
T
TIKIVILLE
Posted
posted
on
Thu, Dec 31, 2009 10:32 AM
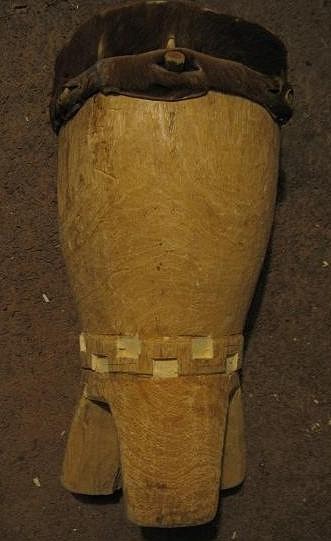
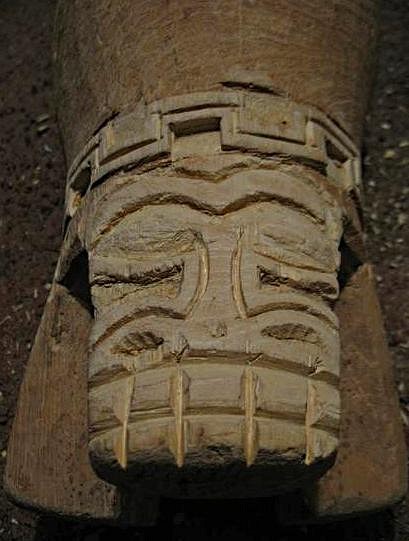
some more I'm chippin at ...( and a drum update) Any comments , sugestions ? what could I do that I'm forgetin ? |
|
T
TIKIVILLE
Posted
posted
on
Thu, Dec 31, 2009 3:43 PM
is their a drum carving champ on this here dealeo? |
|
T
TIKIVILLE
Posted
posted
on
Tue, Jan 5, 2010 5:35 PM
bump.....anybody? |
|
LLT
little lost tiki
Posted
posted
on
Tue, Jan 5, 2010 5:38 PM
Babs has done the research |
|
B
Benzart
Posted
posted
on
Wed, Jan 6, 2010 11:52 AM
Hey, Looking Great! Very nice way to dress up a plain-Jane drum and making it look great. It Might even make it sound a bit better Too! |
|
T
TIKIVILLE
Posted
posted
on
Wed, Jan 6, 2010 12:08 PM
Thanks! |
|
BPB

Bay Park Buzzy
Posted
posted
on
Wed, Jan 6, 2010 6:25 PM
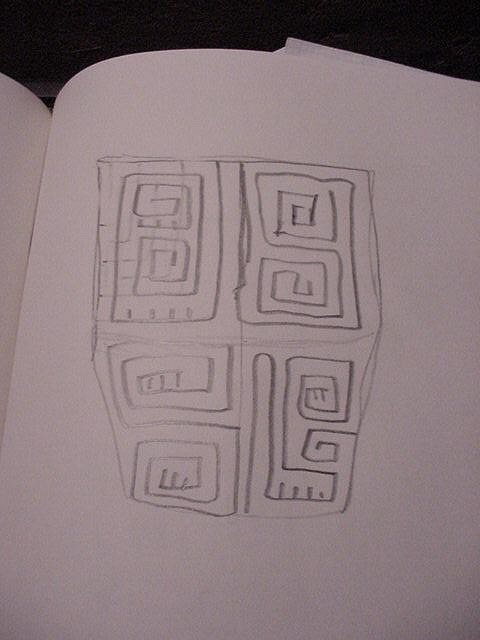
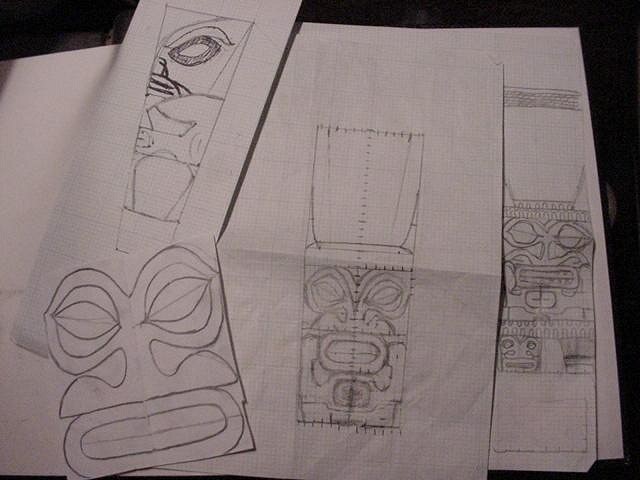
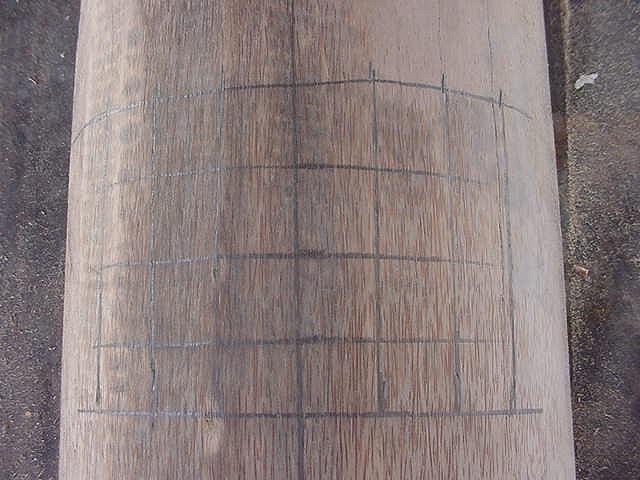
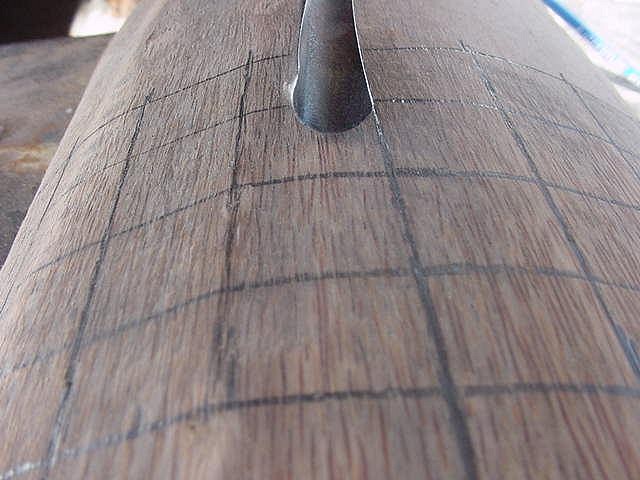
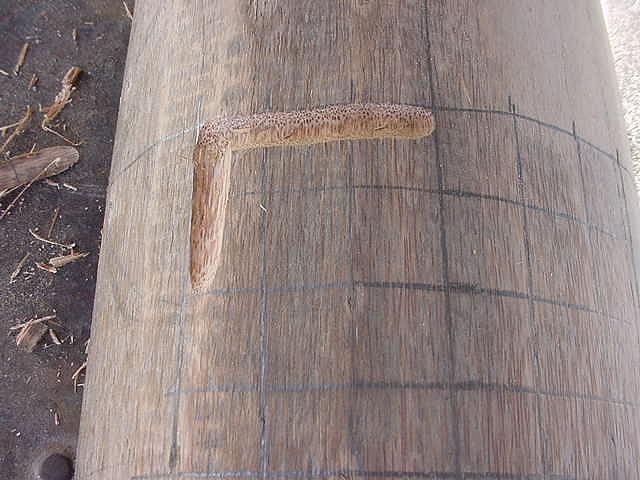
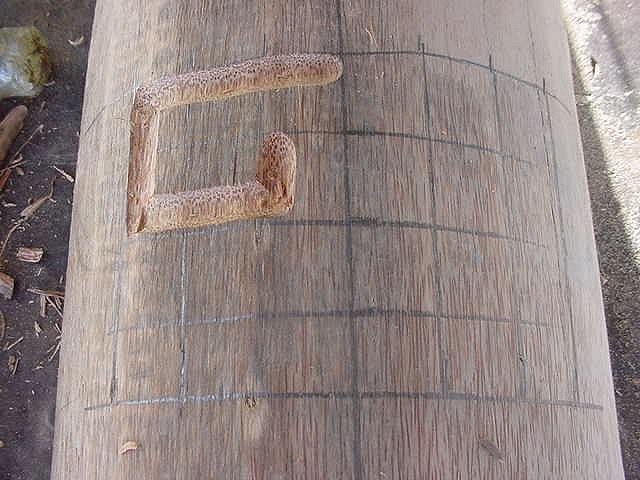
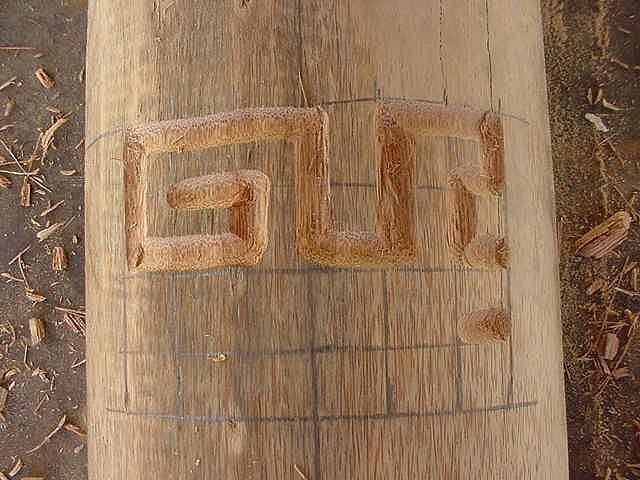
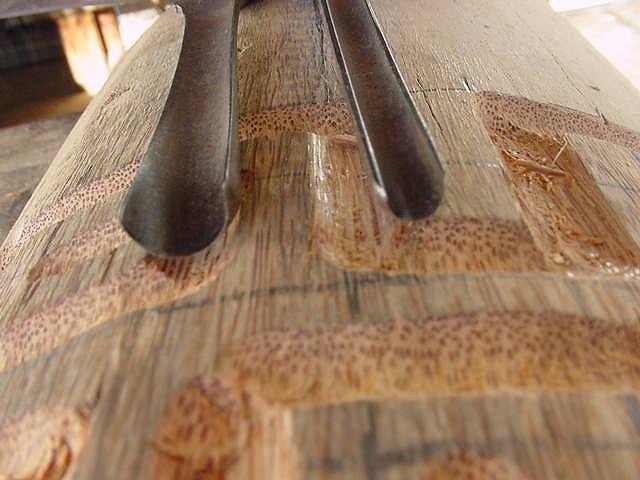
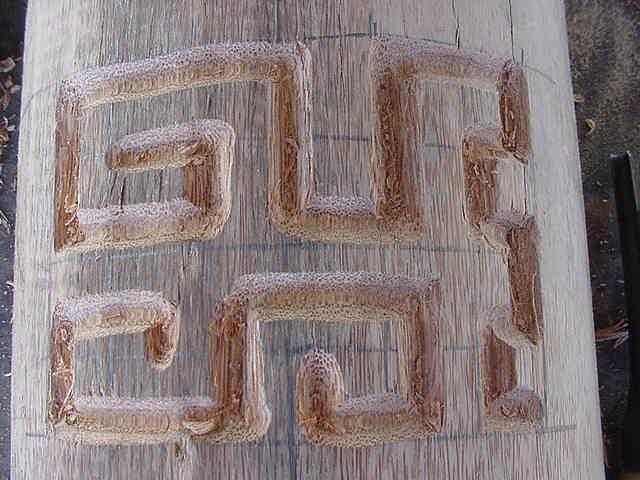
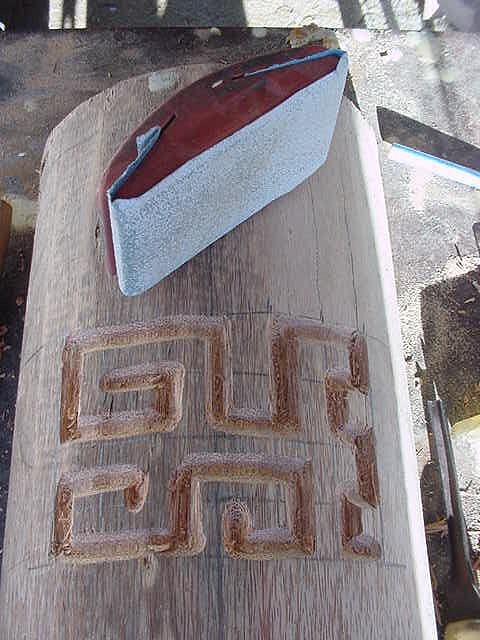
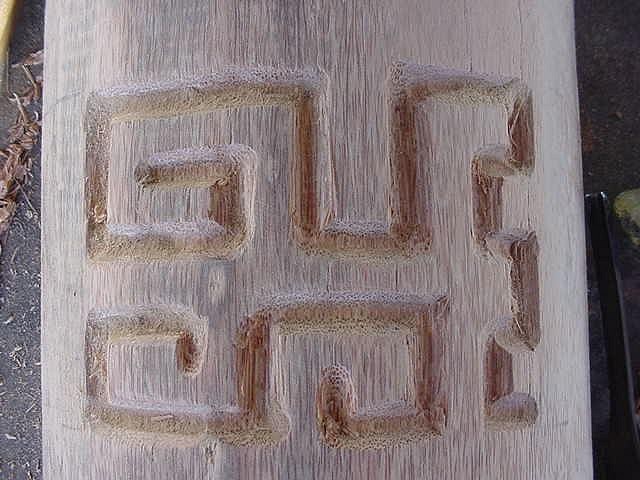
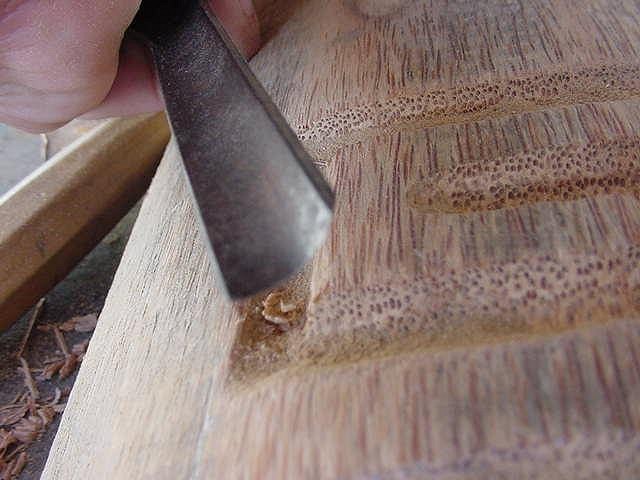
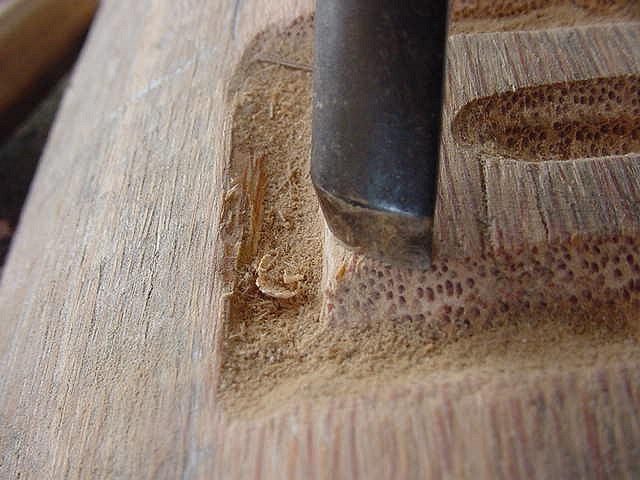
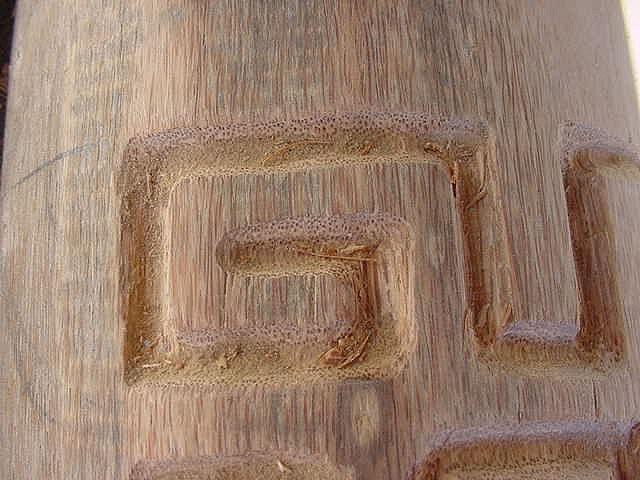
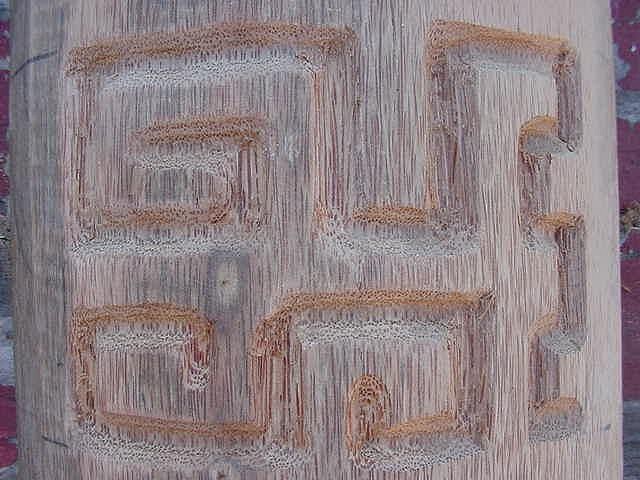
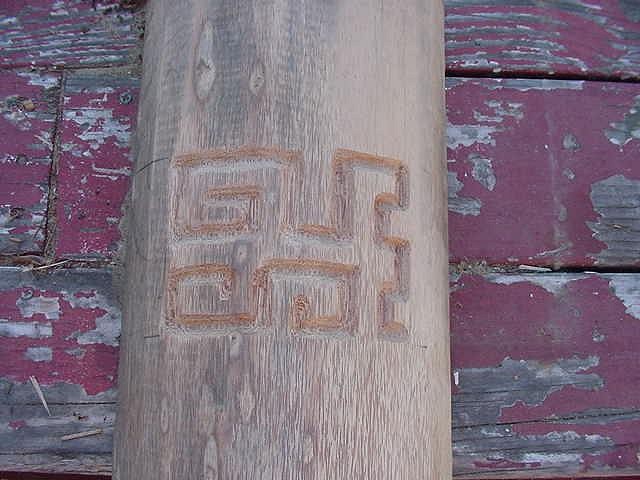
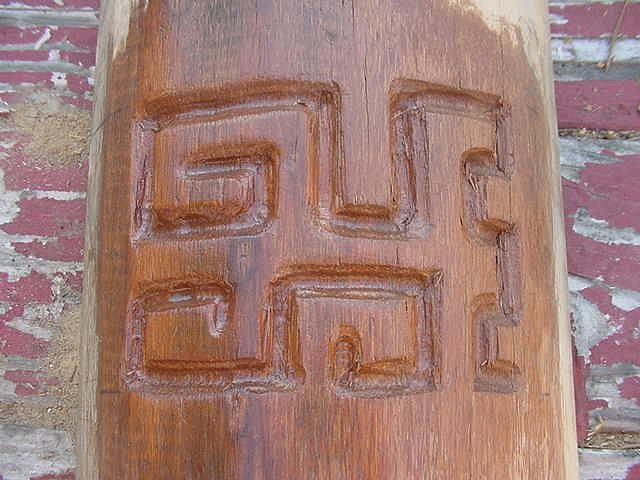
Hey Tikiville: Here's my step by step process for decorating up the drums. Hope you don't mind all this visual clutter on your thread. If you want me to take it off after you check it out, just let me know. First I just kind of get a general rough plan sketched out. Nothing too complicated, just enough for me to have an idea where I'm going before I start This one tries to suggest a hidden tiki face in the design. Not super apparent, just a subtle hint of an abstract tiki. The goal was to make it hidden until it's pointed out, then my hope is that it will be obvious: for the bigger drums, I do scale drawings down to the half inch of them before I start. the Tikiyaki drum is in the middle. On the left in this photo are a couple stencils I used for the legs of other drums: After all the paperwork is done, I do the carving part. I start with a grid of 1" squares over the surface I carve: The reason I do them in 1" squares is because I do the carving with a 1/2" veiner, as shown in the following picture. I'll call the space I carve the "positive space" and the uncarved "negative space" for this explanation. I want the + space to be as wide as the - space. The grid helps me keep those ratios consistent. Here I start carving out the design(this is just a quick one I did on some scrap wood for this educational endeavor) A little more progress: Once I do the whole design with the 1/2" veiner, I take my 1/4" one and make them deeper. I do this because the 1/2 tends to rip out the - space on the palm wood when I try to go deep with it. It's hard for palm to hold detail on the horizontal cuts without breaking off, so I find it's less frustarting to use the two tools to do this. Here's the little veiner next to the first one I used: Here it is after going over it a second time with the smaller tool: for this step I use a hand sanding block: Here's the surface cleaned and most of the edges softened Next, I round out the corners with a small rounded gouge: I just do his by hand like this: See how they are now round in shape? this helps to reduce the chance of splintering off: For that, I wrap sand paper around an emery board and sand away. this part will give you many under the fingernail splinter experiences: Here it is after a real qiuck cleanup In this picture,you can see all the defects and different tones in the wood surface. It still looks "messy", even though it's clean and smooth: All that mess kind of disappears and brings the design forward when you add a little stain to it: If this was a real piece I was working on, I would sand it by hand with emery boards until it was perfectly smooth. I feel it has to be so clean, that there is no chance that a splinter will break off of it when it is handled by the user. to me, that's a very important consideration. drums are differnt in that they will be used and touched, unlike a tiki that just sits there for decoration Here's the little one I just finished to show the quality of finishing on it. this drum is real small, so I used the 1/4" veiner on it with an even smaller one for the second pass: Here's a straight on view of one of the faces: Hope that helps!
[ Edited by: Bay Park Buzzy 2010-01-06 18:31 ] |
|
BTS

BIG tiki scott
Posted
posted
on
Wed, Jan 6, 2010 6:32 PM
buzzy!!! very cool stuff!! that little finished drum is AWSOME!!! you have an awsome style and ur work shows me i have lots to learn!! beautiful carvin buzzy!! cheerz!! |
|
T
TIKIVILLE
Posted
posted
on
Wed, Jan 6, 2010 8:53 PM
YES!, see a true master is always willing to share his knowlage, thank you ! |
|
T
TheBigT
Posted
posted
on
Thu, Jan 7, 2010 8:30 AM
That tutorial is pure gold. |
|
T
TIKIVILLE
Posted
posted
on
Fri, Jan 8, 2010 10:56 AM
Finished this little fella last night ....now to finish that drum! |
|
S

seeksurf
Posted
posted
on
Sat, Jan 9, 2010 9:39 PM
Right on looking good. |
|
T
TIKIVILLE
Posted
posted
on
Fri, Feb 19, 2010 11:12 AM
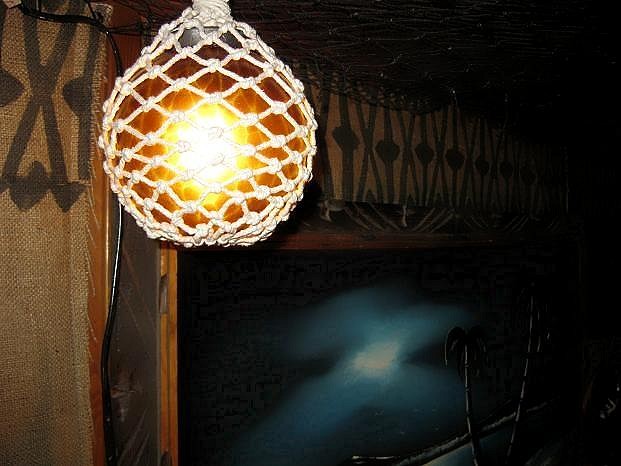
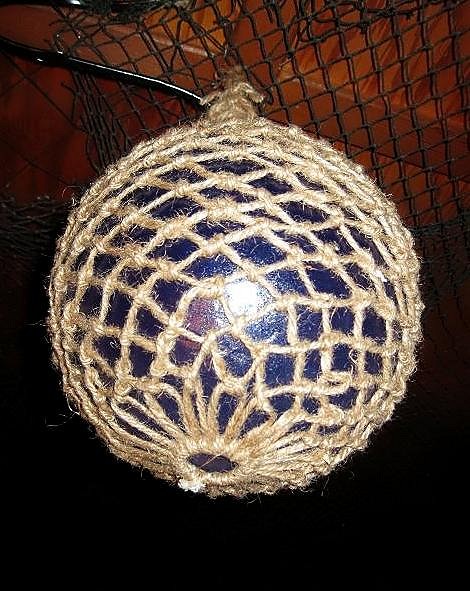
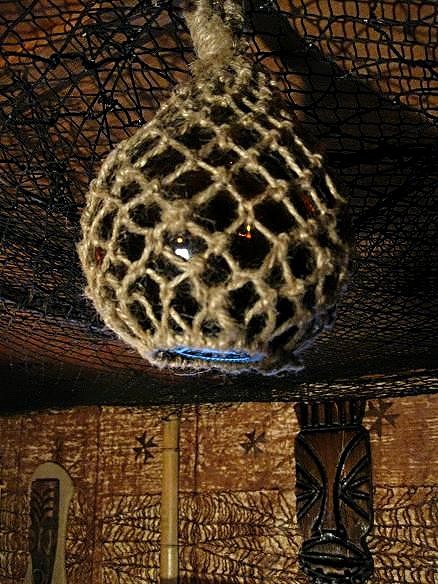
well, the drum got sidetracked AGAIN ! |
|
K

KAHAKA
Posted
posted
on
Sat, Feb 20, 2010 2:19 PM
Nice work! I want to try to make some of those float lamps, but the tying looks tricky to me. |
|
T
TIKIVILLE
Posted
posted
on
Sat, Feb 20, 2010 3:30 PM
not so tricky , as long as you have something to keep the spaces even , |