|
H

Hakalugi
Posted
posted
on
Thu, Apr 27, 2006 11:21 PM
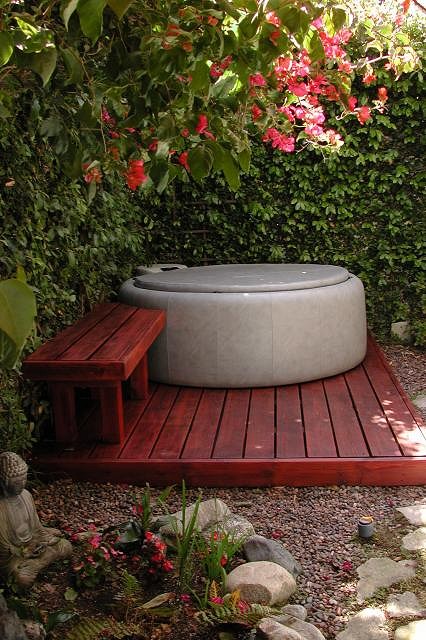
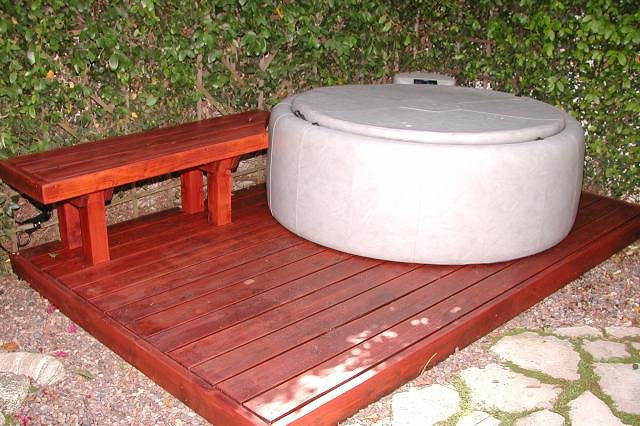
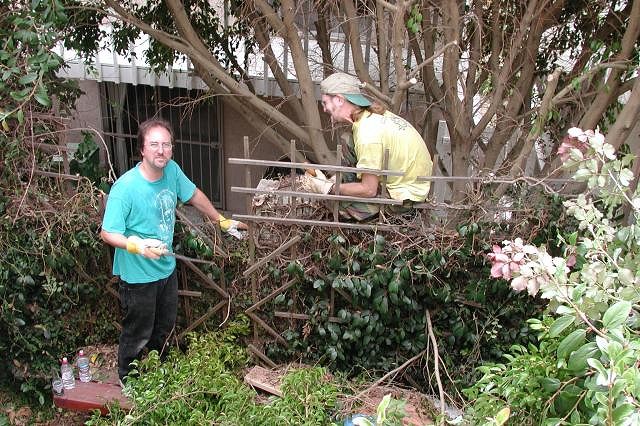
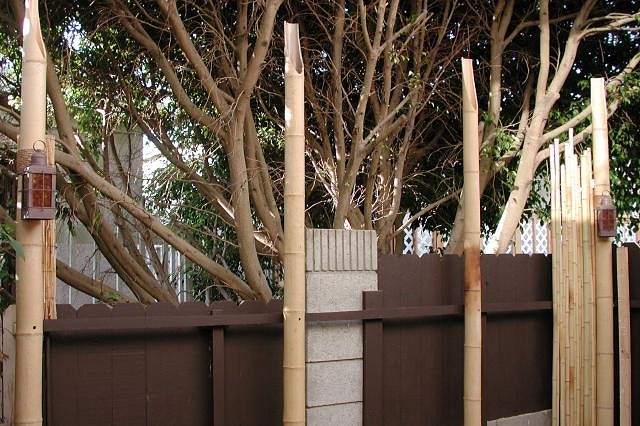
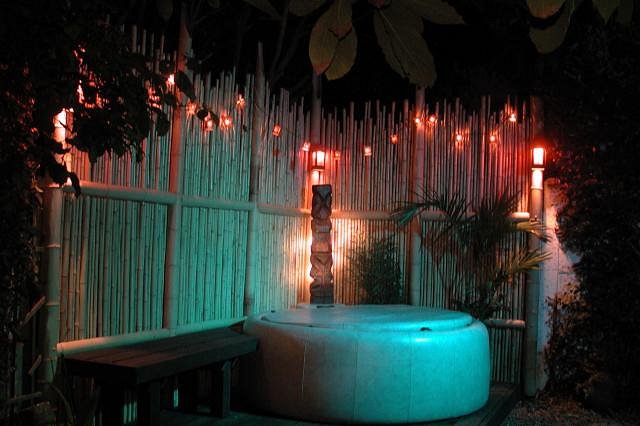
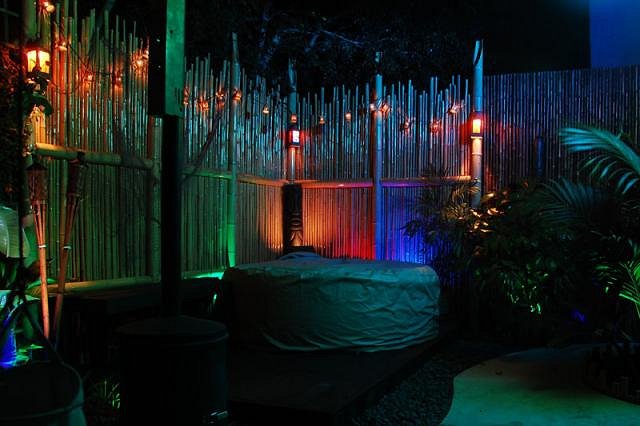
Hakalugi's Bamboo Fence Project: Below are some before shots in better times. After many years the thick overgrown vines were becoming harder and harder to manage. Plus there were times when you would be sitting in the hot tub and you would hear creatures clambering through the vines. You never knew if one of them might fall into the hot tub right into your lap. It was definitely time for a change.
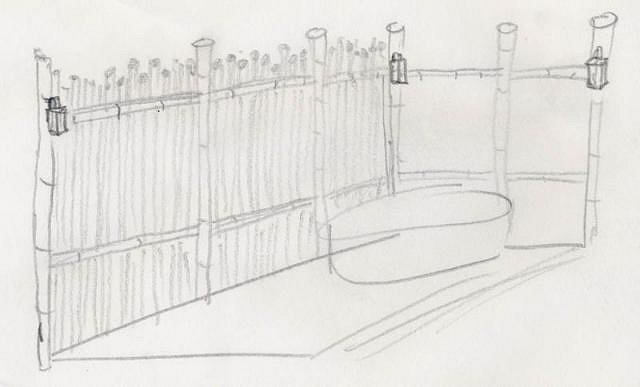
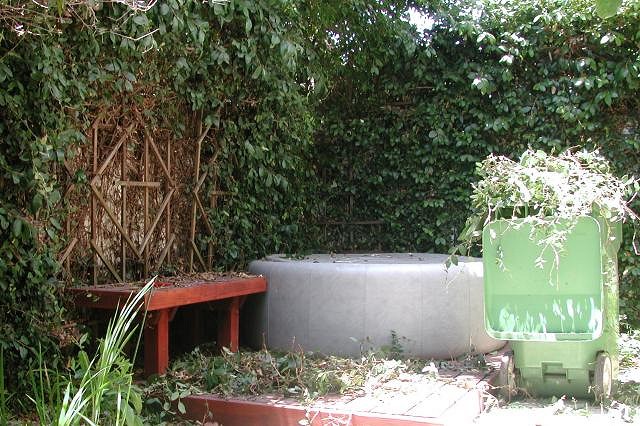
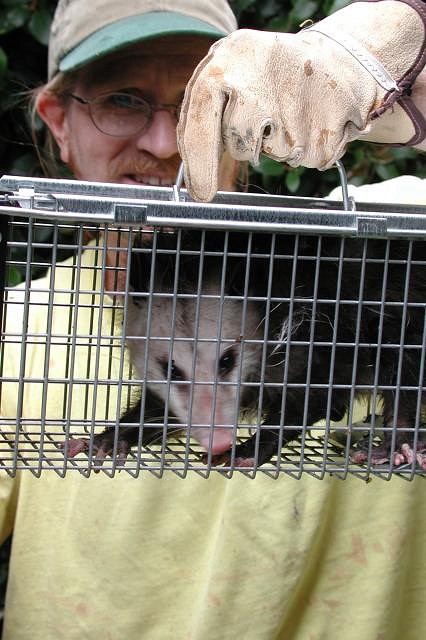
The Plan: Removing the overgrowth: Getting started: Hakalugi (me) and Bartman cutting back the vines and the neighboring tree which leans over the fence and drops tons of leaves and messy seedpods. Our first obstacle was an opossum which had decided to take up residence next to the warm hot tub. When Bartman found it cornered between the fence and the hot tub, it had leaped up hissing and tried to bite him. The opossum had no intention of leaving and we had no choice but to relocate it. Without hesitation Bartman grabbed it by the tail and then was able to hold it by the scruff of the neck. Fortunately I had a cage to put it in. It looked like the opossum had been nesting there for a while. We looked to see if there were any babies but found none. Later that night we drove out to a remote field that had a stream and released it.
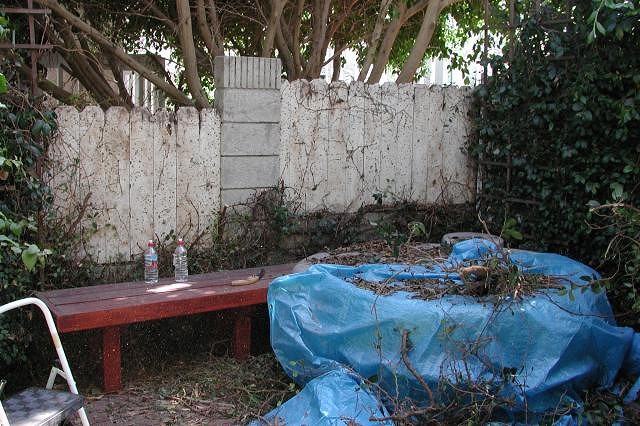
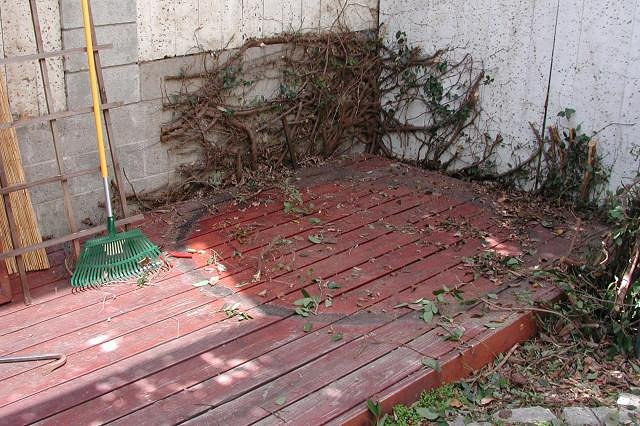
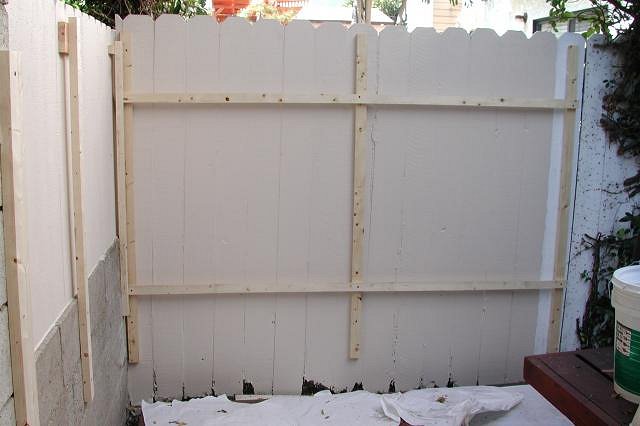
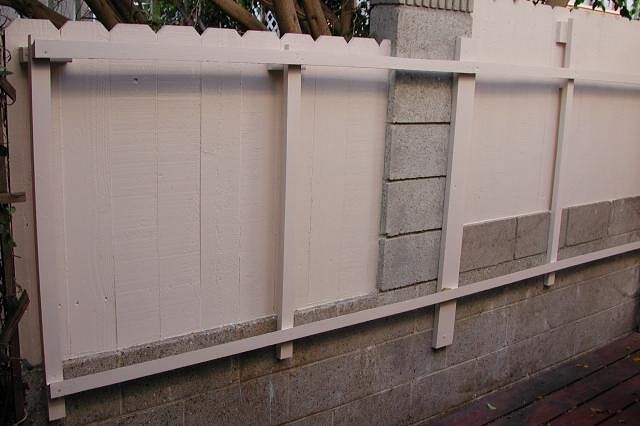
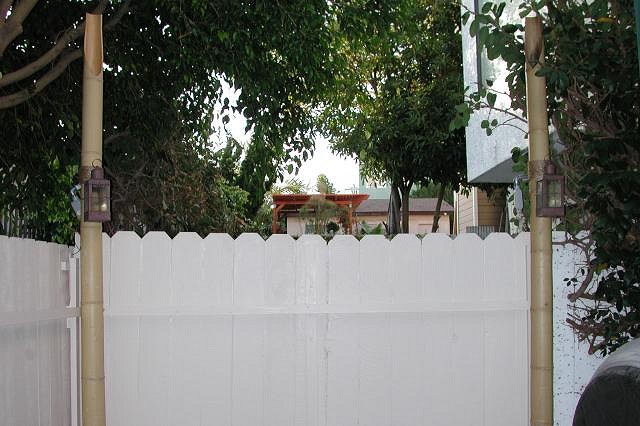
By the end of the first day I was left with this: A few weekends later: These vines were quite thick. Not only did they have to be cut back, but the roots needed to be removed too. After a few more weekends of work all of the growth was removed. I then did some repair work to the fence and painted it. Actually that’s an understatement. I actually had to replace the fence along the back wall because it was badly damaged by termites and from where vines had pushed between the slats. If I didn’t fix it now, any future repairs would involve removing the bamboo fence. Plus the bamboo fence was to literally hang from this existing fence, so it had to be strong. So, new slats, painted on both sides with primer and two coats. I then caulked all of the seams to prevent any new vines from the neighbor’s yard from sneaking through. Of course they might still come over the top but at least they won’t do any damage. After a few more weekends, the above work was done and I was able to install the supports for the bamboo fence:
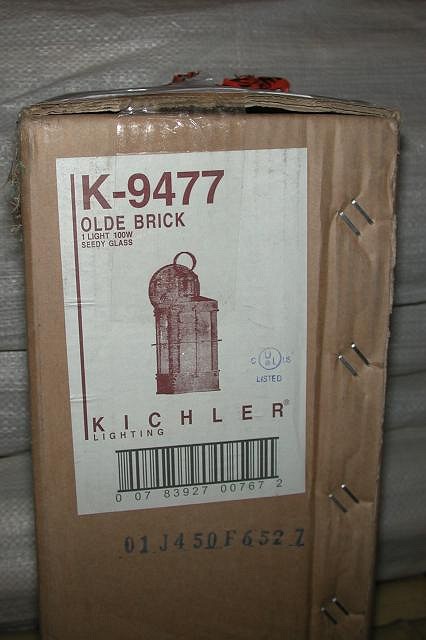
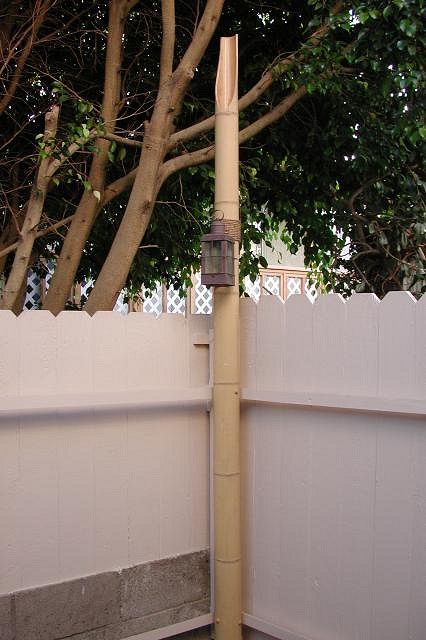
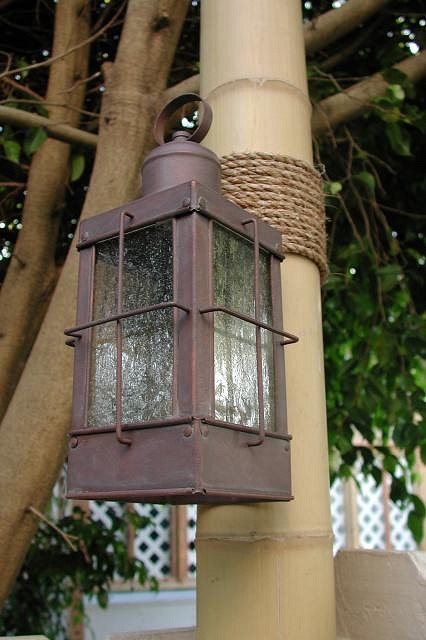
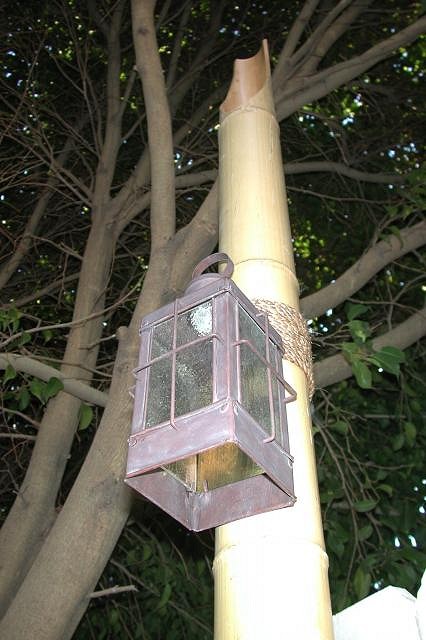
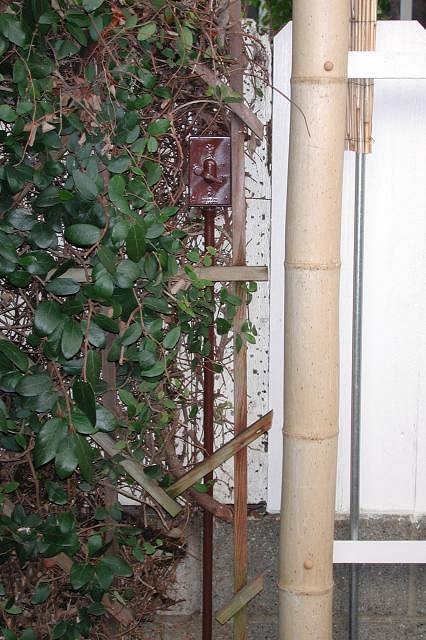
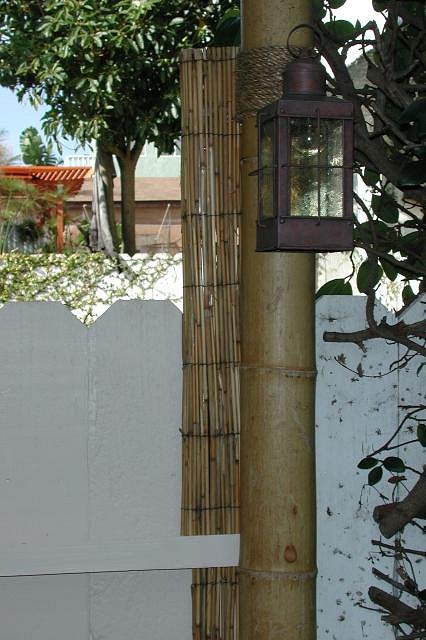
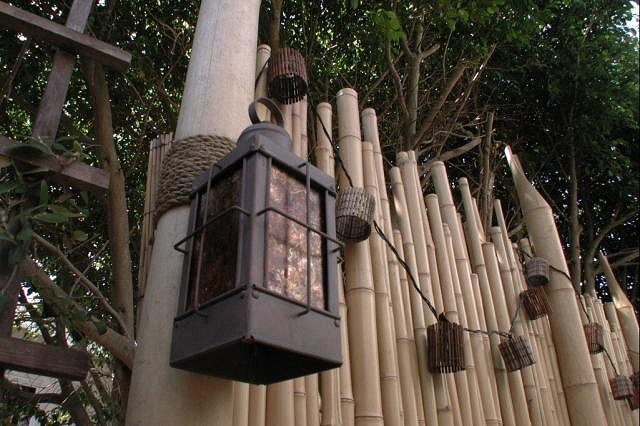
The crossbeams that the bamboo would mount to are angled so that rain water drains off: The light fixture I settled on. The other fixtures I liked had glass globes but I chose these because I wanted to be able to replace the glass with something that looked aged. The posts with lanterns (still with stock glass) go up. I used a fine tooth saber saw to cut the tops of the posts:
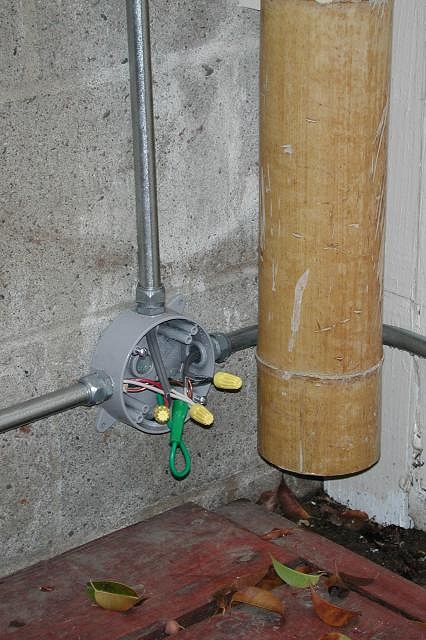
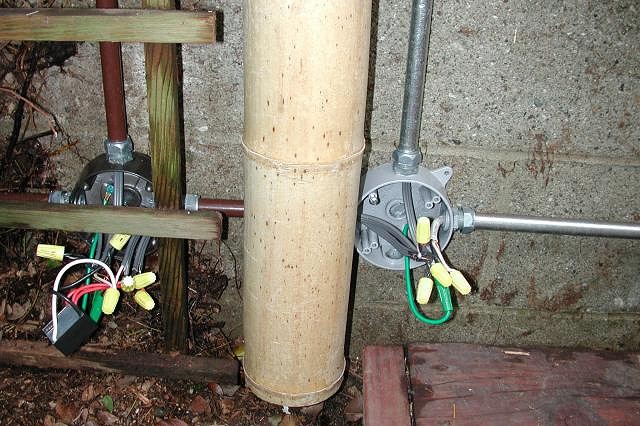
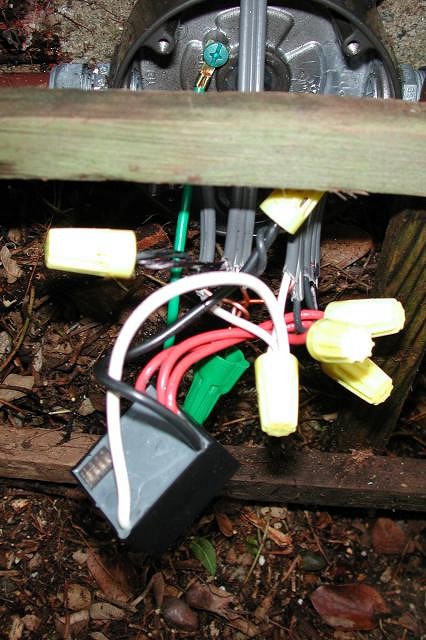
Now that the three lamp posts were installed I was able to move on to the electrical. I was able to tap into an existing outlet which was already along the back wall of the yard:
Here is a close up of the three channel random flicker circuit from SimFlame as originally pointed out by Tiki Lee over here. This is a really cool device. Each lamp is independent and softly flickers like a flame. Switch for the lamps: Since I attempt to be nice to my neighbors, I didn’t want the electrical to look obtrusive from the backside of the fence. So I wrapped the conduit. Unfortunately this didn’t stop the neighbors from complaining about the noise from my last late night gathering.
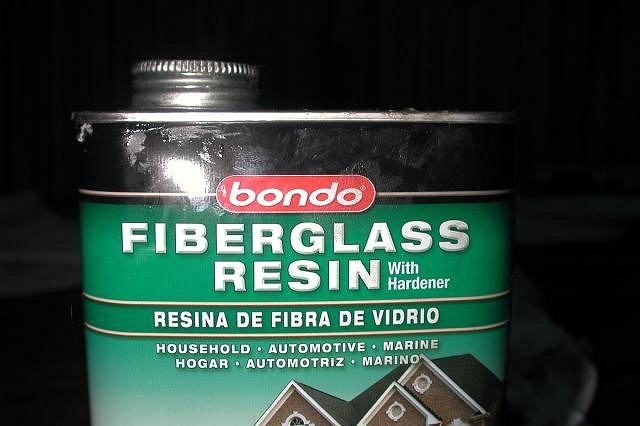
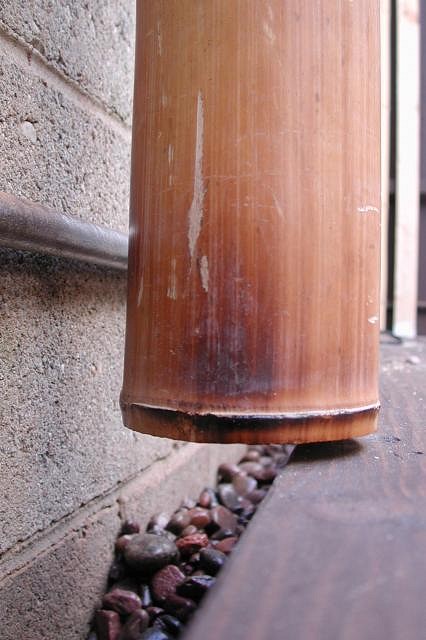
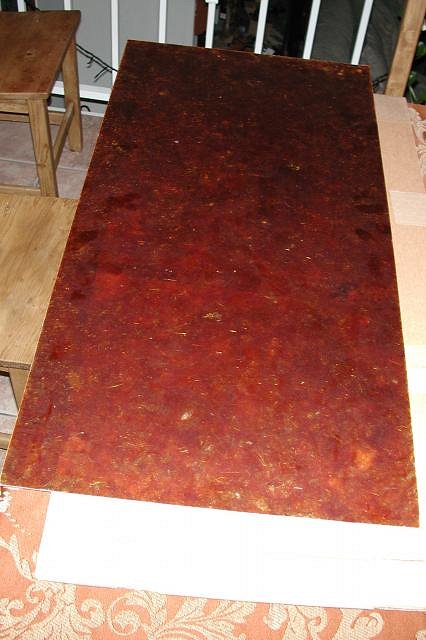
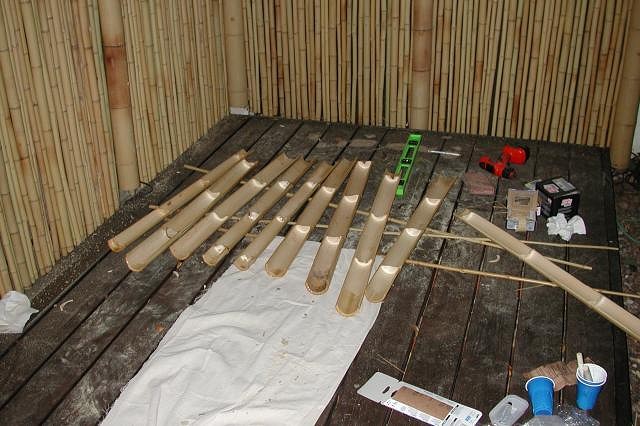
All of the bamboo was sealed on the ends with resin.
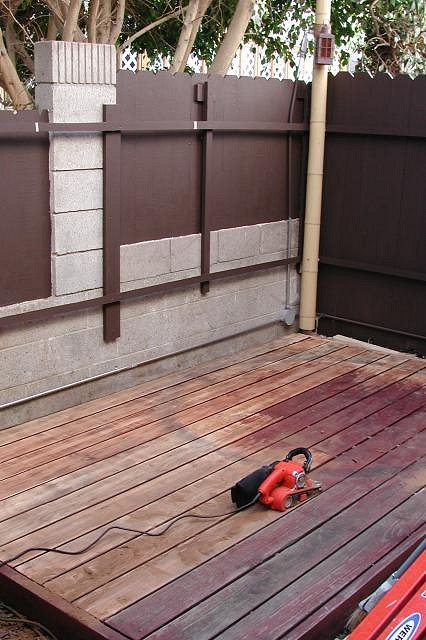
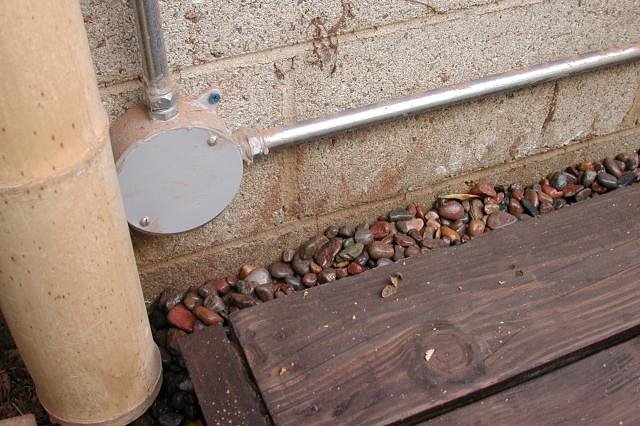
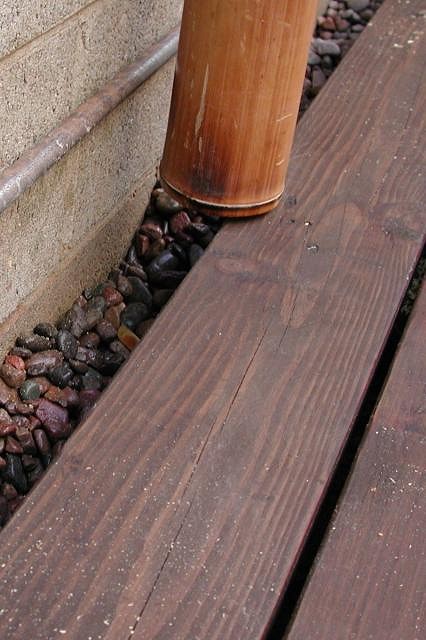
I decided it would be best to paint the fence a darker color so it would be less visible through the spaces between the bamboo. Refinishing of the deck has also commenced: Fresh gravel has been laid along the perimeter: The bamboo must not be allowed to touch the ground (or deck in this case).
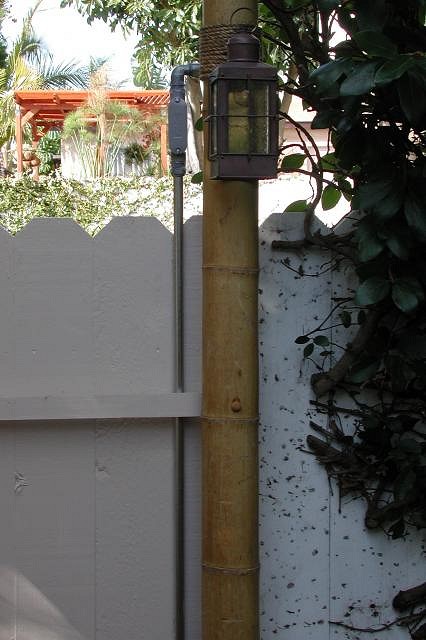
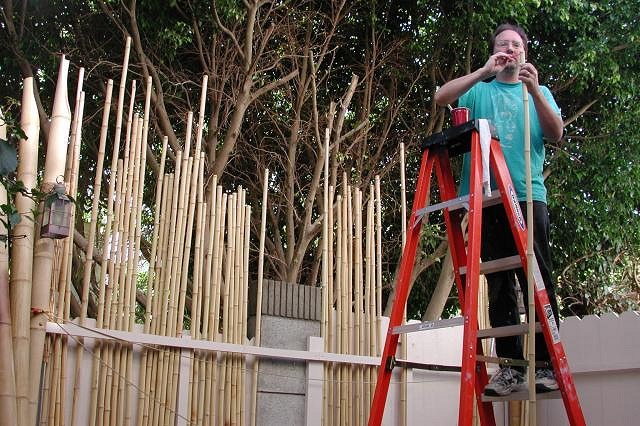
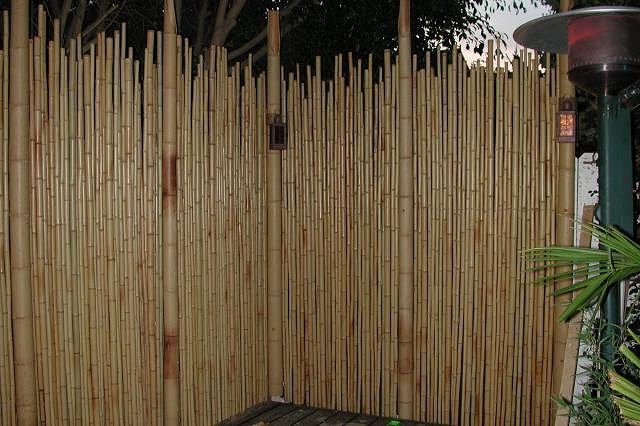
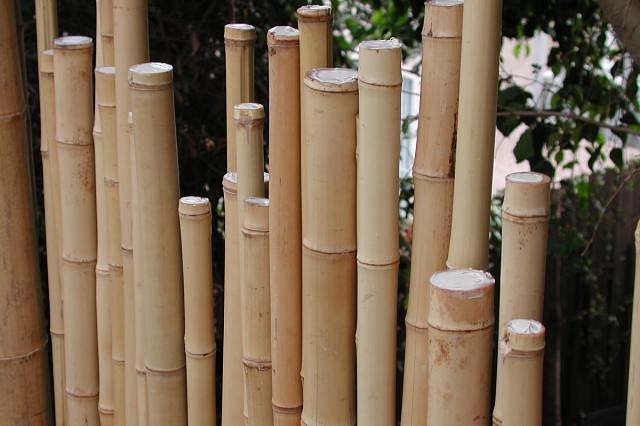
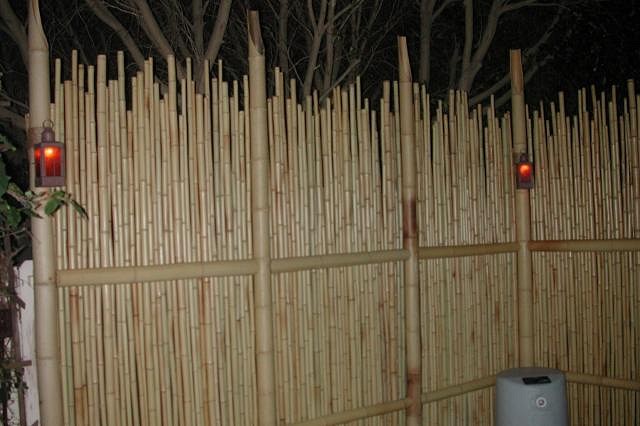
I replaced the stock glass in the lamps with amber mica. This stuff looks great when illuminated. I purchased it from here. The final posts go up and the rest of the bamboo starts going in. The bamboo was all cut in random lengths (prior to sealing you dope!).
The tops of the bamboo are then filled with caulking to prevent standing rain water and mosquitoes. The post tops are filled with resin for the same reason. After:
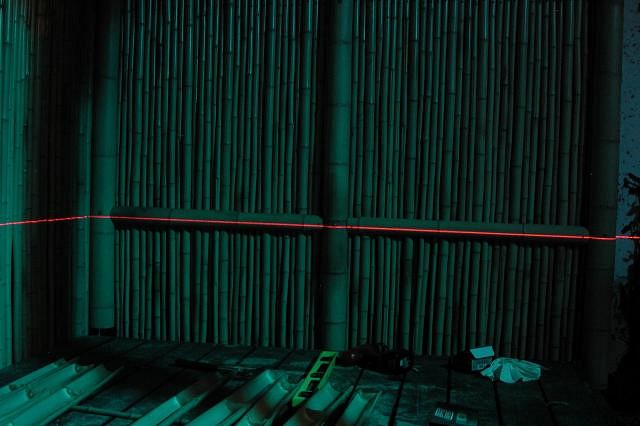
One thing I chose not to do at this time was to completely seal the outside of the bamboo with some sort of varnish. Why? Because I was in no mood to sand off the waxy coating on the hundreds of pieces of bamboo. Over time the waxy coating will weather away (6 to 18 months?) and the bamboo will begin to change color, at this time I will seal the bamboo. I may use Australian Timber Oil unless someone here has a better recommendation. The cross beams are cut and ready to install. I aligned them the way the ancient Polynesians would have, with a laser:
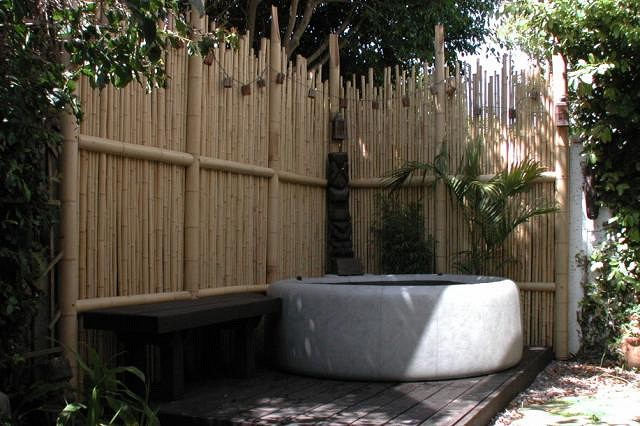
Pretty much done. The Tiki is a temporary one which I found for $40.00 at a garden décor shop which was going out of business. I will soon commission someone for something better. But for now, this Tiki is quite happy where it is.
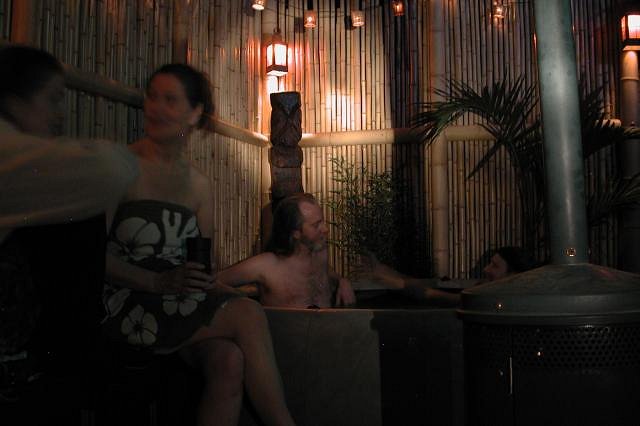
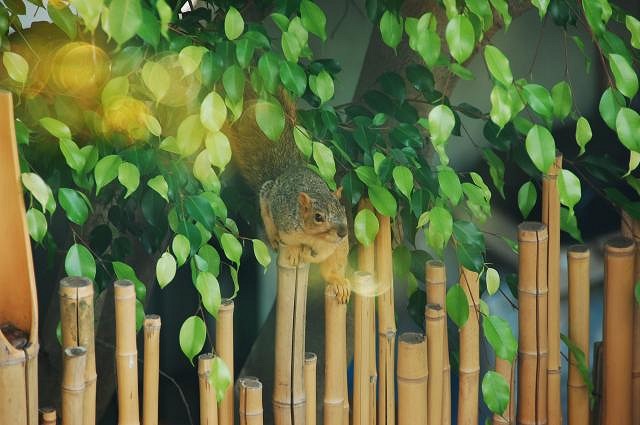
Scoundrels enjoying the fruit of my labor: Time for a Mai Tai. (edited to fix image links) [ Edited by: Hakalugi 2008-08-08 02:05 ] (edited to revise subject) [ Edited by: Hakalugi 2013-07-11 00:24 ] |
|
H

Humuhumu
Posted
posted
on
Thu, Apr 27, 2006 11:33 PM
That turned out wonderfully! Great step-by-step, I almost feel like I could build one now. Almost. Yikes on the oppossum, though it looked like a smaller one. Good thing you had a cage handy. Thanks for all the pics! |
|
UB

Unga Bunga
Posted
posted
on
Thu, Apr 27, 2006 11:54 PM
Bartmans' got Bartballs! Great ending. Time for a Mai Tai. |
|
E

ErichTroudt
Posted
posted
on
Fri, Apr 28, 2006 10:04 AM
Awesome Job man!!!!! Thanks for the step by step. Those Lantern lights are way cool. Erich |
|
M

Monkeyman
Posted
posted
on
Fri, Apr 28, 2006 11:07 AM
Lots of work and POW !!!! what a result. Nicely done Hakalugi. Done up in the disney style. the bondo in each bamboo piece is over the top. Crazeeee |
|
P

Polynesiac
Posted
posted
on
Fri, Apr 28, 2006 1:48 PM
Great job on that fence - mm's right. It looks like it's straight outa adventure land. great ideas on the resin/bondo at the tops of the bamboo - first class all the way! |
|
K

kingtiki
Posted
posted
on
Fri, Apr 28, 2006 2:07 PM
WOW - that is beautifully done. Nice to see the hot tub populated by a naked guy right off the bat! It's not a party without a naked guy of some sort
|
|
TB

Tiki Bird
Posted
posted
on
Fri, Apr 28, 2006 3:26 PM
Awesome job Hakalugi! Need to get me one of those Polynesian Lasers myself! TBird. |
|
H

hodadhank
Posted
posted
on
Sat, Apr 29, 2006 12:24 AM
Jeezus that thing is pissed! This one's more my speed...
|
|
TSW

The Sperm Whale
Posted
posted
on
Sat, Apr 29, 2006 9:09 AM
I really liked your step by step and found it very informative. The results are great. I personally have done quite a bit of work with bamboo over here at my pad and I know it can be very time consuming. I was wondering if you used any reading material first before you started? and also when am I coming over?? |
|
C

Chongolio
Posted
posted
on
Sat, Apr 29, 2006 10:51 AM
Great Post Hakalugi you and Bartman did a great job on the project as well as the post. I bet that possum has forgiven you by now too. If the critter comes back grab some carrots and potatoes and invite him in the tub for some possum stew. Chongolio
[ Edited by: chongolio 2006-05-18 13:06 ] |
|
8T

8FT Tiki
Posted
posted
on
Sat, Apr 29, 2006 6:07 PM
Hakalugi, I am very impressed with the amount of work and skill you needed to complete this project. It turned out so nice. You are certainly deserving of the praise from your friends. Congrats on a super result. I once was lost....... [ Edited by: 8FT Tiki 2006-05-05 16:24 ] |
|
H
Hakalugi
Posted
posted
on
Sun, Apr 30, 2006 10:25 PM
Hey, thanks for all of the nice comments! |
|
H
Hakalugi
Posted
posted
on
Sun, Apr 30, 2006 10:25 PM
Yeah, that one is a little on the small side. Here's one that's a bit bigger: (edited to fix image link) [ Edited by: Hakalugi 2008-08-08 00:01 ] |
|
H
Hakalugi
Posted
posted
on
Sun, Apr 30, 2006 10:26 PM
Most of my research was done online. There was one book I picked up: "Building Bamboo Fences" by Isao Yoshikawa but I ended up not using any of the designs in it. And yes, you must come over. I'll be talking to you. |
|
H
Hakalugi
Posted
posted
on
Sun, Apr 30, 2006 10:26 PM
I should clarify here. The tall guy in the hot tub isn't totally naked. He's wearing a condom. |
|
U

unklefun
Posted
posted
on
Thu, May 4, 2006 11:58 AM
Strong Work Hakalugi and Bartman! On the bambo fencing, Hot tub patio area as well as catching the possum. [ Edited by: unklefun 2006-05-04 11:59 ] [ Edited by: unklefun 2006-05-04 11:59 ] |
|
H

hewey
Posted
posted
on
Tue, May 9, 2006 7:40 PM
Awesome man! Looks great and a great step by step too. Loved it. |
|
T

thehipster
Posted
posted
on
Thu, May 18, 2006 11:53 AM
Outstanding! I want one! |
|
DL

Deery Luau
Posted
posted
on
Fri, May 19, 2006 9:32 AM
Was that tiny, fuzzy guy one of the angry possum's offspring? :( |
|
H
Hakalugi
Posted
posted
on
Fri, May 19, 2006 10:12 AM
You must have missed the part of the post that said "We looked to see if there were any babies but found none". That photo of the baby opossum was posted by Hodadhank and was probably over 100 miles away. So cheer up now! Oh, but on the other hand, maybe the well being of that little critter should be taken up with Hodadhank. I hear that baby opossums make a great drink garnish. |
|
T

turbosickboy
Posted
posted
on
Sun, May 21, 2006 2:26 PM
great work... i love these step by step threads. |
|
B

Benzart
Posted
posted
on
Sat, Jun 3, 2006 5:44 PM
Excellent step by step pic's and Excellent work and Dynamite ending. Very Nice addtion to Any back yard. |
|
V

VampiressRN
Posted
posted
on
Sun, May 6, 2007 9:43 PM
I was searching for something and came across this great project. Holy rat's arse...glad ya won the fight with them thar possum. Dang...those things can be really mean and aggresive. Hope you are enjoying your spa...the fence is awesome...I like the varying heights of the poles. :) |
|
U

Uggamug
Posted
posted
on
Sun, May 20, 2007 8:43 PM
Wow, Hakalugi, what a great job. I really admire your craftsman-like approach to building this project... quite impressive! Thanks for posting the pics and the "how-to" of building this project, you do really good work. |
|
H
Hakalugi
Posted
posted
on
Fri, Aug 8, 2008 1:23 AM
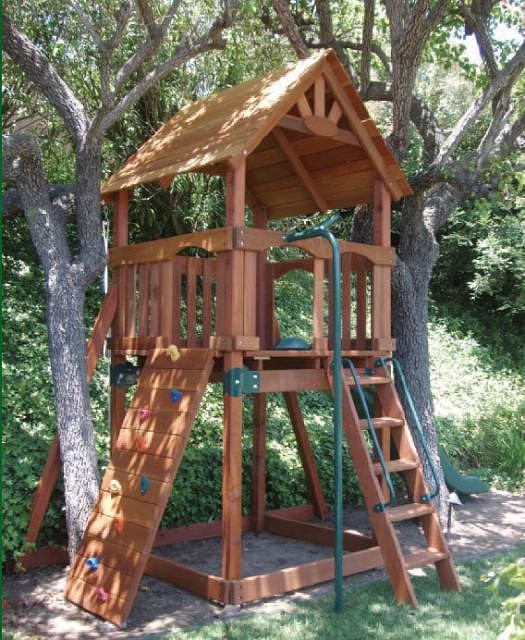
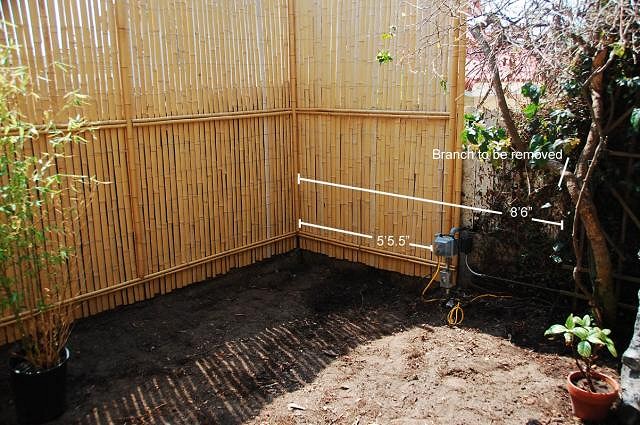
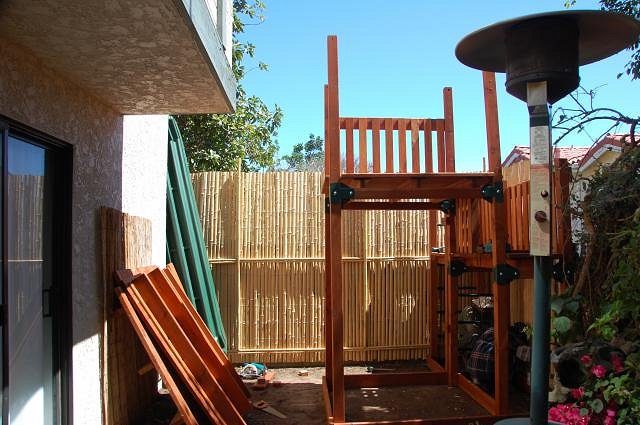
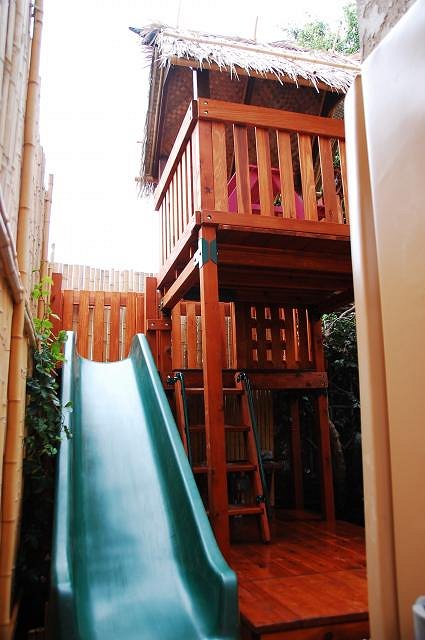
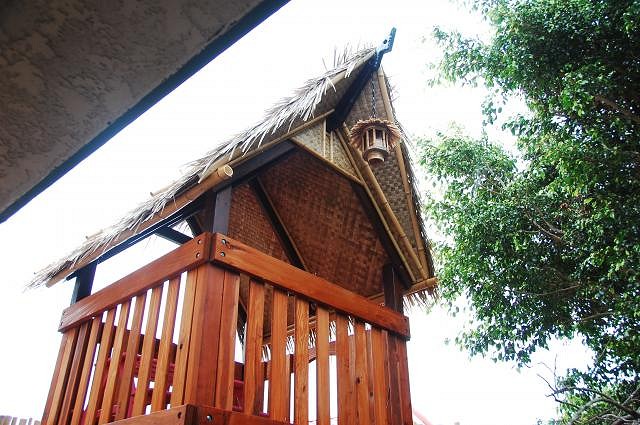
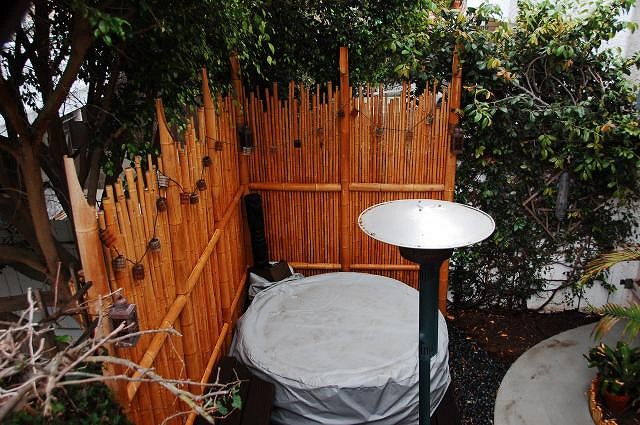
Play Structure Tiki Makeover Phase 1: Another backyard project far enough along so that I can share some photos. We wanted to get one of those wooden play structures for our daughter. Something like this: Unfortunately our backyard is so small, I was unable to find a prefab one that would fit the bill. I did however find a somewhat local place (Play-Well) that was willing to customize their designs based on my own specifications. Here is the space I had to work with:
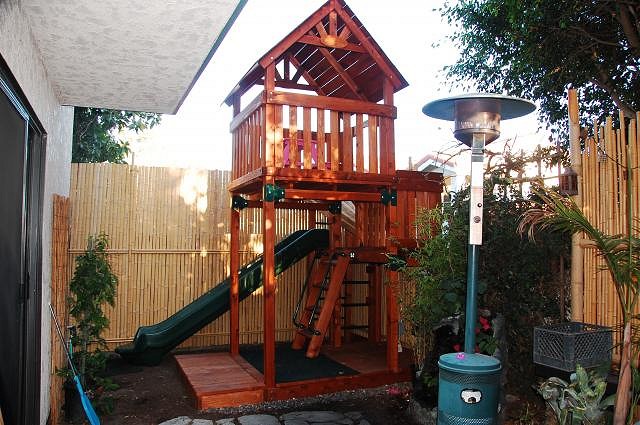
Here's the partial installation and completed stucture:
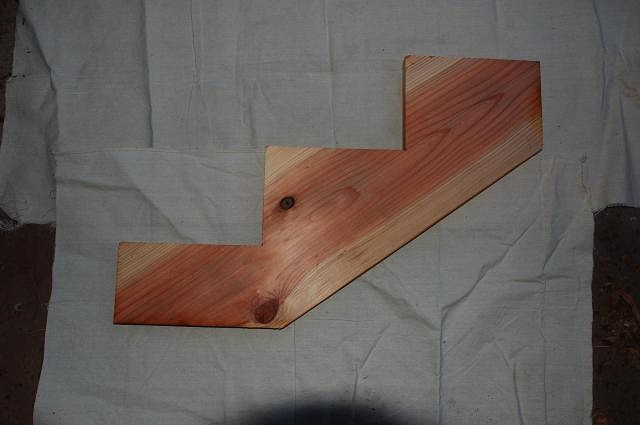
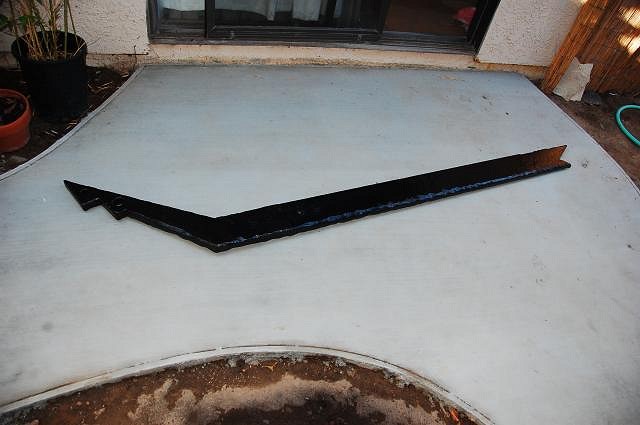
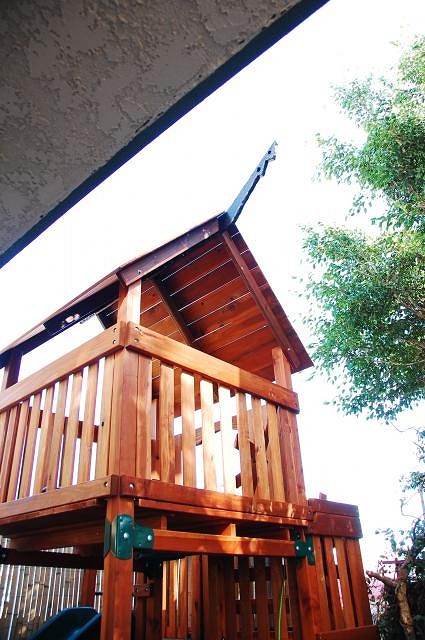
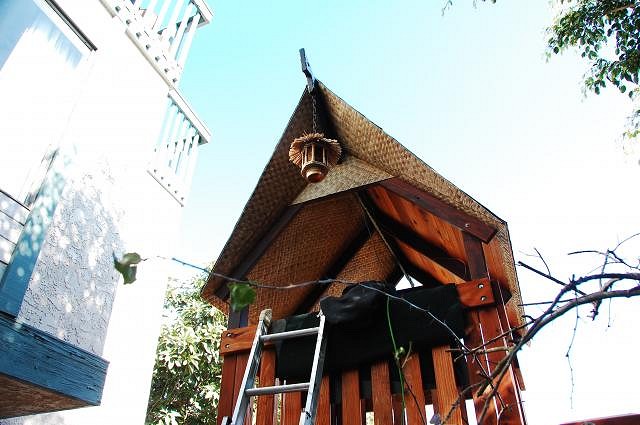
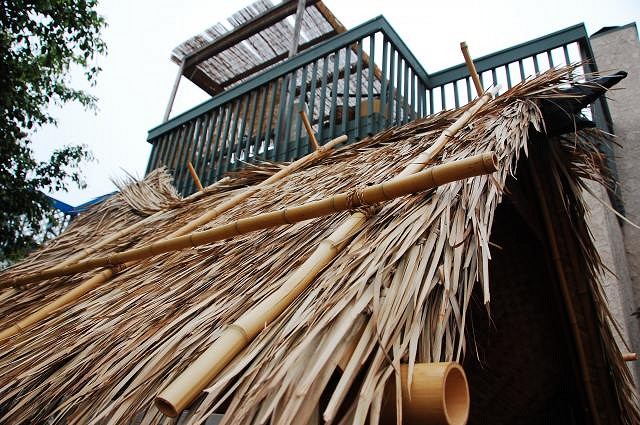
Changes to their design included a narrower side porch and installing the steps on the inside. Now that the structure was in place, the transformation could begin. The plan is to totally Tikify the stucture and it would be done in three phases. Phase 1 - Extended roof beam, thatching and trim So on to Phase 1: Of course any good Tiki A-frame needs to have a nice beam that protruds up. So I started with a stock piece of wood from Home Depot which is meant to build stairs:
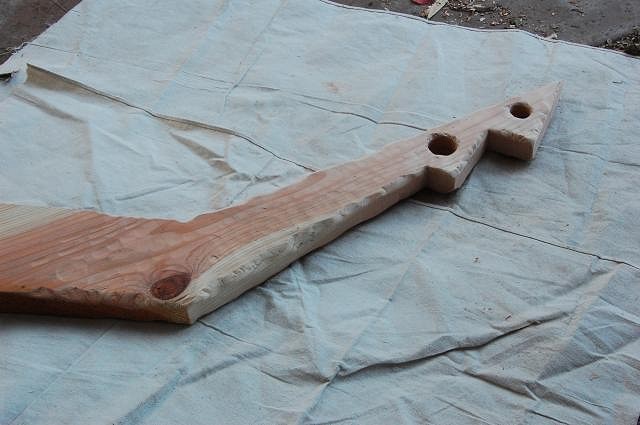
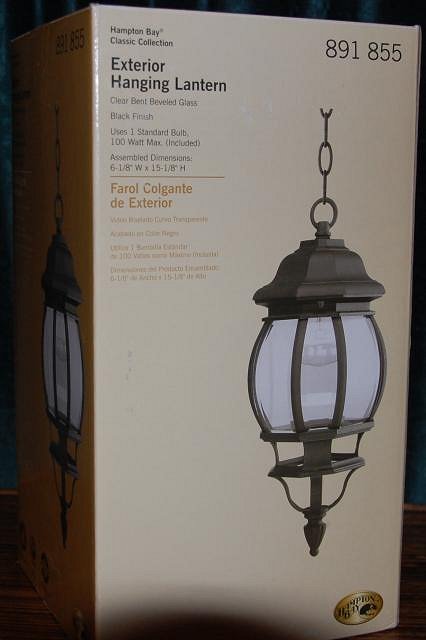
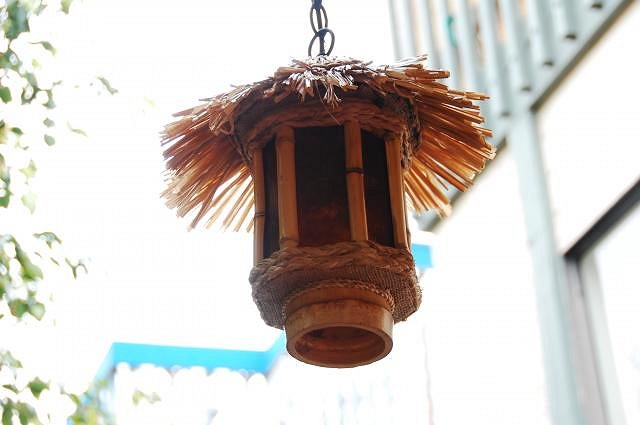
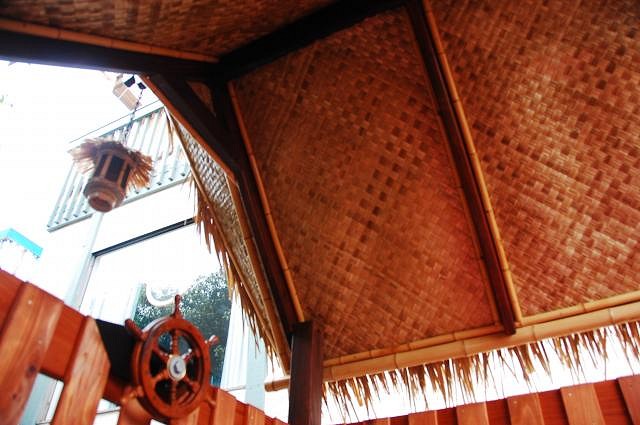
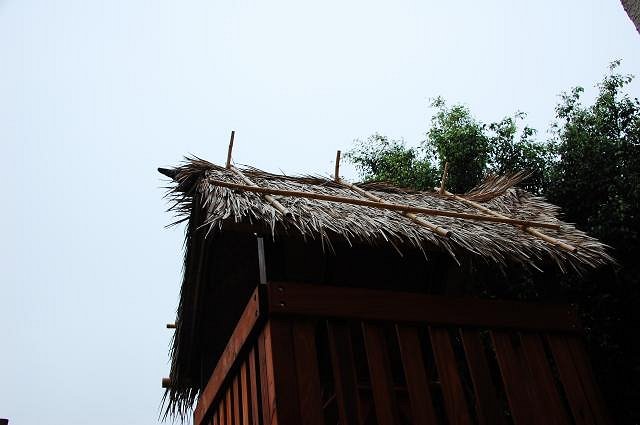
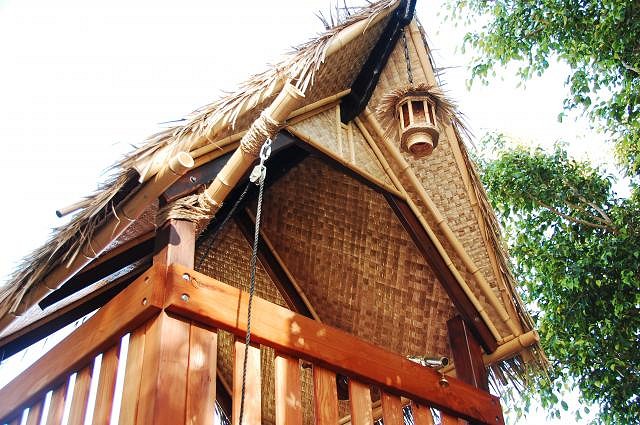
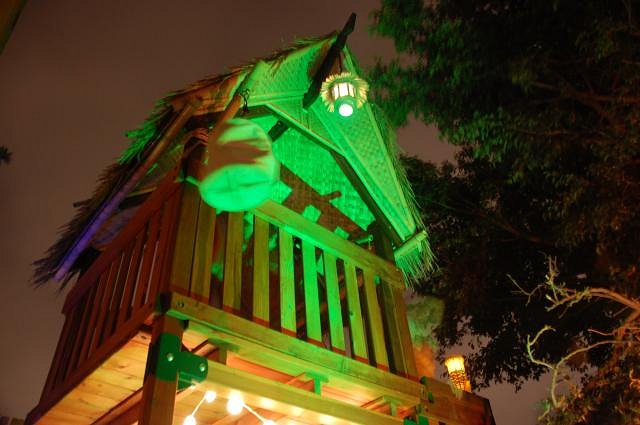
Connect that to a longer piece using some big black brackets (unfortunately a bit hard to see in this photo). Once the beam was complete all I had to do was open up the roof, shave some of the existing wood a bit, and drop in the beam. Back: Now of course you've got to have some sort of hanging lamp. I didn't want to use a glass float because it would probably somehow get inadvertantly smashed by my daughter or one of her overly rambunctious friends. And a fake plastic float wouldn't hold up to the sun too well over time (plus they're fake). So I bought an outdoor light at Home Depot for $20.00. All I had to do was strip the lamp down to a bare frame and with some bamboo, sea grass braid, mica, and a hot glue gun, I ended up with this: Then I extended the roof and begun adding matting: Now the thatch goes on as well as bamboo trim. You can also see the tar roofing material I've added. The trim and thatch is complete.
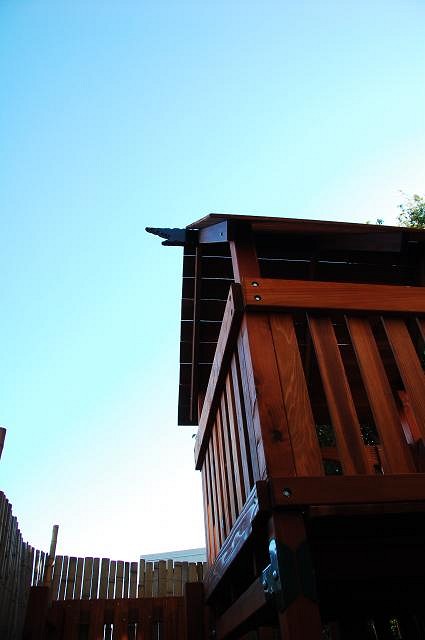
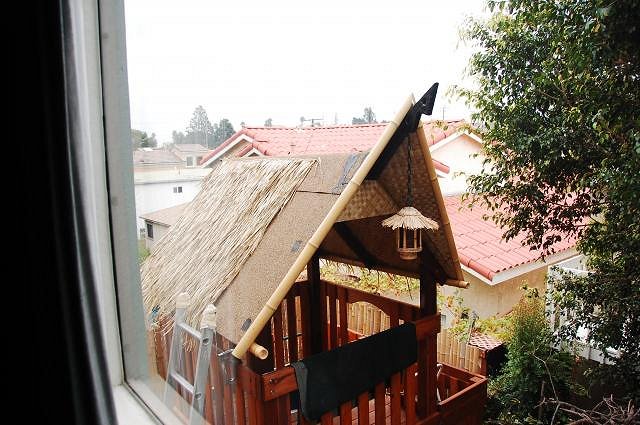
We chose to turn down a plastic ships wheel and added our own: View from second level of the structure: Even though the thatch is nailed down it might still get a bit thrashed from the wind, so I made a bamboo retainer. Not only is it functional, but it looks good:
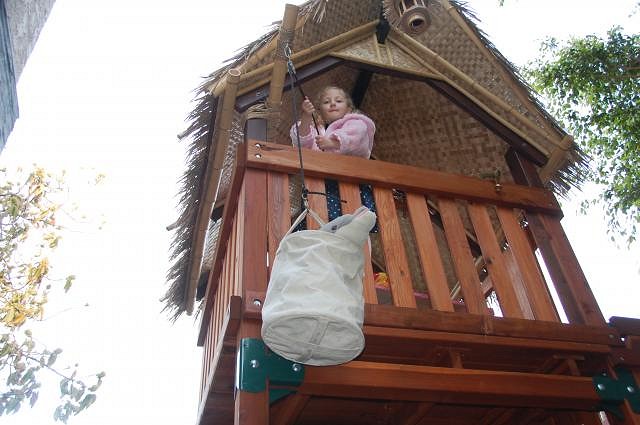
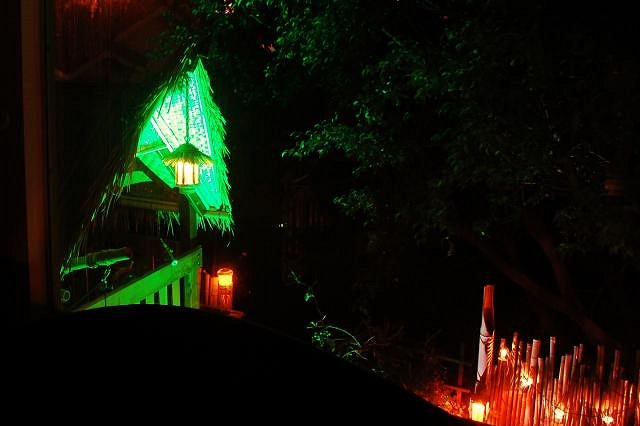
Tiki Bo Peep approves: Here's the extension and pulley for the lift bucket. You can also see the brass telescope: Tiki Bo Peep still approves: And so does some of the other wildlife: Here's a night shot from our second floor living room window: And a few more night shots:
Phase 2 will soon commence, but for now, it's time for a double Zombie. [ Edited by: Hakalugi 2008-08-08 02:05 ] |
|
H
hewey
Posted
posted
on
Fri, Aug 8, 2008 3:13 AM
Man, that looks great! Nice job :D |
|
SD

Savage Daddy
Posted
posted
on
Fri, Aug 8, 2008 5:49 AM
Wow! :o Now that is a cool play structure. Nice work. |
|
U

UtopianDreem
Posted
posted
on
Fri, Aug 8, 2008 10:10 AM
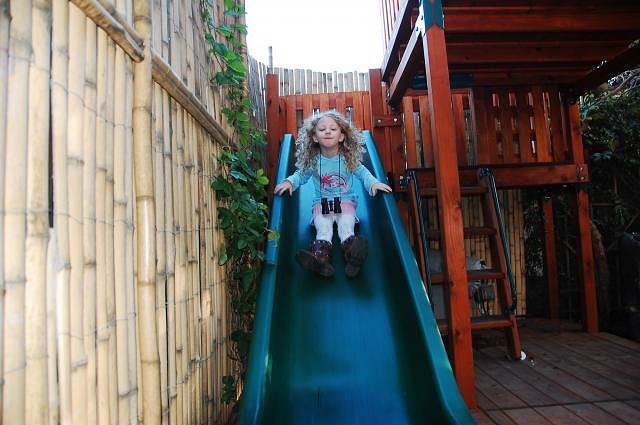
It's a beauty! Looks like the bamboo fence near the hot tub is holding up well, too. Did you end up varnishing/sealing it? |
|
TSW
The Sperm Whale
Posted
posted
on
Fri, Aug 8, 2008 10:20 AM
Coolest Dad evar!! I gotta ask again....can I come over and play? |
|
O

OceaOtica
Posted
posted
on
Fri, Aug 8, 2008 10:30 AM
Are you going to release a limited edition sippy cup for that place. Its a beauty, you got some lucky childrens! |
|
F

freddiefreelance
Posted
posted
on
Fri, Aug 8, 2008 12:18 PM
Have I kissed you lately? 'cause beautiful work like that deserves a big buss. |
|
JT

Jungle Trader
Posted
posted
on
Fri, Aug 8, 2008 3:28 PM
Send the kids away and we'll swing nekked from a rope into the pool (is there one?) with Spermy and the other hoity toity "koolkids". |
|
H
Hakalugi
Posted
posted
on
Sun, Aug 10, 2008 9:28 PM
Hey everyone, thanks for the nice comments!
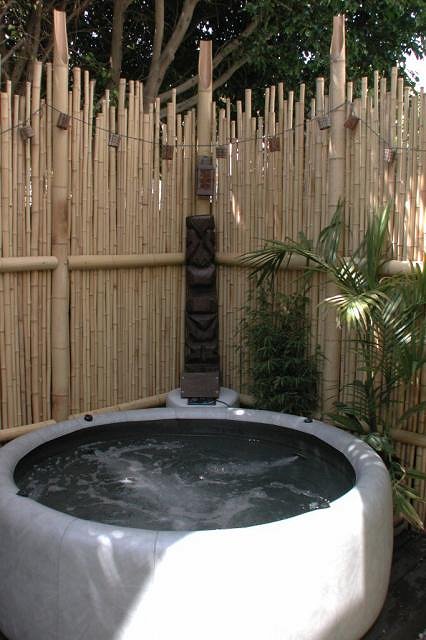
Yes! After waiting for the bamboo to age a bit I finally varnished it (about three months ago). Here's a better photo: |
|
W

WooHooWahine
Posted
posted
on
Sun, Aug 10, 2008 9:40 PM
WooHoo!! I want to take my class to your house for a Field Trip :) |
|
M

mstevens
Posted
posted
on
Tue, Jun 18, 2013 7:54 PM
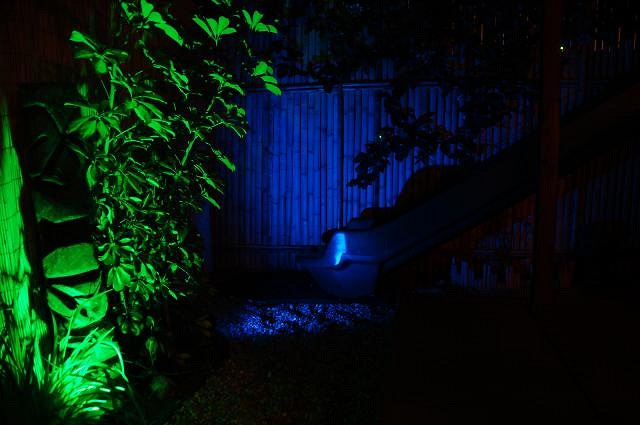
What an amazing fence!! I hope you don't mind if I ask you a few questions please in hopes that I'll get the courage to try and make something similar in my yard. What did you use to fasten the big and small bamboo to your crossbeams? Wood Screws? It almost looks like you used something to plug where you fastned them too? Also, if you don't mind me asking, how did you mount the lanterns to the bamooo? The different colored lighting from the ground shining up onto the fence looks awesome too. Can you give any detail on what you used for that lighting? I'm not this creative to come up with a design by myself as good as this so thank you for sharing all of your information. |
|
D

danlovestikis
Posted
posted
on
Tue, Jun 18, 2013 8:58 PM
That photo makes me think of King Kong trying to get in from the jungle. What a wonderful play place for young and old. Wendy |
|
T

tigertail777
Posted
posted
on
Tue, Jun 18, 2013 9:15 PM
WOW! That is BEAUTIFUL! Love the lighting especially. What a truly special place to play in. :) |
|
HT

Hale Tiki
Posted
posted
on
Thu, Jun 20, 2013 8:08 AM
There's a thread about it under home bars, I believe. It's recent. Just happens to be going on at the moment, so you have good timing! |
|
ATP

Atomic Tiki Punk
Posted
posted
on
Thu, Jun 20, 2013 11:00 AM
I want it! |
|
T

TikiAno
Posted
posted
on
Thu, Jun 20, 2013 11:18 AM
I hadn't seen this thread before- Wowwwwwww. Now I'm re-inspired to update my yard. Argghhhhh. |
|
K

KAHAKA
Posted
posted
on
Fri, Jun 21, 2013 10:13 AM
I haven't seen this either... wow. Not sure how I missed this! I need to send this to my brother and demand that we make one for my nephew. Ha! Very cool. |
|
ATP
Atomic Tiki Punk
Posted
posted
on
Fri, Jun 21, 2013 12:06 PM
I don't see a "Tiki Bar" in the play structure Karl? |
|
L

littlegiles
Posted
posted
on
Fri, Jun 21, 2013 1:53 PM
Since that build was 5 years ago, have you since added a large screen TV and free Wi-Fi? Just curious. :) Awesome projects and it was something I had not seen before. Glad it was brought back up.
|
|
BT

Badd Tiki
Posted
posted
on
Fri, Jun 21, 2013 2:46 PM
Very nice, me thinks you need to keep going though, maybe carve tikis into the support beams (DON'T carve too deep though :wink: ) |
|
HT
Hale Tiki
Posted
posted
on
Fri, Jun 21, 2013 10:58 PM
That's awesome man. x2 on the need for a play tiki bar! |
|
H
Hakalugi
Posted
posted
on
Thu, Jun 27, 2013 3:30 PM
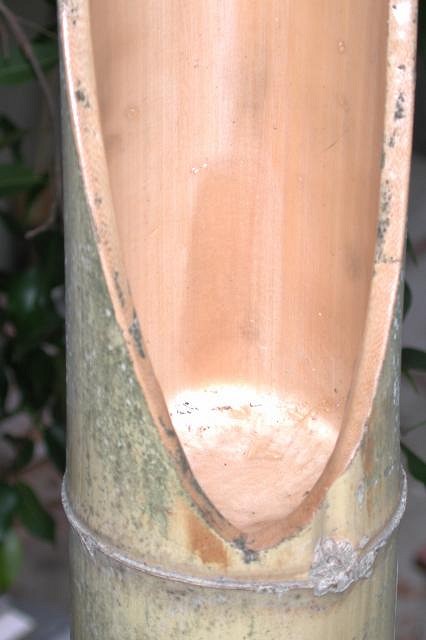
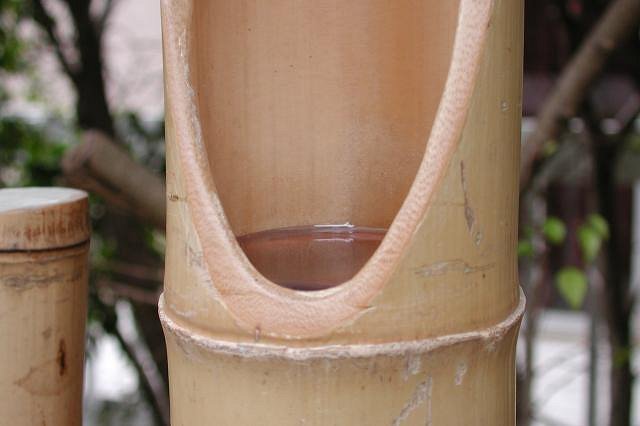
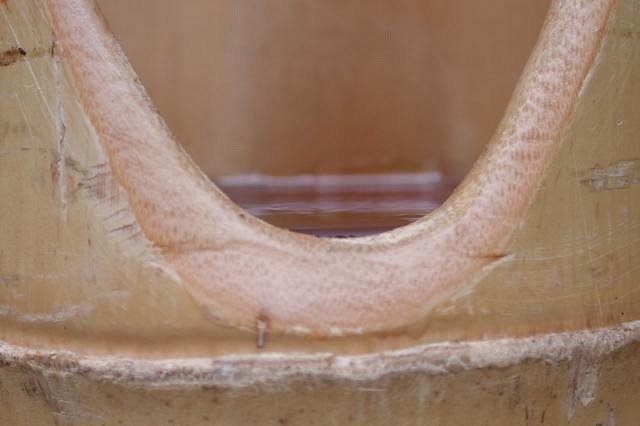
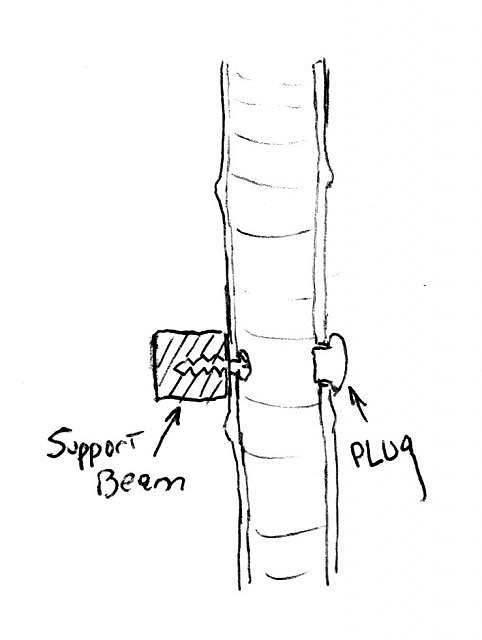
Wow, this ol' thread got bumped up! First off, thanks everyone for all the new comments and compliments! Secondly, I'm going to move this to the Home Tiki Bar thread 'cause it's most appropriate there. Yeah ATP, there's no bar on the play structure but that actually was intended for part of phase three! Maybe someday I'll start phase two... Mstevens, good eye on spotting the wood furniture plugs. As far as your fence questions, the large bamboo poles are secured to the crossbeams with wood screws. First, a large access hole was drilled on the exposed side of the pole, then a smaller hole was drilled directly opposite for the wood screw, then.. err.. wait. let me find a pen. Okay, here's an image that should make it pretty clear.
Ideally the wood plugs would be covered with some sort of rope or sea grass lashing. As far as the smaller bamboo poles, they were all secured directly to the support beams with wood screws as well. No access holes or anything like that, just straight through. None of those screws are visible because they are covered by the split bamboo cross beams. The cross beams were secured to the support beams using tan counter sunk deck screws(just two per cross beam). The screws are visible but hardly noticeable. Here again though, they could potentially be covered with some sort of lashing. I don't remember the exact details on how the lanterns were attached but I do recall using some standard off the shelf lamp parts to extend the mounting posts all the way through the bamboo. The lashing around these is purely decorative. The lighting is run of the mill low voltage landscaping lighting fixtures purchased from Home Depot or Lowes and then outfitted with various MR16 led lights. I purchased these led lights from SuperBrightLEDs.com. Hope that helps! Mahalo! |
|
UB
Unga Bunga
Posted
posted
on
Fri, Jun 28, 2013 1:27 PM
Hak is a Rad Dad! |