|
S
Swanky
Posted
posted
on
Thu, Aug 9, 2012 1:10 PM
And on Monkey Man's point... Even with a 4 gang in the ceiling on a switch, to "turn on" the bar, I must:
And I have consolidated A LOT of stuff to those power strips! Everything I could I put on power strips and attached them into the overheard switch. My last step may be to install a bunch of clappers! How many things do you turn on to get your bar going? |
|
M
Monkeyman
Posted
posted
on
Thu, Aug 9, 2012 2:25 PM
|
|
P
PolynesianPop
Posted
posted
on
Thu, Aug 9, 2012 6:59 PM
Only 2 switches in the Desert Oasis Room. 1 for the electrical grid I installed on the ceiling in the main room (32 outlets) and 1 for the electrical grid I installed on the ceiling over the bar area (12 outlets). No power strips or extension cords anywhere. Here's a link to how I did it (about halfway down the page): **Poly-Pop ***
Bartender, make mine a glass of WATAHHH!!!!! [ Edited by: polynesianpop 2012-08-11 16:06 ] |
|
M
Murph
Posted
posted
on
Thu, Aug 9, 2012 9:01 PM
I switched all my outlets to wireless remote control so now instead of flipping on 10 individual powerstrips I can just flip all the lights, fountains, fans, stereo and computer on with a handheld wireless remote control... might be the best thing I've put in the Womb... maybe even better than the extra large Hula Lamp :D
|
|
T
tikiskip
Posted
posted
on
Sat, Aug 11, 2012 3:59 PM
WOW!!! Polynesian Pop great job on that space. Here's a tip hate cleaning those brushes after painting or shellacing? |
|
V
VampiressRN
Posted
posted
on
Sat, Oct 27, 2012 9:41 PM
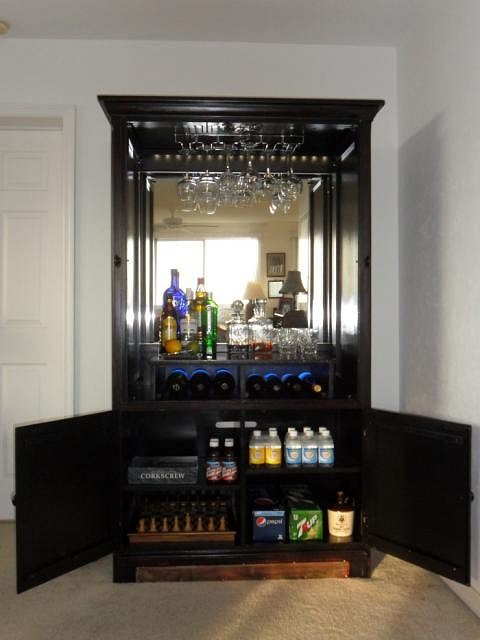
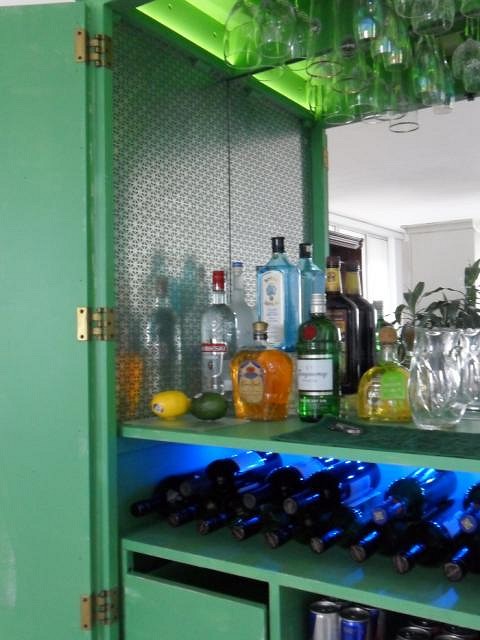
Was just surfing around and found this site. Might help someone with an idea for re-purposing a cabinet. I liked these two the best.
|
|
L
Longboard
Posted
posted
on
Mon, Nov 26, 2012 2:37 PM
Great tips! Got any for tackling a ceiling, yours is way cool. |
|
T
tikiskip
Posted
posted
on
Mon, Nov 26, 2012 3:15 PM
Nice Vamp, I like the second one best. |
|
S
Swanky
Posted
posted
on
Tue, Nov 27, 2012 8:58 AM
THis is what you used? I assume you are happy with it. Does it require a line of site? I have outlets behind the couch and chairs I want to use them with. It also appears to cover the outlet and so you can then only use one plug, correct? That's a great price for the convenience. If I use those, it gets me to 1 dimmer on, one switch flipped, one remote for bar lights and this remote for the rest. |
|
M
MaukaHale
Posted
posted
on
Tue, Nov 27, 2012 3:15 PM
During the Christmas season you can get a similar device from Home Depot. I have outlets behind furniture that go on with no problem. I have one outlet behind the bar refrigerator and sometimes I have to angle the remote. I was going to fish the wires so everything was hard wired but these remote control outlets work great. I have a couple on Lutron dimmer switches and there is a delay before they come on. I plug a power strip to this device, at the wall outlet. That way I can have multiple lights going off one switch.
[ Edited by: MaukaHale 2012-11-27 15:20 ] |
|
M
Murph
Posted
posted
on
Tue, Nov 27, 2012 11:00 PM
Yes that is the same set I ordered. I love them. |
|
M
markmywords
Posted
posted
on
Thu, Feb 7, 2013 9:47 AM
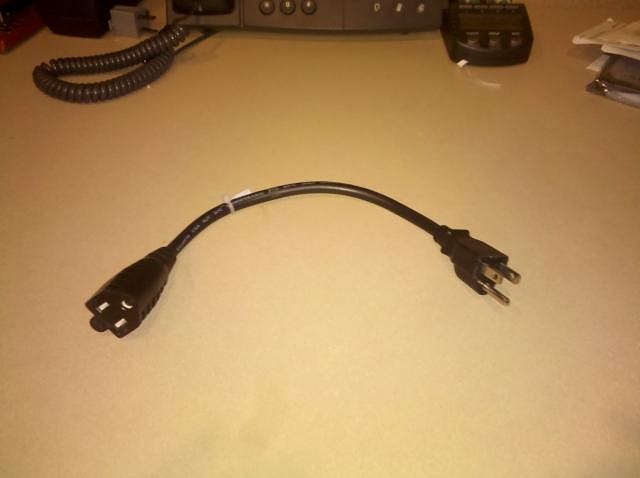
I use these guys on each of my remote controlled power switches:
Comes in handy for when you need access to that other plug on the outlet. -mark [ Edited by: markmywords 2013-02-07 09:48 ] |
|
E
ErichTroudt
Posted
posted
on
Tue, Nov 11, 2014 12:29 PM
The door saver II pin hinge stopper is my new buddy. Stops the door without anything being on the floor to trip over or those regular ugly stoppers that go on the hinge. Makes the door stop before it hits the clam shell in my door trim and is pretty invisible. $8 bucks on Ebay. |
|
L
Longboard
Posted
posted
on
Mon, Nov 17, 2014 8:38 AM
Defiantly plumbing and electrical work. Take the time to have it figured out before you start. Right now I'm replumbing my bar and adding electrical, that would have been way easier had it been done in the first place. -Longboard |
|
T
tikiskip
Posted
posted
on
Mon, Nov 17, 2014 10:37 AM
Thanks Erich that is a good tip! And Longboard that's what this thread is about trying to save people time and money and get it right Have seen many more great ideas here on TC on many topics not posted here but I wanted to try and Will try to post links when I see these great ideas from other TCers on this thread. Thanx for adding guys. |
|
T
tikiskip
Posted
posted
on
Mon, Nov 17, 2014 10:49 AM
File this link under best thing.... To make the hypertufa used here, A couple of tips.
To apply the chicken wire to the foam armature I bought a spool of standard heavy gauge craft wire at Home Depot, cut off long pieces and folded them over to make long staples. I just shoved them into the foam around the chicken wire. You can twist the chicken wire to give it shape. I used the wire to crimp and hold the shapes. I have never worked with hypertufa so I had no idea what the final color would be. It was perfect for the first month or so then it got very light in color. I ended up sponging on some diluted Quikrete concrete stain to get the look I wanted. I called Quikrete and they did not think it would work. So far...so good. We'll see how it makes it through a New England winter.
I now have a small MIG welder and I would weld up a wire frame instead of using the foam. I hope this helps. Good Luck! Dave |
|
T
tikiskip
Posted
posted
on
Mon, Nov 17, 2014 10:54 AM
Here is another great idea from muskrat. |
|
T
tikiskip
Posted
posted
on
Mon, Nov 17, 2014 10:58 AM
Ok one more on the good side. jungle cruise ride sign..... This idea is from gabemaita. |
|
T
tikiskip
Posted
posted
on
Wed, May 20, 2015 4:23 PM
This guy needed to restore end wrap on his bar. Wrapping Bartop with Cane....HELP!!.... |
|
KG
Kahiki Guy
Posted
posted
on
Fri, May 22, 2015 7:53 AM
two pieces of advice for all outdoor tiki bars...
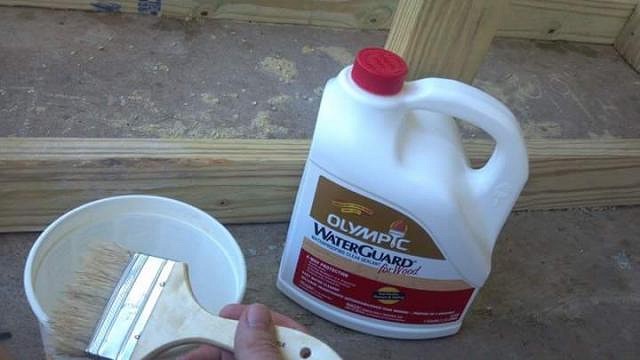
As I built my bar, I used Olympic Water guard on all the wood, from the frame up and then, for the bar top, about 15 coats of Helmsman Spar Urethane, which is designed for outdoors and is UV resistant. And I reapply about 2 coats to the top of the bar every year. I'm fortunate in that I have a roof over my back patio, so there is limited exposure to the elements, but the side bar gets rained on all year, as well as exposure to Maryland's snow and ice all winter, and has help up pretty well for the past 2 years. Now, for the part that I would have done differently... I trimmed my bar top in bamboo slats and raised them slightly above the top of the bar (1/16" at most), and filled in with lots of coats of the urethane, so that I have a "spill resistant" edge. Pretty smart I thought, until the rain, melted snow, etc started building up at the end of my bar and sitting there, which has now clouded the end of the side bar. It's still got the urethane finish on it, but there's an obvious difference in the look of the side bar, which is exposed to the elements, and the front bar, which is not. I'm going to try to sand down the urethane on that end and recoat over the course of this summer, but I fear that this is one of those things that I'll just have to write off to a learning curve. |
|
T
tikiskip
Posted
posted
on
Fri, May 22, 2015 11:45 AM
Good tip Kahiki Guy. There is a solvent than may help with that bar top area I think, that stuff is going to muck up When building your bar space I say why fight it, plan your bar to look old and distressed. That's what these bars should be taking us away from. Good luck!! |
|
K
Kevco
Posted
posted
on
Fri, May 22, 2015 12:02 PM
Best thing I did to Kevin's Tiki Bar was get this sign hung up today! |
|
T
tikiskip
Posted
posted
on
Fri, May 22, 2015 1:52 PM
Nice. |
|
JJ
Jungle John
Posted
posted
on
Fri, May 22, 2015 9:11 PM
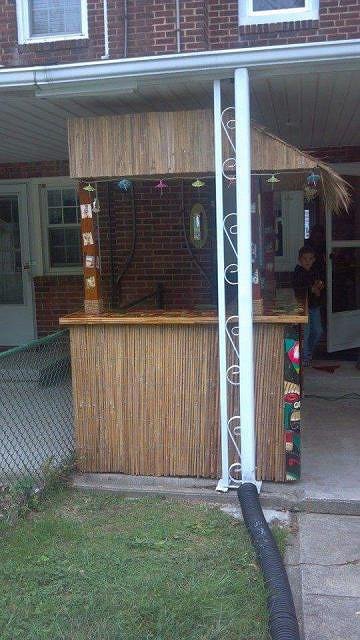
My biggest mistake was thinking a tiki hut was a good idea. Once the novelty wore off after a month, no one wanted to sit around and watch tv and drink those god-awful "tiki" drinks in my outdoor mosquito infested tiki hut. Sure you can douse yourself with repellent and pretend the atmosphere is in some exotic tropical locale, but the harsh reality is that you're sitting in a backyard, and if you drink those rum drinks you know they are going to make you sick as a dog. Pupu platters and tropical punch are best enjoyed in air conditioned comfort. If I had the indoor space that's where my tiki hut would be, complete with fake palm trees and erupting volcano. |
|
ATP

Atomic Tiki Punk
Posted
posted
on
Fri, May 22, 2015 10:47 PM
And so it begins, again..... |
|
T
tikiskip
Posted
posted
on
Sat, May 23, 2015 4:37 AM
Quote: Thank you Donny Downer. BUT if you do better in life they spray for mosquitos in your So for the people who do want an outdoor tiki spot Jungle John thinks Pupu platters and tropical punch are best enjoyed in air conditioned comfort so keep that in mind. I will be out by the pool. Debbie Downer Theme Song... [ Edited by: tikiskip 2016-02-25 02:48 ] |
|
T

Thortiki
Posted
posted
on
Sat, May 23, 2015 2:44 PM
Hey how is Clear Coat on Mosquitoes ): ??? |
|
V
VampiressRN
Posted
posted
on
Sat, May 23, 2015 7:33 PM
I think a best practice is to develop a good bar name & a logo. Then having cocktail glasses made with your logo along with swizzle sticks, napkins, coasters, a sign, etc. not only fun but can be gifts to fellow Tikiphiles. Planning can sometimes be an afterthought for many of us. I am filling my walls up but have that empty (off-white) ceiling that is going to need some serious help one day. While it is best to work from the top down, those of us that don't have building skills sometimes get stuck working from the bottom up. [ Edited by: VampiressRN 2015-05-23 19:36 ] |
|
PP
Pele Paul
Posted
posted
on
Sat, May 23, 2015 8:27 PM
Don't let Bamboo Ben hear you have white walls or ceilings!!! lol |
|
L

LoriLovesTiki
Posted
posted
on
Sun, May 24, 2015 7:30 PM
I love my outdoor spot but am sad I only get to really enjoy it for 3-4 months a year. Maybe someday I'll have an indoor space as well. As of now the tiki has started creeping into the house..... Here in NJ the rain and snow are the biggest problem especially on the natural materials. Although expensive we've been most pleased when we put up the extra $ for synthetic materials. Every year I have to sand/stain/poly the wood and bamboo. Even the wood tikis and masks that I have polyed the crap out of grow little spots of mold from being outside all season. But the artificial thatch and weave look as good as the day we installed them, 4+ years later. |
|
T
tikiskip
Posted
posted
on
Mon, May 25, 2015 7:56 AM
Thanks Lori this thread is only as good as what people post to it. My hope was to save people time money and work at the same I can't tell you how many times somebody says they are going to use thatch or Make bamboo elements that you can remove and take inside of the winter. So do it once, do it right, and put more time into other projects or enjoying the space you ¤(¯ |
|
T
tikiskip
Posted
posted
on
Fri, Jun 5, 2015 4:02 PM
How to wrap your Bamboo corners here... http://www.tikicentral.com/viewtopic.php?topic=49163&forum=1&22 |
|
V
VampiressRN
Posted
posted
on
Sat, Jun 6, 2015 7:44 PM
I feel the creep coming on. My lounge is getting full, already a year ago Tiki moved into my dining room. It is starting to move into the hallways between the lounge, dining room, and living room. My living room is rather nondescript, there is no theme...so the big Tiki I just got has moved to my lounge, but he has his eye on the living room!!! |
|
T
tikiskip
Posted
posted
on
Wed, Jun 17, 2015 8:30 AM
Yeah Vamp most old timers have boxes of tiki packed away as hey hunted over the years. Here is some great tips on making trim for your tiki bar spot.... |
|
TT
Tiki Toli
Posted
posted
on
Thu, Jun 18, 2015 11:12 AM
Another rope tip! Everyone loves the look of triple braided hemp Manila rope. Thing is it rots from the inside out, never dries out, and will shrink to 90% of its length when wet. For outdoor use, use a product called Pro Manila, it looks like manila but is made from polypropylene film and they then use that to make the individual rope strands. The result is a rope that replicates the look and feel of manila that doesn't rot or shrink. best place I know to get it is knot and rope https://www.knotandrope.com/store/pc/viewCategories.asp?idCategory=2 |
|
K
kalenatiki
Posted
posted
on
Thu, Jul 2, 2015 1:02 PM
Thanks for getting this started tikiskip. I've always found sometimes it's the little stuff that gets you into trouble. |
|
T
tikiskip
Posted
posted
on
Fri, Jul 3, 2015 8:02 AM
Thanks ka'lenatiki. I wish I had thought out my backyard more really. Hope that this thread can help people do more with less. |
|
B
Biotron2000
Posted
posted
on
Fri, Jul 3, 2015 2:15 PM
Don't forget lauhala matting is a hand made product, and subject to variances in size and appearance. I forgot, and started stapling a piece to my wall, and it was about three inches short of the 8 foot length. The next piece was about three inches longer. I had to get creative with my bamboo trim on the bottom of the wall. |
|
K
kalenatiki
Posted
posted
on
Thu, Jul 16, 2015 12:21 PM
I know the feeling. I would have moved the fence back another 10 ft. The thing I really hate is coming up with the space for a new whatever, like a spa,lol. The cobble pathway we just put in leading to the newly redone pond sat on the pallet for 2yrs while I figured out how I wanted it done. |
|
K
kalenatiki
Posted
posted
on
Thu, Jul 16, 2015 12:25 PM
While I think of it, is there a way to clean the black off bamboo? I have a couple of pc's I picked up, but after getting wet they blackn'd. Thought about a bleach wash but.... Also, will a coat of shellac help? |
|
T
tikiskip
Posted
posted
on
Sat, Jul 18, 2015 10:55 AM
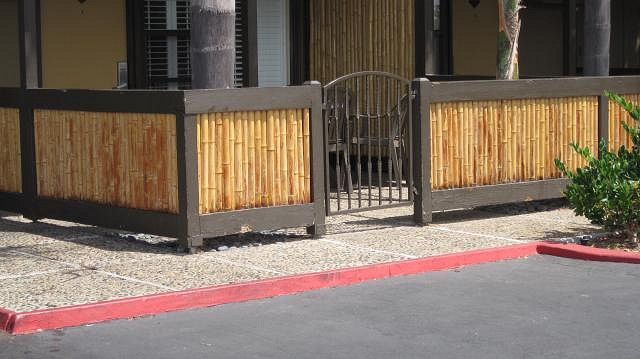
I would try TSP. Man you have had no rain how did you get mold? And at least here in Ohio shellac does not help much. Look go to Disneyland and see what they do, then do that. Why do I live in Ohio? Look at these painted metal foe bamboo fence at Half Moon inn. Good luck!!
¤(¯ |
|
K
kalenatiki
Posted
posted
on
Fri, Oct 23, 2015 1:14 PM
Hey we get water from the sky sometimes lol. Where I'm at in northern cal, it rains quite a bit, snows and sadly gets to be 115 during the summer. I didn't think of tsp, duh, I use to sell it. Tsp plus alittle bleach worked wonders. Most of it was where it blackened from getting wet. Disney uses mixed items for there look. Some real, some fake. Working on the pvc bamboo for that same reason, plus it gets hot enough here to split the bamboo in no time. |
|
T
tikiskip
Posted
posted
on
Fri, Oct 23, 2015 7:06 PM
Glad that worked for you. Do what the big parks in your area do as they have figured the best way |
|
T
tikiskip
Posted
posted
on
Sat, Jan 9, 2016 5:15 PM
Ok here are some great bar towels. "Dude it's a towel" true but some towels these days are almost water proof. You will love them. PS not my sales, I make nothing on this and do not know sellers. 6 100% COTTON TOWELS RED STRIPES DISH GLASS TOWELS LINT FREE FLOUR SACK TOWEL $8.39 free shipping. 1 DOZEN 100% COTTON BLUE STRIPE HERRINGBONE KITCHEN DISH TOWELS LINT FREE $10.74 [ Edited by: tikiskip 2018-04-09 10:22 ] |
|
B
bobtiki
Posted
posted
on
Tue, Mar 15, 2016 10:42 PM
Thanks for the great thread, tikiskip, et al.! Lots to figure out as I'm putting my space together — thanks for letting me learn from you! That post on wrapping corners may be just what I need to tighten up my mitred corners here. |
|
K
Keaka-tiki
Posted
posted
on
Fri, Apr 22, 2016 10:41 PM
Tikiskip, thanks for reminding me about this thread. So many awesome ideas all in one place. |
|
T
tikiskip
Posted
posted
on
Wed, Jun 15, 2016 9:58 AM
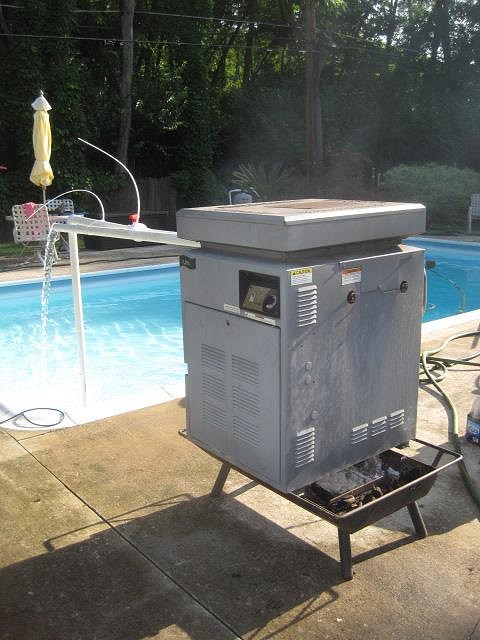
No prob Keaka-tiki. Here is a good AND bad thing all in one. I give you the Hillbilly pool heater. Good thing... it did heat the pool to like 79 degrees it was 68! Bad thing It took 10 hours of stoking the fire and smoking up the neighborhood, it put flakes of metal in the pool from the heater. Next will be solar heater put on roof. |
|
A
AkronTiki
Posted
posted
on
Wed, Jun 15, 2016 1:31 PM
I’m in Ohio, too (during the summer, we pronounce it Oh-HEE-Oh – the lost Hawaiian Island) but the winters are tough. I’ve used often used 2’-6” hollow core lauan doors for my bar top; everything gets covered in the winter but after the first one warped to hell, I just remove it and keep it in the garage during the winter, the bar itself gets pushed up against the house and covered with thin plywood or whatever else I can find, then a plastic tarp. Like most of my stuff, it sits on my deck overlooking the pool. I had a little 3-shelf bookcase to store mugs and other stuff on – I paid $10 at a thrift store and even though it was made of cheap plywood, plenty of paint kept it useful for about 6 years; it finally fell apart this spring, but I found a little solid wood stand with turned legs to replace it. Plenty of paint and stain help me get through – I usually have to give some things a brief touch-up each spring, but it doesn’t take long. If it can get stored in the garage or shed, it is. The biggest problem I seem to have is watching some items fade so badly – and sometimes so quickly – tin signs, door mats, etc. There may be a spray on UV protectant, but who knows if that would work… [ Edited by: AkronTiki 2016-06-15 13:32 ] |


