Tiki Central / Other Crafts
Building a Rock Waterfall for Tiki pool area
Pages: 1 34 replies
|
S

sneakyjack
Posted
posted
on
Wed, Jun 7, 2006 5:54 PM
So I am interested in creating a rock wall type fountain, possibly with them big clam shell type things in it (any one know where to buy?), but I am wondering the best technique or any hints from people that have made them. I do not necessarily need a "pool" / Pond at the bottom with fish and such because it will be near my swimming pool (in ground). I plan on using real rocks and I have heard to use Black foam (spray type) to secure the rocks. I have also heard about silo liners for the Water area but am thinking about using just a cooler in ground as you won't really be able to get close to it to see where the water is ending up. I do want to light it and I have electricity running to the area. SO what am I asking? Mostly for tips on what to do and not to do or any pics / websites that could help. I am considering having a tiki or Moai on top to start the water - falling. Also the area is about 8 feet by 6 feet. I could also use help for a "fence are to go behind - I'm thinking bambo in en type fence Who can help in my quest? Thanks in advance for any help. |
|
LS

Lake Surfer
Posted
posted
on
Wed, Jun 7, 2006 10:15 PM
Just re read that you want a rock wall... that's not what I built... sorry... But it is a cool little fountain feature for those with limited space...
[ Edited by: Lake Surfer 2006-06-08 21:00 ] |
|
T

tikigap
Posted
posted
on
Thu, Jun 8, 2006 6:16 AM
Hey Sneaky! I would like to see Lake's pictures of this! I want to make one too! I searched E-Bay for "large clam shell" and got lots of hits. Here's the first one: [ Edited by: tikigap 2006-06-08 06:21 ] |
|
T

tikiwinebear
Posted
posted
on
Thu, Jun 8, 2006 8:18 AM
Sounds like a fantastic project, sneakyjack! We also have been entertaining the idea of putting something like this together, but in a smaller scale. I did a little research on giant clam shells, and found that they are not cheap! I got some ideas of materials from this website: Good Luck! Take pictures along the process!
|
|
CL

Coco Loco
Posted
posted
on
Thu, Jun 8, 2006 9:13 AM
Hey Sneaky, Oceanic Arts in Southern CA has giant plastic clam shells. They look more realistic than plastic. They're punch bowl size to large enough to sit in. I think they're around $30 - $50 each. http://www.oceanicarts.net. They can most likely ship it out to you. Sounds like a great project. Would love to see the pictures! |
|
S
sneakyjack
Posted
posted
on
Thu, Jun 8, 2006 9:34 AM
Thanks for the quick responses I didn't think the shells would be cheap - was hoping they would appear cheaper (oh well) by doing it myself it will save $$. I'm hoping to do this this summer but it may spill into NEXT summer - only because of removal of a farge bush where the fountain will go. thanks again. YES before and after pics will be posted! Keep the help coming! words, links pics too! |
|
BB

Bamboo Boyd
Posted
posted
on
Thu, Jun 8, 2006 9:52 AM
Hi SneakyJack, Sounds like a great project. I'm a landscape architect so I'll give you a few pointers on the design/construction of the waterfall and hopefully will get you started on the right foot. When we build permanent water features here in Phoenix, we use real boulders so I assume that it will be similar to what we build. Basically start with a few of your larger boulders at the base, we call them pancake boulders because their dimensions are, for example, 2'x 3' 2', or 4'x 3'x2'. Basically you want ones with a flat surface on the top that you can "stack" smaller boulders on around. The key is to get a good solid base. We typically dig a 8"-12" footing for the base of the boulders, use 4" mesh wire set on a a few broken brick pavers to elevate the wire 2"-3" off the ground and then fill the footing with concrete. We fill the footing to within about 3"-4" of the dirt level so that after we place the boulders, we can backfill against them and hide the footing and the bottom few inches of the boulder and make it look more natural. Once the concrete starts to set up, we place our base boulders in place so that they are set with the tops somewhat level and they won't move on you as you build the rest of the water feature. Once you get the base set, you then add boulders and shape the water feature to your taste. You asked about using a black spray foam to hold the boulders in place. I'm not familiar with that. We use standard mortar and you can buy coloring additives to add to the mortar mix if desired. Check in your yellow pages for any masonry supply store. As for the pond, you can use just about anything you want. Most people out here dig the pond about 20" deep and to what ever shape they want. Plumb it with PVC pipe for the pump. And then they use the wire mesh and concrete to build the pond and then do a rounded berm edge to make it look a little natural. Almost like a bond beam on a swimming pool. Then after the concrete sets and cures, you can seal it to help prevent leaks, and line it with river rock or whatever you like and then you should be all set. There are a ton of different things you can use for the pond, you can do what you were thinking, or you can get the plastic inserts from home depot or Lowe's. You can also use a rubber liner. The possibilities are endless. Let me know if you have any other questions. |
|
F

freddiefreelance
Posted
posted
on
Thu, Jun 8, 2006 9:59 AM
|
|
H

Howland
Posted
posted
on
Thu, Jun 8, 2006 2:10 PM
Do a google search on "photo props clam". I've found some in the recent past running about 50 bucks for one big enough to hold a small child. I've had a similar project running around in my head for a month or so now, just no time yet to pull it together. Good luck and post some progress pics. |
|
CS

chisel slinger
Posted
posted
on
Thu, Jun 8, 2006 3:08 PM
thanks bamboo boyd, you just helped me on my project. now, what do you use to seal/paint the concrete. I want mine black, But I dont want the paint to come right off. thanks. c.s. |
|
BB
Bamboo Boyd
Posted
posted
on
Fri, Jun 9, 2006 1:59 PM
Chisel, are you talking about the concrete base for the pond? I know I mentioned sealer, but after asking around, most installers said they don't seal the pond basin unless it leaks. If you are going to put fish in it, painting it black could make it hotter and literally "cook" your koi. I've seen it happen. If you aren't going to put fish in it. You could use a coloring additive (see link below), but if it were me, I'd probably go for the more natural look and get a bunch of those black shiny 1-2" pebbles and cover the bottom with that. Out here they call them "black mexican pebbles". You could even "set" them in the wet concrete basin so that they were touching each other, and when the concrete hardens, they are set in place, but that would be pretty time consuming. If you really want a black basin, you might look at the plastic basins at home depot. They are pretty easy to use and camoflauge. Either way would work. I would, however, add a coloring additive to the mortar mix I use to build the waterfeature that matches the boulders so you don't see the grey mortar. The coloring additive you can get at any masonry supply house. Or check with a local pool builder, they might help. Here's a link to the local one here in Phoenix that we use. http://www.cohills.com/main.htm. Open the link, click on "Intrgral colors" and then on color swatches. They don't have a black, but I'm sure if you find something like this locally, they can tell you what colors to mix to get black. Let me know if you have any more questions. |
|
CS
chisel slinger
Posted
posted
on
Sat, Jun 10, 2006 11:06 AM
thanks! |
|
JT

Jungle Trader
Posted
posted
on
Sat, Jun 10, 2006 3:41 PM
All you need is a shovel, 45 mil liner, pump, 2 inch pipe for large waterfall, filter, rocks and plants. You don't need mortar, concrete or gunite. Take a look at my website and you'll see some of the stuff I've done. The Abigail pond is my backyard. For me, I love it when it looks natural. You can't get that with mortar, cuz you can't plant between the rocks. Without plants it's too stark and unrealistic. Plants tend to soften the look. For the filter I just use a 55 gal. drum and fill it with lava rock. If you have koi, you'll want a UV light, but if it's just goldfish, don't worry about it. Algae Fix is also a must for clearing of pea soup algae. Create bogs or steps and you can set plants down in the pond. Shade is also a must to prevent string algae, otherwise you'll fight it during the hot summer. Oh yeah, don't put rock at the bottom. Unless you get a muck vac. It's just harder to get to the debris with rock. When debris sinks to the bottom, it tries to decompose but it can't. If it stays there it will eventually cause your pond to "crash". It might take 2 years or 5 but it will crash, and kill everything in it. With no rock the debris won't get stuck between the rocks. Some algae is good for the pond and it will eventually cover the liner so it's less visible. Another oh yeah, I also use the black foam in a can. Spray it between rocks, it expands 3 times the size of the original bead and seals cracks so the water flows over the tops of the rocks and not underneath. Once it has dried, after about 1 hr., you can cut out or tear off any excess. Good luck! [ Edited by: Jungle Trader 2006-06-10 21:14 ] |
|
R

RevBambooBen
Posted
posted
on
Sun, Jun 11, 2006 9:31 AM
So...... How do I build a waterfall the re-circulates into my portable spa? The Gut's Parts/ pump tubing, etc. Not the shell, exterior, part. [ Edited by: RevBambooBen 2006-06-11 09:33 ] |
|
JT
Jungle Trader
Posted
posted
on
Sun, Jun 11, 2006 5:46 PM
You don't, you scurvy dog. |
|
S
sneakyjack
Posted
posted
on
Sun, Jun 11, 2006 7:30 PM
Ben you can come over and jump in my Hot tub anytime!!! |
|
M

McTiki
Posted
posted
on
Tue, Jun 20, 2006 3:49 AM
http://www.tikicentral.com/viewtopic.php?topic=16702&forum=7&hilite=waterfall Mine's still flowing. PM me for any questions. Search on "waterfall" Mahalo |
|
S
sneakyjack
Posted
posted
on
Tue, Apr 24, 2007 10:44 AM
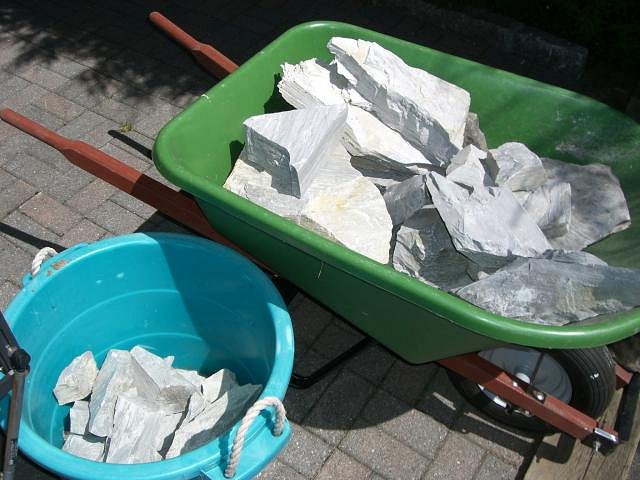
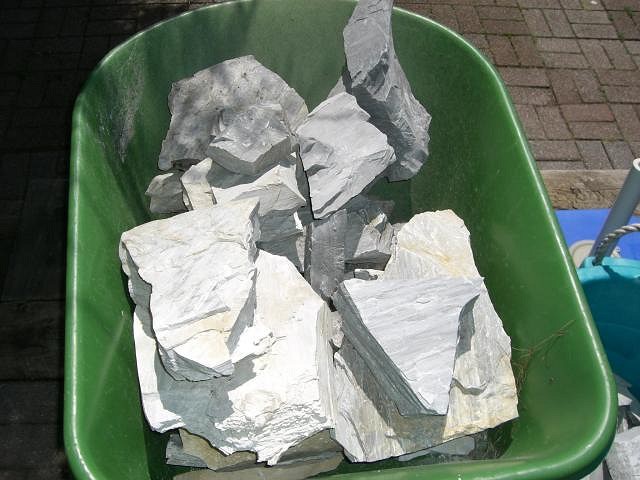
well ground has been broken - rocks have been gathered and Ideas are being laid, stay tuned for some progress pics soon - I hope! |
|
S
sneakyjack
Posted
posted
on
Tue, Apr 24, 2007 11:03 AM
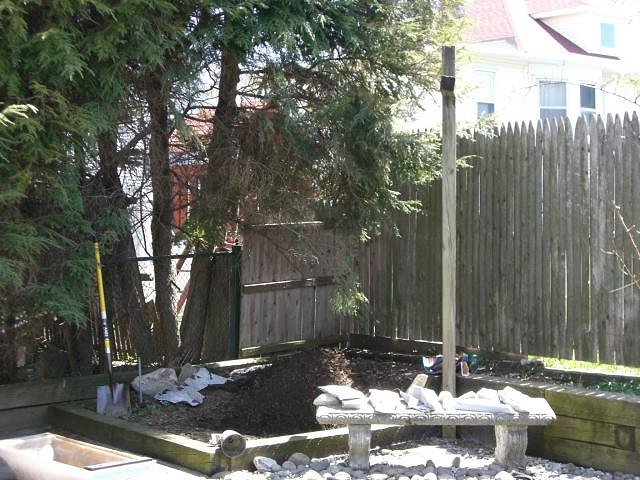
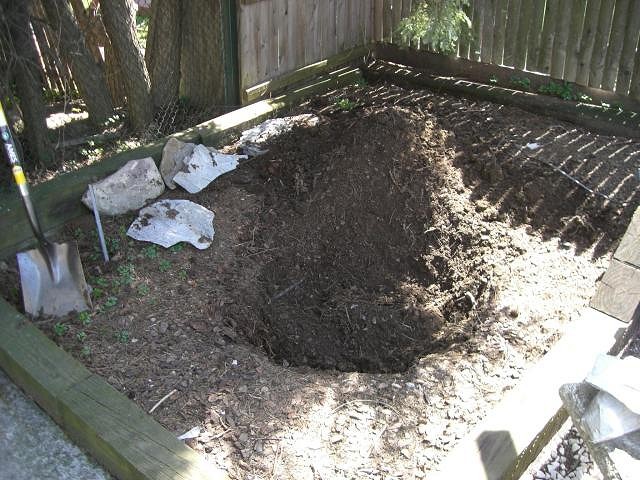
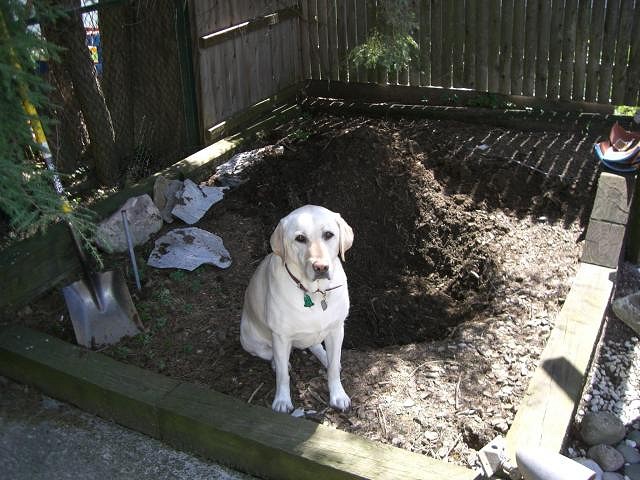
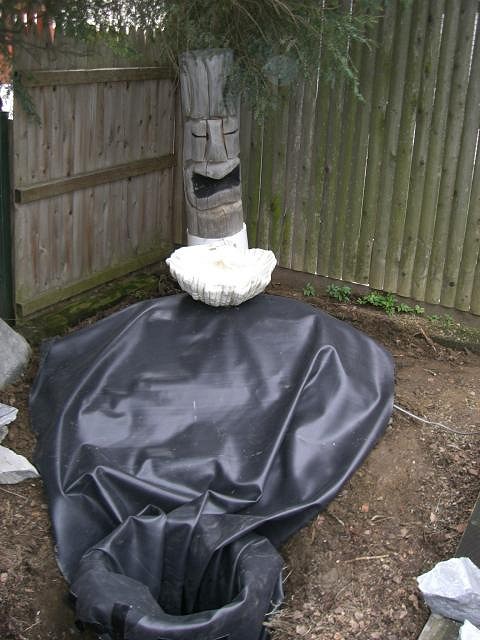
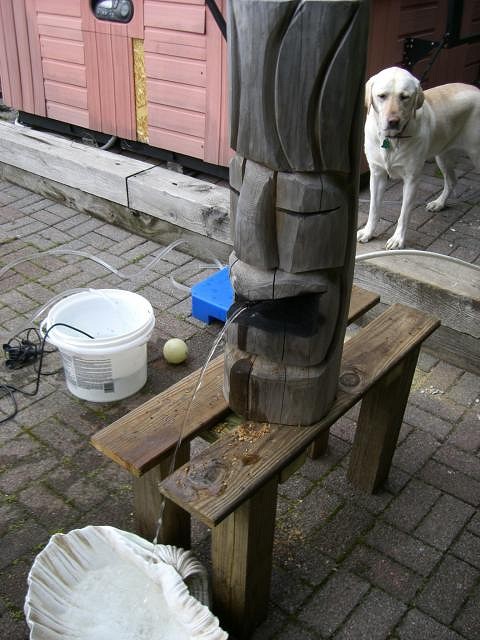
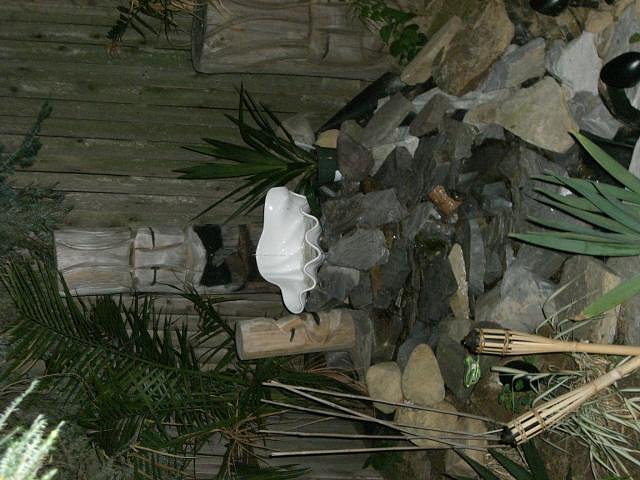
ok so I'm faster than I thought for pics:
Any input would be great - the idea is to have a wooden tiki spraying the water from mouth / through a tube into a clam shell that will then spill / cascade down the rocks - not a big drop but it will make a bit of splash sound. We'll see! I plan on some lighting in a dn around and behind it some Bamboo "fencing" and plants / palms. PLease speak up with thoughts or possible problems! |
|
MB

Mr&Mrs BPHoptiki
Posted
posted
on
Tue, Apr 24, 2007 11:21 AM
Great! Another Tiki Central project in the works. I love these posts! Sneakyjack the location looks great. I think this is going to turn out super! Mrs Hoptiki |
|
S

Swanky
Posted
posted
on
Tue, Apr 24, 2007 11:32 AM
The ponds they sell at Lowe's etc. are black, so I doubt black is an issue. You don't want it in the sun anyway, or the algae will get out of hand quickly. They are also pretty cheap. Maybe $50 for a pretty good sized one. I have been considering this project myself. They have lots of pumps and supplies, so it could be an easy-ish project. Lots of digging though. Liner, pump, tubing, and that's all under $100 for a pond about 4 feet across. Add rocks and run the tube through the rocks to pour out as you want. Of course, none of that is as easy as it sounds. |
|
CS

Capt'n Skully
Posted
posted
on
Wed, Apr 25, 2007 9:26 AM
looks like you're off to a good start! Here's a ponding forum with tons of info that can help if you need: http://forums2.gardenweb.com/forums/ponds/ I have a similar tiki fountain project in the works and have been looking for a decent clamshell too (Not sure if you're still going that direction). Check out this planter if you're still looking: http://www.lillianvernon.com/catalog/product_display.jsp?pdId=2393 Can't wait to see the progress.. |
|
S
sneakyjack
Posted
posted
on
Sat, Apr 28, 2007 12:37 PM
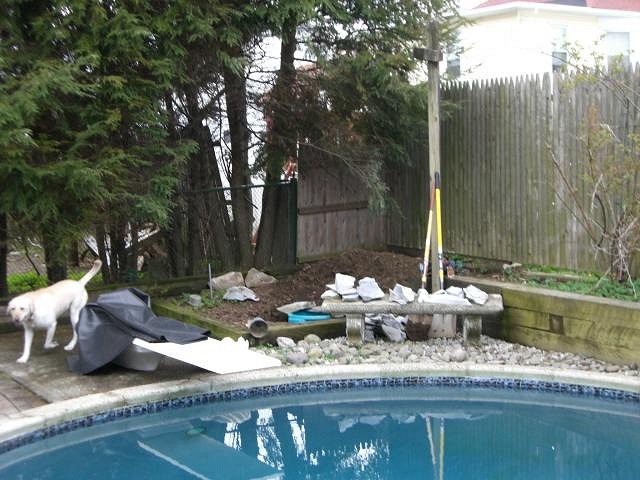
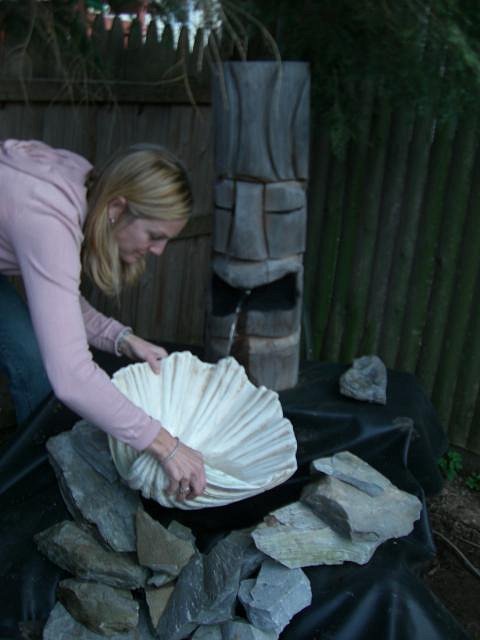
ok so moving closer heres some more shots.. |
|
S
sneakyjack
Posted
posted
on
Sun, Apr 29, 2007 5:45 PM
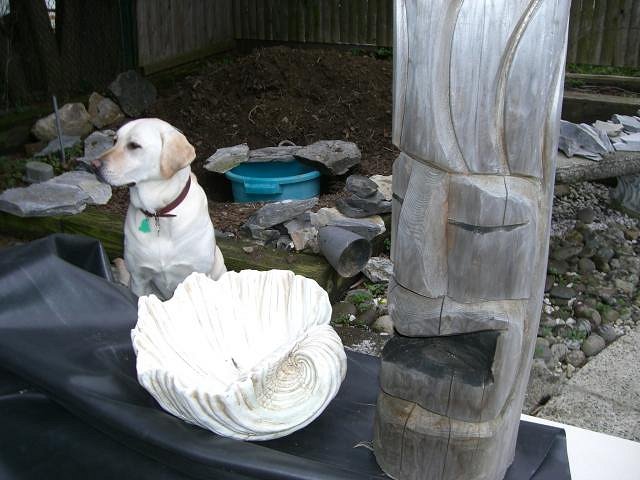
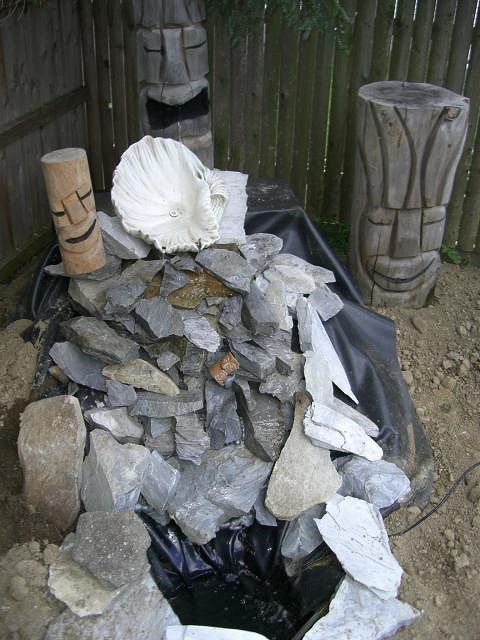
some more updating More to come just got to adjust some more rock reset rocks and spray the black foam. I noticed on great thing - unplanned and I'll post a pic soon. From my inside bar I can see the fountain easily out the window - so While mixin mai tais and Fogcutters I can look out and see the fountain action - Once it gets goin and I light it up! Stay tuned! |
|
S
sneakyjack
Posted
posted
on
Tue, May 8, 2007 2:11 PM
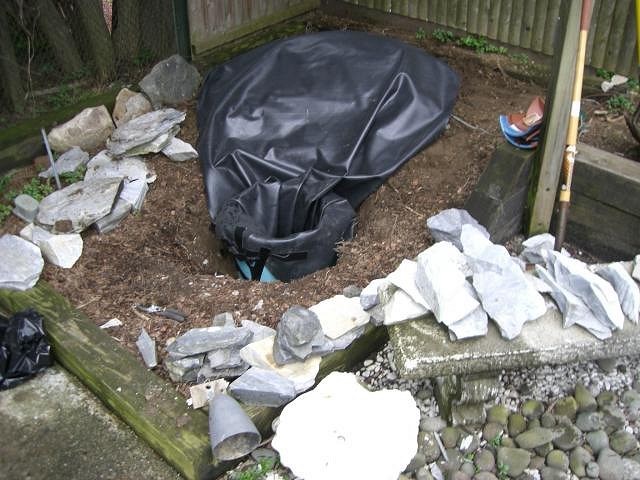
will it works just need a few more rocks and some plants - and lighting
next shot will be full effect! stay tuned |
|
S
sneakyjack
Posted
posted
on
Thu, Aug 23, 2007 10:56 AM
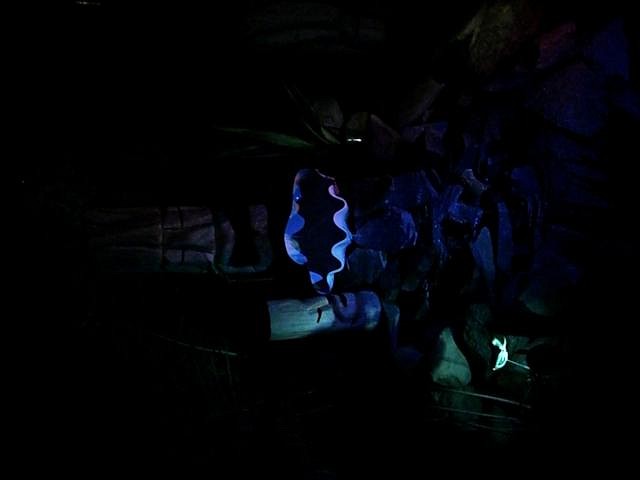
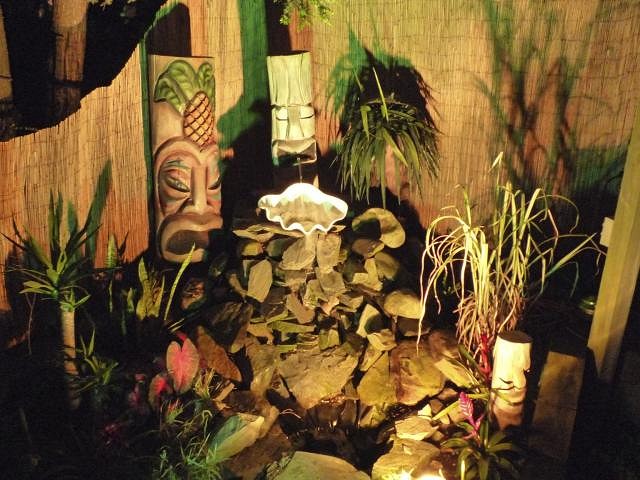
Its been a while and the fountain is still working, a few tweaks of rocks and a shell replacement from oceanic arts - its plastic. The night shot is not so great but I'll use my good camera at some point in the evening and update.
let me know what you think |
|
Y

YankeeAirPirate
Posted
posted
on
Thu, Aug 23, 2007 11:11 AM
That turned out amazing. Great work! I really like the lighting. I wonder if the Air Force will let me do this in base housing.... |
|
S
sneakyjack
Posted
posted
on
Tue, Aug 28, 2007 10:08 PM
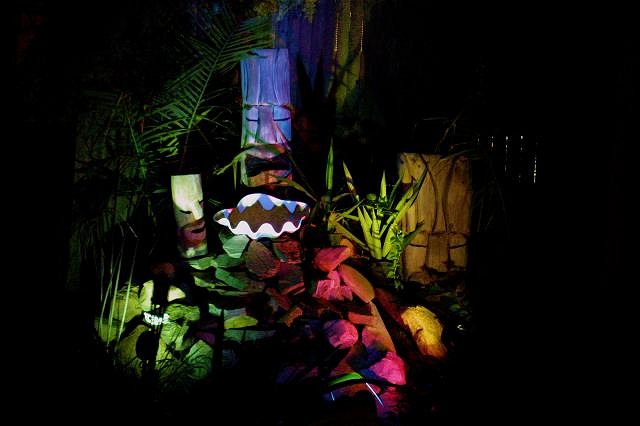
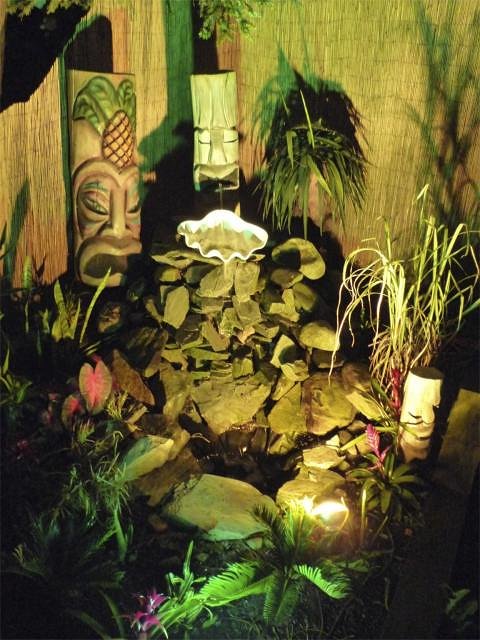
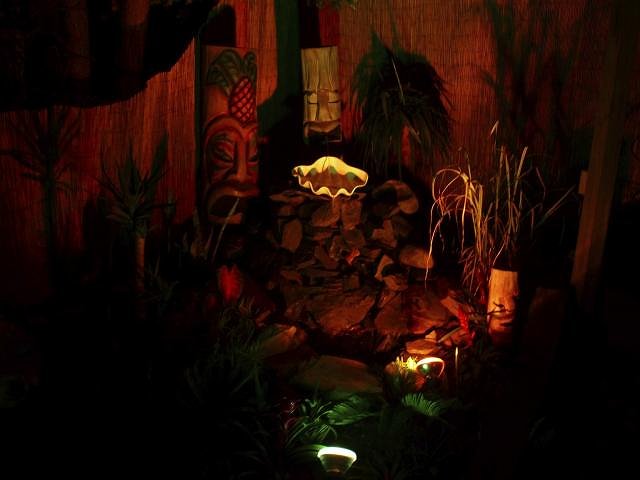
well fun lighting and a good camera gets these photos - I think this should cover it!
and the use of pool / water relection
postcard like - huh??? |
|
R
RevBambooBen
Posted
posted
on
Tue, Aug 28, 2007 10:11 PM
Arrsome!!!!! |
|
V

VampiressRN
Posted
posted
on
Wed, Aug 29, 2007 5:27 AM
Looks fantastic at night. GREAT JOB!!! |
|
DT

diesel tiki
Posted
posted
on
Fri, Aug 31, 2007 7:59 PM
That looks really good!! I'm envious! |
|
SF

Slacks Ferret
Posted
posted
on
Sat, Sep 1, 2007 10:04 PM
The way you have those tikis lit for the night shots makes me think they'll start singing along with Jose, Fritz, Michael, Pierre, and the rest of the glee club. Nice job! |
|
CH

cheeky half
Posted
posted
on
Sun, Sep 2, 2007 6:43 AM
How did I miss this thread before??? Great job sneakyjack!!!! I need to get the Mr, head back to the east coast and check this out in person. Sweeeeeeeeeeet! |
|
S
sneakyjack
Posted
posted
on
Thu, Aug 6, 2009 12:26 PM
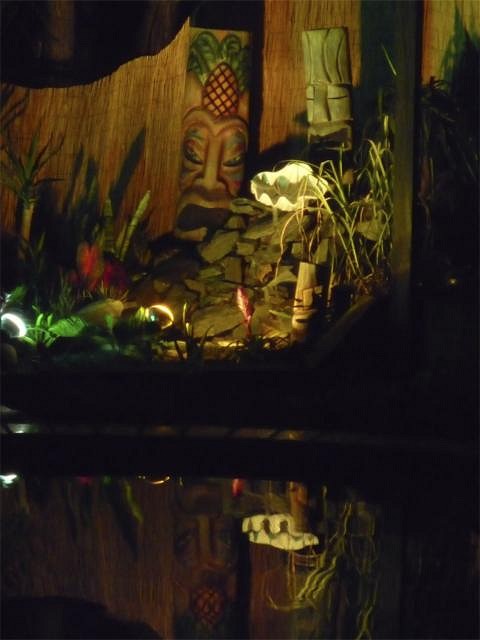
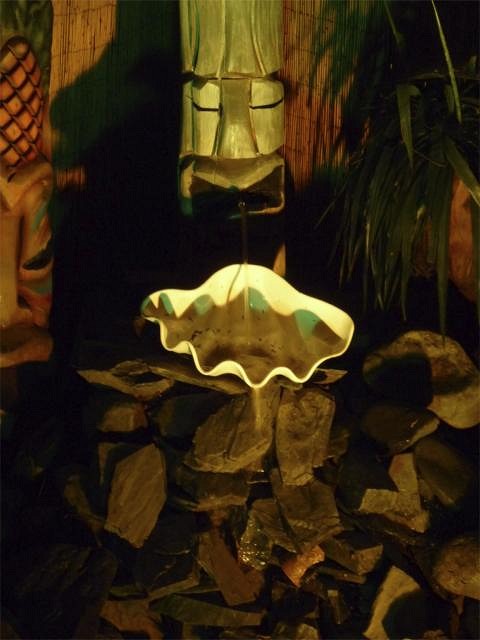
updated pics for 2009 summer - Note the airbrushed tiki addition (not so sure but hes big!) reflection -
redish filter
what ya think? |
|
TWO

Tai Won On
Posted
posted
on
Mon, Nov 23, 2009 7:40 PM
Great looking fountain Sneaky. The night shots look especially cool. |


Pages: 1 34 replies