Tiki Central / Tiki Carving
bigt carvings
Pages: 1 2 3 4 5 6 7 8 9 10 11 12 572 replies
|
T

TheBigT
Posted
posted
on
Tue, Sep 4, 2007 8:08 PM
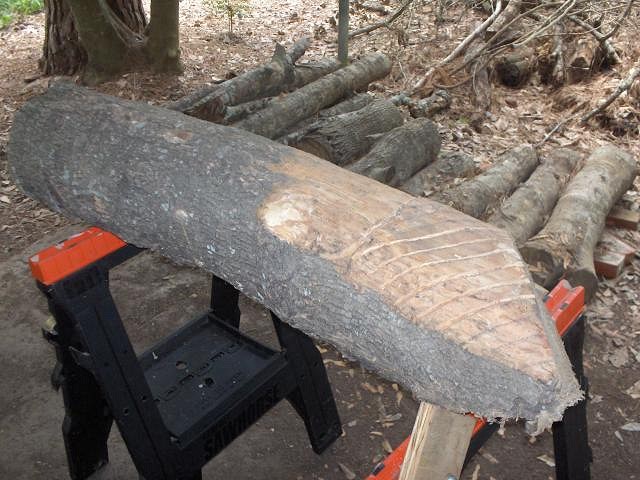
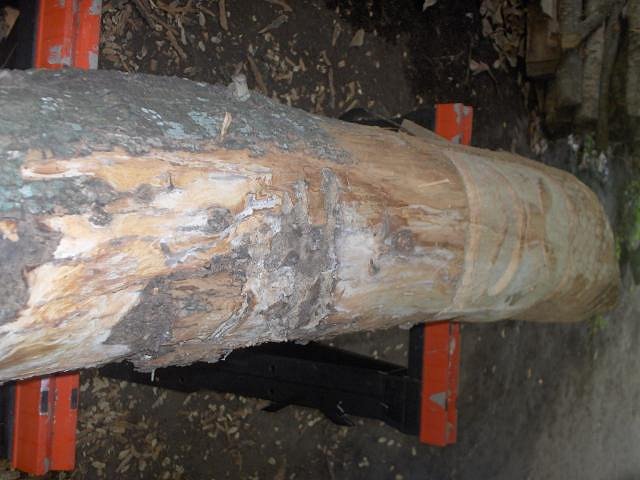
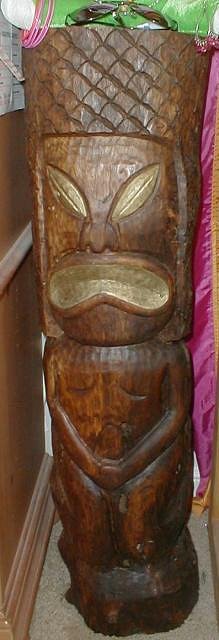
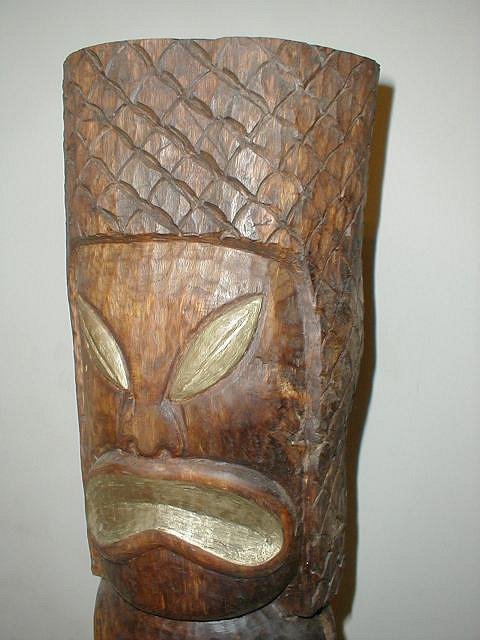
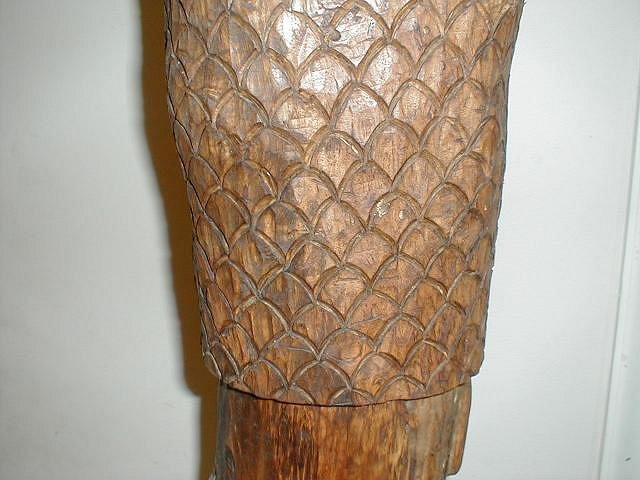
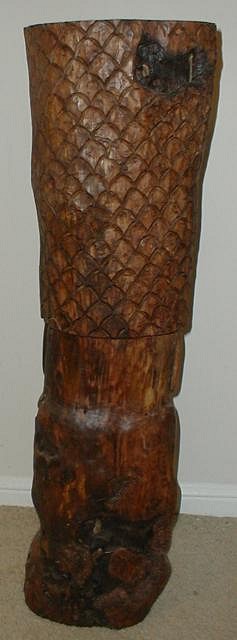
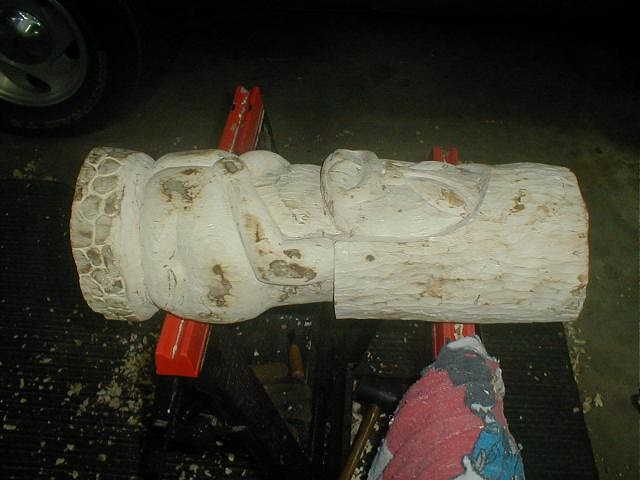
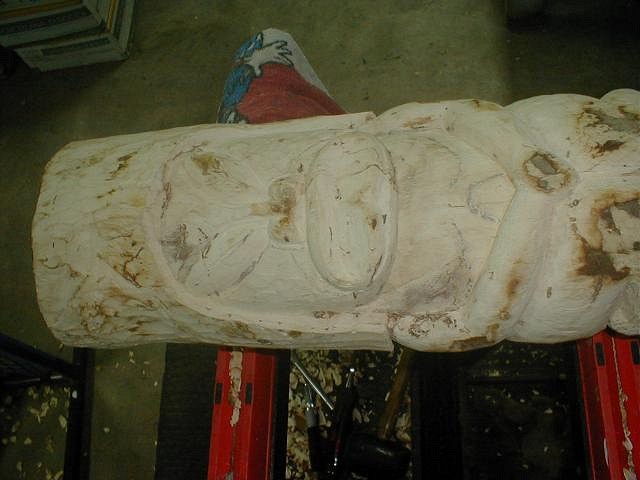
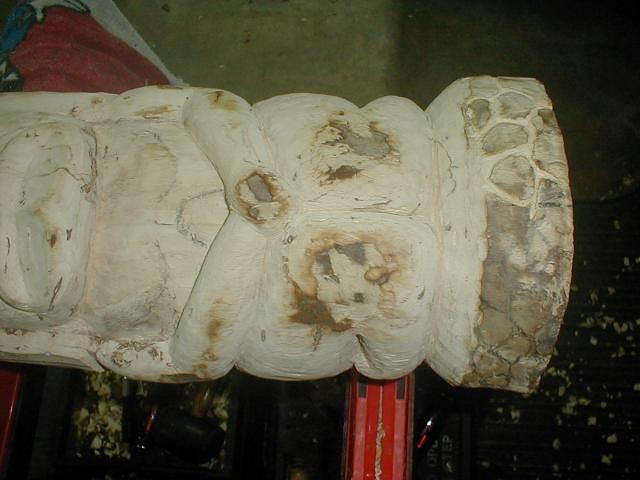
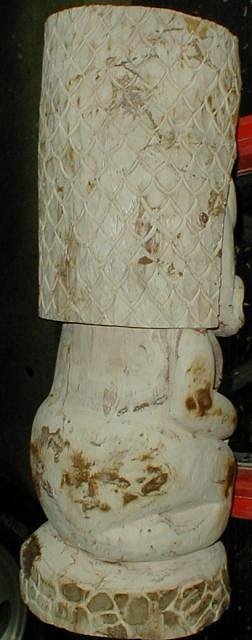
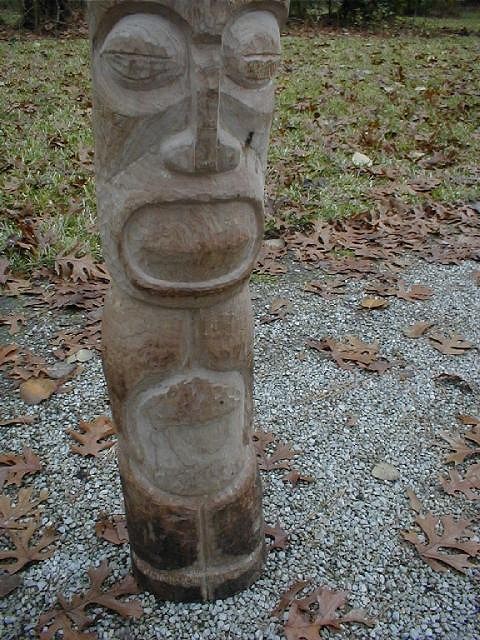
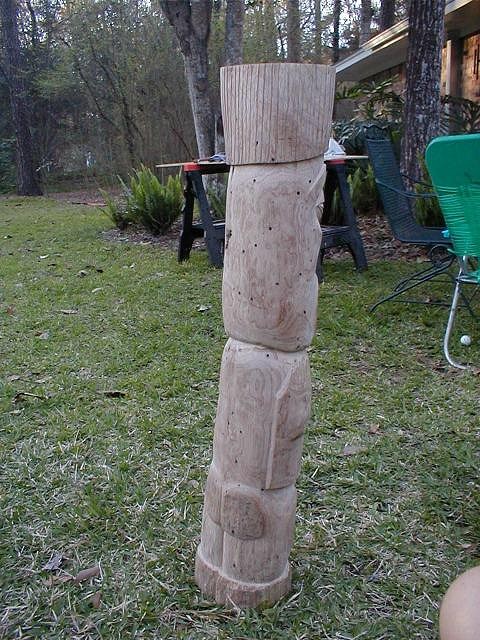
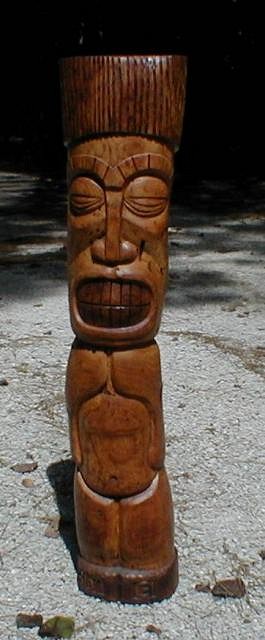
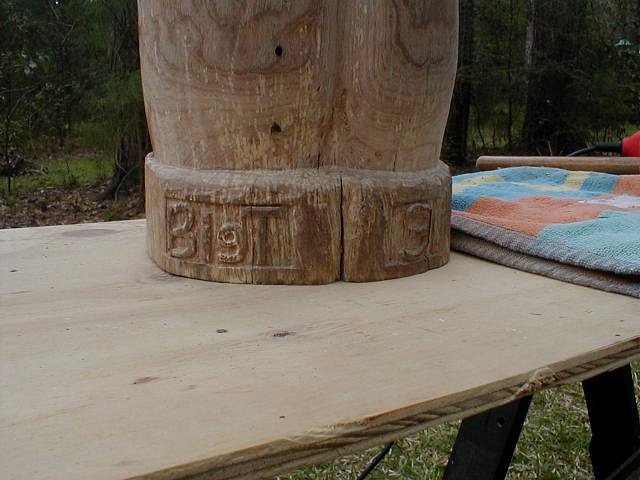
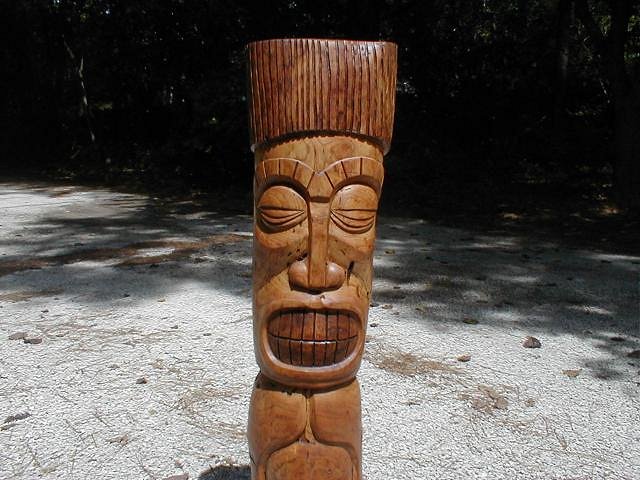
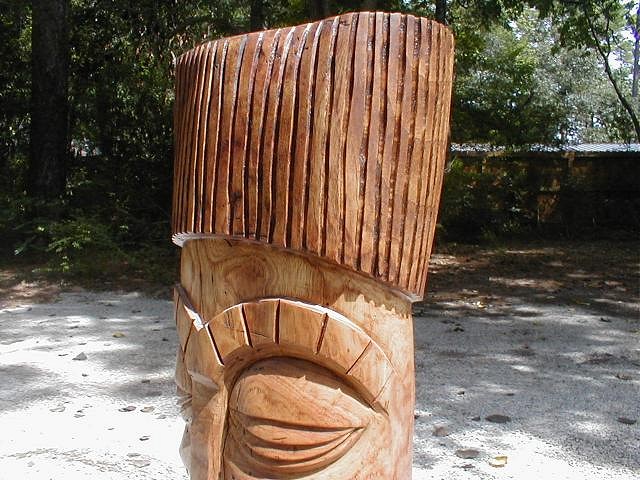
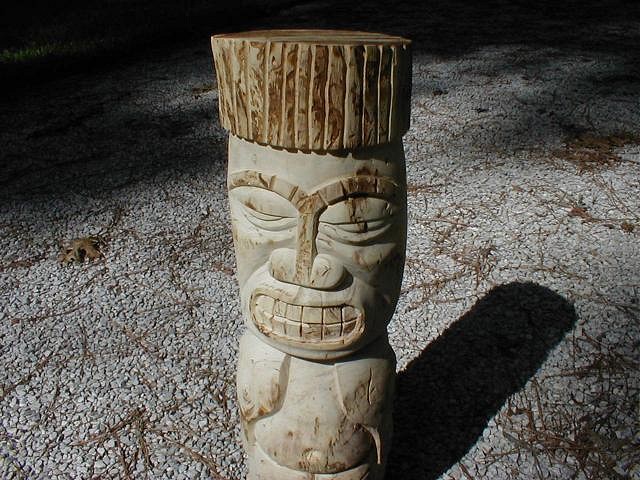
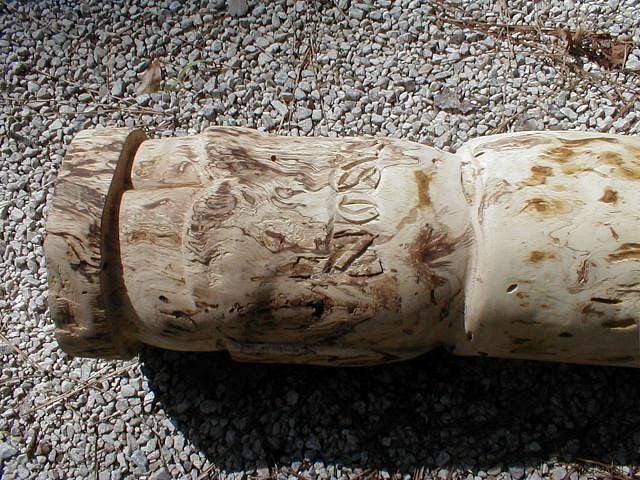
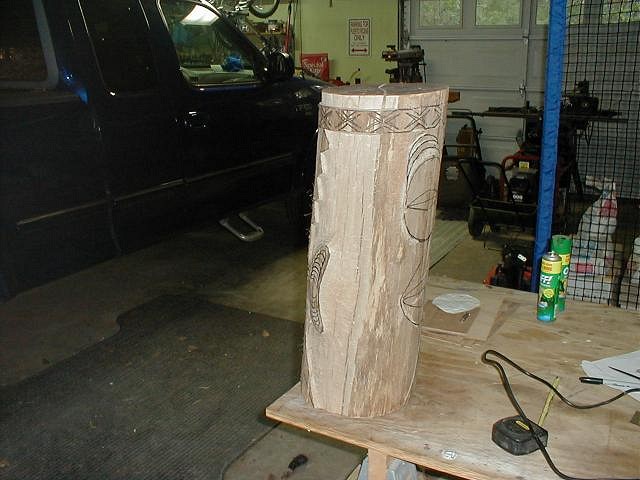
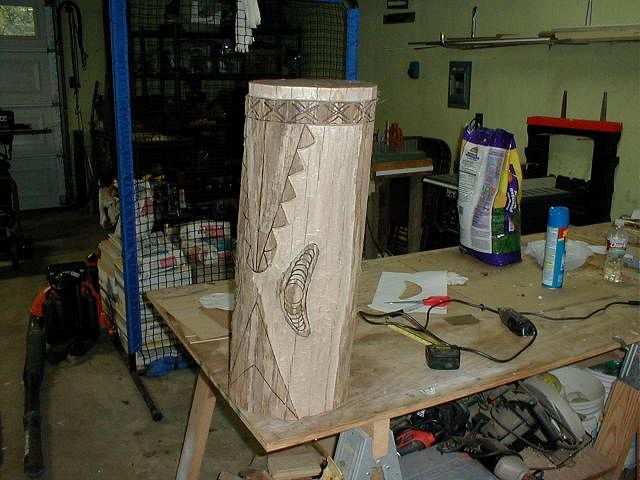
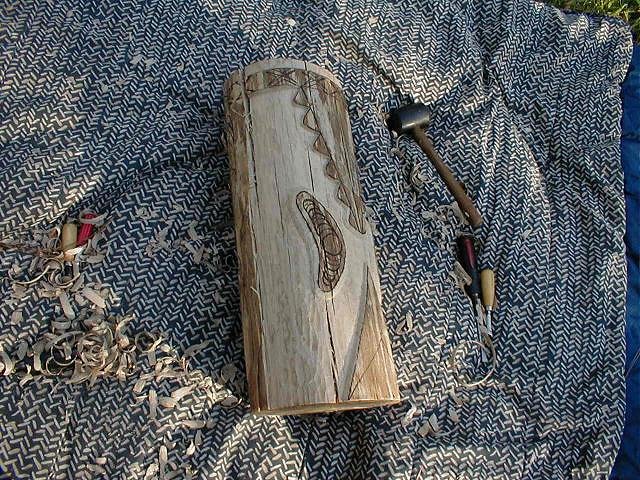
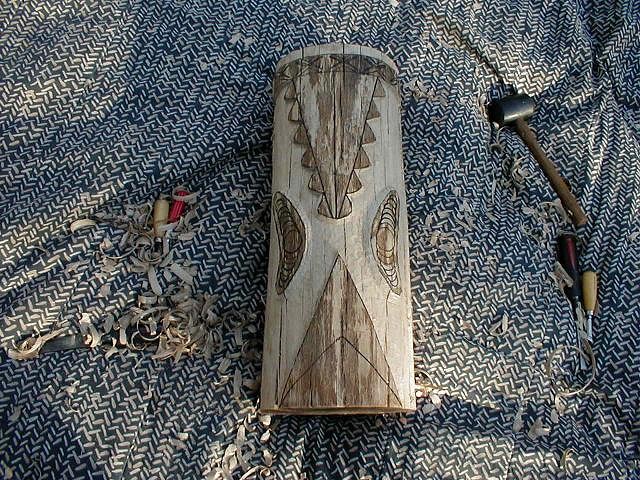
This was my first tiki, started last year in August and finished in December 2006. I did the sanding and staining over the 2007 New Year holidays. I used a set of old Speedball carving chisels I found at a resale shop; mostly just the small gouge. I believe the wood is Ash, probably Arizona Ash, and was riddled with insect damage (beetles, bees, etc.) and a little bit of rot here and there. This tiki was meant to be a larger replica of the tiki featured in the Gilligan's Island episode, "Waiting for Watubi". Looks sorta like a gumby head at this point before it was squared off... 8/6/06 8/8/06
8/15. Stripped off some more of the bark...
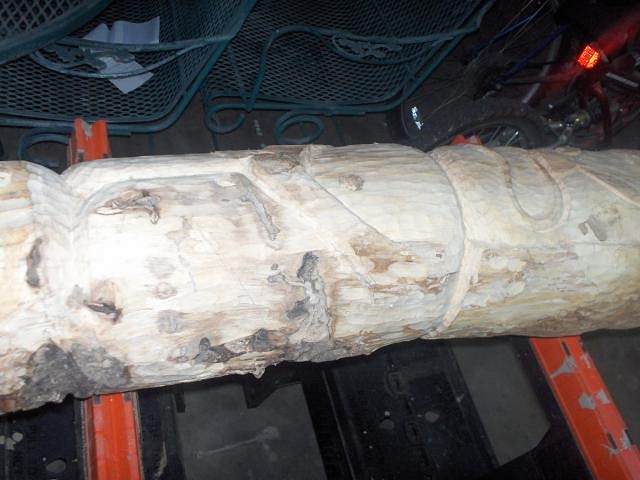
8/22 - the beginnings of arms and legs.
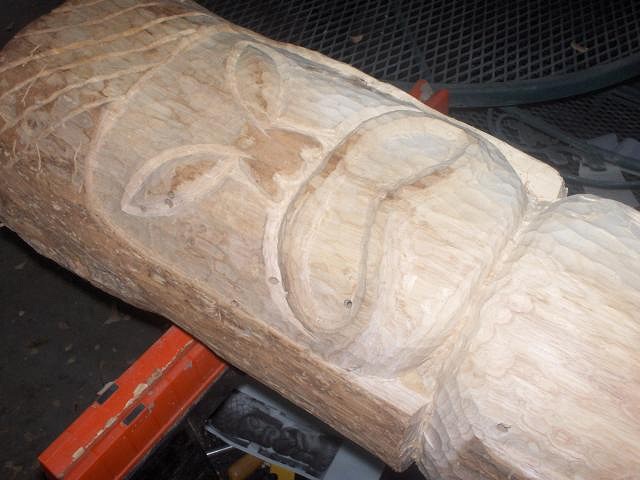
8/26:
Jan 07, finished.
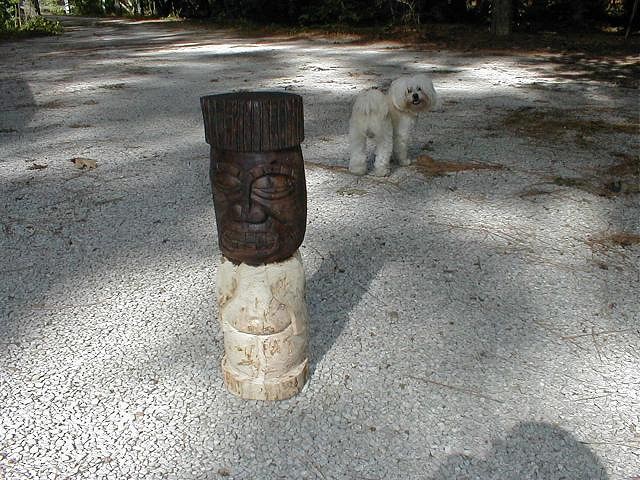
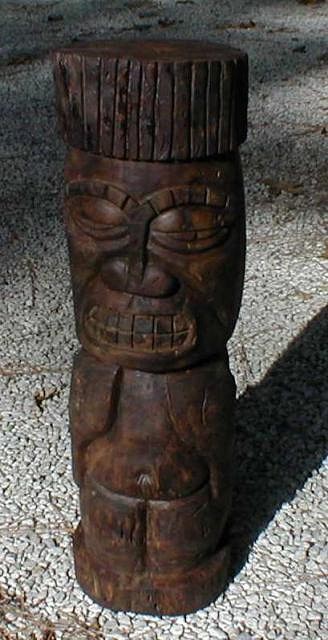
He's now decorating my daughter's room. :)
All of the holes are insect damage to the log before it was carved. The one exception is the round one on the stomach, which I'm pretty sure is from a woodpecker - probably one of the big pileated woodpeckers. Finished with a coat of Restore-A-Finish brand wax. Eyes painted with a Gold paint pen. [ Edited by: TheBigT 2015-12-01 04:33 ] |
|
P

Paipo
Posted
posted
on
Tue, Sep 4, 2007 10:39 PM
That's a very nice first piece - looks like the source tiki may have been a Milan Guanko? It's a credit to your work that the style is so recognisable. He has a great vintage looking patina and the various holes and cavities contribute to the old-school vibe. Bring on #2! |
|
C

closettiki
Posted
posted
on
Tue, Sep 4, 2007 10:56 PM
very cool.......i really like the old school look also.......it looks as if its been hangin around the island for awhile....great detail on the head piece....being a beginner also its cool to see other poeples first works.....great style......keep on chippin away....theres tikis in them there logs....go let em out.... |
|
T
TheBigT
Posted
posted
on
Wed, Sep 5, 2007 1:29 PM
Paipo: yep, it probably is a Guanko design. I've seen the photo here of a Milan Guanko that looks like this. I don't know the originals of the Gilligan's Island tiki though. It looks different than the one found here in TC. Does anyone know the origins of the GI tiki? closettiki: I've seen your thread - great work! Thanks both for the kind words. Yes, once I started I realized that if I didn't over finish it, all my screw ups might help give it an old look and feel (and help hide some of my screw ups that couldn't be fixed). So that's what I did, just left if pretty rough - no final sanding on the headdress part at all and just enough sanding on the rest to still leave a sorta rustic appearance. |
|
T
TheBigT
Posted
posted
on
Wed, Sep 5, 2007 7:27 PM
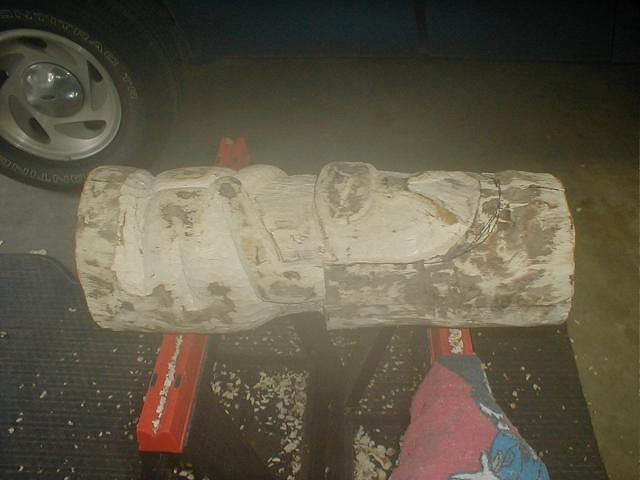
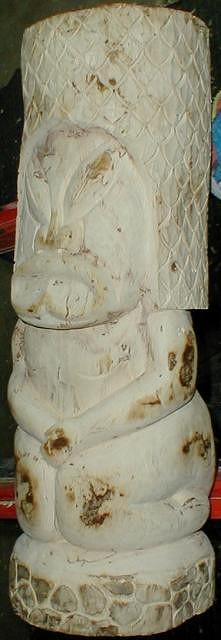
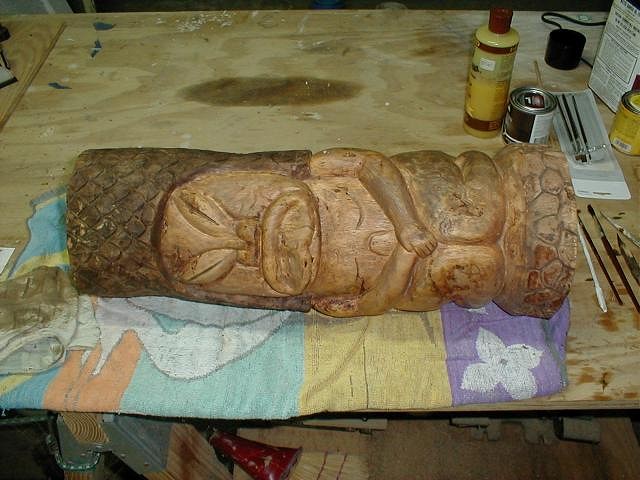
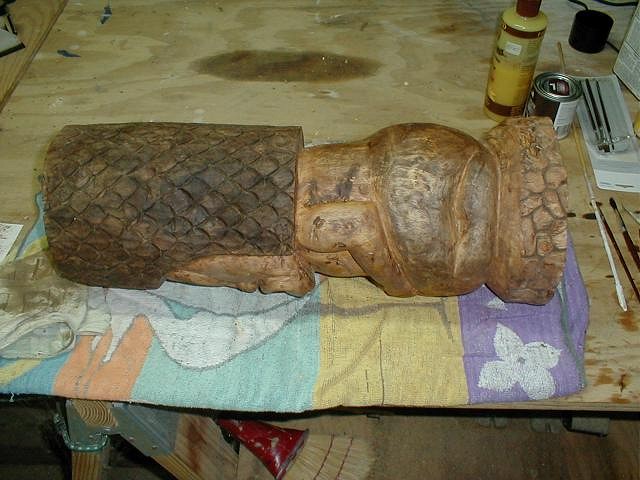
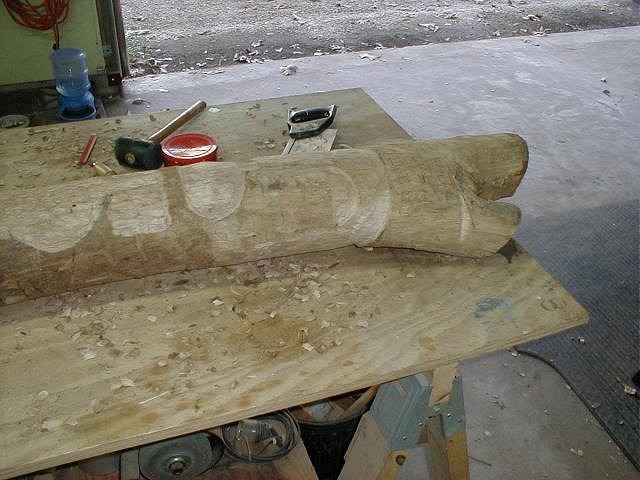
Started tiki #2 last month. This one is a smaller version of the Gilligan's Island/Milan Guanko tiki. This one is pecan and 21" tall. These pics, taken about a week after I started, came out pretty hazy. Must have been really humid that night! lol But, hey, it's Houston.
Here's the pics from last weekend:
I'm doing something a little different this time - adding sort of a stone wall pattern that I didn't do the first time. Can't really tell exactly what it looks like in the original on the photos I have. Thanks for looking! All comments welcome. :) |
|
T
TheBigT
Posted
posted
on
Mon, Sep 17, 2007 7:32 PM
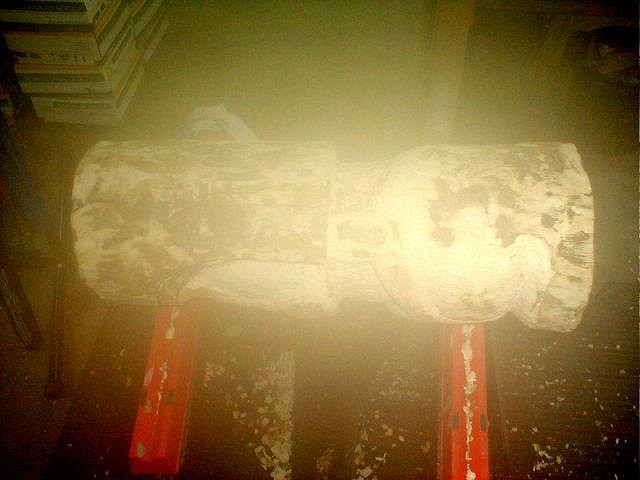
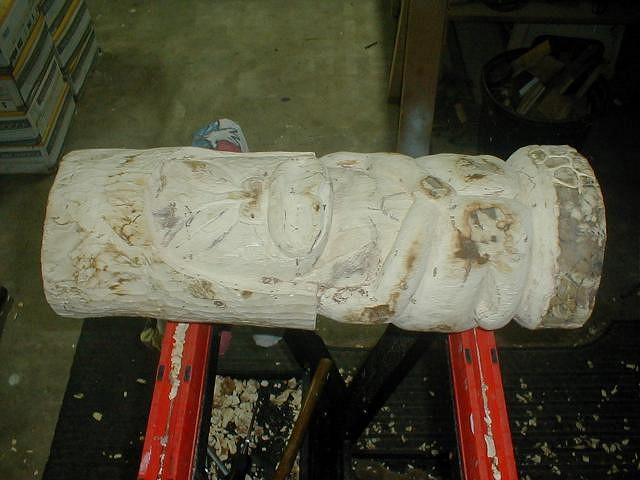
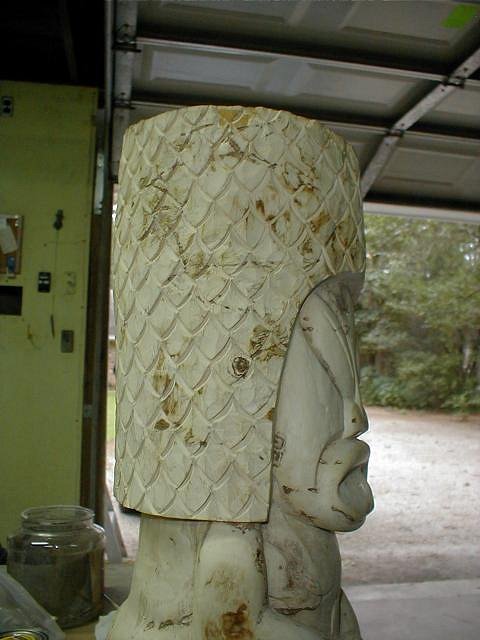
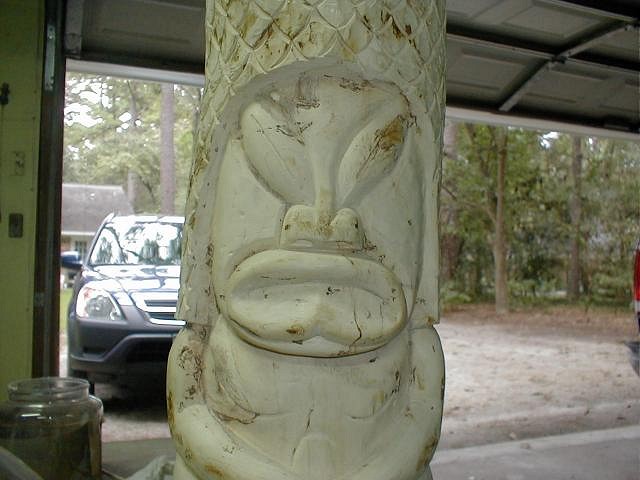
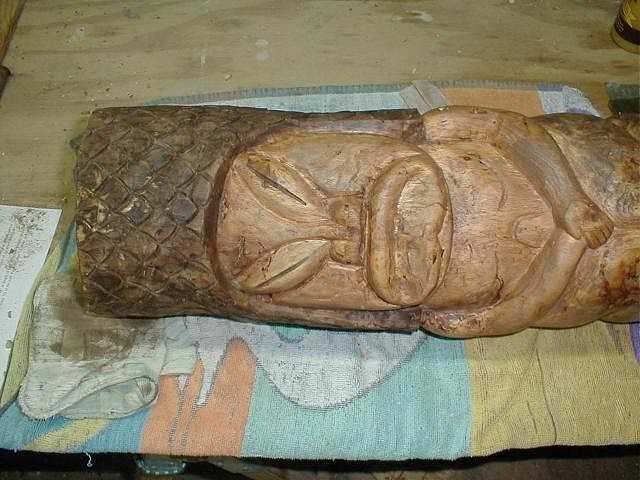
Updates from the past weekend. Some of the details are hard to see. Just about finished with this one. :)
|
|
P
Paipo
Posted
posted
on
Mon, Sep 17, 2007 7:39 PM
I love that base - very cool idea, simple but original. It'll look great burnt and sanded (or something similar) for contrast. The tiki is looking very smooth once again too. Nice work T! |
|
B

Benzart
Posted
posted
on
Tue, Sep 18, 2007 6:02 AM
You are really Getting the Detail down nice and clean. Nice definition. Keep up the Excellent work. |
|
T
TheBigT
Posted
posted
on
Tue, Oct 2, 2007 7:39 AM
Paipo: thanks - can't take credit for the idea tho, as the original seems to have something similar on the base. This is just my interpretation of it. Benz: thanks for the words of encouragement!! :) |
|
T
TheBigT
Posted
posted
on
Tue, Oct 2, 2007 7:49 AM
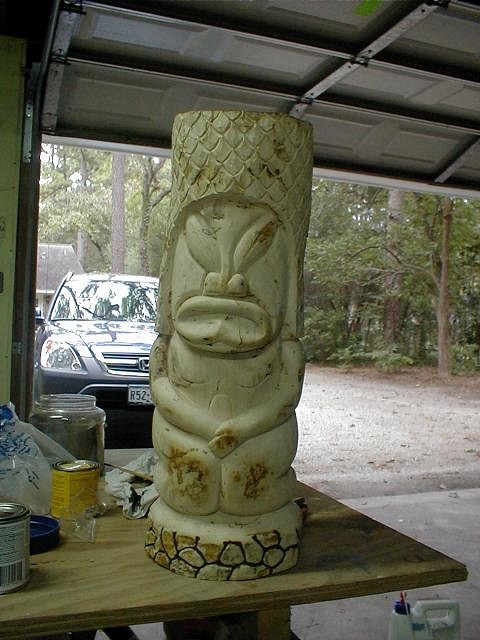
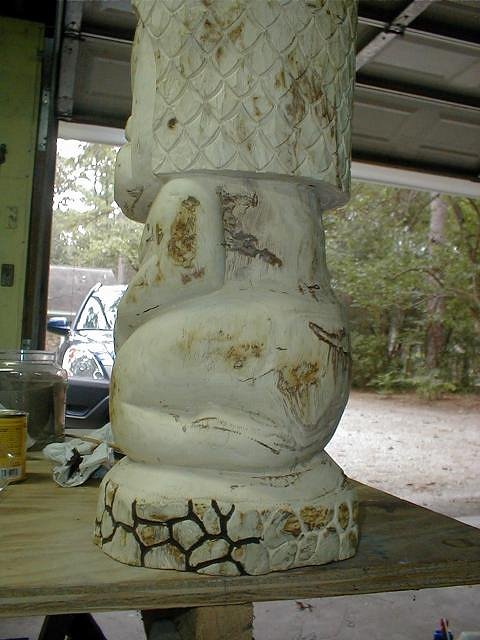
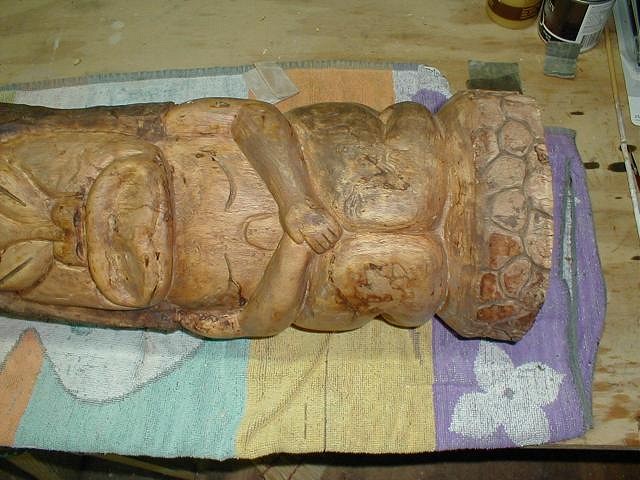
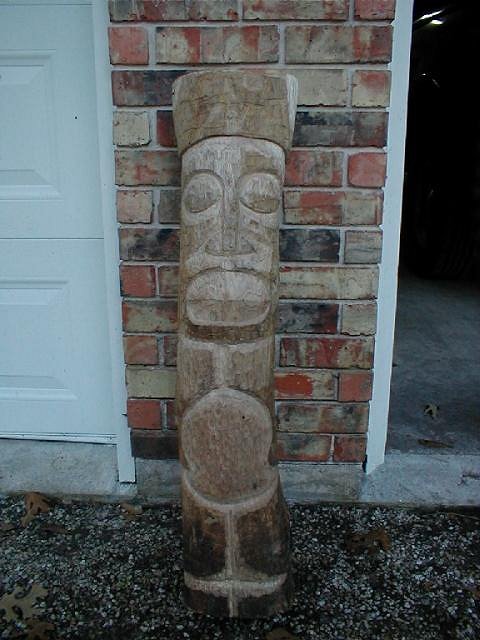
The latest updates - tried to finish it last weekend but I think I rushed it. The stain didn't come out like I wanted, so now I have to figure out what to do from here... re-sand and re-stain??
The stain came out really blotchy. Although this piece of wood had lots of swirls, knots, and thin ribbons of bark in it. Don't know if I should have sanded more or less...
I think I didn't mix the stain well enough and when I got to the headdress, it originally came out very red, so then stained over it with mahogony stain. I think the rest of the body needs to be darker too. The original dark highlights didn't come out as dark as I wanted them either. :(
|
|
S

seeksurf
Posted
posted
on
Fri, Oct 5, 2007 10:44 PM
BigT looking good that wood looks like marble before the stain. |
|
T
TheBigT
Posted
posted
on
Sun, Oct 7, 2007 9:55 AM
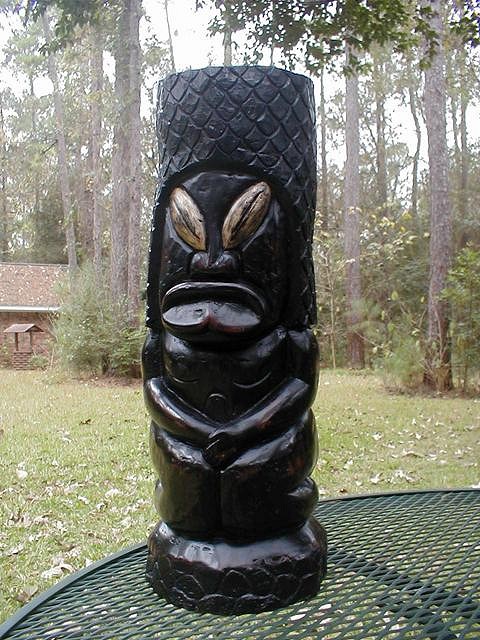
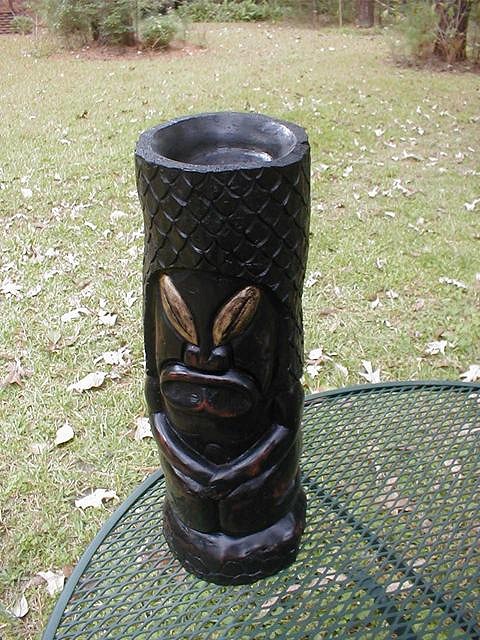
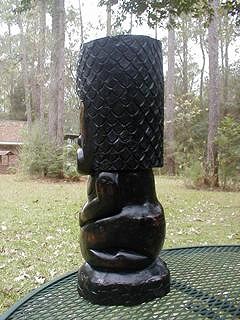
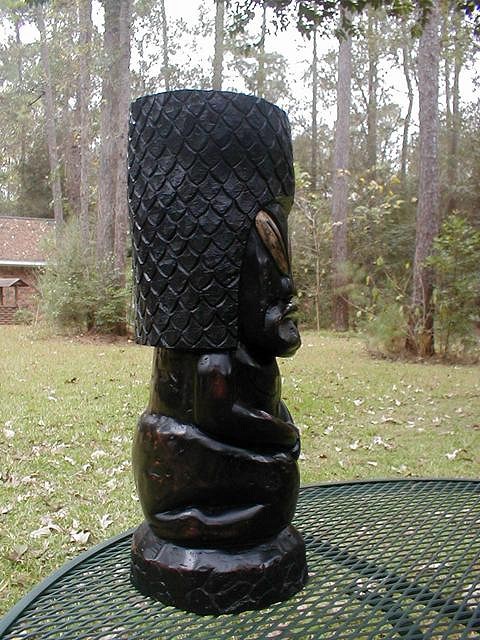
seeksurf: thanks for the comps! Sorry to say the gold color is going to get covered up...lol. After talking with my dau, the wants me to paint/stain it black and carve a bowl in the top and she's going to put it on her kitchen counter. So that looks like the direction this one's going to take. |
|
B

Bowana
Posted
posted
on
Sun, Oct 7, 2007 10:21 AM
Hey Big T! That's a good idea to carve a bowl on top of the head. It will be a functional piece of art now, and not just a pretty face. I have sanded off undesirable stain and refinished some of my pieces in the past. It's unpleasant, but if ya gotta, ya just gotta! Ceramics stores carry that type of band clamp I used. Get a few, they are very handy! |
|
T
TheBigT
Posted
posted
on
Sat, Dec 8, 2007 9:29 PM
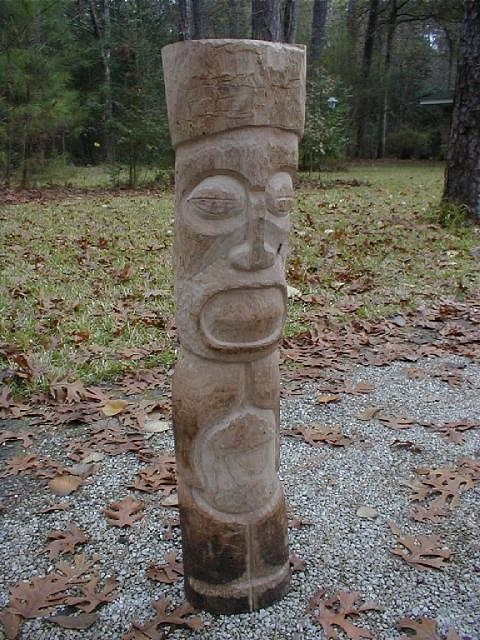
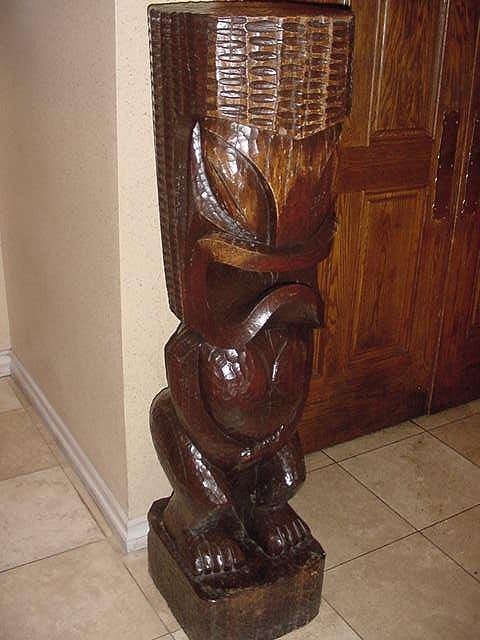
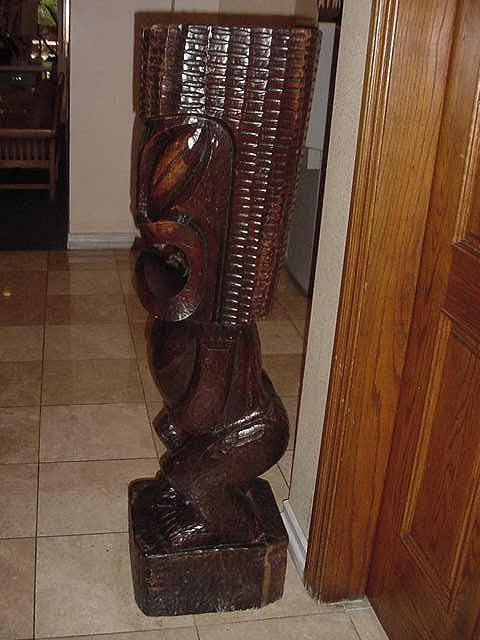
Hey all! Took me a while, but finally finished #2. Here's the results. Hope everyone likes it. Boy, I noticed the paint really exposes every little blimish doesn't it? :)
|
|
B

benella
Posted
posted
on
Sun, Dec 9, 2007 2:15 PM
Hey man, very good looking piece. Benjamin. |
|
T

teaKEY
Posted
posted
on
Sun, Dec 9, 2007 4:04 PM
That last one has the Wendy/Gecko mug look all the way. But a first for wood. Great job. Funny thing is, mugs try to look like carved wood and now carved tikis are going for the mug look. :shecky: |
|
S
seeksurf
Posted
posted
on
Mon, Dec 10, 2007 5:11 PM
Nice BigT. I particularly like the |
|
T
TheBigT
Posted
posted
on
Mon, Dec 17, 2007 10:31 AM
Benella, teakey, seeksurf: thanks for the kind words. Got some honey-do's on my list before Christmas, but hope to start on #3 soon! |
|
B

BUFFBAD
Posted
posted
on
Tue, Dec 18, 2007 3:35 AM
Nice job dealing with the knots/blemishes that dont stain or suck up too much stain. |
|
T
TheBigT
Posted
posted
on
Tue, Dec 18, 2007 7:30 AM
Buffbad, that's the outline of his stomach. It doesn't seem to show up as well now that's it's painted. Thanks for the compliment! |
|
B

Bali_Dan
Posted
posted
on
Tue, Dec 18, 2007 9:50 AM
Hey BigT, I like a lot. Don't know if you get the Tiki Magazine, but on page 9 there is a tiki that looks similar to yours, although a female version. Keep up the good work. |
|
T
TheBigT
Posted
posted
on
Thu, Feb 21, 2008 2:14 PM
Some progress pics of #3. This tiki might look suspiciously similar to one of the Target tikis... :wink: I'm further along than this, but need to take some current pics.
|
|
BPB

Bay Park Buzzy
Posted
posted
on
Thu, Feb 21, 2008 2:31 PM
Yo Big T! An old tiki from the Red Lion/Crowne Plaza/ Hanalei hotel in San Diego: The Brady Idol was a brown version of this Coco Joes tiki: Carve on! |
|
T
TheBigT
Posted
posted
on
Thu, Feb 21, 2008 2:39 PM
Wow, I love those! Thanks for the pics. I might have to try a copy of that first one. :) |
|
S
seeksurf
Posted
posted
on
Thu, Feb 21, 2008 2:42 PM
Nice Job BigT I haven't seen the target tiki. |
|
T
TheBigT
Posted
posted
on
Thu, Feb 21, 2008 3:03 PM
Thanks seek. That's pretty much the extent of our winter (Houston area). So far this winter we had one night of at/below freezing long enough to kill one of my few remaining stalks of sugar cane. Hard to grow that stuff in the woods... |
|
T
TheBigT
Posted
posted
on
Mon, Feb 25, 2008 9:28 AM
Weekend updates:
|
|
S
seeksurf
Posted
posted
on
Tue, Feb 26, 2008 3:15 PM
Nice chops! What is the wood? |
|
T
TheBigT
Posted
posted
on
Thu, Feb 28, 2008 6:25 AM
Thanks. It's some variety of ash. They plant these kinda trash ash trees down here for quick shade, but they become diseased and don't live long. It's full of beetle tunnels. The round holes are from wood boring bees. |
|
B
Benzart
Posted
posted
on
Thu, Feb 28, 2008 8:37 AM
Excellent, Crisp detail showing a lot of attention to top grade finish. This is an Excellent tiki from TheBigT. |
|
T
TheBigT
Posted
posted
on
Sun, Aug 10, 2008 8:15 AM
Some updates... been a while so I thought I'd brush the cobwebs off this thread. I finished #3 sometime back in March according to the dates on the pics. Here's the results.
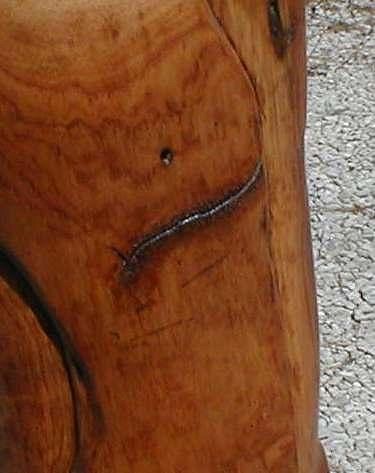
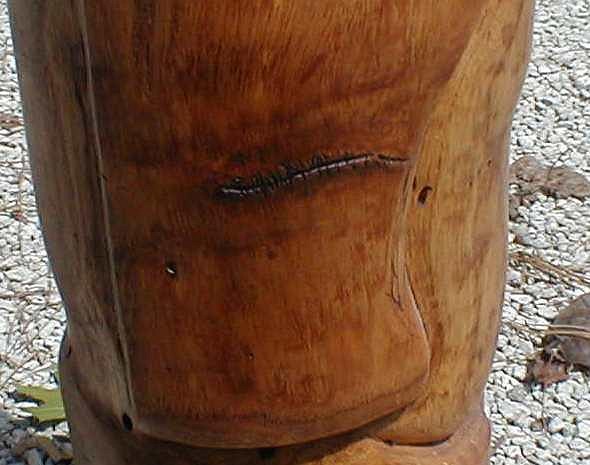
Oh, I almost forgot... I left some of the original surface on each of the arms to look like a battle scar. The orginal surface was thoroughly worm scoured, so on each arm I carved around one of the worm tracks leaving a litte bit of the inner bark around it. Right arm... Left arm... Well that's it. I managed to finish #4 a couple of weeks ago so more updates coming soon. |
|
C

congatiki
Posted
posted
on
Sun, Aug 10, 2008 10:00 AM
Hey Big T...I like this tiki a lot. To me it has a real 50s-60s feel, |
|
ES

el Stingray
Posted
posted
on
Sun, Aug 10, 2008 11:39 AM
Hey T. – el Stingray
[ Edited by: el Stingray 2008-08-10 11:41 ] |
|
T
TheBigT
Posted
posted
on
Sun, Aug 10, 2008 4:53 PM
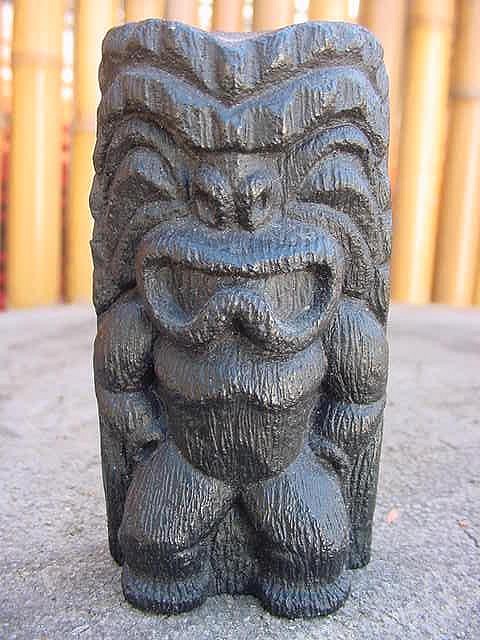
Conga: thanks for the comps! Yep, I hope it isn't too cartoony. That's definitely not the look I was going for. Glad you like it. el stingray: the black one is Pecan. It's native to Texas and pretty common in the area where I live. I painted it because that's the look that my daughter wanted. It was a coat of brown primer and two coats of black spray paint. Then I used rubbing compound on the egdes to wear away the black paint a little to give it an "old" appearance. Thanks for the comments! |
|
S

surfintiki
Posted
posted
on
Sun, Aug 10, 2008 5:10 PM
Whoah! He's got stitches in his arm! Shark attack? |
|
T
TheBigT
Posted
posted
on
Tue, Aug 12, 2008 8:39 AM
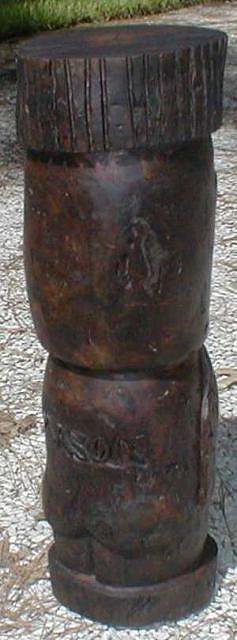
Surfin: thanks man. Not nearly as elaborate as your stuff, but maybe someday... :) Finally got the pics of #4 uploaded. So, I suck at stopping to take pics along the way... so basically I didn't take any until it was ready for finishing (as far as I can find anyway). :(
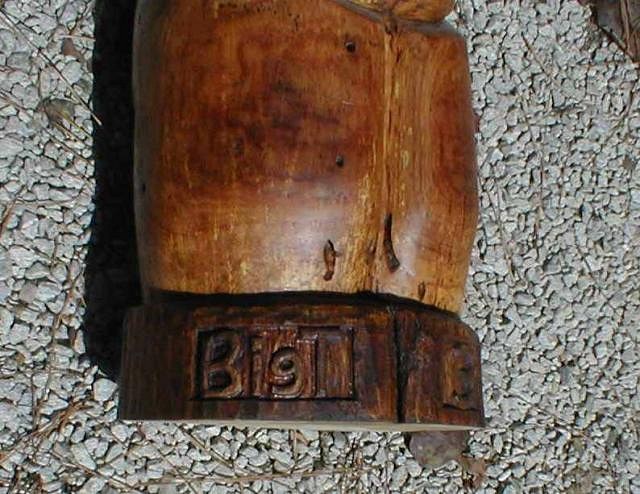
This is a birthday present for my nephew. So it's got his name, Mason, carved in the back. [ Edited by: TheBigT 2008-08-12 08:41 ] |
|
T
TheBigT
Posted
posted
on
Tue, Aug 12, 2008 8:47 AM
The finished version of #4. It's sort of a mini-me version of #3. Halfway stained... kinda strange. Even my pooch is wondering, 'what the heck'? |
|
T
TheBigT
Posted
posted
on
Tue, Aug 12, 2008 8:49 AM
And a mini family reunion. :D
|
|
SD

Savage Daddy
Posted
posted
on
Tue, Aug 12, 2008 3:43 PM
Oh yeah! I remember that tiki with the gold eyes. They all look great. |
|
T
TheBigT
Posted
posted
on
Wed, Aug 13, 2008 6:31 AM
Savage: Thanks, man. Will do. Although it's much easier to reply to other threads than it is to go in and update mine. :D |
|
B
Benzart
Posted
posted
on
Wed, Aug 13, 2008 7:12 AM
Big T, Looking good. I Love the nice smooth style you are developing, Very distinctive and Pleasant to look at. we will always be able to pick the BigT out of the bunch! How Cool is that? |
|
H

hodadhank
Posted
posted
on
Wed, Aug 27, 2008 12:38 AM
I dig these too. Keep up the good work bud! |
|
B
Benzart
Posted
posted
on
Wed, Aug 27, 2008 2:52 AM
Cool Stuff BigT, That Pecan wood is really nice but HARD, was it difficult to carve? |
|
S
seeksurf
Posted
posted
on
Thu, Sep 4, 2008 7:46 PM
Nice bigT you have some great tikis there very cool. |
|
H

Howland
Posted
posted
on
Thu, Sep 4, 2008 9:06 PM
Very cool vintage poly-pop vibe going on with these cats--I like! |
|
T
TheBigT
Posted
posted
on
Thu, Oct 23, 2008 5:27 PM
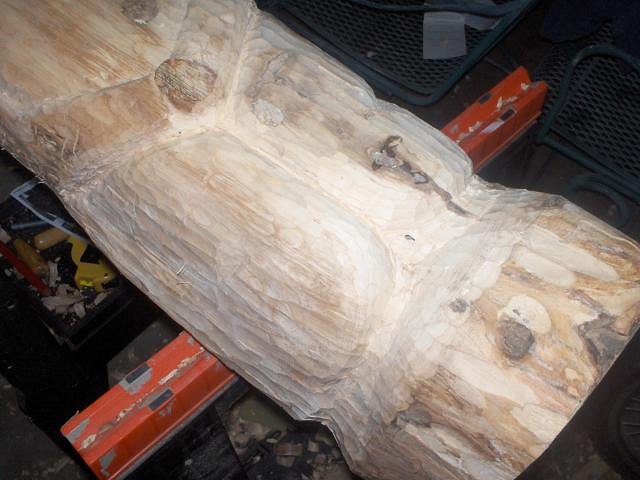
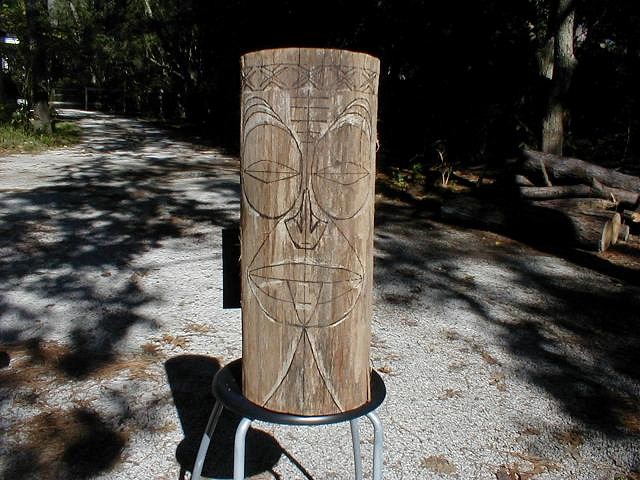
hodadhank, benz, howland, seeksurf: Thanks for all the comps! Benz: That pecan wasn't hard to carve. I think it was already staring to dry rot, so was softened up. Now this new one, is definitely hard. Here's the latest I'm working on. It's sweetgum. Super hard wood.
|
|
T
TheBigT
Posted
posted
on
Sun, Oct 26, 2008 7:10 PM
Today's updates:
Going kinda sloooow. But at least the back is roughed out now. |
|
T

Tikilizard
Posted
posted
on
Sun, Oct 26, 2008 8:22 PM
BigT, Your tiki's are looking great! Put a little more depth in those cuts and you'll be way a head of the game. If that is only #5 you have some natural talent. Happy carving. |