Pages: 1 25 replies
|
T

tiki_tim
Posted
posted
on
Wed, Apr 30, 2008 7:42 PM
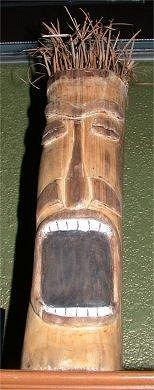
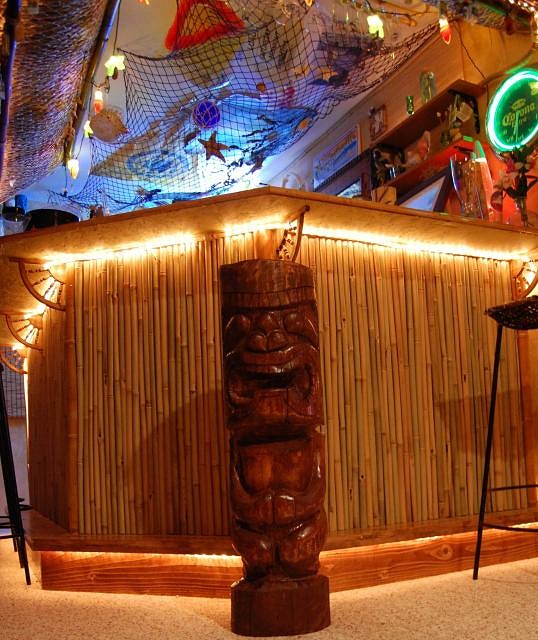
First thanks to everyone out there who posts up their work, and their feedback. It's you guys/gals who make up this awesome sub-culture known as tikicentral. :) It's hard to post up my primitive attempts in the presence of such good artists, but everyone starts somewhere right? hehehe. I have been lurking around here for a couple years, getting ideas, reading up, making notes, etc. Have been working on a tikibar in my basement for a while now (they are never done), and creating things to decorate it. I will post up pics of the bar a little later. Anyhow, I will post up my first tiki which I carved about a year ago. (I have done 2 more since, will post them up later too). This one came from an inspiration I got from a friend who sent me the following pic from a putt-putt course on the El Camino Real in Sunnyvale, CA: (some of you may recognize it).
When he sent me that pic I thought, "This is what I have been waiting for, something to inspire me to carve!" Well I took a shot at it. Of course it barely resembles the original, but oh well.
The wood is part of a tree trunk from an Aspen tree I cut down in my backyard. I dried it for 6 months or more, pretty soft and easy to work with. It's about 12" tall, not counting the hairdoo. The hair is actually made from taking leaves from cat-tails and tearing them into thin strips. Some of the wet strips were ran across a scissor blade to give him some curl. Each strand was then pushed into a hole I pre-burrowed into his skull and filled with a small bit of glue. Just like the hair club for men! The hair doesn't really look like the thatch on the original, but hey, my guy is balding. :) I carved it mostly with a dremel, some of the mouth wood I removed with a chisel. Lightly sanded/stained, and some acrylic paint. All in all, I am fairly happy with my first foray into this diversion. More to come later. "In the dark, mysterious, pagan womb of the tiki bar, Organizational Man could escape the spectre of the A-bomb and the 30-year mortgage." (Grog Log - J Berry, A Kaye - 1998) TT [ Edited by: tiki_tim 2008-11-30 17:37 ] [ Edited by: tiki_tim 2009-04-22 19:13 ] [ Edited by: tiki_tim 2010-03-08 18:24 ] [ Edited by: tiki_tim 2010-10-02 17:09 ] |
|
B

Benzart
Posted
posted
on
Wed, Apr 30, 2008 7:51 PM
You SHOULD be Happy with this Tiki. For a First it is WAY Excellent, Hell for a 50th it is Still excellent. I think you have the gift, you just have to carve a bunch for us to find out. Big Welcome to TC for finally coming in from the Lurker ranks! |
|
W

WooHooWahine
Posted
posted
on
Wed, Apr 30, 2008 8:26 PM
WooHoo!! Keep on carving :) |
|
K

King-bilt
Posted
posted
on
Thu, May 1, 2008 9:17 AM
Good looking tiki, the hair is certainly a nice touch. Keep the posts coming. |
|
T
tiki_tim
Posted
posted
on
Tue, May 13, 2008 5:30 PM
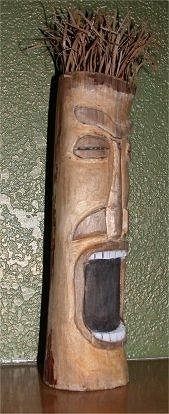
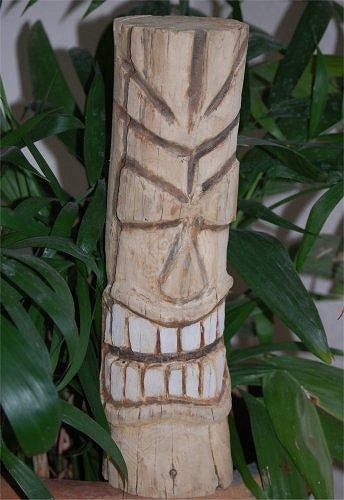
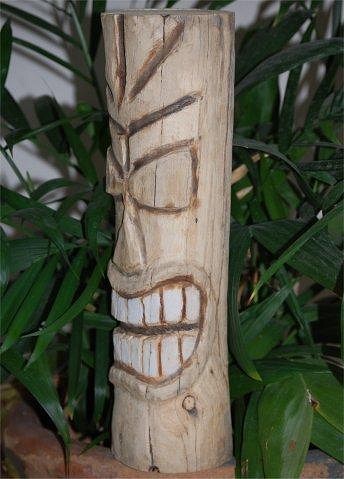
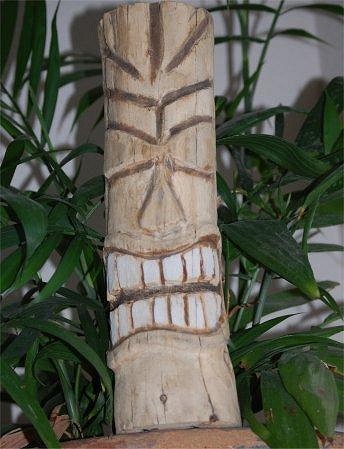
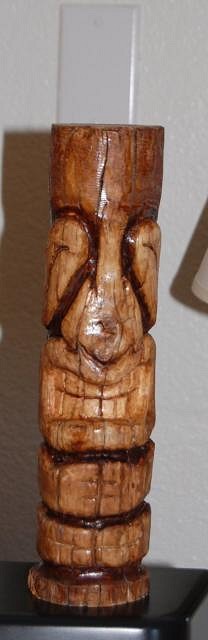
This 2nd tiki was inspired by King-Bilt's recent work. His thread is http://www.tikicentral.com/viewtopic.php?topic=27837&forum=7&14 This was done on lodgepole pine, which had been sitting outside for a LONG time. The thing I really like about this tiki is the cracks in the wood, which makes it look very primitive, like it's been out in the jungle for years. . . It's about 18 inches tall 4 inches in diameter. Done with die grinder & some harbor freight burs, also a dremel for fine work. No sanding done to speak of, which is reflected in the primitive look. Light amounts of acrylic paint used for teeth. Some stain for dark recessed areas. Careful inspection will reveal some tartar on the poor guys teeth, needs to see a dentist eh?
I have done another tiki since, will post shortly. Also will begin to post pics of my bar, which is pretty much done (if you can ever say they are done .. . .) |
|
T
tiki_tim
Posted
posted
on
Sun, Nov 30, 2008 3:04 PM
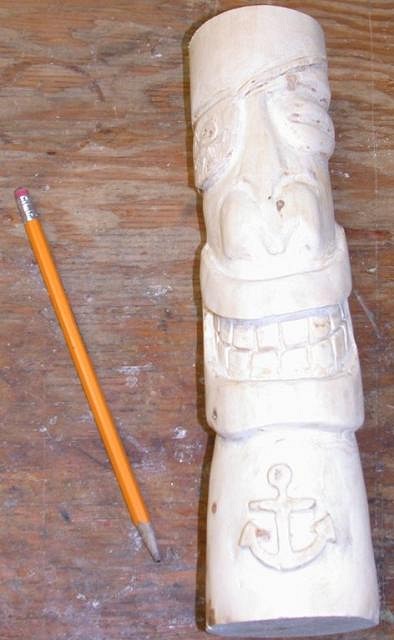
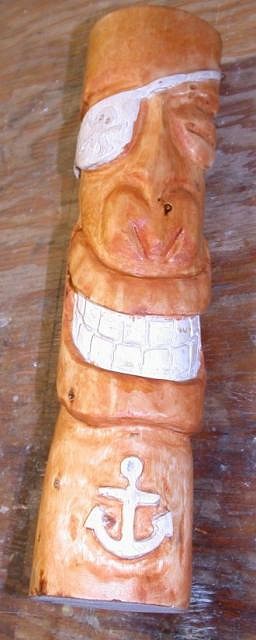
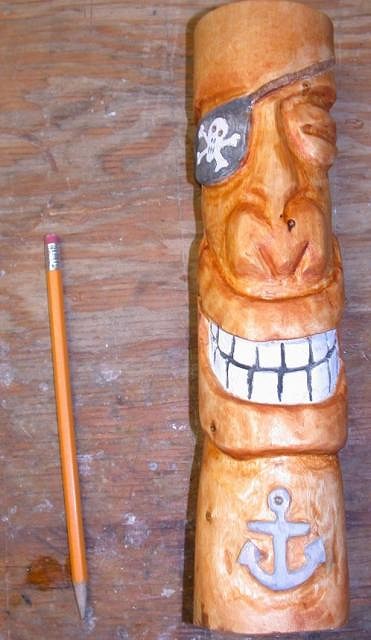
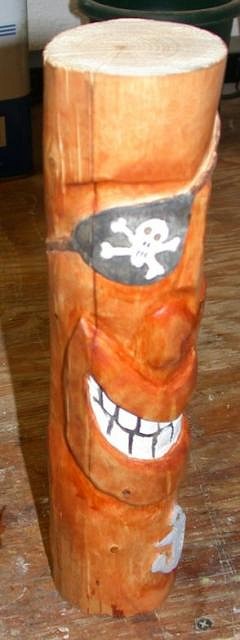
Tiki #3, wanted to go for a nautical theme, somthing campy for my bar. Well, I certainly got campy down :) See below pics. Not many taken during the job, just a few during painting, and a final shot. Wood type is pine. Carving done with dremel & die grinder using HF burr bits. Named this tiki Capt'n Tim.
"In the dark, mysterious, pagan womb of the tiki bar, Organizational Man could escape the spectre of the A-bomb and the 30-year mortgage." (Grog Log - J Berry, A Kaye - 1998) [ Edited by: tiki_tim 2008-11-30 15:13 ] [ Edited by: tiki_tim 2010-10-02 17:09 ] |
|
T
tiki_tim
Posted
posted
on
Sun, Nov 30, 2008 3:11 PM
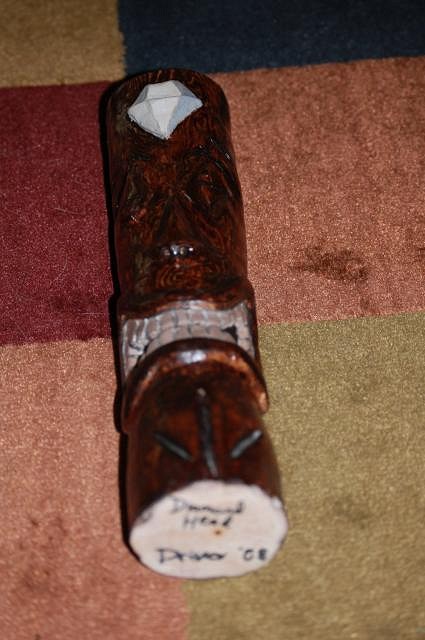
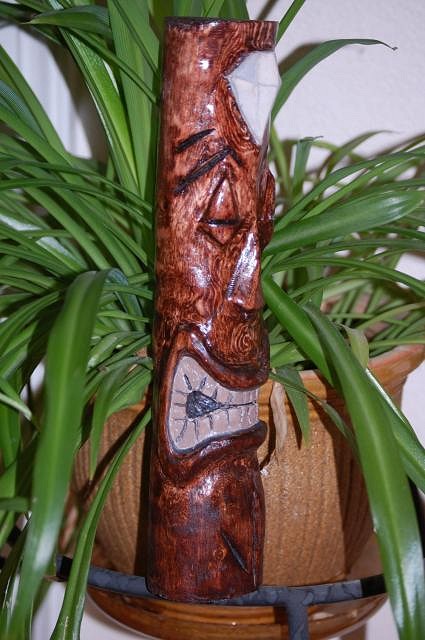
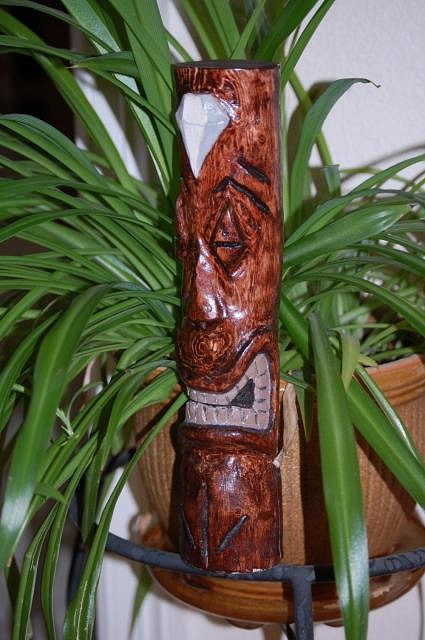
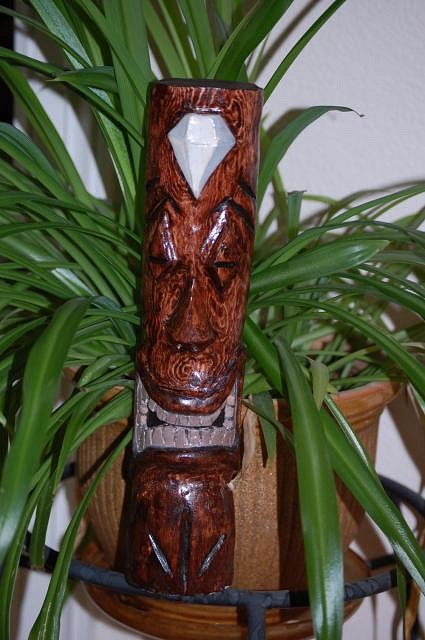
Tiki #4 - Wanted to give away a tiki to a good fried who works at the Shane Company (jewelry store). I carved it from pine (similar to previous tiki) and stained it with dark stain. Named it diamondhead (jeeze. . .)
|
|
T
tiki_tim
Posted
posted
on
Sun, Nov 30, 2008 3:22 PM
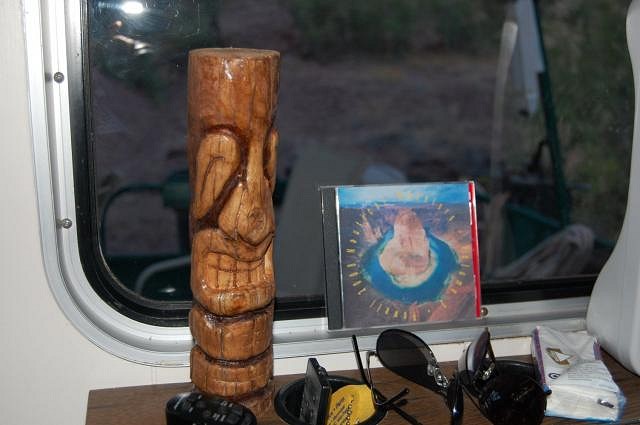
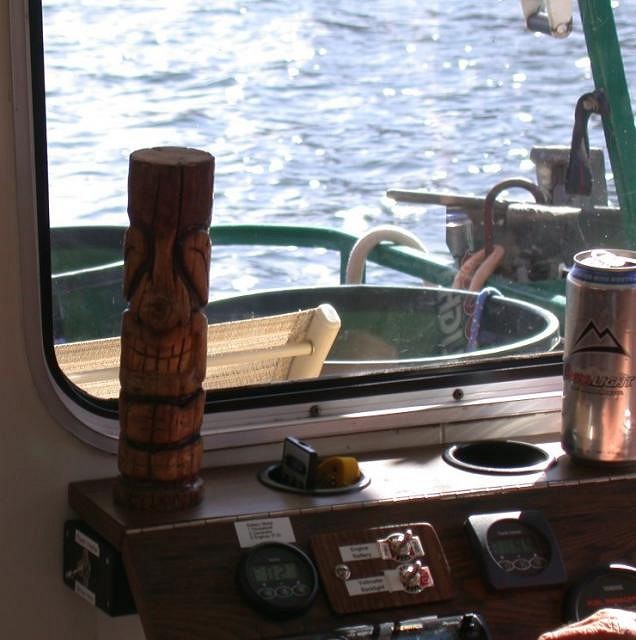
Tiki #5. Wanted to do another one to give away. This one I gave to my brother and sister in law, for thier houseboat. This one I named KonTiki, working on the whole boat voyage theme. Pics below show him sitting proudly on the bridge of the houseboat, looking over them while on Lake Powell.
|
|
T
tiki_tim
Posted
posted
on
Sun, Nov 30, 2008 3:46 PM
tiki #6. Carved from a pine log I brough home from camping (beetle kill). Debarked and trimed down to size with chain saw. Lancelot for rough out, die grinder with HF burrs for medium shaping, dremel for fine detail. Also used sand wheel flaps on the angle grinder for rough sanding. He seems to be happy living on my bar.
|
|
T
tiki_tim
Posted
posted
on
Sun, Nov 30, 2008 4:20 PM
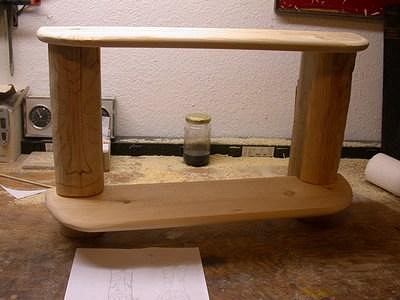
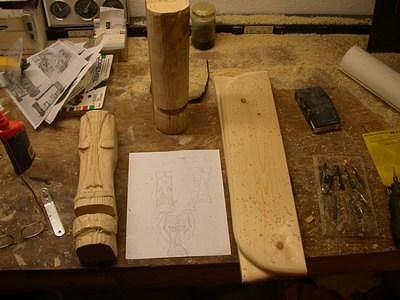
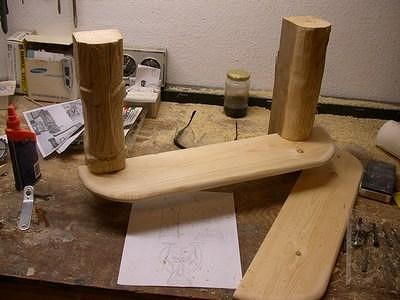
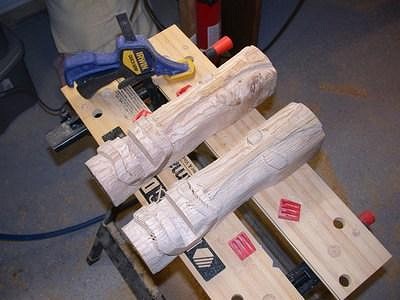
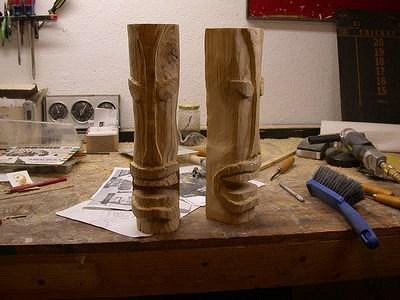
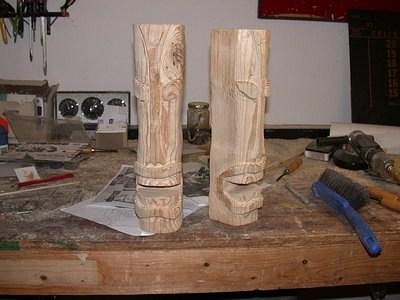
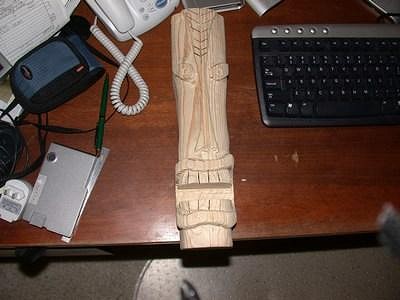
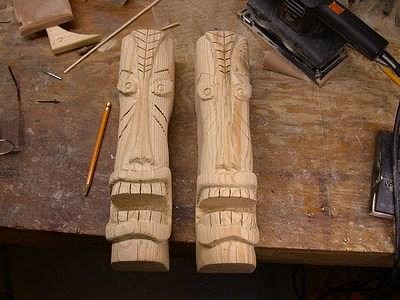
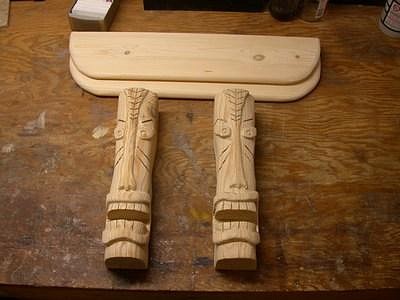
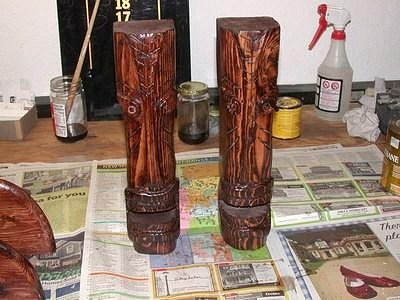
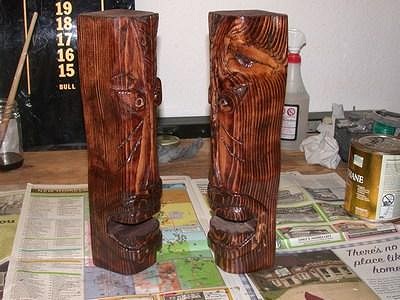
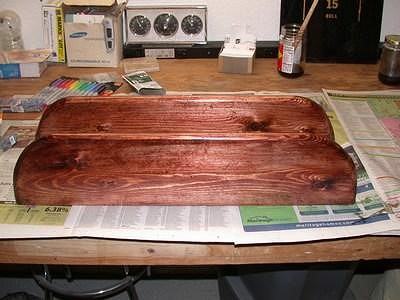
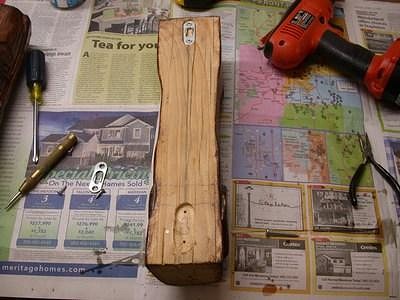
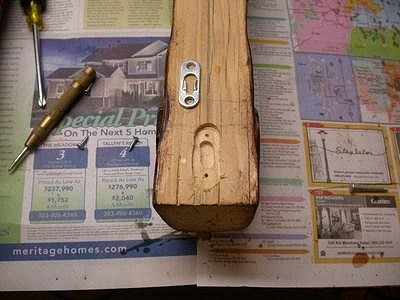
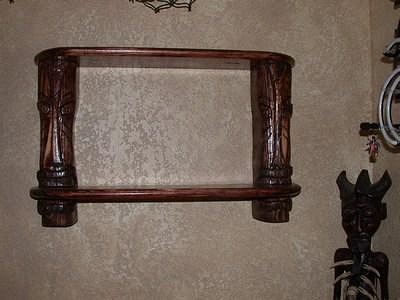
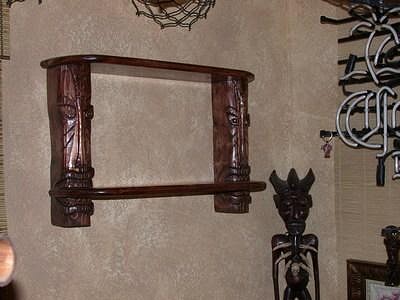
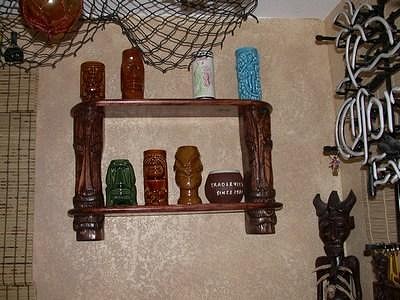
Carving #7. Saw a real cool set of shelves on EBAY, which inspired the next carving. Used 4x4 wood I found laying around the house, and a pine plank I bought at Lowes. I have a lot of images below, so people can see the process of how they were done. Nothing special here, again using the same tools mentioned above. Used a compound saw for the mouths. Used a drill press and some mil bits to mil out the backside for the "screw holes" I bought at Lowes (about $1 per). The grain of the wood was a bit tricky to work with. The light parts of the wood were very soft, the dark "veins" were hard, so carving with power tools often didn't work out like I expected, the bits would dive down into the soft areas for uneven cuts. Had to get used to that. Regarding staining, I stained it and let it dry for about 1.5 hours. Then I hit it right away with clear laquer. This had an interesting effect, as the lighter areas of the wood gave up their stain, becoming ever lighter. This really brought out the grain effects of the wood. Turned out kinda neat, I thought. . . Had a lot of fun carving this one too.
"In the dark, mysterious, pagan womb of the tiki bar, Organizational Man could escape the spectre of the A-bomb and the 30-year mortgage." (Grog Log - J Berry, A Kaye - 1998) [ Edited by: tiki_tim 2008-11-30 17:37 ] [ Edited by: tiki_tim 2010-10-02 17:10 ] |
|
J

JohnnyP
Posted
posted
on
Sun, Nov 30, 2008 4:28 PM
Wow, in less than an hour an half you carved 6 nice tikis! :) The suffering bastard tiki and the shelf show much you have progressed. Good job and post more often as you carve. |
|
T

tikithomas08
Posted
posted
on
Sun, Nov 30, 2008 9:40 PM
cool stuff,man! that shelf is rad |
|
B
Benzart
Posted
posted
on
Mon, Dec 1, 2008 7:03 AM
Well I'll tell you, there is nothing here to be ashamed of, they are All excellent and I Love how you are getting a Beautiful smoothe finish,, Well done. Your skills are getting better with each carve now just work more into the traditional tiki like the SB and you'll REALLY be looking Great. |
|
T
tiki_tim
Posted
posted
on
Mon, Dec 1, 2008 7:49 AM
Johhny, yep an hour and a half was all I needed. :) That was a time span of about 9 months or so, just got behind in my posting. Point well taken though. Thomas, thanks dude. Wish I would have come up with the shelf idea myself. . . . Ben, thanks for the kind words. They mean a lot coming from someone with your talent, thanks! I do intend on going for some full body/headdress Hawaiian types like those shown in BOT. Probably after a couple little projects I am cooking up. Regarding safety, I am not sure why that gaurd isn't visible in my pics, but it IS on there. I wouldn't operate that tool without it, as that Lancelot scares the hell outta me! heheheh. Thanks for the link to the variable speed controller, but unfortunatly, my grinder is an air tool. I do have some speed control via the paddle switch (pressure). I do really appreciate you bringing up the safety issue though. It reminds us all that while this is supposed to be fun, we need to be safe too. |
|
T
tiki_tim
Posted
posted
on
Wed, Apr 22, 2009 7:12 PM
Here is a new one I did a few weeks back for my buddy Bill. Ended up a LOT thinner than originally planned. Grinded his face off several times before I had something I liked. Wood used was old Aspen tree from back yard. Named him Elemakule .
|
|
L

leleliz
Posted
posted
on
Wed, Apr 22, 2009 7:19 PM
Never saw this thread but I agree. Love that shelf and the SB came out great! |
|
H

hewey
Posted
posted
on
Wed, Apr 22, 2009 8:52 PM
Very nice work, the shelf is awesome! :D |
|
T
tiki_tim
Posted
posted
on
Mon, Mar 8, 2010 6:22 PM
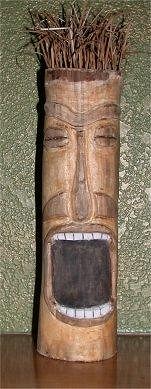
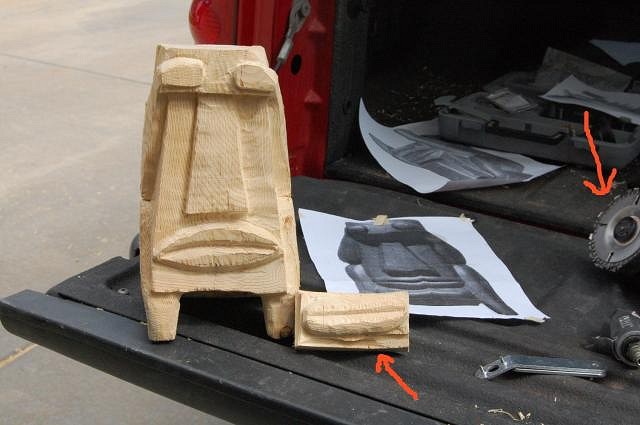
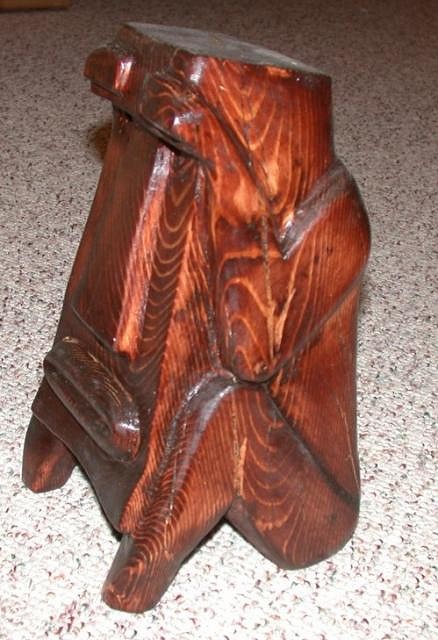
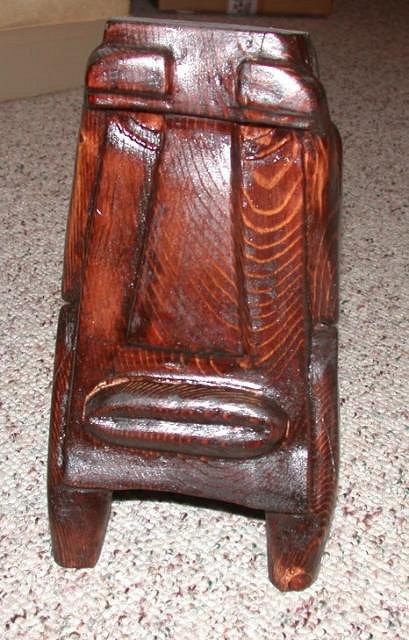
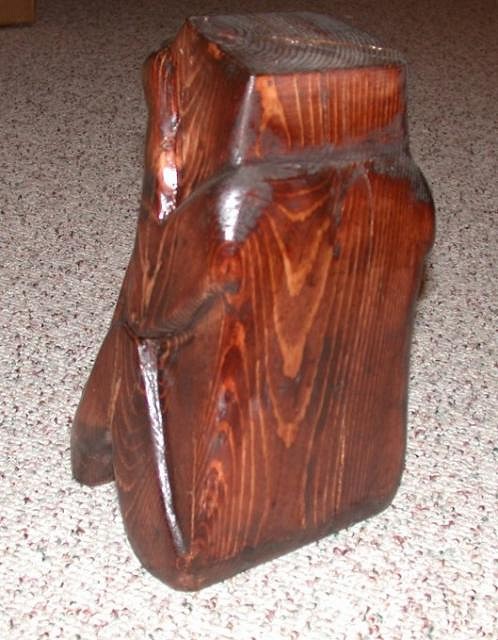
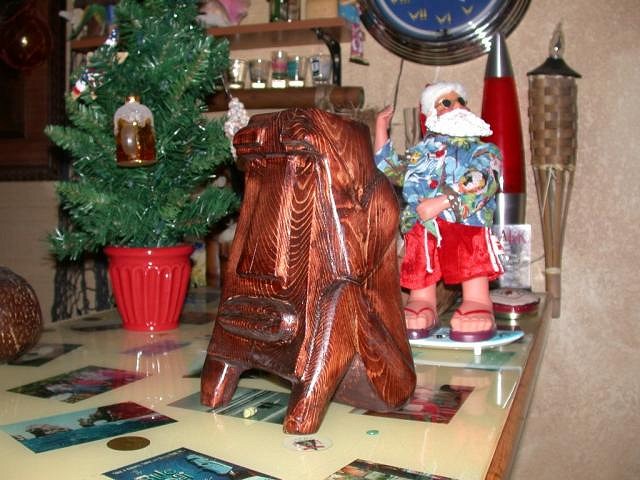
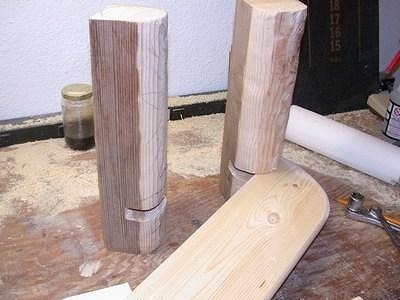
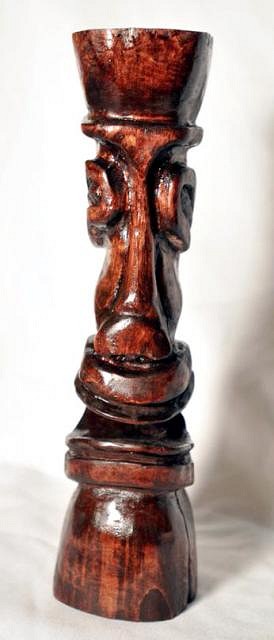
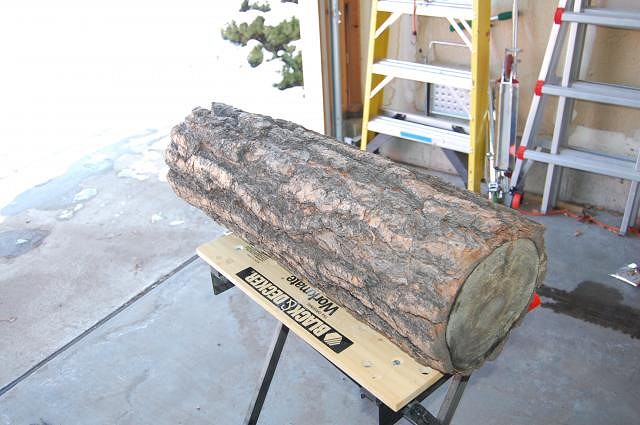
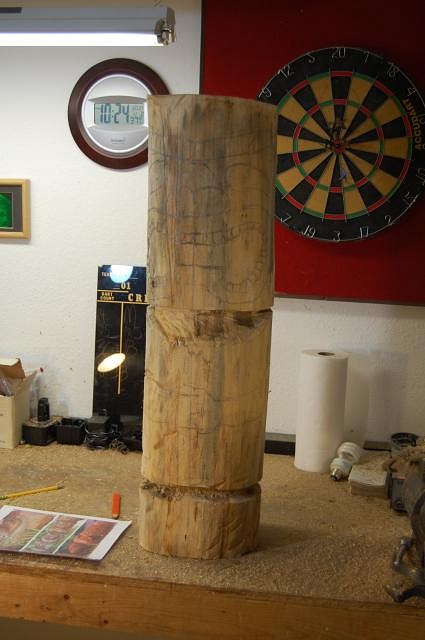
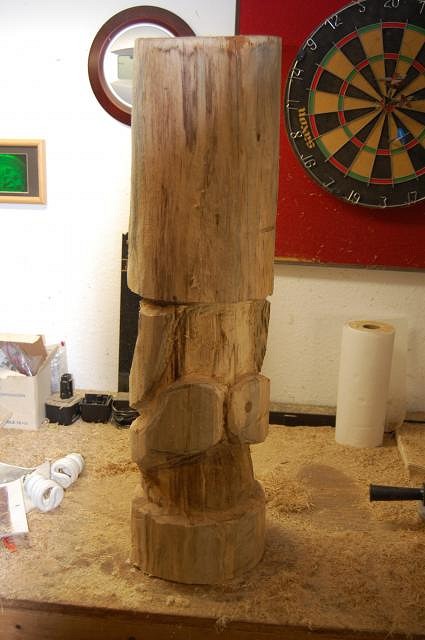
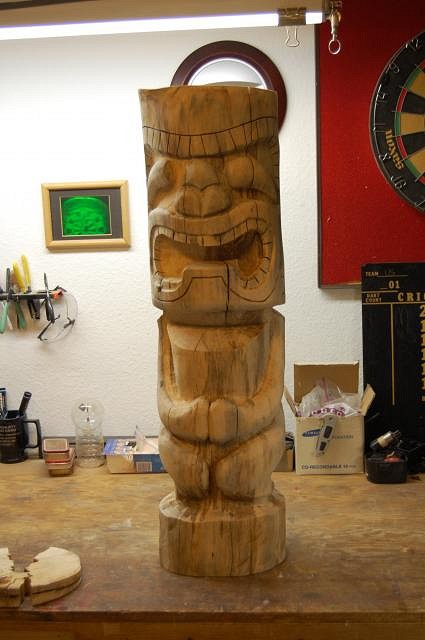
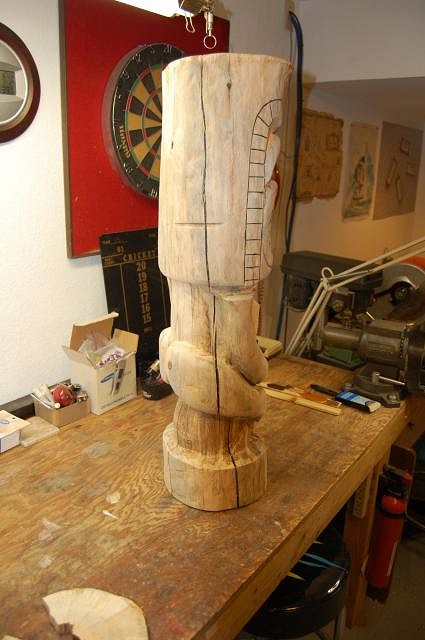
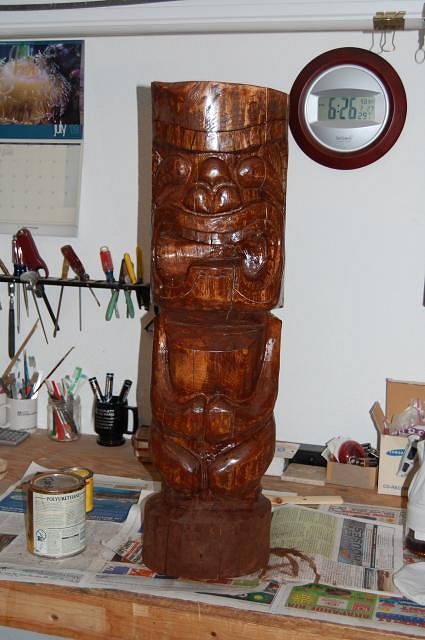
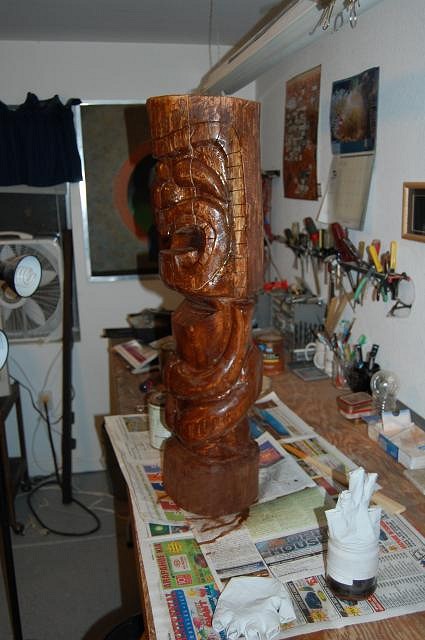
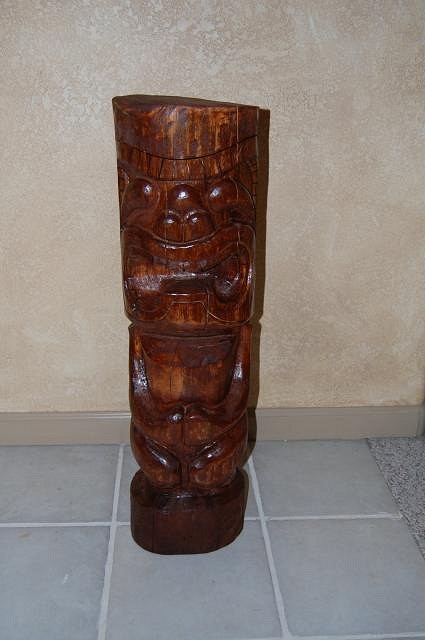
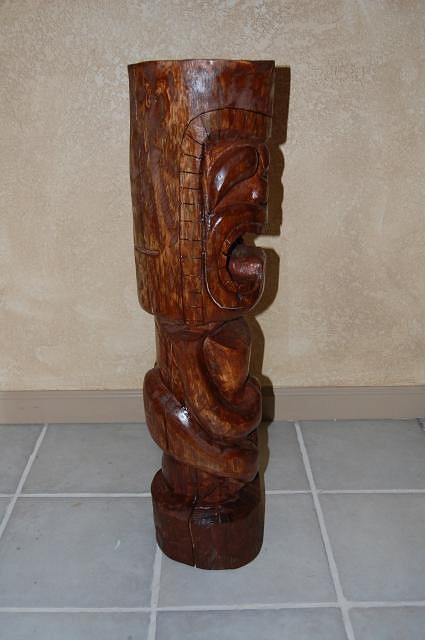
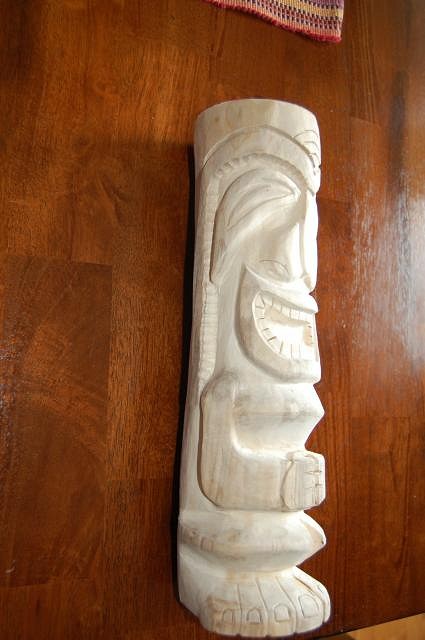
It's been a while, but finally completed my latest carving. Been working through some issues, but figured it was time to get off my butt and carve. Maybe someone will recognize this carving, as I was inspired by some pics I saw somewhere(wink, wink, nudge, nudge) Here are some progress pics:
This was pretty fun to do. For sure it's the biggest one I have done to date. Used lancelot tool on my angle grinder, also used burrs on a die grinder. Used some el-cheapo chisels to help in the wierd spots. "In the dark, mysterious, pagan womb of the tiki bar, Organizational Man could escape the spectre of the A-bomb and the 30-year mortgage." (Grog Log - J Berry, A Kaye - 1998) [ Edited by: tiki_tim 2010-03-08 18:34 ] [ Edited by: tiki_tim 2010-10-02 17:11 ] |
|
TT

tiki tonz
Posted
posted
on
Mon, Mar 8, 2010 6:37 PM
Nice smooth work! The shelves rock! |
|
T

tikigodz
Posted
posted
on
Mon, Mar 8, 2010 6:37 PM
its amazing how good everyone gets. your tikis are lookin gooood. Especially like the shelves. |
|
T
tiki_tim
Posted
posted
on
Sat, Oct 2, 2010 4:50 PM
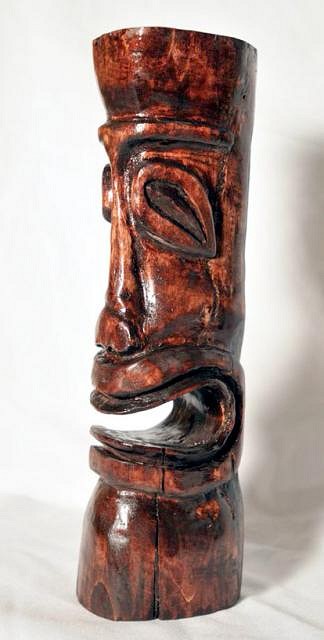
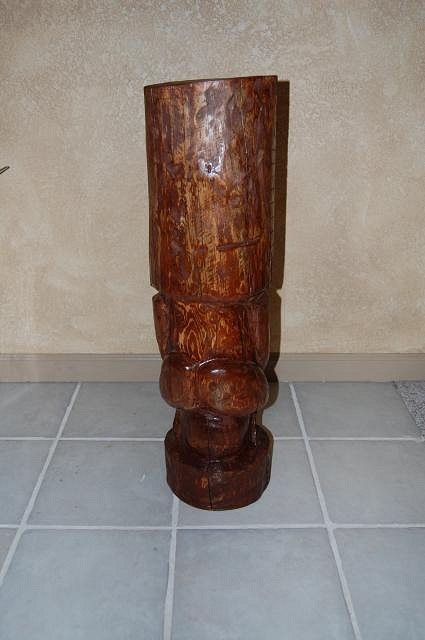
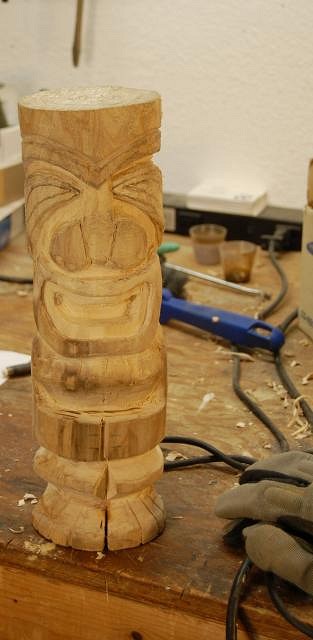
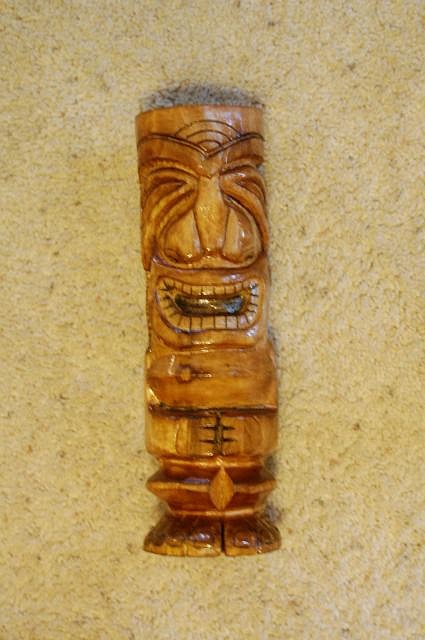
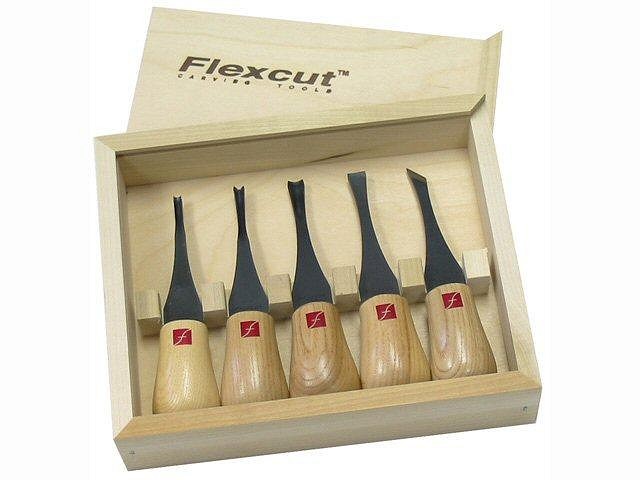
I did this carving about 5 months ago. This carving was inspired by something I saw on this site, but I don't remember the artist. I got a new set of Flexcut hand chisels, and this was first carving I did with them. This was done on a fairly big pine log. Had to chainsaw away a large portion of outer wood to get it down to size, and eliminate the bug eaten outside wood.
|
|
T
tiki_tim
Posted
posted
on
Sat, Oct 2, 2010 4:59 PM
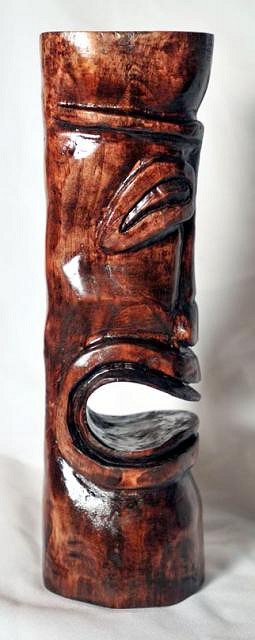
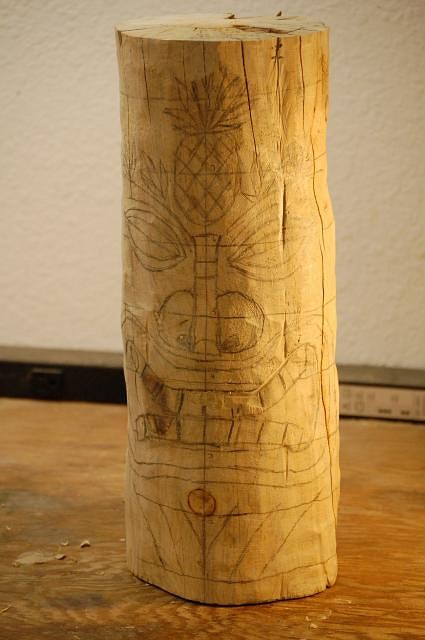
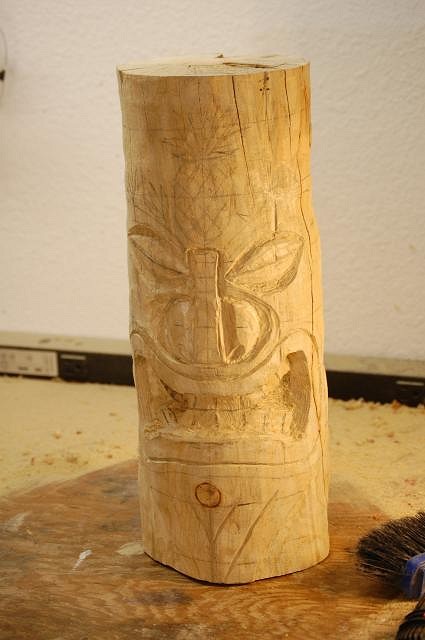
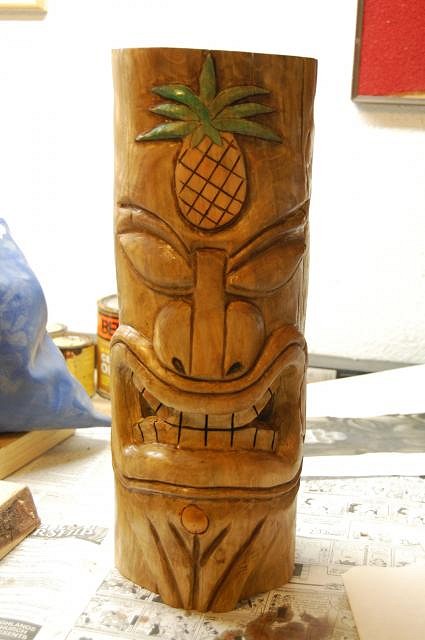
This tiki I did about 2 months ago. I wanted to do one for my mom, so it had to be a happy tiki. I found inspiration from a carving done by a popular Hawaiian carver. This was done in Aspen wood, which had been drying for a few years in my brother in laws basement. Carves really easy.
|
|
Z

Zeta
Posted
posted
on
Sat, Oct 2, 2010 5:20 PM
I would say you where inspired by Florida based carver Mai Tiki, because of the trademark pineapple forehead. Nice gift tiki for your Mom! That's nice! :) Post more often! |
|
B
Benzart
Posted
posted
on
Sun, Oct 3, 2010 6:34 AM
Excellent stuff tiki-tim, and about time you posted it too. I see some Serious tools on your bench there, can we see more of what those are? Thanks for posting, Bring on S'more?? |
|
T
tiki_tim
Posted
posted
on
Sun, Oct 3, 2010 7:46 AM
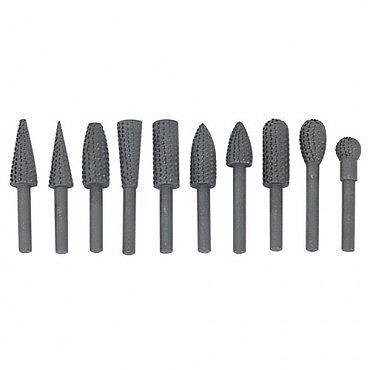
Thanks Ben. No fancy tools here, unfortunately. I use a combo of power and hand tools on big projects: For quick rough wood removal, I use the Lancelot wheel. Quick but scary. This fits on my 4" angle grinder. (always keep the guard in place). NOT for the faint hearted. For smaller details, I use a air powered die grinder with some el-cheapo burs. For details I use some Flexcut palm Tools And also use a Dremmel with a variety of bits/wheels . I really like the control I get using the flexcuts, but they are too small for any large volume wood removal. Someday I will have to cough up some more $ to get some big chisels. For miscellaneous weird cuts/shaping, I have been known to use the drill press and compound miter saw. |
|
A

amate
Posted
posted
on
Sun, Oct 3, 2010 12:00 PM
A couple of those are remarkably similar to some of my first carves. I wish I still had those guys to show because they could be brothers. I see a 6 footer in your future. |


Pages: 1 25 replies