Tiki Central / Tiki Carving
First Tiki Attempt
|
P

PutiTiki
Posted
posted
on
Mon, Jun 8, 2009 7:54 PM
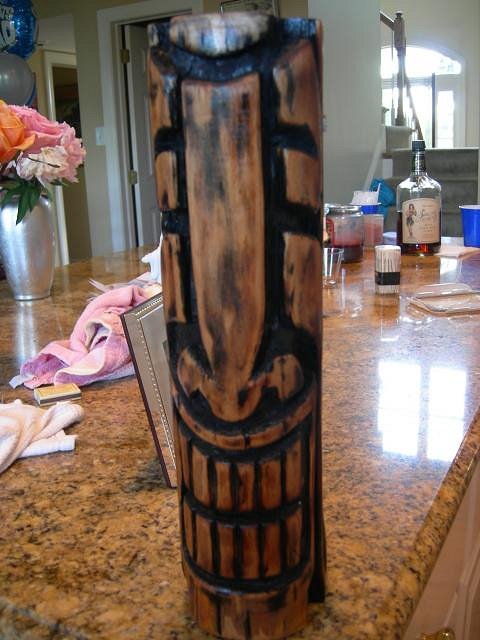
I was bitten by the Tiki bug awhile ago down in Maryland at Solomon's Island for the renowned Tiki Bar Opening. It was my first time attending the bar's spring opening along with another 2,000 people. Ever since I got back I've been researching and reading up on tikis. This website is the best resource for everything and all things tiki. So I set out and created my first tiki. I've been itching to get the pics up and get some feedback. I'm on the east cost so I don't have access to palm trees. This wood was a limb we cut down from a tree at my beach house years ago and I stumbled upon a whole pile of it drying out in our garage. The chisels I purchased off Ebay - one of those 15 chisels sets in a pouch. They suck..... period. Does anyone have any advice for sharpening chisels? The set came with a flat bench stone and 2 shaped slipstones. Anyways, onto the good stuff....
To get the black inside I tried torching the log but it burnt the face of the tiki faster and darker then the inside where I cut so I ended up spray painting it black and sanding the front off. I'll give credit where credit is due, I took the inspiration from http://www.buytikitorches.com/totem-poles/atp-24# titled "the Jester." |
|
P
PutiTiki
Posted
posted
on
Thu, Jun 18, 2009 5:21 PM
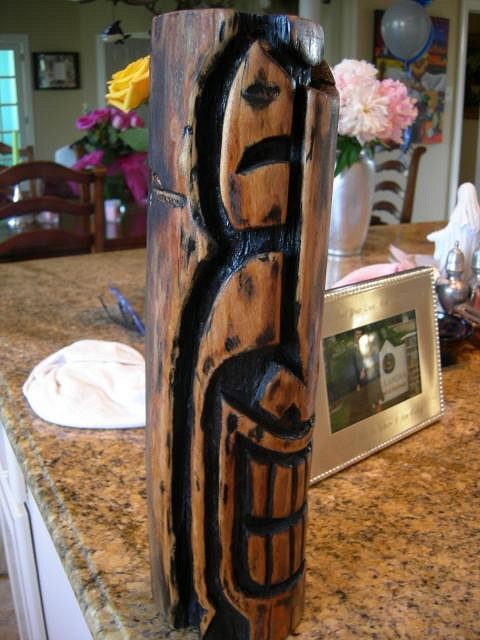
So couldn't wait too long to start a new tiki. I drew it up the other day and made the decision to invest in a Flexcut MC150 starters set. Carved for about half an hour today and I have to say that was the best decision I've made recently. Compared to the ebay set I got for $25, these Flexcuts cut through the wood like its no body's business. Here are two progress shots.
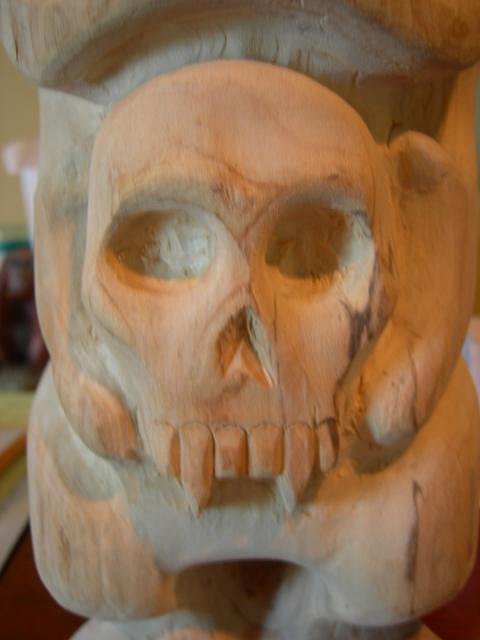
This is my second tiki attempt and first attempt at carving out a body. Hopefully I didn't aim to high by including the skull (inspired by Tiki65). Any advice on going 3-D with the body? |
|
P
PutiTiki
Posted
posted
on
Sat, Jun 20, 2009 8:18 PM
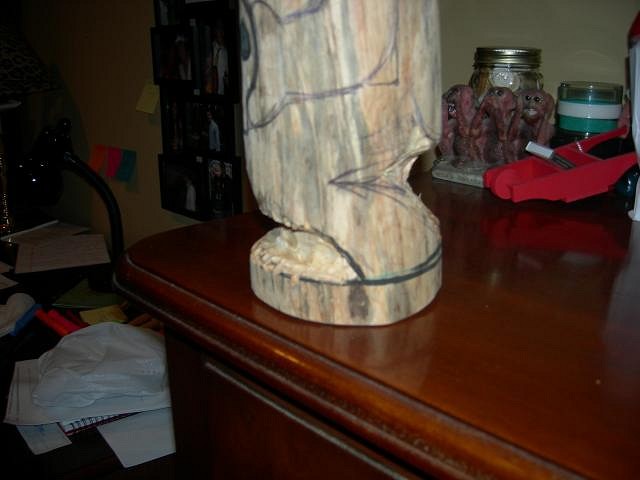
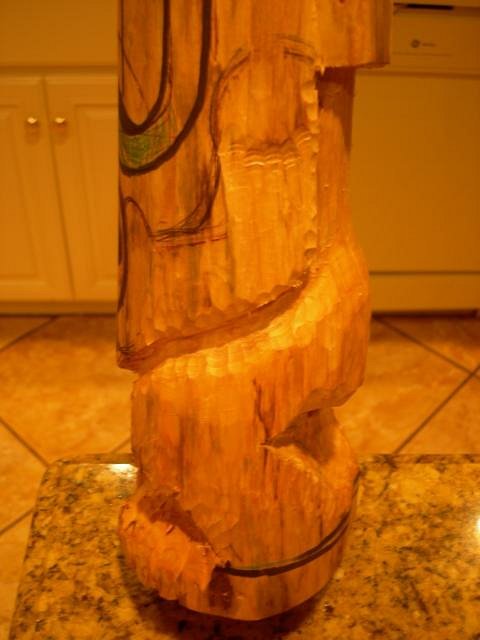
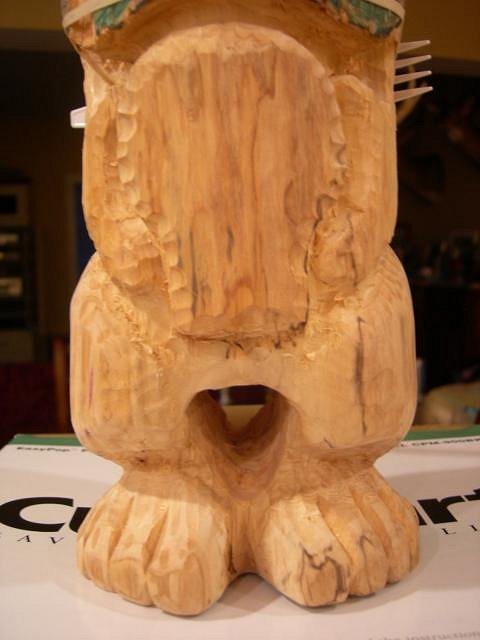
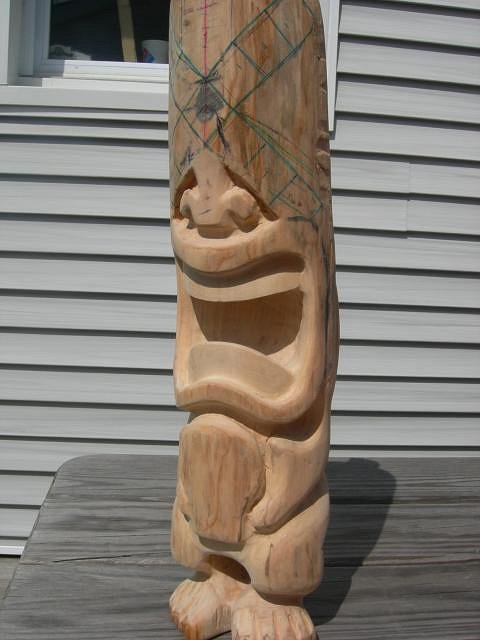
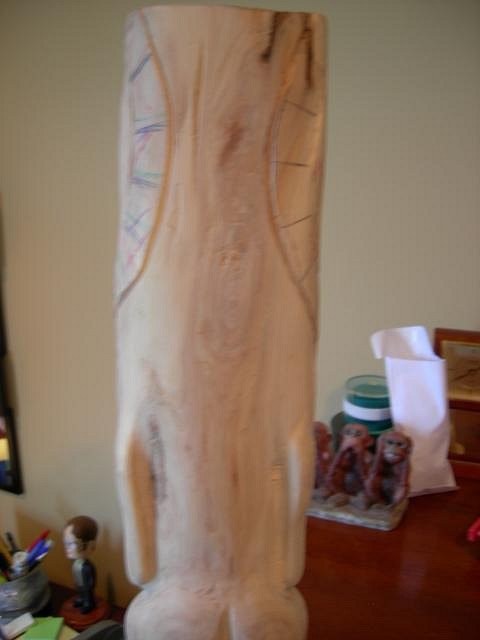
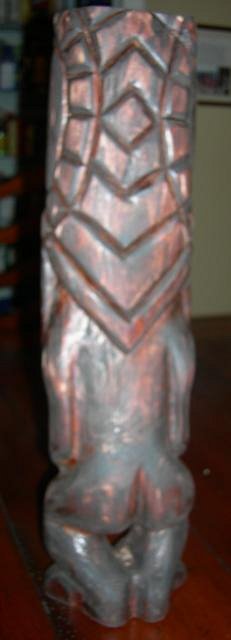
Here are some progress shots. Going 3-D with the body for the first time has definitely presented some challenges and made me wish I thought ahead more often but once I get the mallet in my hand its chisel first, think second. Here is a shot from the back. Can't wait to get started on a headdress. Shot from the side. I Decided to drill out between the legs and I'm going to add toes but this a rough start - the drill battery died out on me. As always - advice and feedback are much appreciated. |
|
T

TikiMango
Posted
posted
on
Sat, Jun 20, 2009 11:19 PM
So far you are off to a good start. The legs look great. It appears that you are improving from #1 to #2, and the fresh chisels help. What type of wood are you using on #2? Usually the wood will dictate how much detail you can achieve. I'm not sure about others, but I use 120 and 400 grit sandpaper on a clip board, one sheet each, and touch-up my chisels on that continuously (every 20-30mins of carving) as I work. What are you burning the tikis with? Some use a propane or MAP gas torch, and some throw the whole log in a fire and let it cook, while others only use spray paint. It depends on what look you are going for. Thanks for sharing, as it looks like the tiki gods have claimed another victim. |
|
TLT

The Lounge Tiki
Posted
posted
on
Sat, Jun 20, 2009 11:23 PM
Aloha! Good to see another beginner on here. You're definitley off to a great start with your first one and the new full body. I'm also attempting a larger full body tiki. My advice to you about the features is to just either sketch them out or do very shallow cuts on the surface of either the tiki itself, or on a piece of scrap/firewood just to gauge it out. Hope this helped. -LT |
|
B

Benzart
Posted
posted
on
Sun, Jun 21, 2009 5:46 AM
Putitiki, Welcome to the "Bitten" and to TC. Your second guy Really shows what a good set of chisels can do as this guy is really looking excellent so far. Personally I would prefer not to see the burning of the detail but rather a stain on the whole piece, letting the detail speak or itself. |
|
S

seeksurf
Posted
posted
on
Mon, Jun 22, 2009 5:23 PM
Welcome your coming along nicely! Good job on these early guys |
|
P
PutiTiki
Posted
posted
on
Tue, Jun 23, 2009 7:36 PM
Thanks for all the warm feedback and welcome. I was starting to worry that my work wasn't up to par since I didn't get any hits after awhile. TikiMango - The wood for #1 and #2 are from the same tree, I think it's some sort of maple. It grows down at my beach house in NJ but its been sitting in my garage drying out for at least two years. It cuts real nice. My next project involves one of two 4 foot white cedar logs with a 10 inch diameter I got from an Amish guy. I used a propane torch but will probably skip the torching on #2 since there's more detail. |
|
G

Grapa-RuHa
Posted
posted
on
Wed, Jun 24, 2009 1:14 PM
Hey PutiTiki, welcome on the addicted to carving tiki forum :) Have Fun and keep up the good work, |
|
B
Benzart
Posted
posted
on
Thu, Jun 25, 2009 9:43 AM
Any good dark stain will work great, dark walnut, ebony even too.. Minwax is good and I use cabot when I can |
|
P
PutiTiki
Posted
posted
on
Sun, Jun 28, 2009 6:20 PM
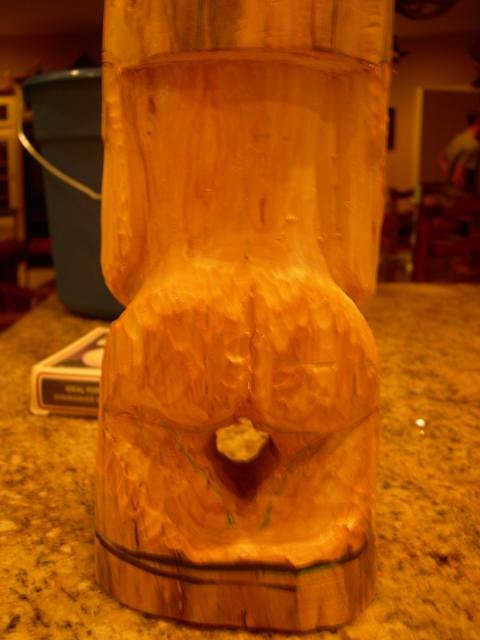
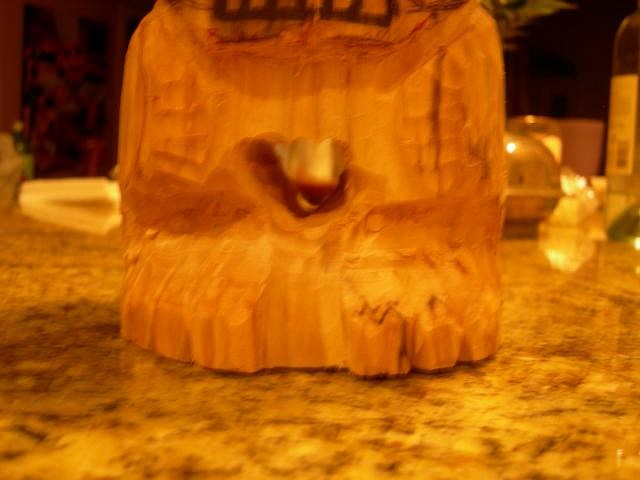
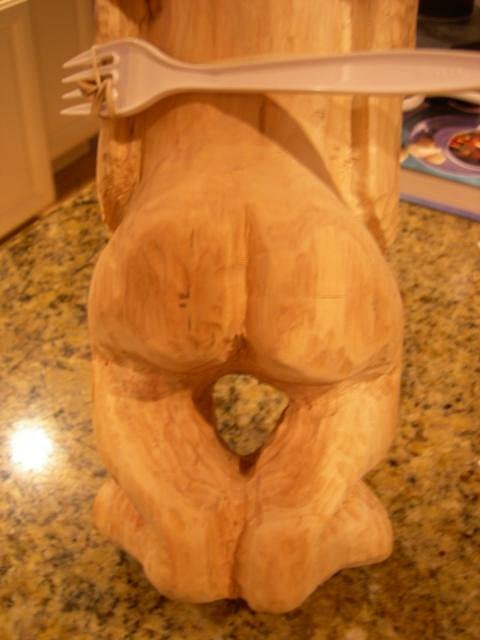
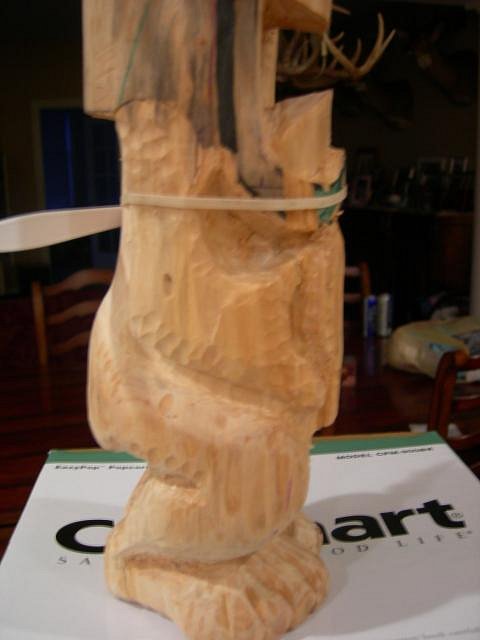
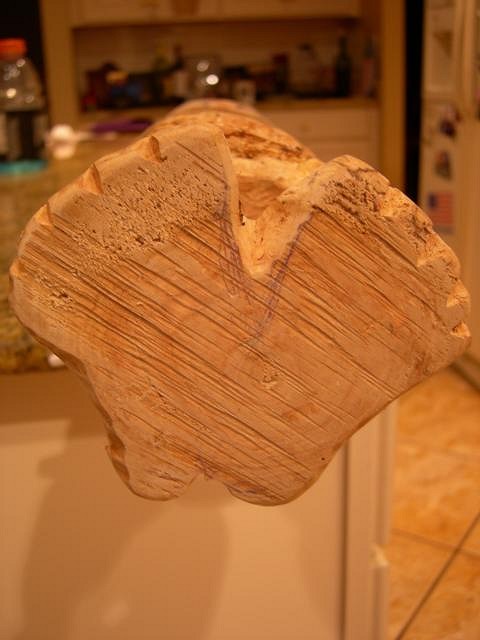
Have not been getting enough time to turn this tiki out as fast as I'd like but here are some progress shots. Here is the back side. The fork is tightening a rubber band I rigged in lieu of a vice because I was working around his upper lip and chipped two massive chunks out. Here is the front, a vast improvement from the first shot of his once club feet.
Although no one can see under his feet I thought it looked cool carving out actual feet and not leaving a complete round base. I plan on buying the Black and Decker Mouse for detail sanding, it comes with 33 attachments. Anyone have any advice as far as sanders go? |
|
SD

Savage Daddy
Posted
posted
on
Sun, Jun 28, 2009 7:03 PM
Looking good! Your carving skills are developing nicely. I'm looking forward to seeing this one finished. |
|
WP

Watango productions
Posted
posted
on
Wed, Jul 1, 2009 8:38 PM
Your stuffs lool'n great.I use a mouse sander and think it |
|
S
seeksurf
Posted
posted
on
Wed, Jul 1, 2009 9:12 PM
Nice work he is coming out great. I see you have run into the glue |
|
T

Tikilizard
Posted
posted
on
Wed, Jul 1, 2009 9:12 PM
Welcome to TC. Really nice start on the tiki. Takes some guts to carve through on the just your second tiki. Great start on the feet as well. Nice design and nice use of the space, although it does look familiar. Anyway, keep up the great work and look forward to seeing the rest of the progress shots. Happy Carving. |
|
P
PutiTiki
Posted
posted
on
Sat, Jul 11, 2009 9:26 AM
Not going to be able to post any progress pics for some time because I'm studying for a certification test for work. However, purchased the B&D mouse sander with 33 attachments with advice from Watango and man, that thing works great for its price. Didn't bring my chisels down to the shore for the 4th so I just sanded for the weekend off instead.
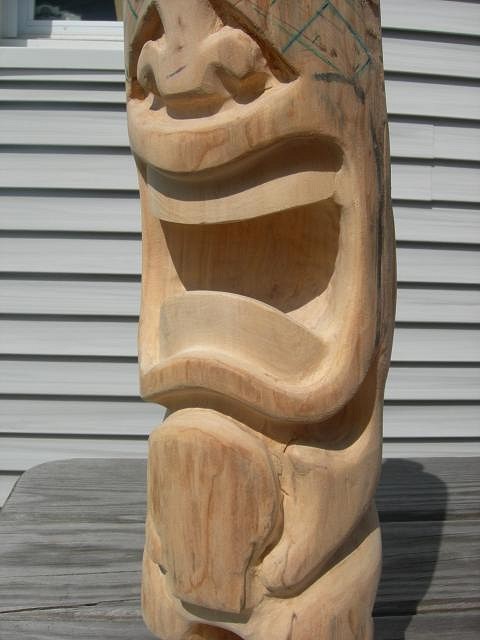
Not sure what to do with the teeth. After sanding it out, it looks almost comic book style with one solid tooth and I love how smooth it is. Not sure whether to make individual teeth (partially afraid I'll mess it up or make it look worse). What do you guys think? All that's left is the hard stuff - face/eyes/headdress. I take the test at the end of the month so hopefully I'll make up for lost tiki time and crank this bad boy out before winter rolls around. |
|
T
TikiMango
Posted
posted
on
Sat, Jul 11, 2009 10:37 AM
Push yourself or you'll never try anything new... so I say make teeth! It's only wood (and your time, sweat and maybe blood), if you "mess up" you can carve a better one next time! |
|
T
Tikilizard
Posted
posted
on
Sat, Jul 11, 2009 11:57 AM
I agree. Go for it when you just start carving. That's where the developing of skills comes in but stay within reason. As an analogy, you wouldn't want to paint the Mona Lisa in your first art class. |
|
BD

big daddy
Posted
posted
on
Sat, Jul 11, 2009 12:02 PM
i agree with the 2 previous posts. he needs teeth. right now he looks like he'll gum you to death. he's looking good though. nice work. bd |
|
B
Benzart
Posted
posted
on
Sat, Jul 11, 2009 4:45 PM
Definitely needs teeth, I Know you can do it, just Go for it! |
|
L

laojia
Posted
posted
on
Mon, Jul 13, 2009 4:06 PM
Again much progress here!! And quickly! Congrats! J. |
|
S
seeksurf
Posted
posted
on
Wed, Jul 15, 2009 6:53 PM
Looking great! way to sand like a mad man! |
|
P
PutiTiki
Posted
posted
on
Tue, Aug 11, 2009 12:25 PM
Not much to report on. This summer has blown by and I haven't had as much time as I'd like to carve. I am determined to finish this, my second piece, by the end of August. I carved for awhile a few weeks back but never posted any progress. Here is a start to the eyes and "face mask." I wanted to do a headdress but the way I carved the body, the face mask design stops at his lips. By far my favorite part of this piece is the skull. My favorite holiday is Halloween so I think I did this skull some justice. I originally had all the fangs the same length but it looked stupid so its now a vampire or some kind of monkey skull with fangs - go figure. I'd love some feedback on what to do with the back of his head..... Originally there was a large chunk running from his upper back to the top that I had some cool ideas for but when I drew the eyes, that large chunk was completely off center so I lopped it off with the chisels. Now he has a completely flat back and it looks boring. I have all this blank space to work with between the eyes and above his shoulders but no ideas where to go with it...... Thanks for checking in. This will be finished, do or die, by the end of August. I even purchased some Mahogany Red Minwax finish for it. |
|
S
seeksurf
Posted
posted
on
Tue, Aug 11, 2009 9:34 PM
Still looking great you cant go wrong on this guy. |
|
B
Benzart
Posted
posted
on
Wed, Aug 12, 2009 10:04 AM
YES, Definitely looking Excellent. The back can be covered by the headdress that should be all the way around, It's There you just gotts uncover it along with the Teeth :o :) . |
|
P
PutiTiki
Posted
posted
on
Sat, Aug 15, 2009 10:41 AM
Two questions looking for some advice on:
Thanks for the help. |
|
BD
big daddy
Posted
posted
on
Sat, Aug 15, 2009 11:12 AM
racer x is looking mighty good there. like the fangs on the skull. good job. my 2 cents...as for chisels, well i use cheap, sharp flat ones to knock off major pieces then use my better ones to shape and refine. also use a dremel on some small pieces for outlining and sanding. i know that several people use grinders and chainsaws on bigger pieces to remove the big stuff. i started using a hammer and was given a mallet for xmas (best gift) and don't know the weight on my mallet but after about 1 hour of swinging the damn thing it does feel like about 10 pounds, but a whole lot easier than the hammer. certain that you will get more and better feedback than what i've given you and don't know if any of what i wrote will help you but good luck finding what you need and/or want. bd |
|
A

AlohaStation
Posted
posted
on
Sat, Aug 15, 2009 12:38 PM
Urethane mallets - the majority of the time I use a 20oz. mallet and for smaller detail I use a 12oz. I also have some smaller wooden ones that I made myself that can be used for very small detail. I just bought the Flexcut Sculpture set from Timberline for $92+ (as seen on Amazon). Having a good all-around set is a great way to start. |
|
P
PutiTiki
Posted
posted
on
Sat, Aug 15, 2009 12:50 PM
Did you receive the set yet? I'm hesitant to buy if they normally sell for $124 -> $30 savings seems too good to be true. If you have them and they are genuine, then I'm buying. |
|
A
AlohaStation
Posted
posted
on
Sat, Aug 15, 2009 7:18 PM
I actually called and they told me the price was $120. I told the guy i saw it on Amazon for $92 but did not see the set on their website. He told me they were out of the set but would give the the individual chisels at the Set price (no box). I paid and the package followed a few days later. Great service! The individual chisels came with a price tag on each of $62! Just started playing with them this weekend. |
|
P
PutiTiki
Posted
posted
on
Sat, Aug 15, 2009 7:42 PM
I actually went ahead and ordered them earlier today. I started freaking out when I read your last post. Did they contact you about the $120 price? Do you have someone I can email about it or should I just wait to hear from them? I could care less about a box, I just don't want to get charged the full $120 when the site listed it at $92. |
|
T

TheBigT
Posted
posted
on
Mon, Aug 17, 2009 10:37 AM
I'm currently using a rubber mallet, 16oz. Works pretty good. I'm sure the urethane mallet is better but haven't gotten yet. As for the chisels I have one small wood carving set, palm sized, that I bought a long time ago. I basically just use the gauge and straight chisel from that set. The rest of my chisels are straight chisels of good quality bought from the local hardware store. Then I'm using a variety of dremel bits in addition to that. Your tiki is coming along great! You could continue the headdress around the back or carve out the flat part currently in the back to make the two lines of the headress currently shown stand out better. Then you can make a dividing line between the head and back. Might be a compromise between doing a full headdress if you don't want to go there. |
|
P
PutiTiki
Posted
posted
on
Tue, Aug 25, 2009 9:23 PM
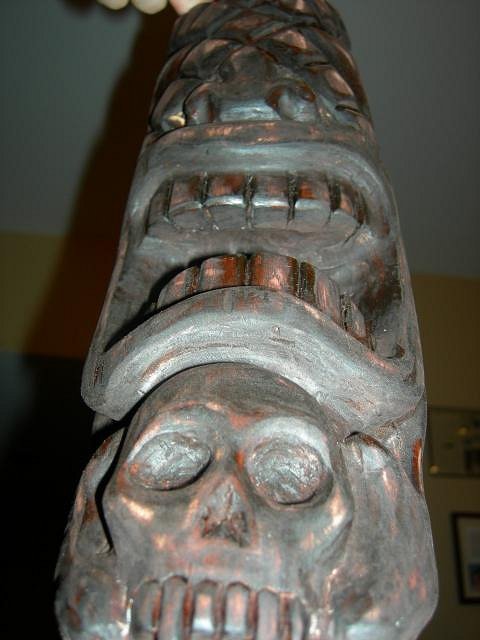
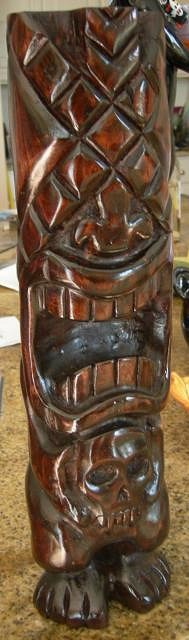
Well, as promised I finished Tiki #2. Overall, extremely happy with my results. I managed to get my first head dress finished which I free-handed on the fly since my original plans went out the window when I took a large chunk off his back. I look at tikis all over this website and love certain features in each and tried to incorporate a few of those on this piece: 1) Had to have a skull = BADA$$ 2) The criss-cross "face mask" of Tiki God Kane 3) Deep cuts in the mouth 4) Full 3-D Body. As far as the stain, it did not turn out how I liked. I was so happy to finish carving/sanding that I had to stain it before another day passed so I did so in poor lighting and put the stain on wayyyyy to thick. I'm currently deciding whether to sand the entire thing and leave the dark stain in all the crevices and inlays then go over with a lighter stain or just leave it as is and move onto #3...... Thanks for checking in. |
|
AA

Aaron's Akua
Posted
posted
on
Tue, Aug 25, 2009 9:39 PM
PT, It's hard to tell from the photos, but it looks a bit washed out without some type of clear coat to go over that stain. If the stain was applied too thick, you may want to rub it down with a cloth and rubbing alcohol or something else to strip it down a bit. Or maybe a quick sand on all of the high spots like you mentioned, then a light stain over that. I think it's a killer tiki and definitely not ready to give up and move on to the next. Good luck! Aaron |
|
N

nomolos
Posted
posted
on
Wed, Aug 26, 2009 7:21 AM
Great tiki - I think a rejig of the stain would work wonders! |
|
WP
Watango productions
Posted
posted
on
Wed, Aug 26, 2009 1:49 PM
Kool look'n peice!I'd be give'n this guy a rough once over with the mouse and |
|
GP

Grand Poobah
Posted
posted
on
Thu, Aug 27, 2009 5:32 AM
Your details are really excellent. It had to have taken some time to do. I have had the same problem with the stain several times. It is has be a leraning process for me as I spend a great deal of time carving. Then when you think you are finished and all that needs to be done is throw on a quick coat of stain, you find that it is not the way you hoped. The finish will usually highlight the rough spots. I have to force myself to bear down and bite the bullet. To go back and sand it really sucks, but it is a small time invested compared to how long you will have it. |
|
T
TheBigT
Posted
posted
on
Thu, Aug 27, 2009 6:26 AM
I like it! I think it came out great. Even the stain looks good to me - but is the color in the pics just caused from the indoor flash? It has kind of a silvery sheen to it. Is that not what it really looks like? It also looks like it already has different highlights on the edges - like wear. Did you do this or is that just the staining issue you're talking about? |
|
P
PutiTiki
Posted
posted
on
Sun, Sep 20, 2009 8:22 AM
Tried the mouse on this guy to tone down the stain but even the finest grit paper took all the color away so I ended up scrubbing him with some steel wool. Re-stained after the steel wool with a very light pine color and used some spray varnish. I'm very pleased with how he looks after the seal coat because in the last pictures I posted, the finish looks horrible.
My friend just called because he is cutting down a monster pine tree so #3 is on his way..... Check back later. -PutiTiki |
|
ATP

Atomic Tiki Punk
Posted
posted
on
Sun, Sep 20, 2009 1:15 PM
The refinish job was the ticket, looks great! I like to see the detail of the wood come threw. |
|
T
TikiMango
Posted
posted
on
Sun, Sep 20, 2009 3:58 PM
Nice refinish! Way to not concede to a piece until you're happy with it. |
|
T
Tikilizard
Posted
posted
on
Sun, Sep 20, 2009 11:08 PM
Excellent refinish and very nice tiki! Keep up the great work. |
|
P
PutiTiki
Posted
posted
on
Mon, Sep 21, 2009 6:55 AM
Atomic, Mango, Lizard - Thanks for the compliments, I'm glad I put some more time into the piece. General question to all carvers - Just cut down fresh pine, not sure what kind. I sealed the ends with a spray on varnish but its seeping sap all over the place. Anyone carve fresh pine before? I'm looking for a recommendation on drying it out and when to carve it.
|
|
B
Benzart
Posted
posted
on
Mon, Sep 21, 2009 8:01 AM
Puti, I love the final finish on this tiki, Excellent work and follow-through. Good on'ya for not chucking it and starting new. Those lessons are the Best ones, when you take the time to figure out the problems encountered while carving Anything. Way to GO! |
|
S
seeksurf
Posted
posted
on
Mon, Sep 21, 2009 9:37 PM
Yes! He looks fantastic right now with that finish. |
|
P
PutiTiki
Posted
posted
on
Fri, Jan 29, 2010 7:47 AM
So after many moons I have returned to TC. I started a new job in the fall and I'm sad to say I have not channeled my tiki passion since the warm days of summer. However, the tiki fire was recently re-ignited after booking vacation for the grand opening of the Tiki Bar in Solomon's Island http://www.tikibarsolomons.com/Home.aspx a recent tradition I started. So I return to TC with some questions before starting things back up again. I have 4 nice sized logs in my garage - 2 white cedar and 2 some sort of pine. The cedars are bone dry and unfortunately cracked all over but still carve-able while the pines are rock hard and sap covered. The temperature are mid 30s around me and my garage isn't too much warmer - is that too cold to carve? Will cold wood damage chisels? I want to let some chips fly this weekend but the pines are like rock (I doubt they are completely dried out despite being cute down in June) while the cedar is dry and cold. Anyone carve in cold temps? Any recommendations? I've been scouring TC posts the past few days and the creative juices are flowing. -PutiTiki |
|
J

JohnnyP
Posted
posted
on
Fri, Jan 29, 2010 10:58 AM
|
|
P
PutiTiki
Posted
posted
on
Sun, Apr 11, 2010 6:14 PM
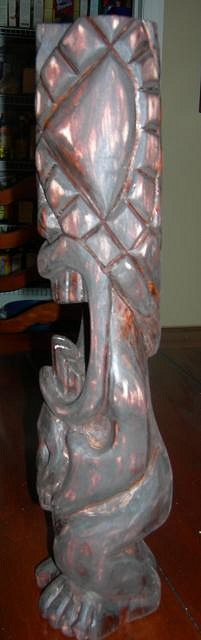
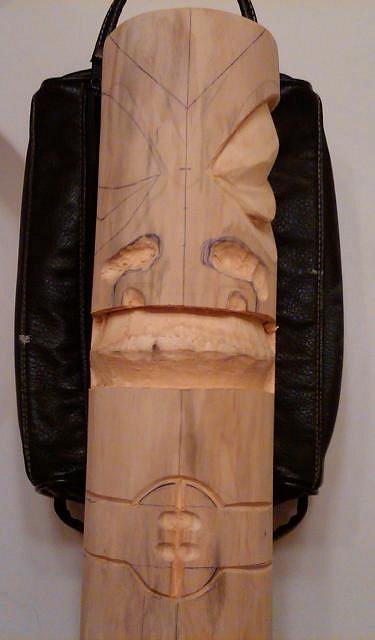
Well I've been a stranger to any sort of progress on my carvings since my last tiki but not to TC. I visit on a daily basis and truly love what I see. I have a pile of logs in my garage and the tools but can never find the time. Today I got fed up with seeing all your work and not having anything to contribute so I grabbed a dried out log and free handed more or less. Definitely learned some things working on the fly. I still have plenty of work left on this carve but I knew another beautiful day would go by with no carving if I obsessed over drawing it out. Being this is #3, I wanted to try my hand at a Marquesan.
Looking for advice - do the teeth usually go around 360? As of now, he has no lips so I'm unsure of what to do with the space between his hands and his teeth. After working the eye out, I'm getting a 'creature from the black lagoon' look from his gills. I have a wood burning soldering iron thing, so I plan to do some cool design/tattoo on him once he's done and use a light stain to let the grain show through. Thanks for checking it and keep the tikis coming. |