Welcome to the Tiki Central 2.0 Beta. Read the announcement
Celebrating classic and modern Polynesian Pop

Tiki Central / Other Crafts

Vintage rattan bar restoration 101

Pages: 1 19 replies

1

I have so many projects going on , sometimes I think my ADD kicks into over drive.
I recently picked up some more vintage rattan furniture, and one of the pieces was
this curved L shaped rattan bar that needs restoration.I thought I would show the
before , during and after process of me restoring this unique cool bar.First of all
the varnish was peeling off,so I decided to hand sand the entire bar down - front,
back,sides and inside the shelves and drawers .When I say by hand, I don't mean
using a vibrating power sander-I really mean by hand.There are so many nooks and
cranny's in this bar,it's really the best way to do it.Good ole'fashion elbow grease
is what my Dad use to always say.The original formica top was warped and absolutely
shot so it had to be removed.It doesn't look so hot right now , but just you wait
and see what this gem will transform into.Here are several before pics of the bar
with the top taken off.If you will notice in the second and fourth pic you will see
where rattan is much lighter,that is where I have started hand sanding the rattan
down.

Be back soon with more pics and update info on this project .

[ Edited by: 1961surf 2009-09-03 19:37 ]

nice piece.Hand sanding is the only way to go with furniture.thats how you get the perfect smooth finish

1

Thanks Dawn.More pics of progress and info coming up.

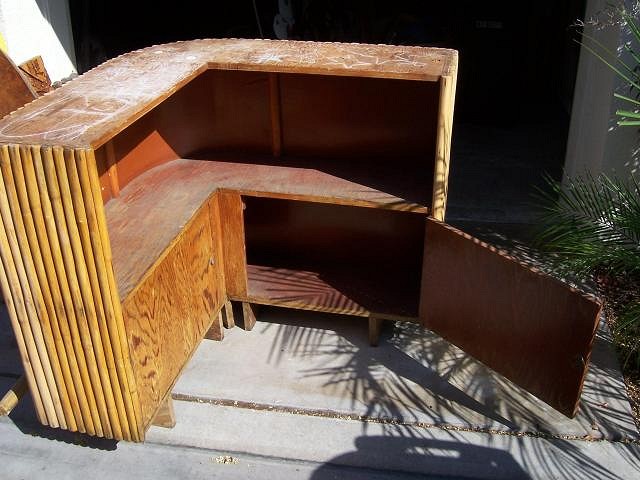
I always wondered why the builders of these things went to so much trouble making these beautiful rattan fronts only to put cheap plywood doors on the back...

1

Derek-they are not all built that way .Although the back used some plywood, the bar
is made very well.I was trying to figure out if this was home made or company built
and I think with the way it was made ..it's company built .When I get done with it
and it has a new finish, even the plywood grain will look good.I have several others
as well.When I finish this bar I will post some of the others also.Monkeyman you have
an eye for detail, and I have always seen that in your work.Wither you are making a
tapa swag lamps or an LP record frame.Your input is always respected and appreciated
anytime.What did you think of the shape and over all design of the bar?

[ Edited by: 1961surf 2009-09-04 22:52 ]

vintage ply is much better quality than new ply. I use it when ever I can find some. . its made from older growth timber , has nicer grain, less off gassing, and is heavier. Alot of quality pieces were made with ply and a teak, walnut or mahogany veneer

I don't know about that Dawn: I'm vintage (circa 1958) and I still have problems with "off-gassing" :D

Looking forward to seeing how this comes out, 1961surf.

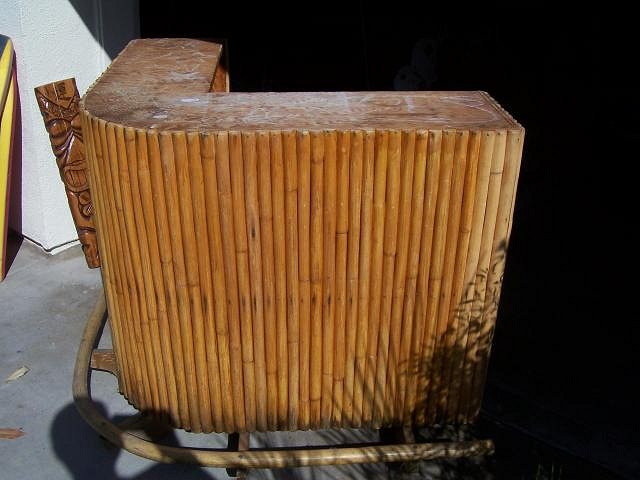
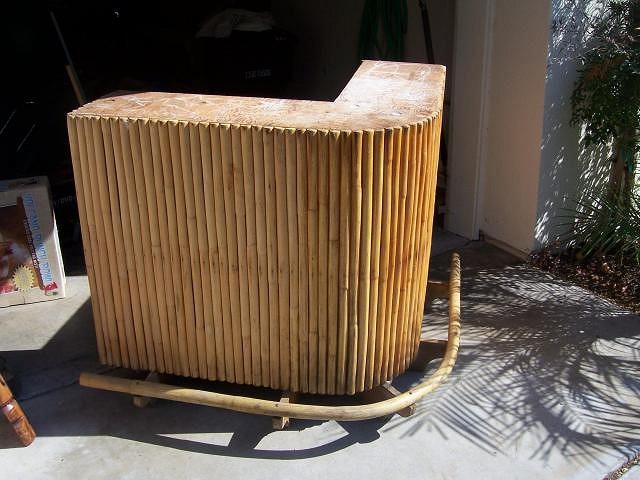
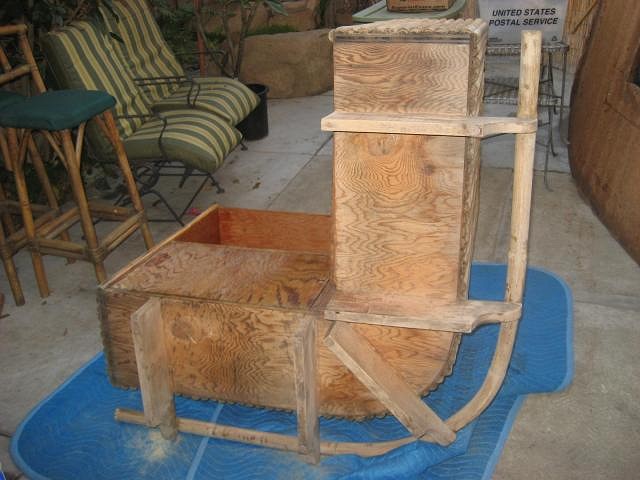
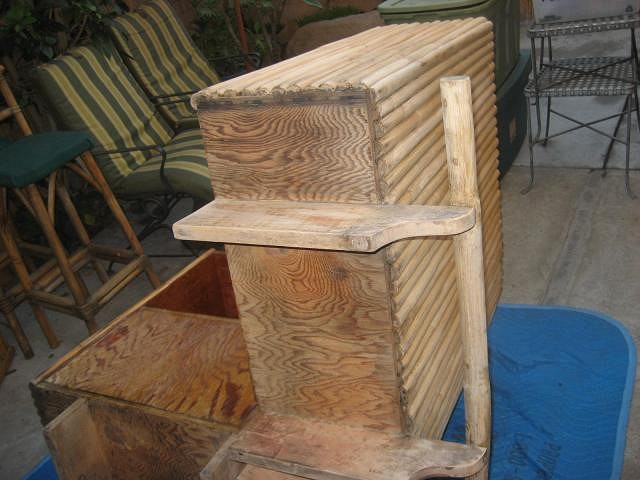
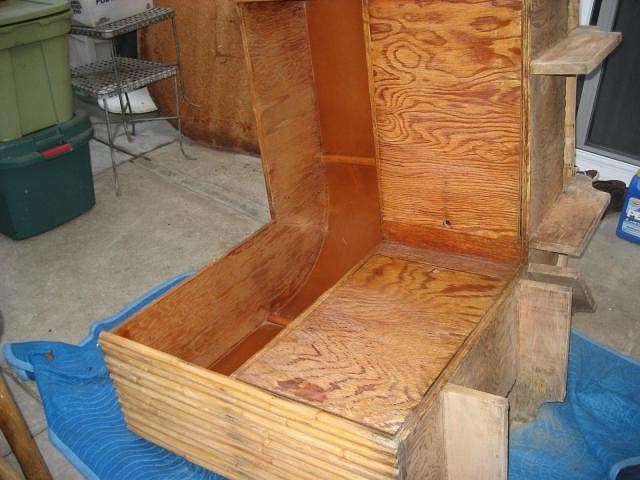
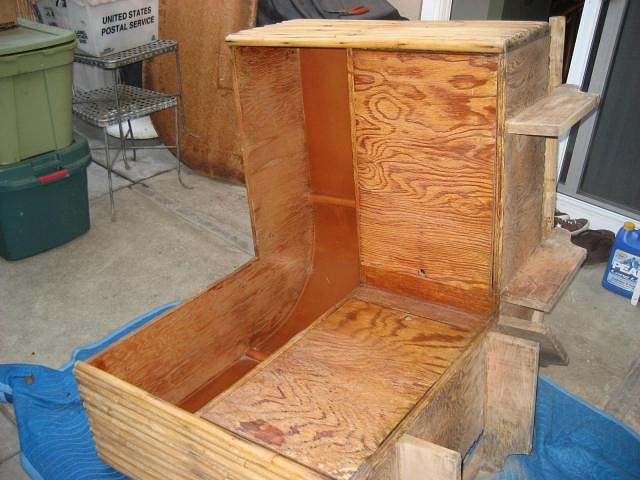
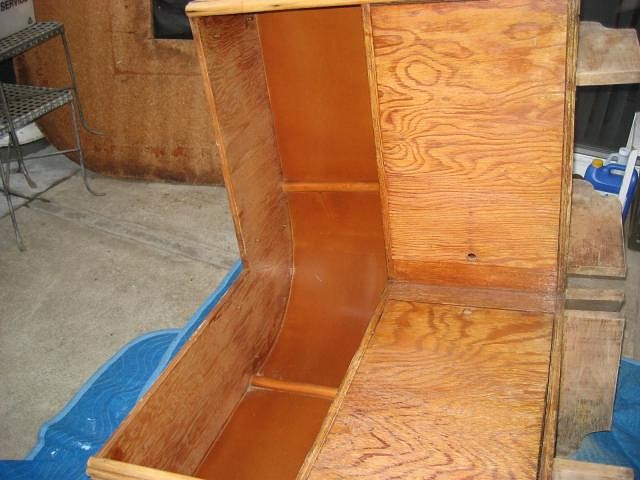
I have completely sanded outside and inside of bar, and is ready for varnishing.
Before I start varnishing I must take the old original top and trace it out before
it goes in the trash .By doing so this will provide me the exact size, shape and
thickness to cut and make new top out of a much nicer wood.

On 2009-09-04 22:12, MadDogMike wrote:
I don't know about that Dawn: I'm vintage (circa 1958) and I still have problems with "off-gassing" :D

haha you said "off gassing"! stop eating turkey chili

Ok back to the subject of rattan restration.
I just moved one of those 40's rattan and mahogany sideboards up onto the new deck from the patio in preparation to start work on it.
Bill heres my question:
Have you ever had to re-attach a piece of curved rattan that has warped away from the frame? and how does one go about doing that??

1

I have not had that situation come up yet.Rattan was originally steamed in the factory
to bend in different curved positions and then put in a jig sort of speak and held in
place for how ever many days they would do it.It was then screwed or nailed into place
depending on the design and construction of the particular rattan piece of furniture.
My best advice is to take the piece that needs to be attached away from the piece
of furniture and figure out how it can be steamed bend it into the position it
originally was , and then clamp it down for several days so it will stay in that exact
position you want it.I have a situation coming up on the bar where I am going to need
to have rattan curved to go around the edge of the new bar counter top, and I don't
know how I am going to do that yet myself.

The piece I have has the rattan going horizontal and some of the ends have popped off where they curve around to the front at the edge of the cabinet doors.
If this turns into a restoration project thread down the road maybe I'll post pics. We cant be the only 2 people who have projects

NIIIICE...thanks for sharing your before pix, they are so helpful. I love to watch how these ambitious projects progress!!! :)

1

On 2009-09-24 16:00, Sophista-tiki wrote:
The piece I have has the rattan going horizontal and some of the ends have popped off where they curve around to the front at the edge of the cabinet doors.
If this turns into a restoration project thread down the road maybe I'll post pics. We cant be the only 2 people who have projects

PM or email me pics .Very difficult to give advise without pics.
I will be glad to help you if I can.

W

Wow, great lines on that bar. Can't wait to see the finished product.

Any one know how to remove the black marks left by the nails? I have a few pieces with that problem and not sure what to do about it. Or should they be left alone?

K

What's it look like now, braddah???

1

DSWAHINE Don't try and remove the black marks from nails.That just becomes part of the patina.
Ads character to the over all look of the vintage rattan .Good eye about the nails, I have had
alot of people ask me that same question .

1

Thanks for the inquiry Woody.Because I had to go to Nor. Cal on such short notice for a week ,
and then I have somebody that wants to buy several rattan chairs that were not 100 % done,
I have been taken away from working on the bar temporarily .
I will definitely update when I can .

Well I finally had a chance to put some more time into the bar.The weather and temperature
this past weekend allowed me to get some varnish work done.Since I have put one coat of
varnish on the back of bar , on the storage doors and the shelves , I decided to do one
last in between coats fine sanding with 220 grit sandpaper.Several hours later I had the
sanding done for the back part of the bar.So the whole back of the bar is ready for it's
final coat of varnish.Before you actually apply varnish, use cheese cloth to get all dust
particles and any remaining saw dust that may be on the surface of the rattan.Alot of saw
dust gets in between the rattan while sanding, so make sure all the rattan is blown out
with air before applying any varnish.Clean air and the right temperature is key to getting
varnish done right.

My next task was to flip the bar upside down to get the support legs,the foot rest
and the entire underside sanded.There were cob webs, dirt and who knows what else
under neath.Because I did not have an air compressor handy , I used several cans of
compressed air that you can buy at any Office Depot or Staples to clean your computer
keyboards .I use this to blow the saw dust out in between the cracks and crevices of
the stacked rattan pieces.The cans actually do a great job, they are light weight
easy to use .

So what remains to be done on our bar project is a sealer applied to the bottom of
bar.Varnish the support legs that were stained with golden oak.Apply last coat of
varnish to the storage doors and shelves .Then my next step will be to varnish all
exterior rattan curved facia .Our final step which is a project within it self is-
the construction of the bar top, varnishing of the bar top, steaming and bending
rattan to go around the edge of bar counter top and then the installation of the
bar top.

Got a lot accomplished this weekend , however there is a lot more to be done.
Logging a lot of hours of elbow grease into this bar project if you know what I
mean.The outcome and final results will make it all worth it though.
Stay tuned , I will be back ASAP with more pics,progress, and info on this
dandy little bar project.Thanks for hangin in there with me.


All the old varnish has been sanded off the exterior rattan facia and foot rail


The underside has been sanded and ready to stain and seal.


The foot rail supports have all been hand sanded and ready for stain and varnish


The storage cabinet doors sanded in between coats and ready for their last coat


The shelf tops and inner storage space all hand sanded and ready for last coat of varnish

[ Edited by: 1961surf 2009-11-25 00:47 ]

Pages: 1 19 replies