Tiki Central / Home Tiki Bars
Mark Mywords' Walls of Voodoo (updated 6/17/15)
|
M

markmywords
Posted
posted
on
Tue, Feb 8, 2011 2:30 PM
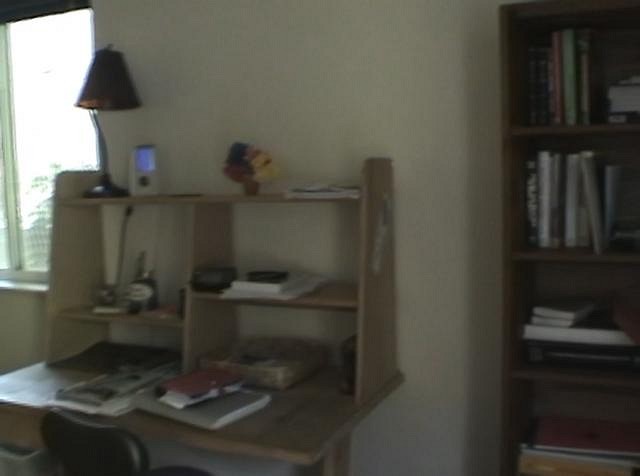
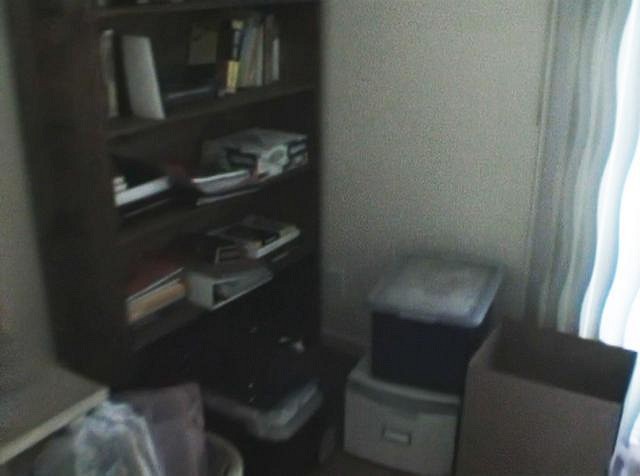
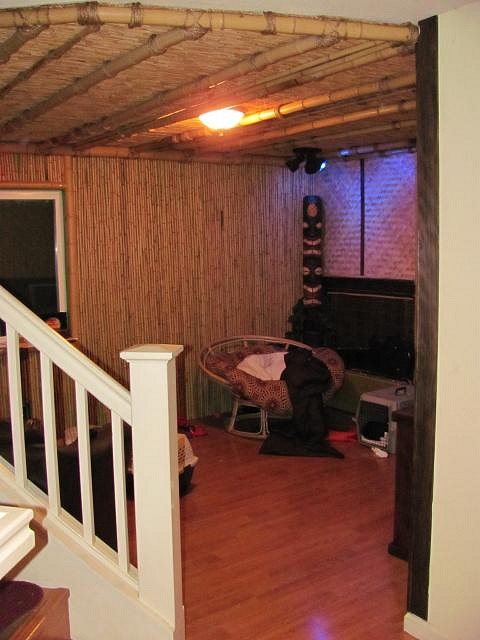
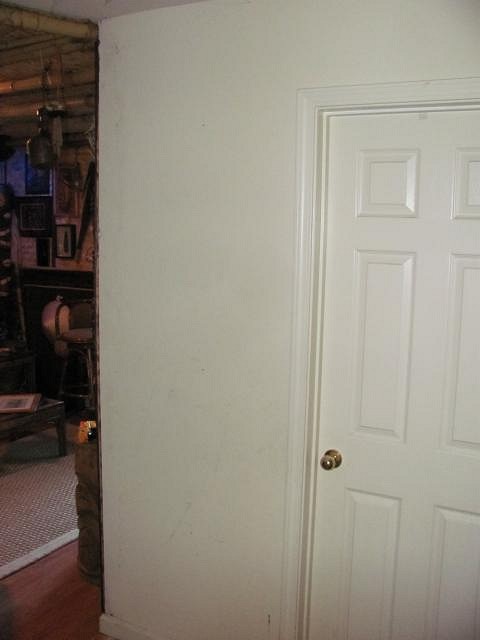
Long time lurker here. Thought it was finally time to put up pics of what I've been working on(and off) and on for the past year. So this whole thing started when we moved from Sac to Davis a year and a half ago. We're used to living in old funky places. The house in Davis is newer and well, pretty "Normal". Having the luxury of extra space for the first time provided the opportunity to add some badly needed character and create the getaway I've wanted to build for some time now... BTW, yeah, the name probably isn't as "Tiki" as the purists might want. My kids named it and it sort of stuck. Unfortunately, more than a few of the early photos of the build got wiped out when I had an sd card die. The only "Before" pics I have are frame grabs from a video. Behold, a very cluttered, boring white walled room -
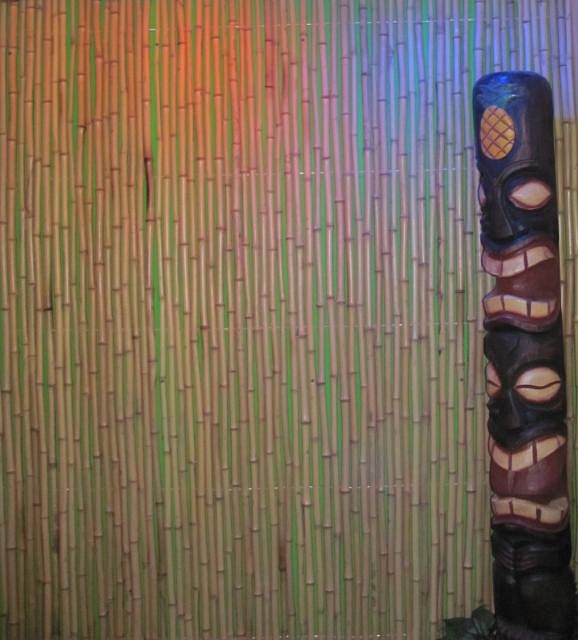
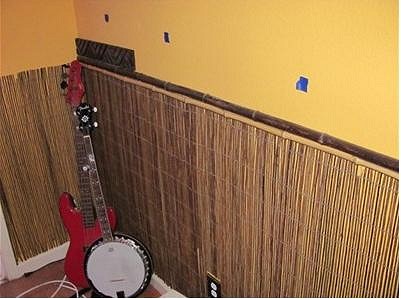
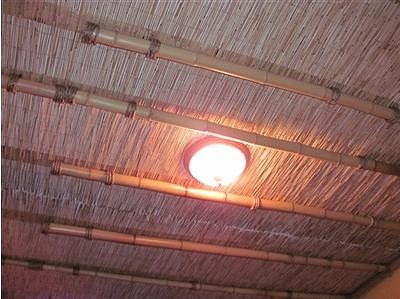
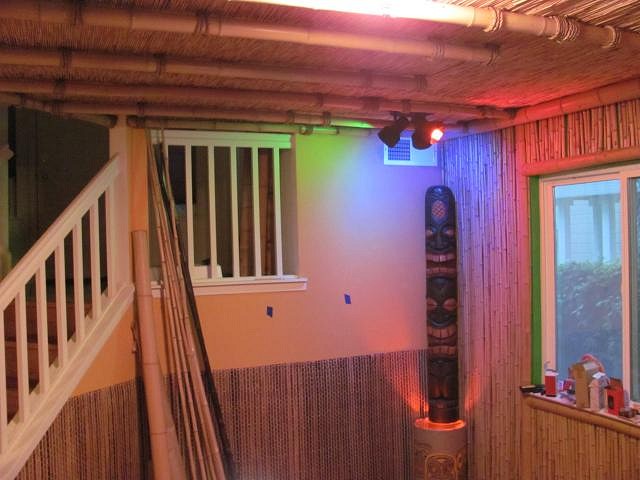
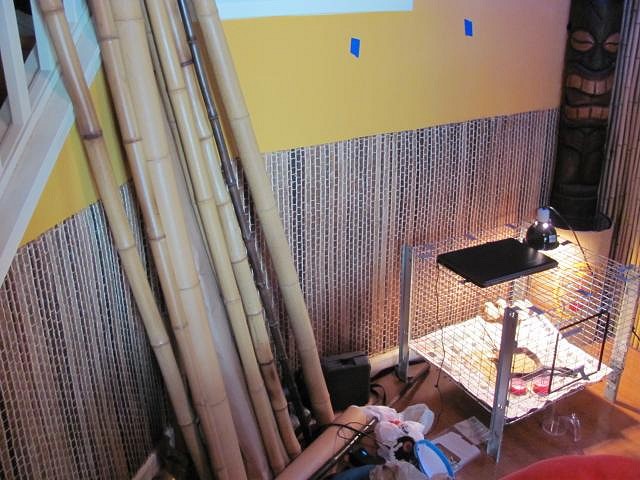
Sooo much white... The first thing I did was paint and start work on the ceiling. Things got off to a bad start with two mistakes. First of all, we had new electrical installed in the ceiling for mood lighting in the corners and a light fixture in the center. This left circular holes in the ceiling (used to route cable). I decided to leave the holes open because my original plan was to use grass matting on the ceiling which would cover them. This was a bad idea that would come back to haunt me later. Putting up the matting was a challenge. The matting that I got is only rectangular in the vaguest sense of the word. The mats were 4 x 8', but swooped in up to a 1/2 foot on the sides. I struggled with this for many hours trying to get it installed so that seams could be covered nicely with trim later on. Getting it stapled down flat was also a struggle. I had about 90% of the ceiling done, when I was informed by a drywall contractor that I absolutely should not have left the electrical routing holes in the ceiling open. The rational being that such holes would create a greater hazard of a in-wall fire (serving as a chimney to suck in air). So, down came all the matting. It couldn't be salvaged and went into the garbage pile. The ceiling was put on hold for awhile while I concentrated on painting and installing the wall of bamboo rounds. I also made a mistake on the painting. I wanted green to peek through the gaps in my bamboo. The green paint I chose was too bright. Luckily, it ended up not looking too bad later on when the room got built out with more dark materials. It was pretty shocking when I first put it up though. I made a similar mistake when painting the other walls in the room. I went with a brownish yellow. Of course, this shone right through the fern wainscoting I put up. I spent weeks trying to convince myself that this looked ok. I did eventually have to buckle and take the fern off and repaint the backing wall dark brown. That's what I get for not doing detailed planning before actually starting work. On to the ceiling...
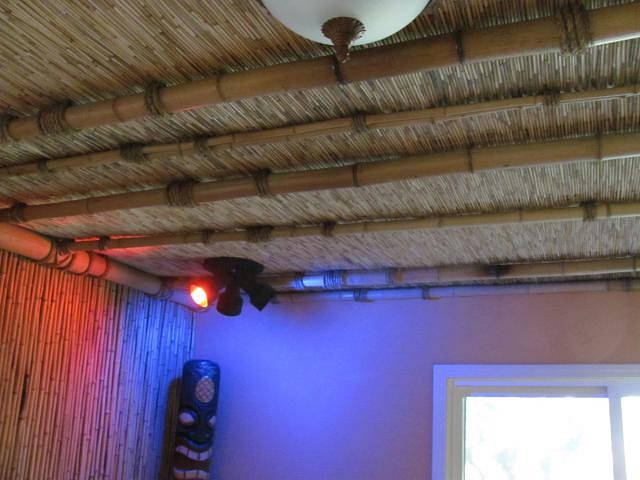
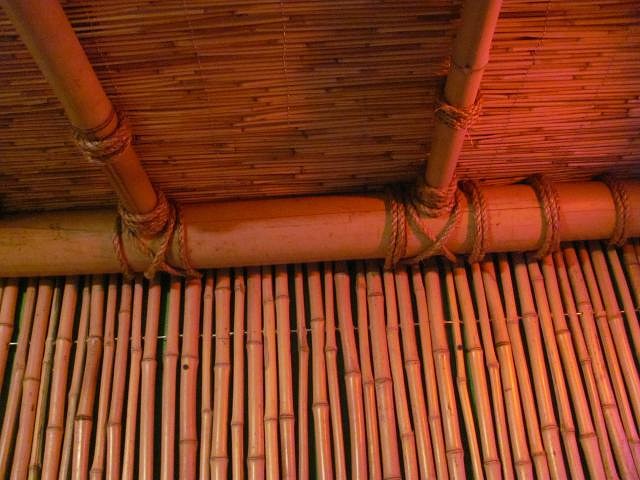
I very quickly moved onto the bamboo ceiling poles. I installed a 4" support pole on one side and a 2 1/2" pole on the other with 2" crosspoles. The mismatched support pole sizes worked good. It creates an illusion that the roof is slightly slanted. At this point, I got stuck for months on getting the poles installed and looking right. The thing that took the most time was doing the fake rope lashings. The poles themselves went up with rope treatments already on them. I ended up gluing rope for the cross lashing effect. This, of course, took forever. BTW, if you ever want to get an extremely strange look from a hardware store clerk, purchase 40 little tubes of super glue. The look of wonder/fear was priceless.
OK, time to move on to walls. More coming later... [ Edited by: markmywords 2011-02-08 14:32 ] [ Edited by: markmywords 2013-01-20 20:36 ] [ Edited by: markmywords 2014-05-31 14:40 ] [ Edited by: markmywords 2014-06-01 09:45 ] [ Edited by: markmywords 2014-06-02 08:04 ] [ Edited by: markmywords 2015-06-17 20:55 ] |
|
B

BigDaddy772
Posted
posted
on
Tue, Feb 8, 2011 3:21 PM
Looks like your off to a great start. Trial and error is how I have learned everything so far..Well that and lurking here. |
|
M

MauiRose
Posted
posted
on
Tue, Feb 8, 2011 4:24 PM
I love seeing all the progress pics. Can't wait for more, thanks for sharing! |
|
M
markmywords
Posted
posted
on
Wed, Feb 9, 2011 4:16 PM
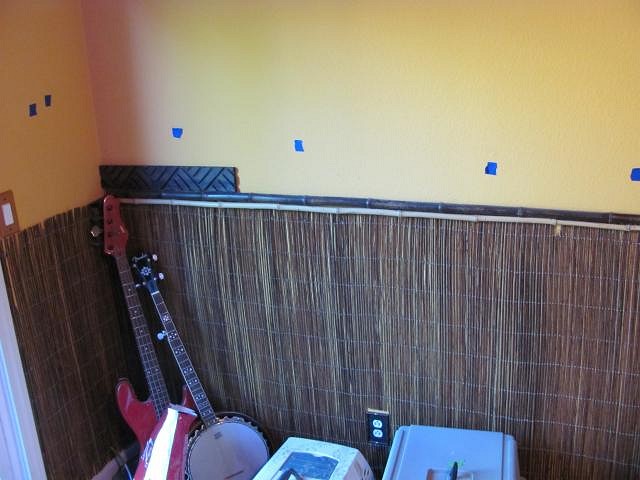
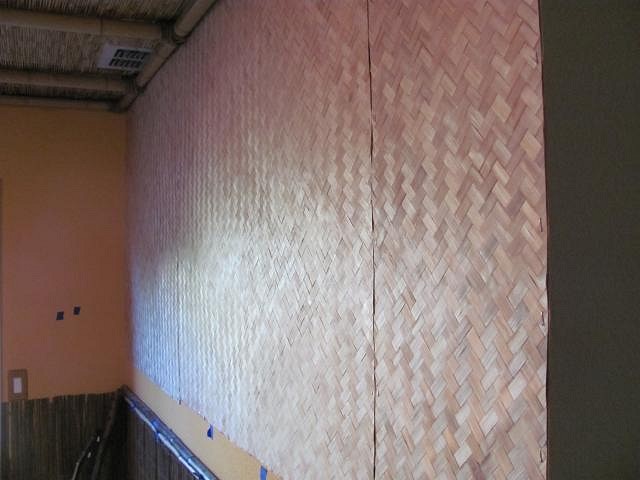
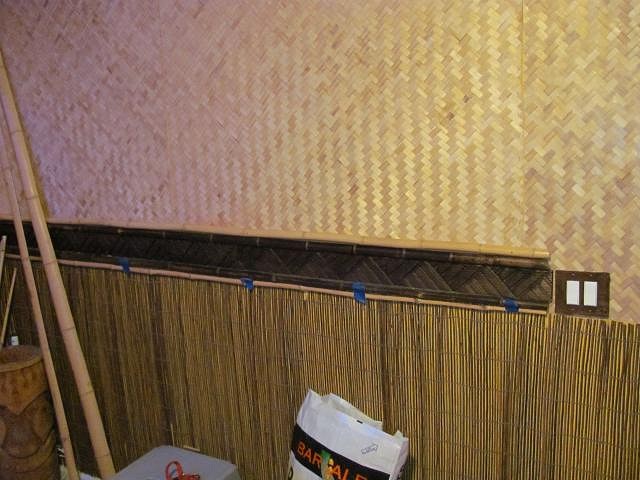
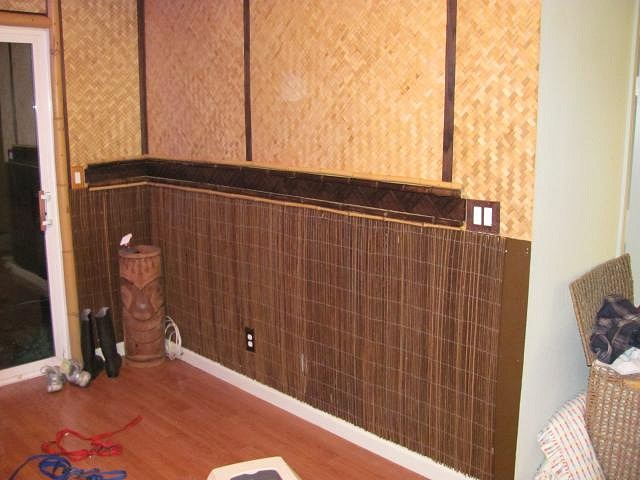
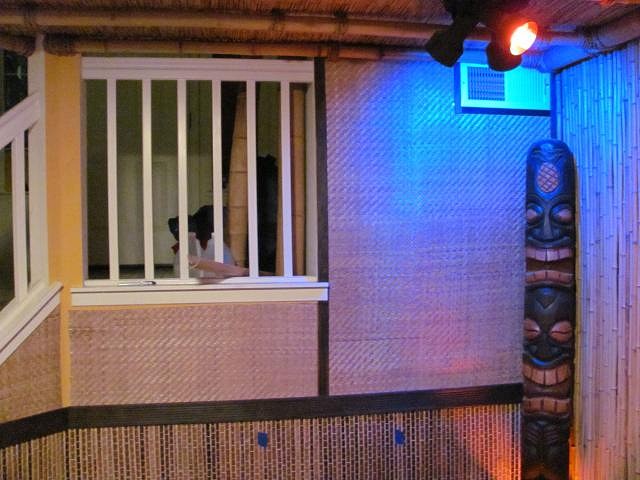
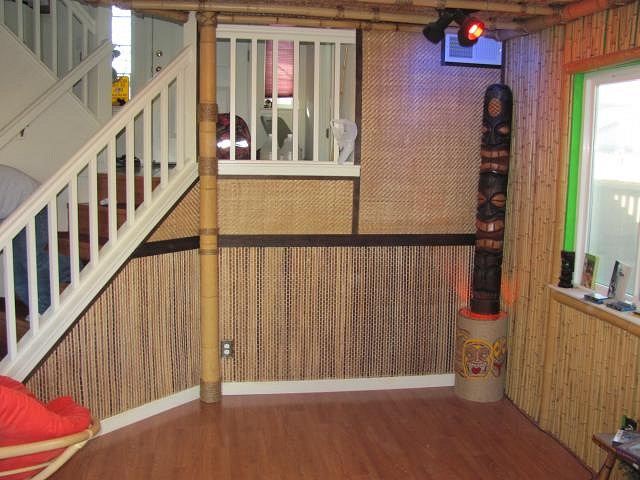
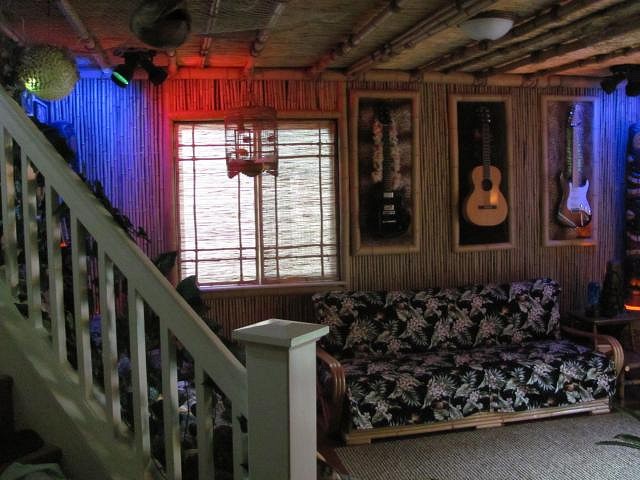
On to the walls... I chose to go with fern fence, abaca matting and bamboo backing for the walls.
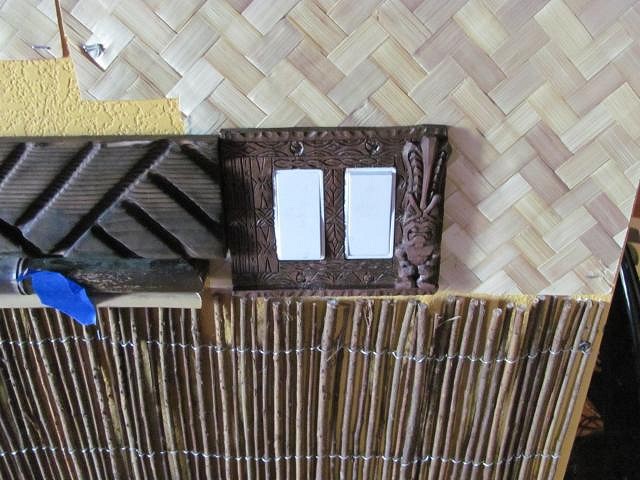
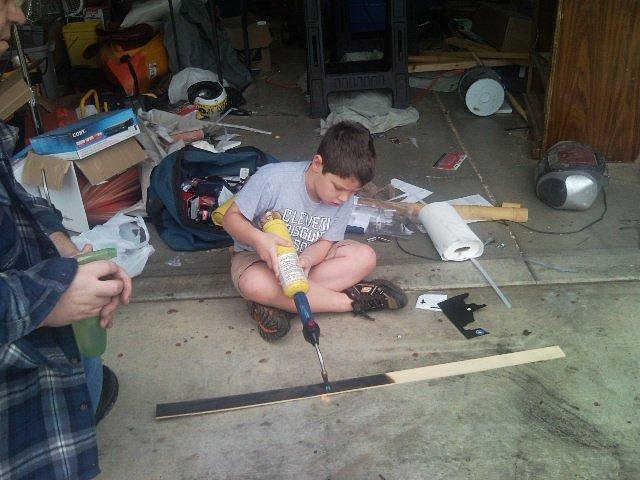
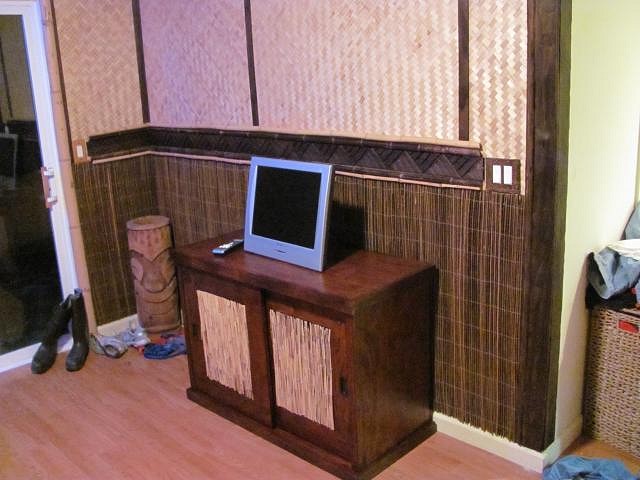
The biggest challenge here was getting the bamboo to go down as perfectly flat as possible. The first section I put up seemed to staple down just fine. However, a week later it started bowing out in the middle. I had to pull it and try again, this time with more staples and attention to stretching and flattening as I worked. Cool switch plate I got from Crazy Al Once that was done, I started working with the trim. I had several feet of nice molding I had purchased from Bosko and combined it with some smaller bamboo pieces. My original idea for covering seams was to use stained wood trim strips. I decided instead to scorch and wirebrush the wood. It takes a really long time (especially using just a little plumber's butane torch), but the final look was totally worth it. I took advantage of my youngest son's pyromaniac tendencies and had him do some of the work... I went ahead and bought an entertainment center to keep the wife happy (she was tired of our kids monopolizing our upstairs TV). I had tried for over a year to find something tiki-tastic, but the only pieces I found were way too expensive. I went ahead and purchased a pretty generic piece with the intention of tikifying it myself. I probably won't stick with the reed fencing treatment I used here. As for the TV, I will be camouflaging it later when I get to the finishing work on the room.
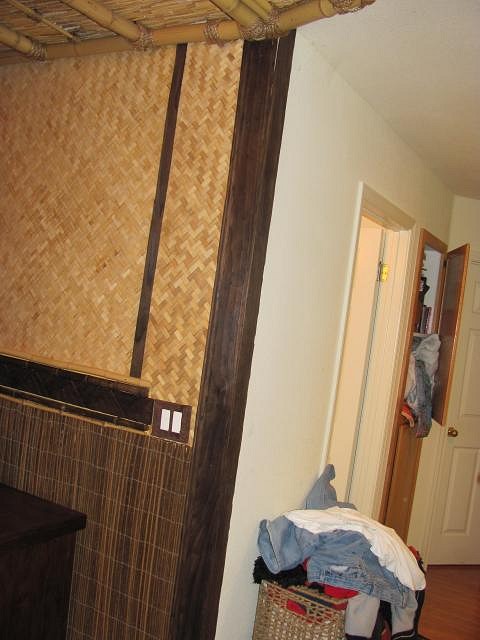
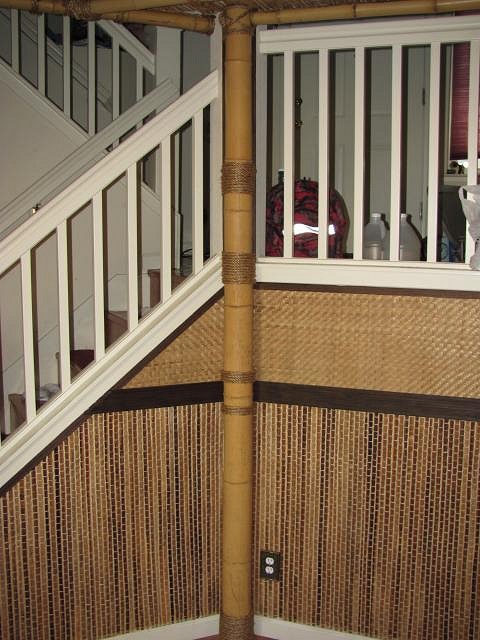
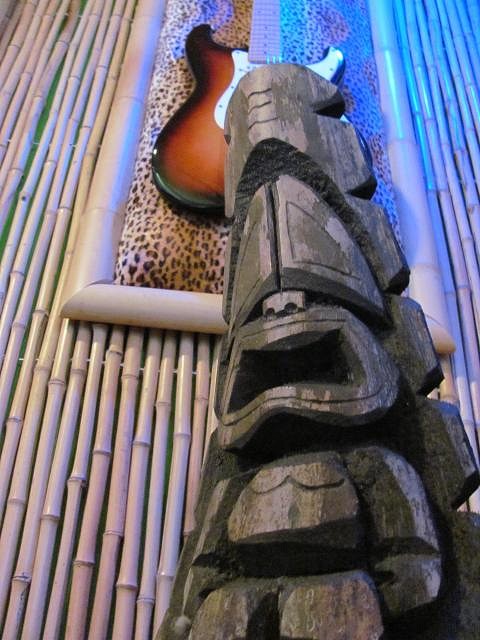
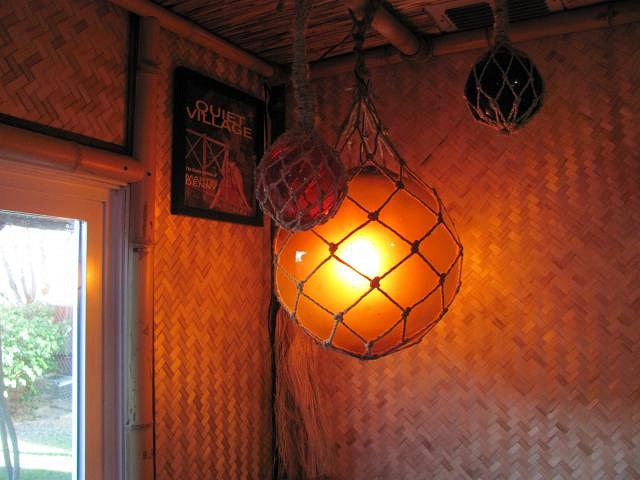
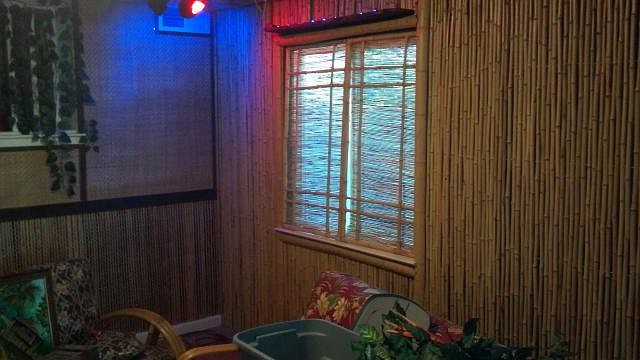
The corner where the wall joins the stairwell was a challenge. I couldn't continue the bamboo backing as it wouldn't trim out right. Instead, I've started fitting a 4" bamboo pole to lay flush as a faux support column and cover up that corner. Getting the notching to accommodate the existing trim is going to be tricky (with my limited woodworking skills that is...). It should finally be up this weekend. So, what does the future hold? I know that I'm going to build hangers for some of the musical instruments on the bamboo pole wall. I need to figure out what I'm doing with the window. I'm thinking about copying the window coverings at Disneyland's Enchanted Tiki Room. Basically they're just a bamboo frame incorporating reed fencing. They seem fairly simple. With major construction done, I get to move on to decorating! I've got a bunch of stuff I've been collecting as well as a whole box of stuff I purchased from oceanic arts on a collecting trip not too long ago. I want to add a bunch of foliage. I'm hoping to score a float lamp in the next few weeks to add to the lighting. I also need to figure out what to do about remaining furniture (the papasan chairs gotta go) and covering up the remaining white baseboards with something more attractive. -mark |
|
J

jokeiii
Posted
posted
on
Wed, Feb 9, 2011 5:26 PM
Well done! Keep us posted! |
|
CN

Club Nouméa
Posted
posted
on
Thu, Feb 10, 2011 4:26 PM
The ceiling looks great - time well spent. CN |
|
M
markmywords
Posted
posted
on
Sun, Feb 13, 2011 7:39 PM
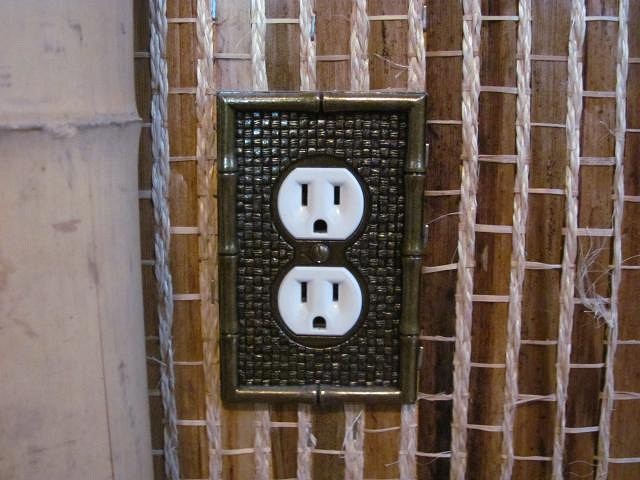
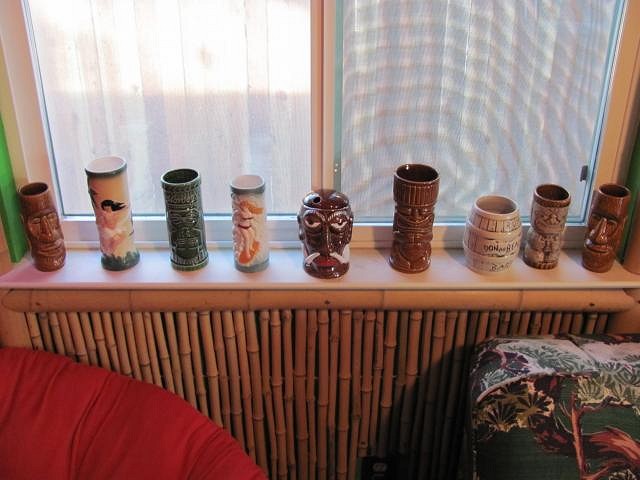
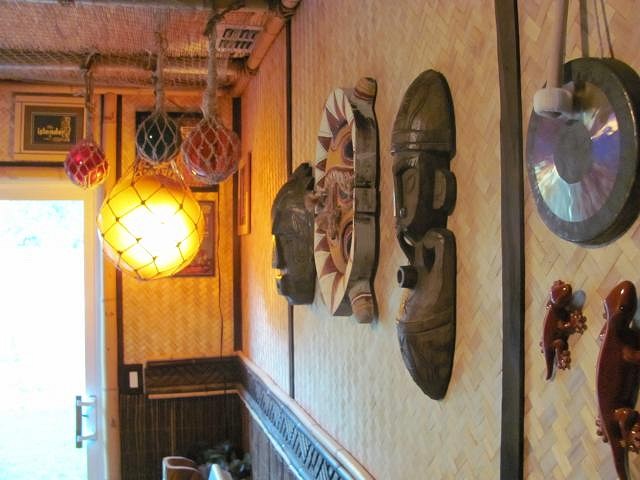
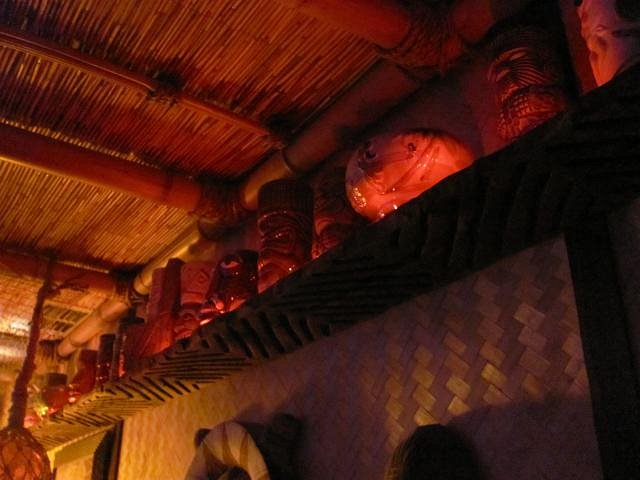
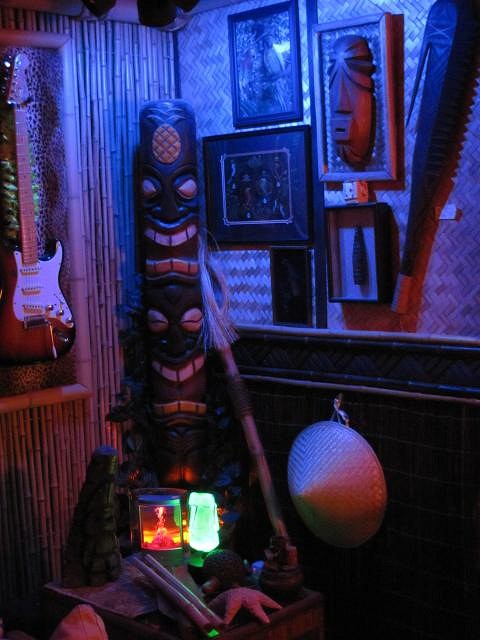
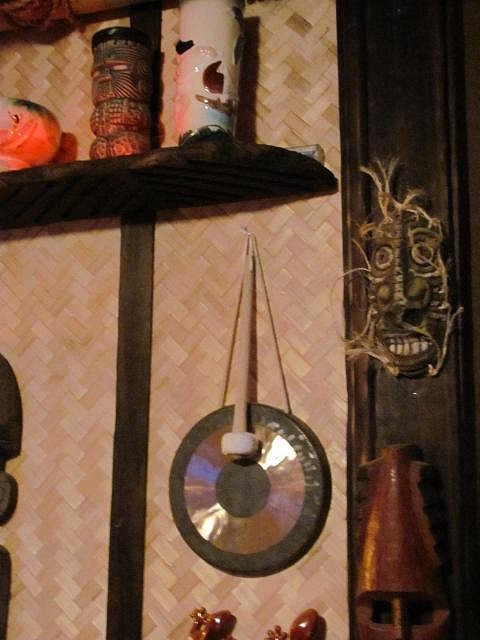
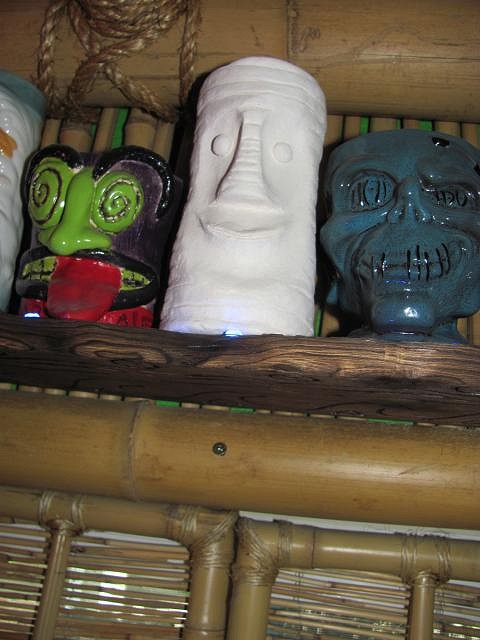
The last piece of trim went up this afternoon. Major construction on the Walls of Voodoo has finished. Time for a drink! 4" pole - it covers up that problem corner. I'm gonna hang masks from it cool bamboo electrical outlet covers - scored a bunch of these on ebay a while back... and there it is! The last wall is done! Time to drink to all the hard work! Get everybody's personal mugs out... ahh, yes! So much goodness in one place! Havin' a flaming zombie with the goof! Next come guitar hangers and putting decorations up... |
|
V

VampiressRN
Posted
posted
on
Mon, Feb 14, 2011 5:59 AM
Congratulations...that is a lot of work you have done to a fairly large space. It's looking great and glad you celebrated with the Goof. :) |
|
M

Murph
Posted
posted
on
Mon, Feb 14, 2011 11:46 AM
Lookin' excellent! |
|
M
markmywords
Posted
posted
on
Wed, Feb 23, 2011 10:41 PM
Look what my wife drove 2 1/2 hours up into the mountains to bring back!
best birthday gift ever! Now, if I can find a couple of Frankl style arm chairs to keep it company, we'll be in business... [ Edited by: markmywords 2011-02-23 22:42 ] |
|
P

Polly
Posted
posted
on
Wed, Feb 23, 2011 11:42 PM
The third mug looks great! |
|
T

TikiTomD
Posted
posted
on
Thu, Feb 24, 2011 11:51 AM
Very nice work with the bamboo and reed matting… great setting for all things tiki to follow. I see that you intelligently applied a cardinal principle of home remodeling projects: start by making an offering to the significant other (in your case, the entertainment center). This brings manifest blessings in the form of ready agreement on scope, as well as grudging tolerance for all those messy intermediate steps. |
|
M
markmywords
Posted
posted
on
Thu, Feb 24, 2011 1:13 PM
Yeah what's hard is having to strike the balance between construction zone and the necessity of keeping a space that's going to be used by the kids a great deal of the time. One of the other things I'm going to have to do because of this is to build a tiki bar on wheels that can be brought into the room for the (far too infrequent) adults only shin-digs that we throw. Those papasan chairs were also a temporary accomodation (although, they do keep with the theme). I'm going to end up ditching them, they're cool, but they're too big and not very durable. |
|
M
markmywords
Posted
posted
on
Sun, Mar 13, 2011 3:13 PM
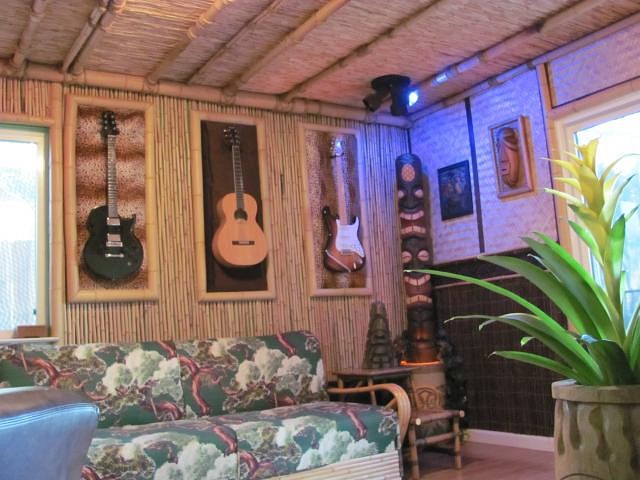
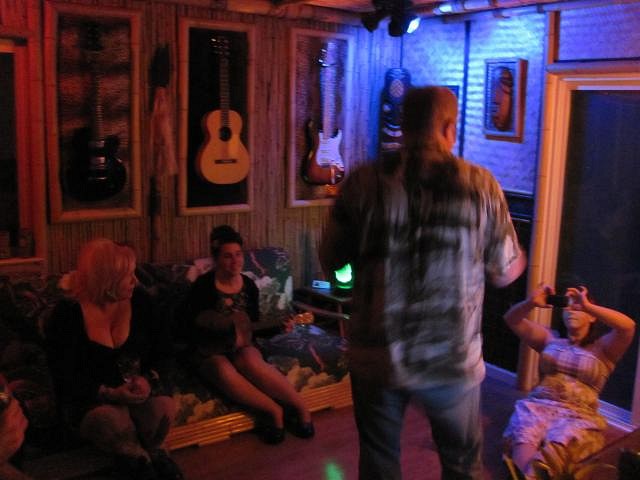
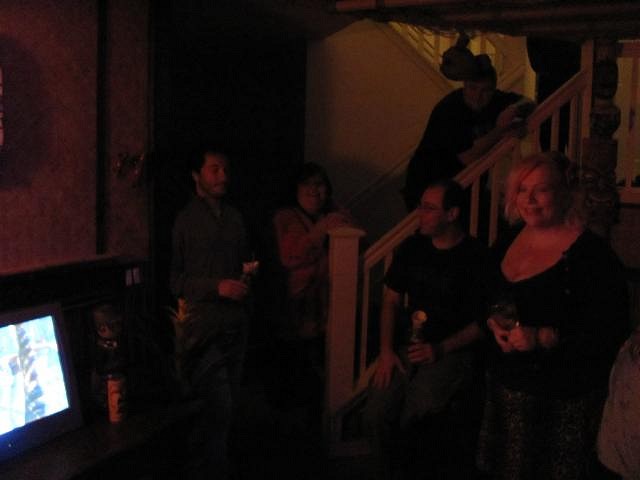
Some new pictures... Things are coming along nicely. Saturday was the Tiki Room Preview / my birthday shin dig. Didn't have a lot of time to put more stuff up on the walls, but I made sure that the two items mandatory to any tiki room were in place... We had way more people show up than expected (we need more seating down there). Luckily we have plenty of spill over space upstairs and on the balcony. it was a blast! Yes, yes, I know, the forbidden TV was also there. We had Pagan Love Song on repeat on low volume. Everybody loved it. All in all a great time. We're already planning the "Official" opening party of the Walls of Voodoo in a couple of months... mahalo, [ Edited by: markmywords 2011-03-13 18:03 ] |
|
P
Polly
Posted
posted
on
Mon, Mar 14, 2011 1:11 AM
Nice guitars! I really love them. |
|
L

LiddleLola
Posted
posted
on
Mon, Mar 14, 2011 9:59 AM
Great job on your space. Darilyn |
|
M
markmywords
Posted
posted
on
Mon, Mar 14, 2011 5:32 PM
Thanks! I'm really enjoying how the room is morphing and taking on a direction of it's own. I had originally imagined a more "Authentic" primitive tiki room. The necessity of having it function as a shared space for the whole family (as well as where the guitars had to go) has now pointed it in the direction of being more lounge-like. As more of the clutter goes up, it will be interesting to see how the character changes... -mark [ Edited by: markmywords 2011-03-14 17:36 ] [ Edited by: markmywords 2011-03-14 17:38 ] |
|
M
markmywords
Posted
posted
on
Mon, May 30, 2011 10:25 PM
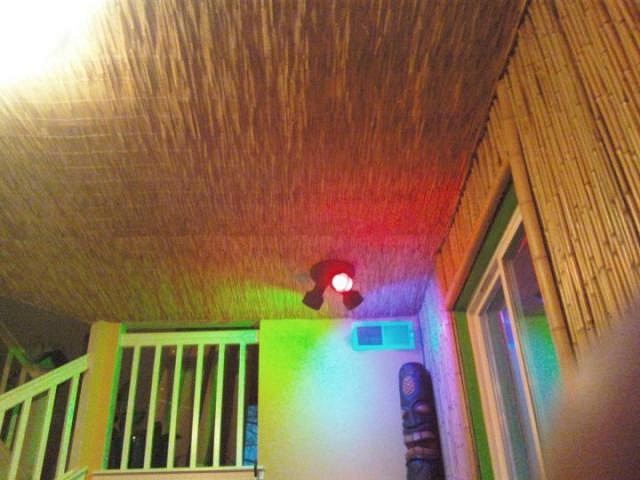
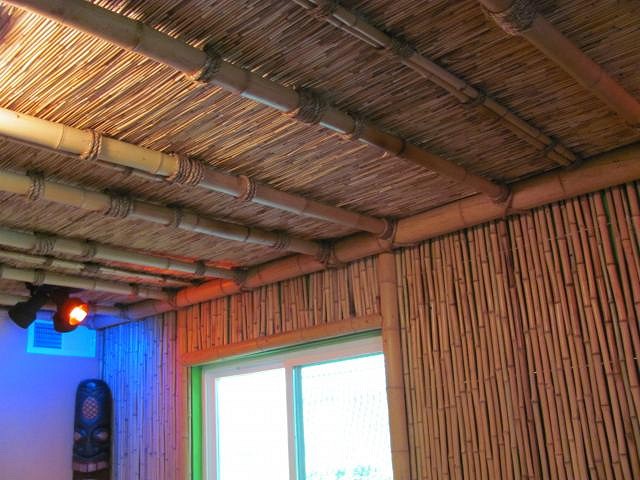
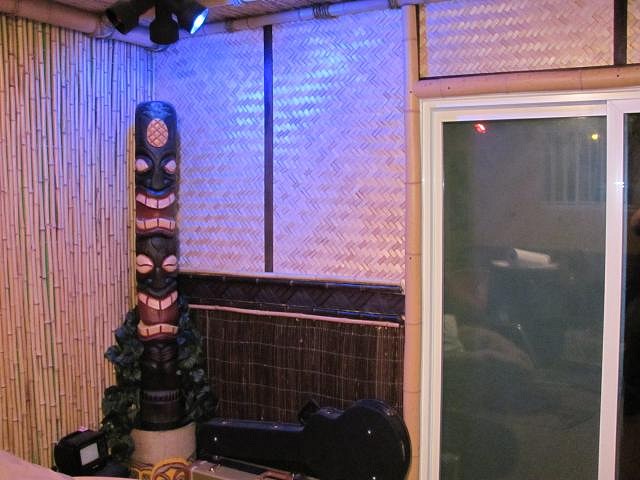
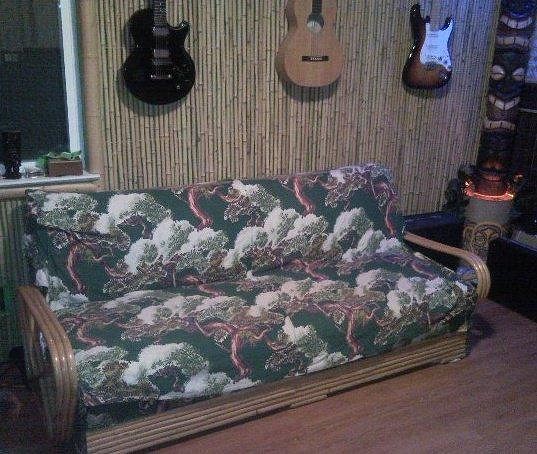
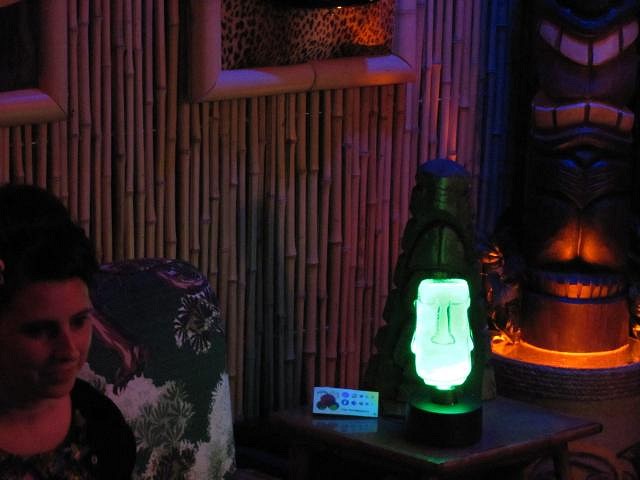
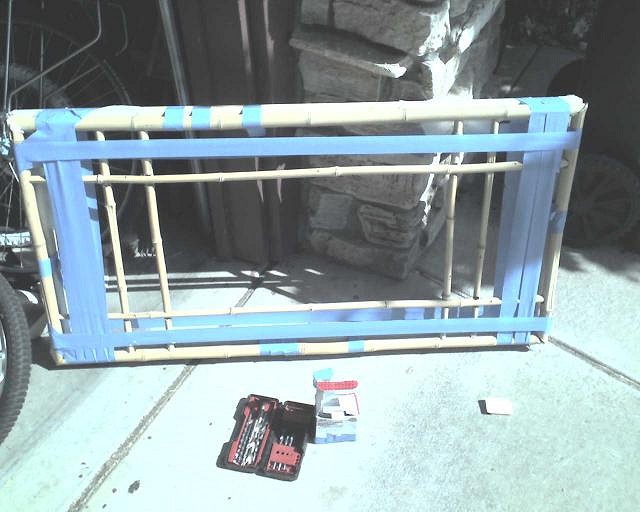
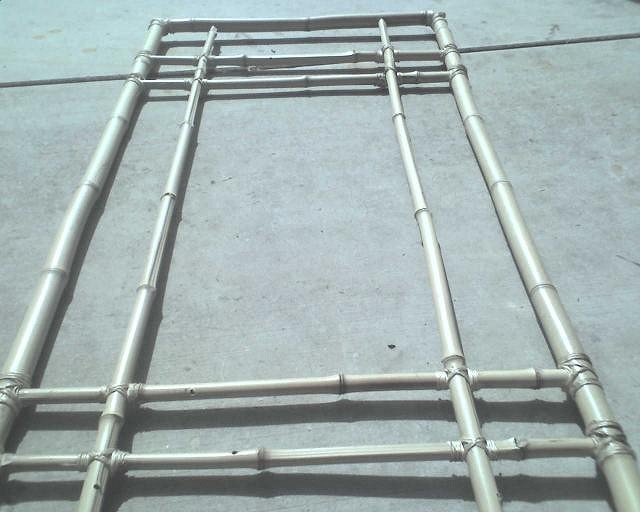
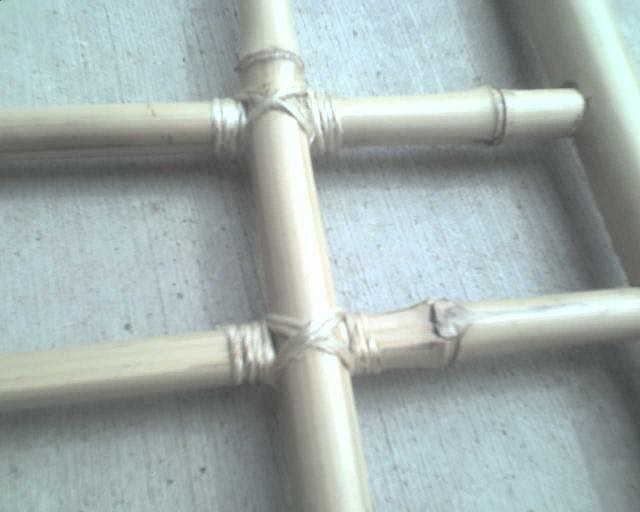
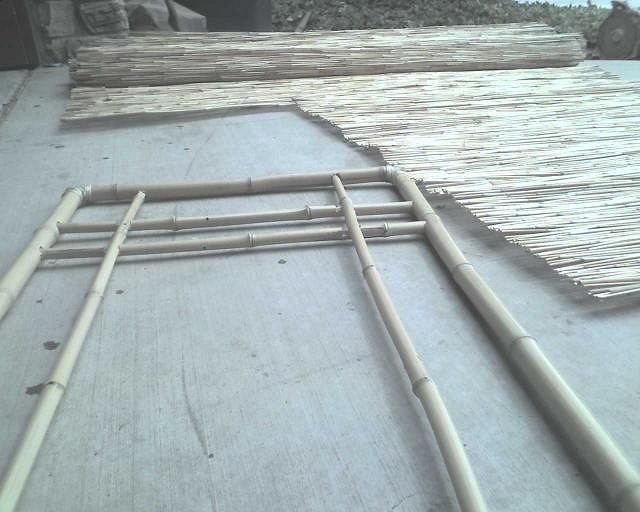
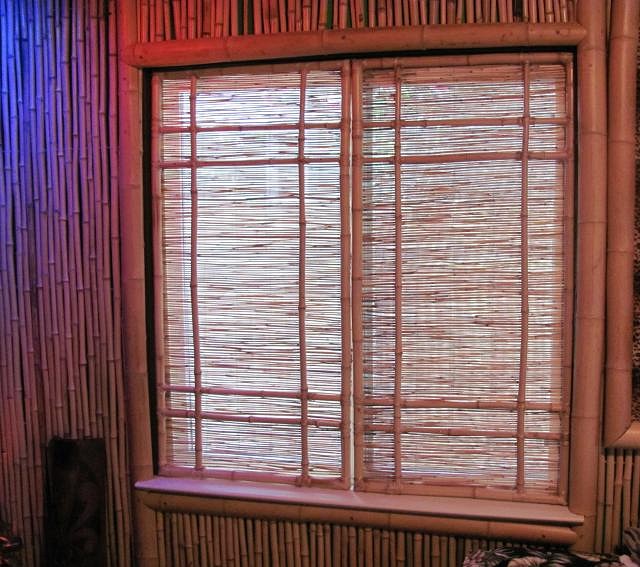
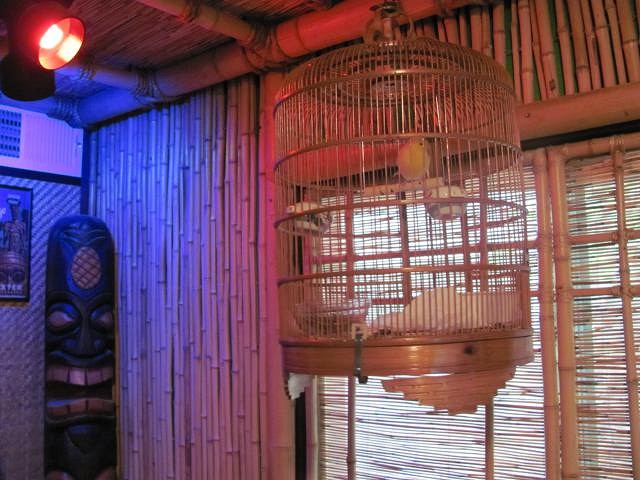
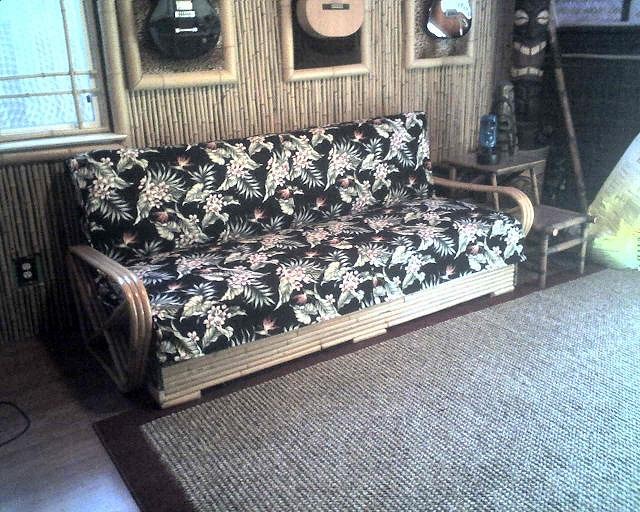
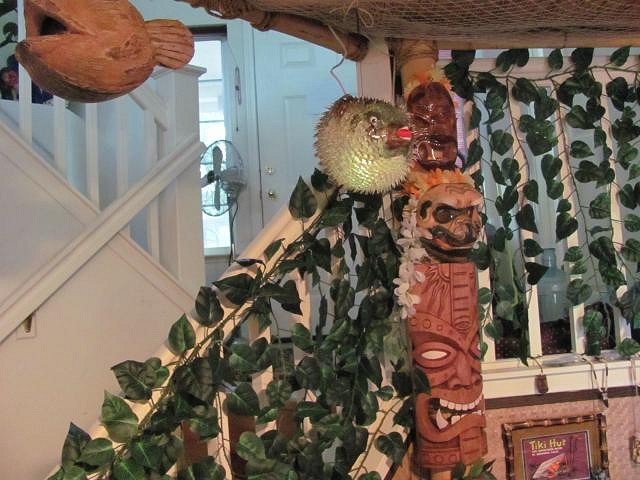
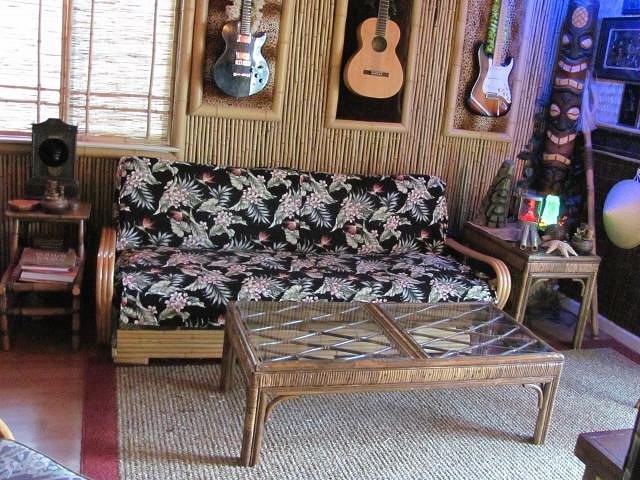
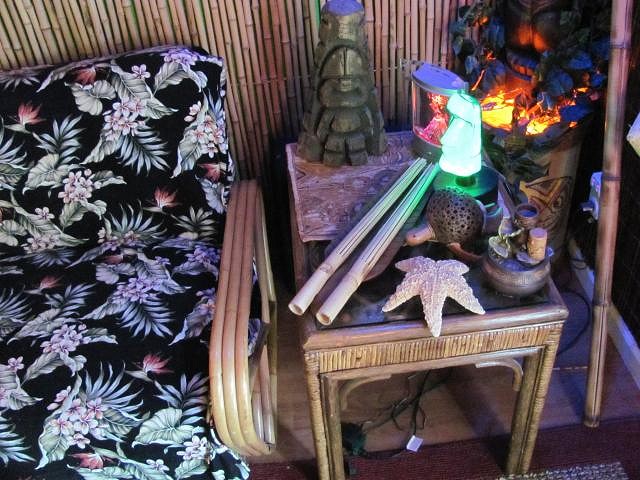
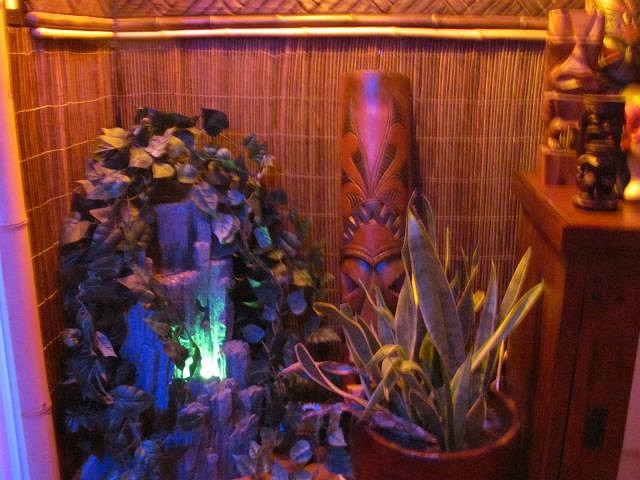
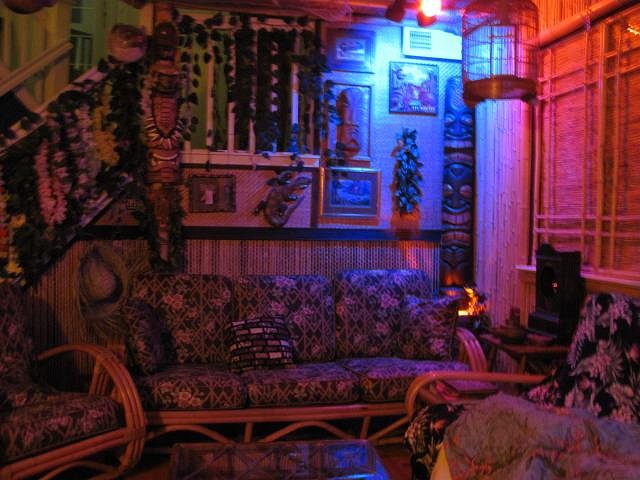
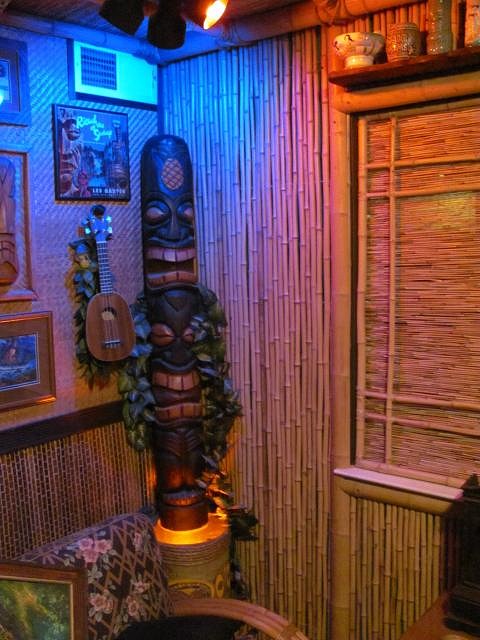
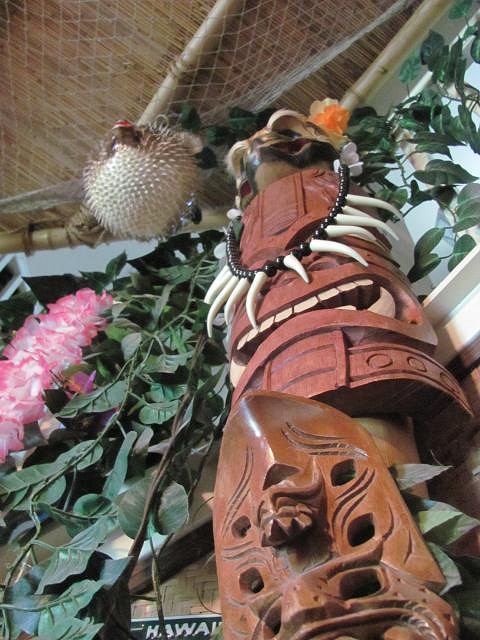
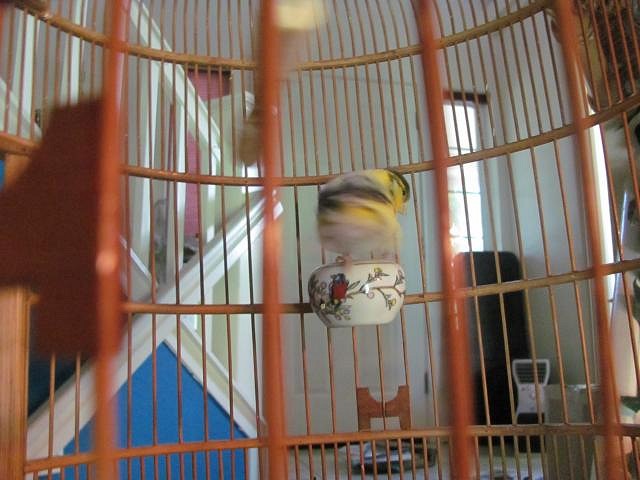
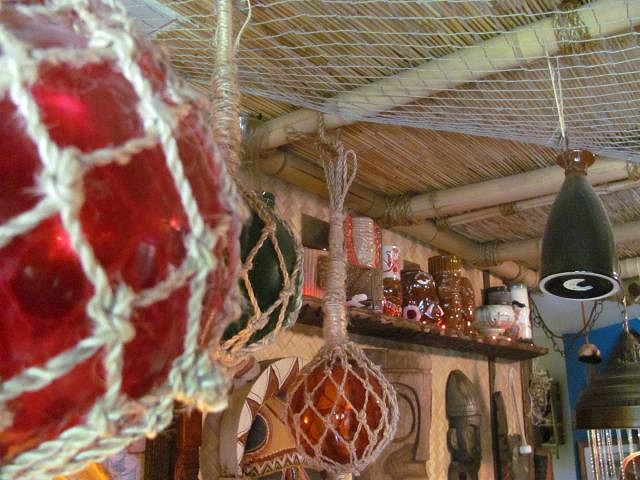
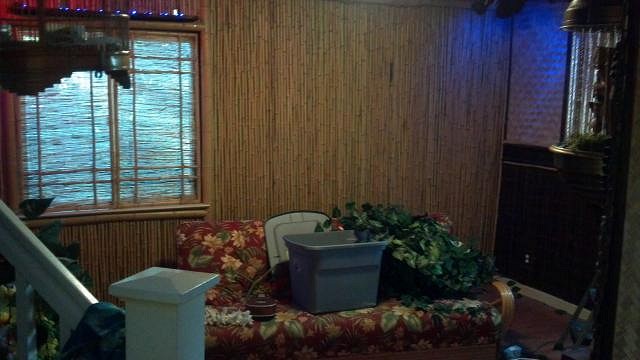
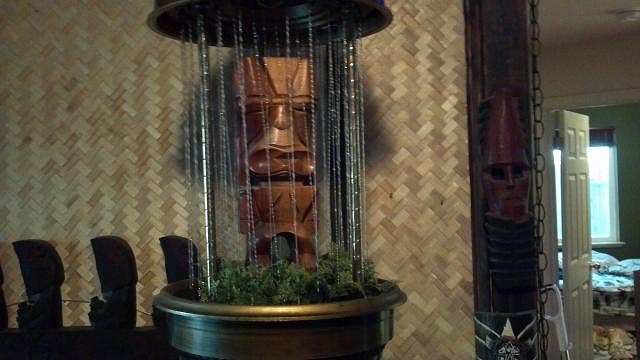
Hey all, here's the latest progress... So, my idea for windows coverings was to copy the ones thay have at Disneyland's Enchanted Tiki Room. It took me awhile to figure out how to the join the frame together. I finally decided on constructing a gluing jig to strap the frame into while the joints were glued and dried. After a lot of gluing and a little improvising to fix unexpected problems I had my frames. It was time to add lashings. And... voila! They're done! The big reward on this project came when we had a guest over and the first thing she said upon entering the room was "Wow, those windows are just like Disneyland's!". I've also added some new decorations and accents over the past couple of months - New bird New couch (and banister treatment) New masks New couch cover not so new fountain After countless requests from guests... I finally caved and got a puffer According to a Hawaiian friend of mine, it is extremely bad luck to have open mouthed tiki's inside one's home. She promptly provided some Hawaiian salt to rectify the situation (in an attractive lauhala box, too).
The grand opening of the Walls of Voodoo is in just a couple of weeks (June 11th). I'm hoping to finish putting up more decorations on the walls. I'll be working on a simple rain effect that will go behind the window coverings I just put up. If all goes well, I'm hoping to get a shelf up along the top of one of the walls for mugs. Also, I'd like to install reflective sheet metal inside to the tiki pole support columns to shoot more light up the front of the tiki poles. Not much time left, so I've got my work cut out for me... mahalo, [ Edited by: markmywords 2011-05-30 22:32 ] [ Edited by: markmywords 2011-05-30 22:43 ] [ Edited by: markmywords 2011-05-31 00:01 ] [ Edited by: markmywords 2011-05-31 07:49 ] |
|
M
markmywords
Posted
posted
on
Sun, Feb 5, 2012 11:19 PM
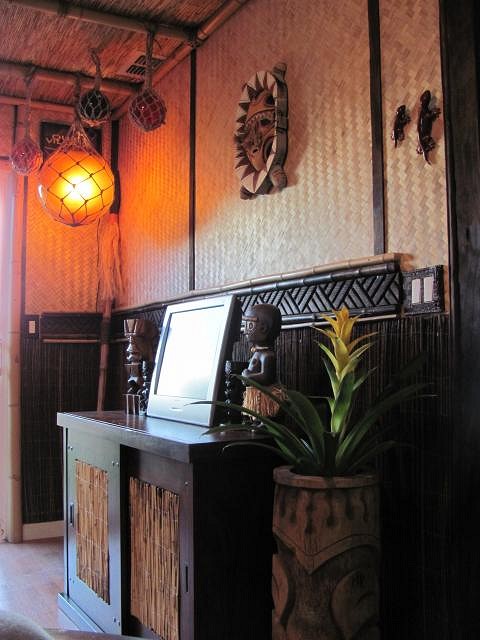
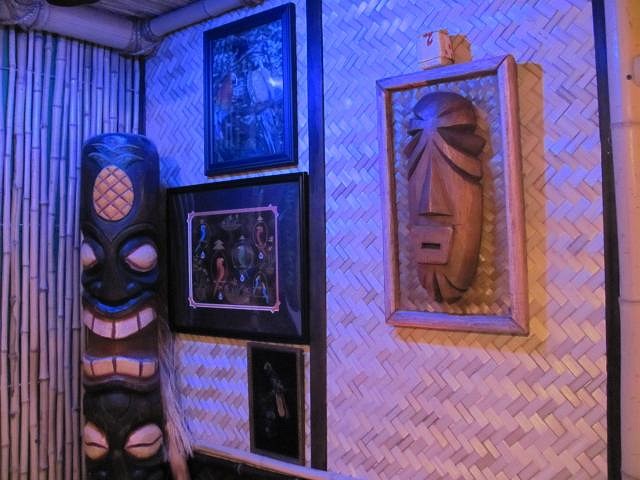
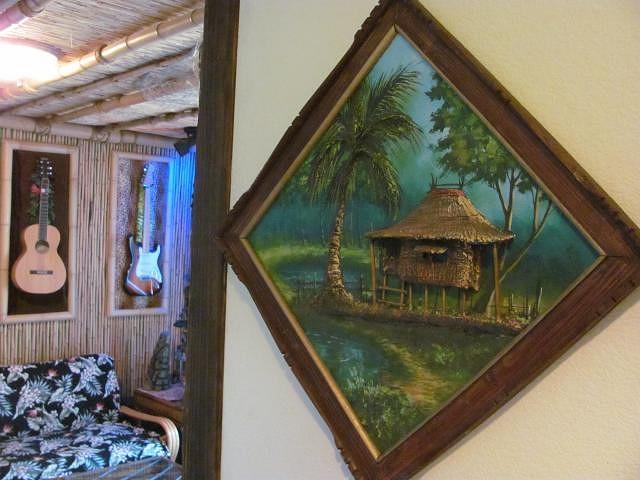
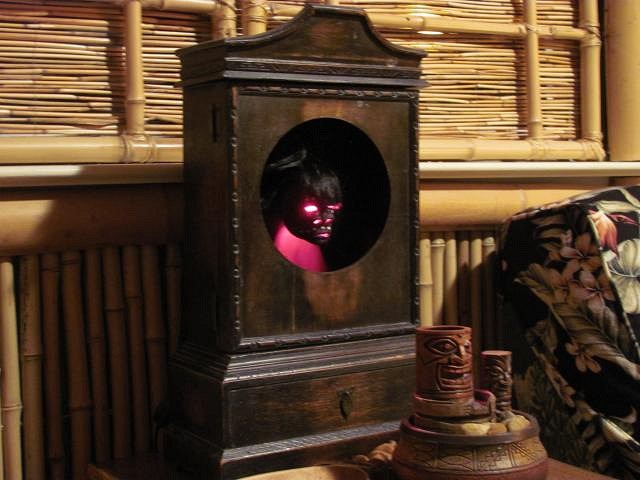
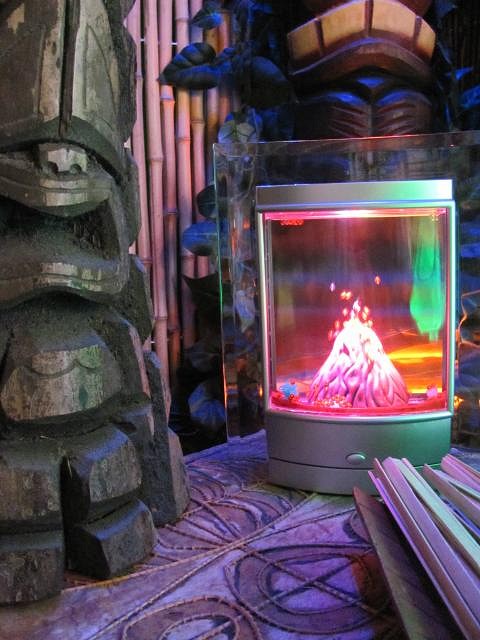
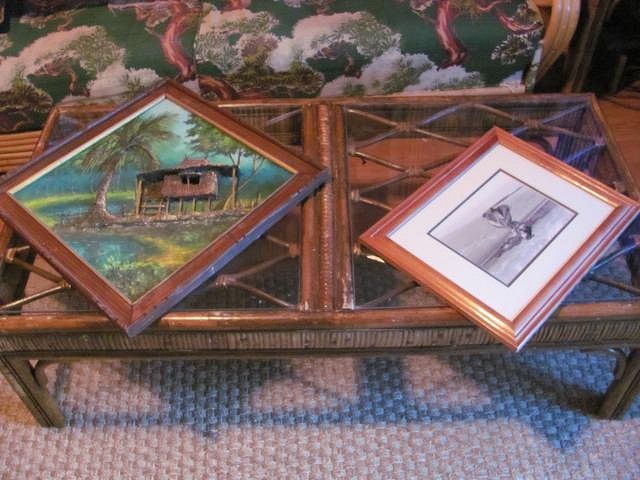
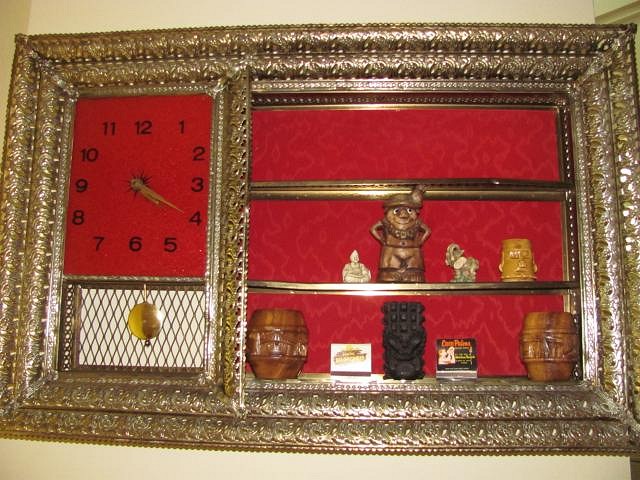
Hey all, I finally got around to working on the entertainment console. The reed treatment I had put on the doors was never supposed to be a final solution and had started to fall apart. Bamboo planks are so much better. I still am searching for ideas on what to do with the TV itself. Any suggestions, anyone? My wife is suggesting enclosing it somehow in a close-able cabinet with witco-style art integrated into it. I acquired this lovely picture from TikiTim My wife picked up this coffee table and a sidetable from craig's list. These are probably the last pieces of furniture to be added to the room. New shelf for the tiki mugs Here is a better picture of the fountain that I originally showed last update Meet Shrunken Head Fred! My youngest son had been lobbying for a shrunken head for the Walls of Voodoo for some time. After taking a look at some of the "Authentic" looking reproductions at Tiki Oasis, I decided that they were probably a little too detailed and gruesome. This lit, vinyl head does the trick just fine. Fred sat in a drawer for several months until I found him a home (a lovely wooden clock cabinet from the local thrift store) This guy is destined for greater things! Right now, it may just be a tacky, plastic volcano. We will eventually be transplanting him into the mouth of a custom carved tiki. Until then, he can keep the plasma moai company... A few new items in this corner. Shrunken head by Tiki Tony It took me about ten shots to get one that looked decent. Low level photography is very challenging, especially with no tripod. That's it for now! I'm planning to start honing my wood carving skills as I would like to add some carved planks onto the stairway banister. I will be adding another carved shelf sometime soon. Also, At some point all of the vintage polynesian related post cards that I've collected over the years are going to start being put up... Thanks for looking! Mahalo, [ Edited by: markmywords 2012-02-05 23:36 ] |
|
K

komohana
Posted
posted
on
Mon, Feb 6, 2012 12:51 AM
looking great, with some very stylish touches. i love how things come together, for the t.v., i'm gonna borrow the idea of hiding it in a wooden crate |
|
P

Polynesiac
Posted
posted
on
Mon, Feb 6, 2012 1:27 PM
Great looking tiki space, it looks very cozy and inviting. I especially like how you incorporated your musical instruments. Very well done!
Great idea! that works very well. There is a thread HERE that discusses installing a (hanging) tv into a tiki bar, but several suggestions and images came up with how to disguise a tv as well. Good luck with your home tiki bar!! It's looking really good! |
|
K

Kanu
Posted
posted
on
Mon, Feb 6, 2012 5:54 PM
Excellent space! Out of curiosity, how'd you hang that 4" support pole on the ceiling? Just screwed it to the wall through the openings you cut for the cross pieces? Looks fantastic. |
|
V
VampiressRN
Posted
posted
on
Mon, Feb 6, 2012 6:14 PM
Really looking great. I don't know who is coordinating our Sacramento Home Crawl this year, but you might want to throw your hat in the ring to host, it's really great fun!!! |
|
M
markmywords
Posted
posted
on
Mon, Feb 6, 2012 6:24 PM
I used a long drill bit (12") to drill access holes into the 4" and a smaller pilot hole for the mounting screw directly opposed from the access hole. I used 4" screws and carefully guided them into the pole and through the pilot using a magnetic screw tip. It was somewhat tricky. I lost quite a few screws inside the pole as they tended to fall off the screw tip at the slightest bump. I have no doubt that the above is definitely the "Hard way" and there most certainly has to be a smarter way of mounting larger beams like that. Also, there are no holes for the cross beams. All cross beams are hung from furring strips. All the lashings are totally faux and just glued on. All those lashings and rope accents serve to cover lots and lots of joints and screw holes. :) -mark [ Edited by: markmywords 2012-12-27 21:46 ] |
|
M
markmywords
Posted
posted
on
Mon, Feb 6, 2012 6:35 PM
Wow, that suitcase camouflage job from that thread is really incredible! I'm definitely going to nick the swivel mount idea from that. To be honest, I've really been stalling on this particular project. I'd rather not have the TV in there at all, but the fact is our one regular, monthly tiki gathering is a movie night ala "South Seas Sin-ema". So it has to stay. I've just got to figure out a stylish way to make it disappear the rest of the time when it's not being used. -Mark |
|
M
markmywords
Posted
posted
on
Tue, Feb 7, 2012 1:14 PM
Thanks Vampiress! |
|
M
markmywords
Posted
posted
on
Thu, Feb 9, 2012 8:15 PM
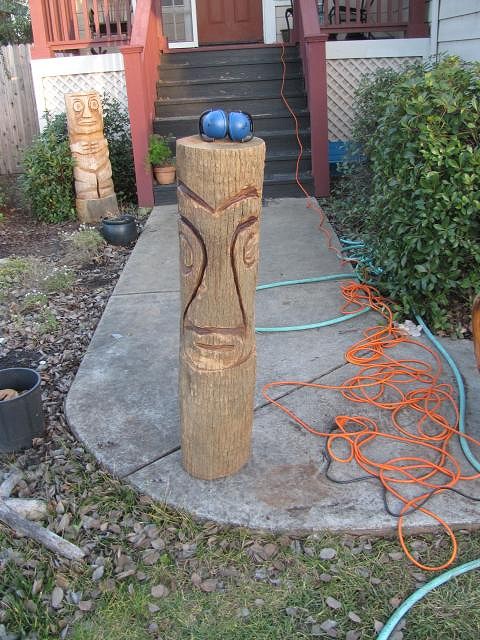
The Walls of Voodoo official Tiki mug is getting ready for the kiln: Courtesy of resident artist Cap'n Sal, who has made at least one previous contribution to the tiki-ness of our house's surroundings: |
|
FT

forgotten tikiman
Posted
posted
on
Thu, Feb 9, 2012 8:35 PM
Lovin this tiki room. What you did with the guitars and stuff. Great idea!!! :D |
|
M
markmywords
Posted
posted
on
Thu, Feb 9, 2012 8:41 PM
Guitar frames were actually my wife's (Cap'n Sal) idea. She's got lotsa good ideas rattling around in that head of hers... |
|
Q

Q-tiki
Posted
posted
on
Fri, Feb 10, 2012 2:28 PM
Wow... What a fantastic transformation! Great job and congrats on a fine tiki space. |
|
M
markmywords
Posted
posted
on
Mon, Mar 19, 2012 11:56 PM
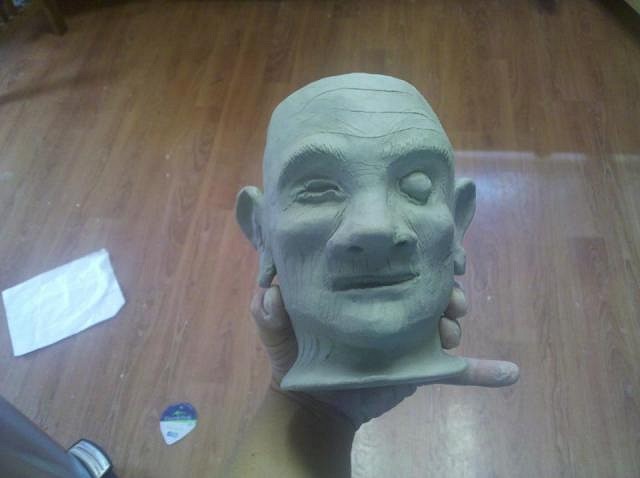
Cap'n Sal has been busy crafting another addition to grace the shelves of the Walls of Voodoo. Behold the WOV Zombie mug - He's drying out waiting for first firing. His buddy (see previous post) is ready for glazing. Both should be quite interesting as we have never actually fired anything in the kiln we picked up years ago (always used the ceramics center kiln). We'll do some tests first and hopefully everything goes ok... As for me... my efforts have been relegated to practicing with the router and dremel routers for the last several weeks. Cap'n Sal has been kind enough to draw up some larger designs for me to practice on. No pics yet. Working with the routers is quite harder than I thought. I had been a big admirer of Monkeyman's routing work before - now that I've had a go at it I'm even more in awe! It'll probably be at least a month more before I feel comfortable enough to start working on real pieces meant for installation. [ Edited by: markmywords 2012-03-19 23:59 ] |
|
H

hang10tiki
Posted
posted
on
Tue, Mar 20, 2012 7:16 PM
Sweet |
|
T

Tiki-kitty
Posted
posted
on
Wed, May 9, 2012 12:13 PM
I love the real birdie in your tiki room! Nice touch :) Tiki Kitty |
|
B

bigbrotiki
Posted
posted
on
Sat, May 12, 2012 9:33 PM
Wow, this frolic room has come together real nicely! I especially like all the individual touches, like the faux window, the shrunken head cabinet, and even the cheesy mini volcano. It reminds me about what I loved about the Tiki Ti when I first came upon it, and what is so great about Tiki style: The way it inspires folk to come up with their own interpretations and individual touches that add to the theme, and the playfulness of it all. It's all for adults that don't wanna stop playing, and it's infectious that way. |
|
M

MadDogMike
Posted
posted
on
Sat, May 12, 2012 10:08 PM
MarkMyWords, I don't know how I missed your great build! Everything looks perfect! Sounds like you have boosted your construction IQ on this one, great problem solving and determination. How did the WOV Zombie Mug turn out? |
|
M
markmywords
Posted
posted
on
Tue, May 15, 2012 9:07 AM
Thanks everyone for all the kind words and encouragement! Unfortunately, I haven't had much time to work on the tiki room over the past couple of months. Hopefully that will change soon. The two mugs are getting close to being finished. The zombie head is currently being biscuit fired. After that, it'll be glazed (should be easy - very simple paint scheme for that guy). The psycho-tiki has been glazed and ready to be glost-fired. I've been stalling on him for quite awhile. I just couldn't come up with a color scheme that I liked. I finally took inspiration from Disney's "Princess and the Frog"'s voodoo scenes. Lots of dark purple, acid green and red. Hopefully he'll look good when he comes out of the kiln. That firing will be the first in Cap'n Sal's home kiln. Wish us luck! |
|
M
markmywords
Posted
posted
on
Tue, Dec 25, 2012 6:34 PM
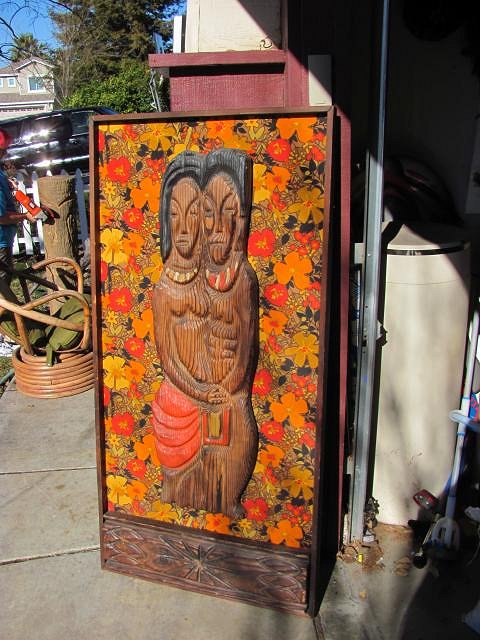
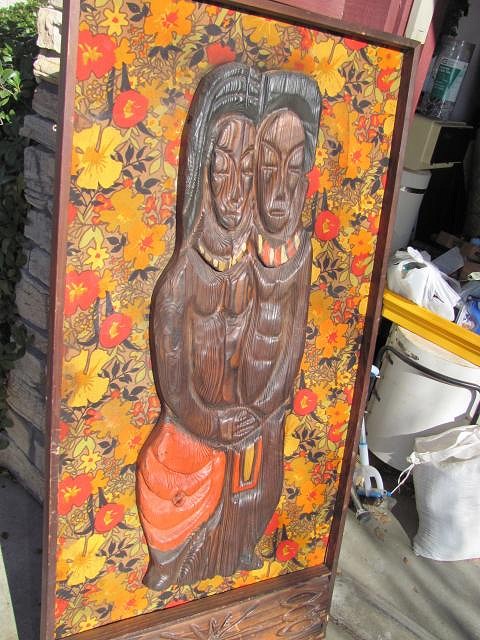
Hey all, These fine pieces once hung at Sacramento's Coral Reef. My family teamed up to score these for me as probably the biggest surprise Christmas gift ever!
I'm still in awe and will be doing some research for more info on these. I'll be hanging at least one of these in the room this week. Stay tuned for better pix! mahalo [ Edited by: markmywords 2012-12-25 21:39 ] [ Edited by: markmywords 2012-12-26 01:11 ] |
|
T

Tabu
Posted
posted
on
Fri, Dec 28, 2012 7:11 AM
Wow. What a great room. The hard work payed off. You have added so many nice details. |
|
M
markmywords
Posted
posted
on
Sun, Jan 20, 2013 8:35 PM
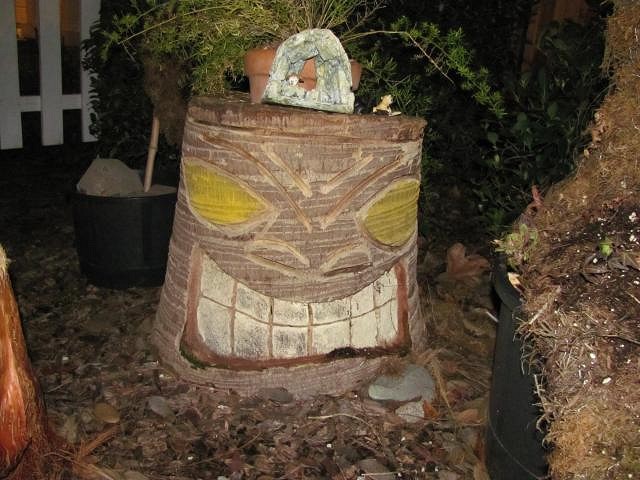
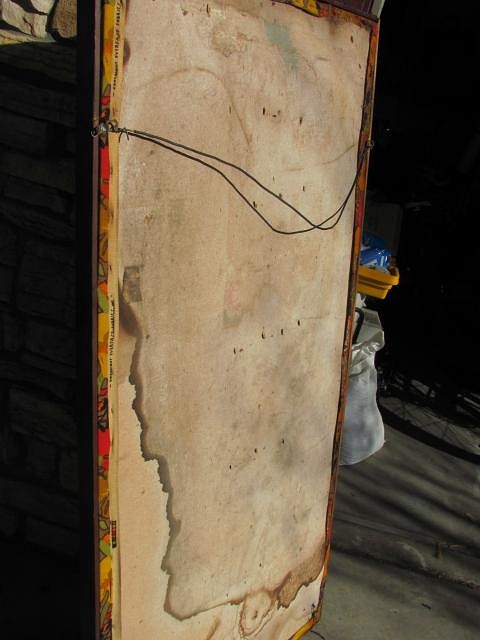
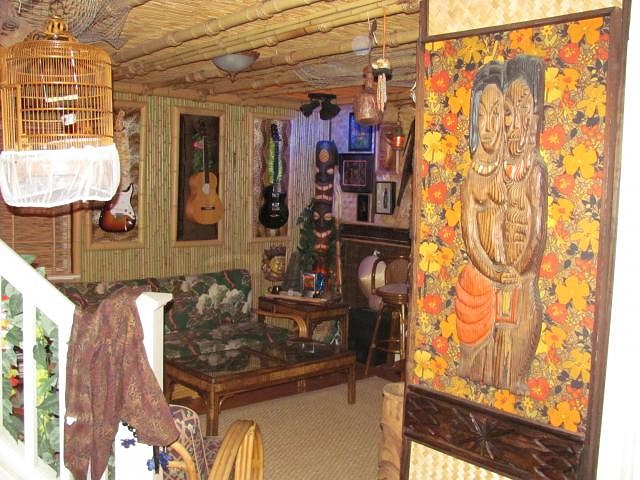
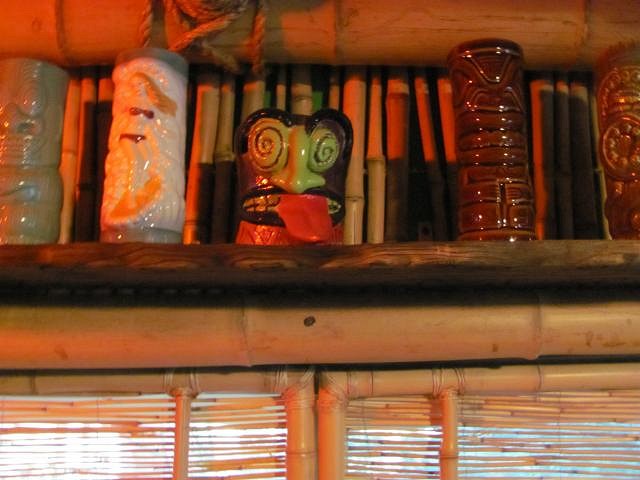
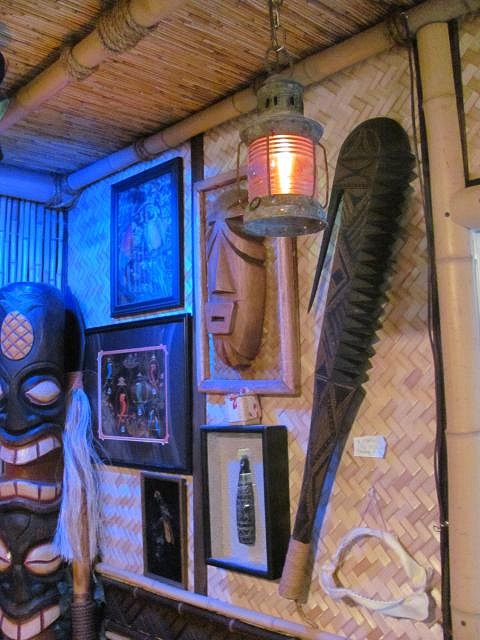
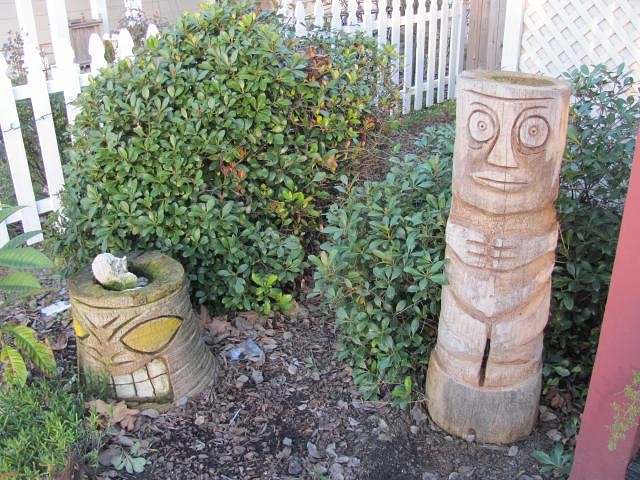
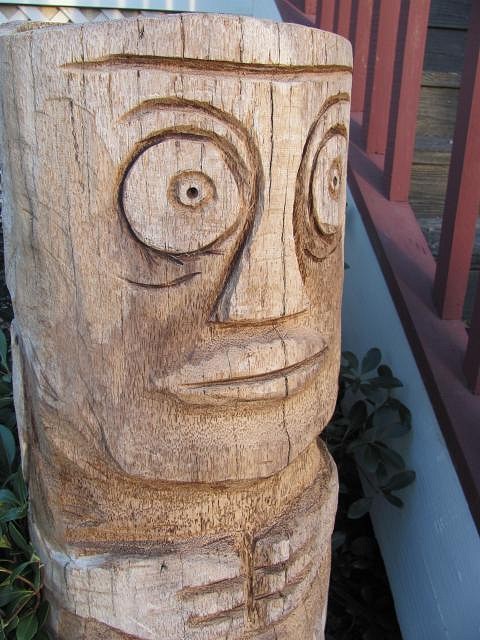
So, after the shock and awe wore off after receiving a couple of large, vintage Witco pieces for xmas, I realized that hanging them was going to be anything but simple. First, a little about the pieces themselves... Luckily enough, it didn't take more than a quick trip through the pages of "Tiki Modern" to figure out what I had acquired: "Tahitian Lovers" (witco catalog w-26). Here's one of the two getting ready for clean up and scuff fixing: I had originally spotted these two pieces in craigslist back in November. The seller had purchased them as part of a storage locker that belonged to the owners of the Coral Reef Restaurant in Sacramento. At the time, I really wanted them, but with Christmas coming up, there was no way I could justify buying extravagant tiki items for myself. I told my wife about them and thought nothing else about it, other than noticing the next day that the ad was gone from craigslist. Apparently, my wife had swept into action the very next morning after we had looked at the ad. She convinced her Mom and my Father to team up on the purchase price. Her Mom then jumped into her car (with my sister in-law, the other tiki-phile in the family)and drove from Sacramento to Richmond. Upon arrival, the seller started to balk a little, as they had received several other offers by phone for more than the advertised price. Luckily, they agreed to honor the original price. Originally the plan was to purchase one of the two pieces (the one in better condition). Upon hearing the heritage of the pieces, My sister in-law (bless her soul) insisted that the set should NOT be broken up and convinced her mom to purchase both. The deal was made and the witco was smuggled back to Davis and hidden until Christmas. Anyhow, my original idea was to hang one of them on the wall at the bottom of the stairs and the other on the wall between two of the guitars. Immediately I realized I had a problem. These things are SO DAMN BIG. We're talking 2 1/2' x 5'. If I put one on the wall at the bottom of the stairs, it would overhang the trip piece bordering the tiki room. So, no just hanging the thing up and calling it wonderful. Of course, if I'm going to have to pull down that trim, I might as well do that whole section of wall with bamboo backing and trim. Expanding the tiki room outside of it's original boundaries. This is a brave new world... The original line of demarcation for the walls of voodoo: Proposed annex: Of course with progress, comes sacrifice. A couple of evictions had to be served. I haven't done walls in a long time, so a quick inventory was required. Glad I didn't toss this stuff out like the missus urged me to. Aha! There it is! I spent most of a Saturday repairing the witco itself. They didn't need much. I decided the original D ring hangers were in good enough shape to re-use. One of the pieces was missing its hanging wire. Both needed touch up for minor scuffs. BTW, here's the "Lesser" of the two pieces. It has some water damage and resulting warping of the backing board. Ugh... not pretty: Sunday was spent hanging backing and cutting and charring trim pieces. At last everything was ready for hanging: View from our front door landing: The whole thing was more work that I had intially anticipated, but it looks really nice. Of course, now the family is telling me that I can't stop at that one wall section. I have to do the entire downstairs common areas! We'll see... Right now I know you're asking "So, where's the other witco piece hanging?". Unfortunately, It's not. To be honest, I really don't know what to do with it. After thinking about it, I'd really hate to break up the three guitars by replacing the middle one with the witco. So, where else could it go? The only space that I have even close to 2 1/2' is in the corner near one of the big tikis: The space between the wall and the window trim is just under 30", meaning that if I was to hang the other "Tahitian Lovers" here, it would partially overlap the window trim. Plus, it's going to stick out from the wall a bit because the back is warped. Plus, part of it will be obscured by the large tiki in the corner. Plus, I'm sorta worried the whole thing will potentially collapse under it's own weight because of the damage to the backing board. What to do, what to do? I'm sorely tempted to try to restore the piece by replacing the backing board. On the other hand, I've always understood that leaving something like this as original as possible (even damaged) is generally the best thing to do. Any Witco experts out there? What do you think? So, for the time being, It will be stored for future unveiling. Here are the other additions to the Walls of Voodoo that have been made over the past several months: New mug shelf New "Walls of Voodoo" mascot mug, custom by Cap'n Sal Monkey head and old bottle: Ship's lantern and shark jaws This one's not strictly "Tiki", but I like its loungetastic-vibe and I'm currently populating it with smaller collectibles (tiki shot glasses, matchbooks, etc...) Thanks to Cap'n Sal's efforts, our tiki-garden is growing: That's it for right now. I'm planning on tackling trim next. Baseboards, stair railings, etc. Still trying to hone my router carving skills... Mahalo! -mark mywords [ Edited by: markmywords 2013-01-20 20:40 ] |
|
M
markmywords
Posted
posted
on
Sat, May 31, 2014 2:39 PM
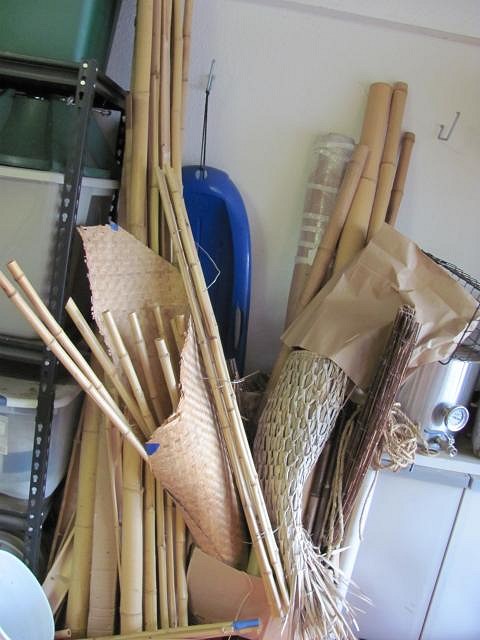
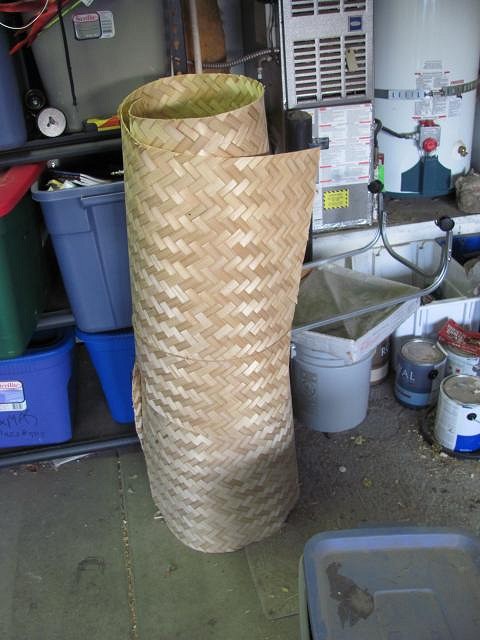
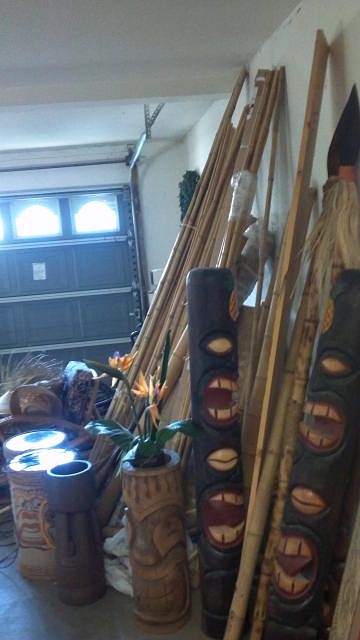
Well, it's been a hella long time since an update. So here we go... Sadly, all good things must come to an end. It breaks my heart to report that the Walls of Voodoo will be closing it's doors immediately. The good news is that we will be reopening for business in the very near future. Cap'n Sal, myself and the Sira Menehunes will be relocating to North-West Sacramento (the strange natives that live there call it "Woodland", personally I have a hard time pronouncing that word). The new digs have a room. The native gods have spoken to me and demanded that I construct a suitable environment in their honor. What choice have I than to obey. Depending of course on how much we clear on the sale of the Davis tiki-palace, of course... So, join me now in remembering our humble Walls of Voodoo. Aloha, WOV!
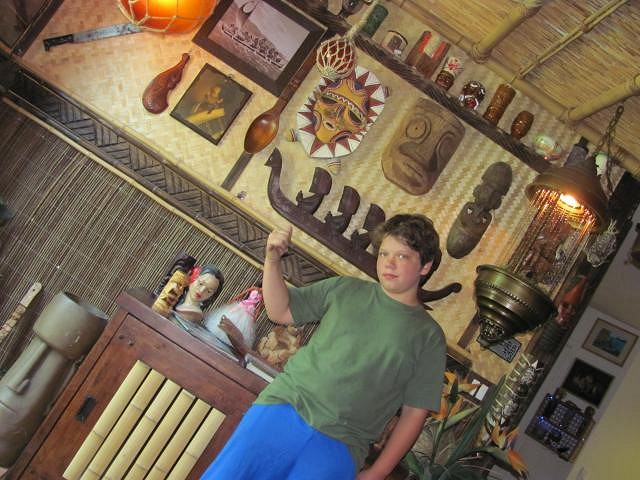
Ian tries his hand at re-creating Lloyd's iconic profile picture The wild, majestic Albino Bob!
Walls of Voodoo mascot "Unlei-ki-lei-ki" stops moving (sorta) long enough to wave his tail feathers goodbye Aww, the emotion is too much... the obligatory shaka from Colin We always meant to get around to adding little notes to pin up throughout the Walls of Voodoo (ala Trader Sam's). The tag for this was going to be something like "When at the Bora-Bora Cafe, do not try the "Jungle Lobster"" That's it for right now. I will be documenting the tear down. Which starts today. mahalo, |
|
PP

Pele Paul
Posted
posted
on
Sat, May 31, 2014 4:11 PM
OMG is that a Manos the hands of faith T-shirt that young man is wearing from MST3K??? lol best show ever! [ Edited by: Pele Paul 2014-05-31 16:15 ] |
|
V
VampiressRN
Posted
posted
on
Sat, May 31, 2014 4:56 PM
Well Mark, glad I got to experience your lounge and looking forward to the new build when you move. At least you had all that practice!!! Maybe 2015 crawl can swing by your new digs? |
|
M

MaukaHale
Posted
posted
on
Sat, May 31, 2014 5:29 PM
The Walls of Voodoo was an inspiration for me at the last crawl. It gave me some great ideas for my tiki haven. Good luck with the new digs and the new build. |
|
M
markmywords
Posted
posted
on
Sat, May 31, 2014 5:38 PM
Oh definitely! We will totally host a stop in 2015! |
|
V
VampiressRN
Posted
posted
on
Sat, May 31, 2014 6:28 PM
Sounds like a plan...looking forward to it. |
|
M
markmywords
Posted
posted
on
Sun, Jun 1, 2014 9:44 AM
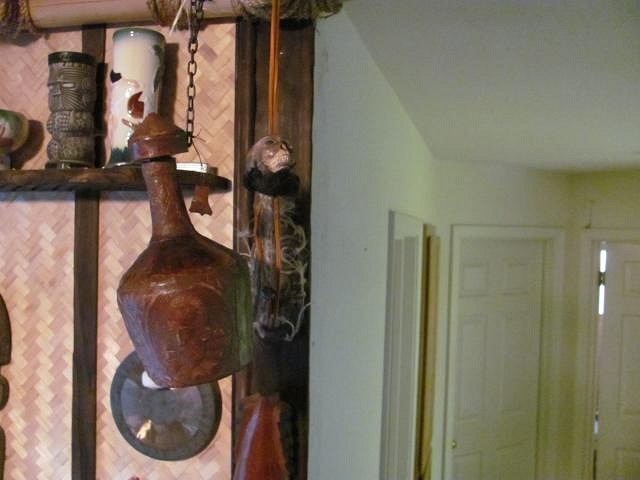
6/1/14: De-tikification continues.
How the hell do you move a tiki oil-lamp without making a complete mess? Tiki Room (some assembly required) Taking down float lamp,floats, mugs and mug shelves this morning. taking down wall/ceiling coverings this afternoon. -mmw |
|
PP
Pele Paul
Posted
posted
on
Sun, Jun 1, 2014 9:53 AM
love your bamboo window cover did you make that? looks like the window at the enchanted tiki room!!!! |
|
M
markmywords
Posted
posted
on
Sun, Jun 1, 2014 10:34 AM
Thanks! Yep, I built them. I'm a little sad that I never got the chance to build the same type of covering for the sliding door. Check out page 2 of this thread, it shows their construction. [ Edited by: markmywords 2014-06-01 10:35 ] |