Tiki Central / Home Tiki Bars
Moku Ana
Pages: 1 12 replies
|
L

Luki
Posted
posted
on
Fri, Sep 23, 2011 6:00 AM
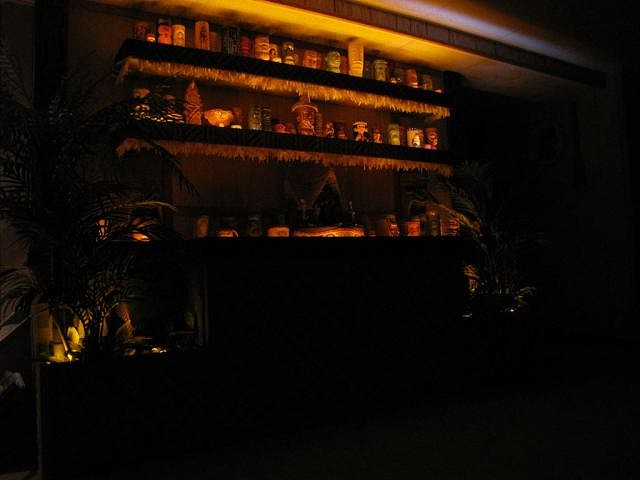
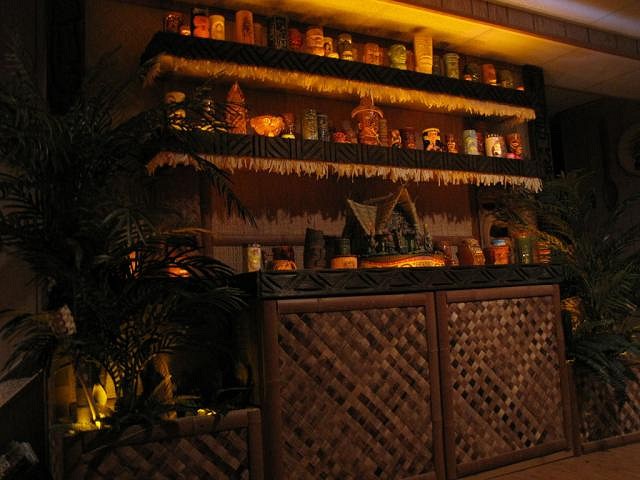
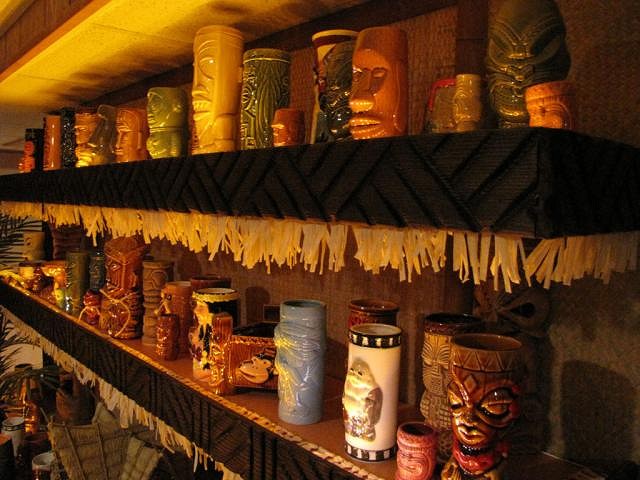
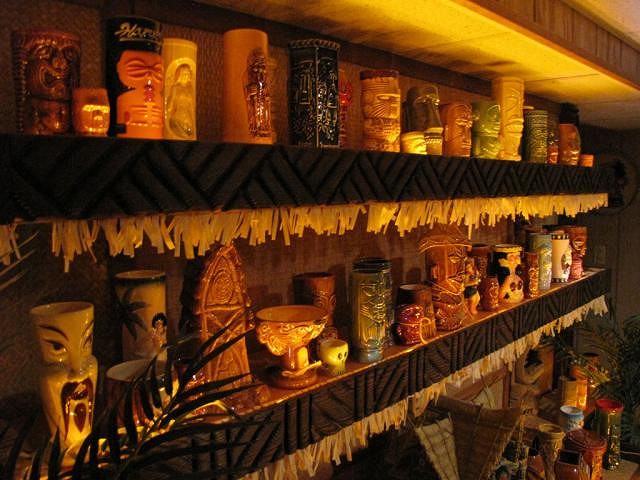
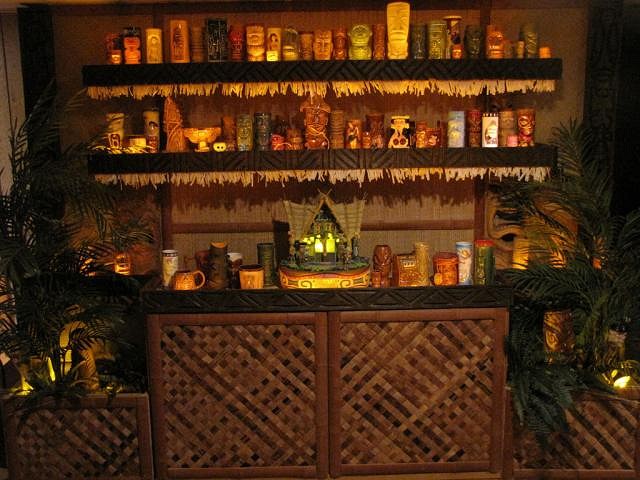
Ok, so we just moved to this house in May and I've been slowly working on Phase 1 of my "Moku Ana" tiki lounge in the basement: The mug display. I don't have a ton of mugs but so far I'm happy with how things are looking. Not sure when I'll get around to expanding the theme in the rest of the lounge but at least this is a start :) This first one is with display lighting only, but of course is a bit hard to see: The rest of these are with other standard room lighting on and show different angles and details:
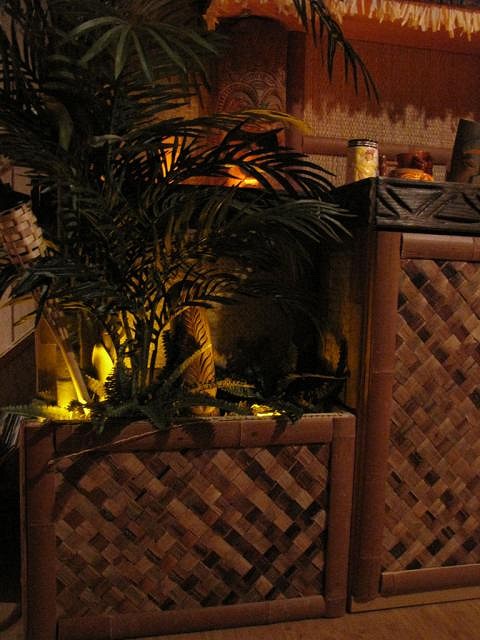
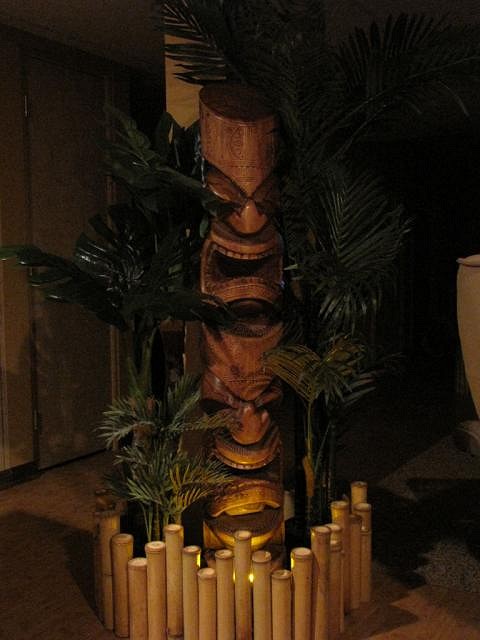
This last one is one of the first other areas that I'm working on. I like a lot of foliage so this little post-covering area's starting to come together. I'm gonna add more theme lighting and I may wrap the post and trim it out with bamboo, too. [ Edited by: Luki 2011-09-23 06:04 ] [ Edited by: Luki 2011-09-23 06:04 ] |
|
N

notebooms
Posted
posted
on
Fri, Sep 23, 2011 7:55 AM
nice. dig the carving and lighting w plants... thanks for sharing -scott noteboom |
|
FT

forgotten tikiman
Posted
posted
on
Fri, Sep 23, 2011 10:29 AM
This is way cool!!! Really diggin the look of the bar and decorations. Nice work so far. :) |
|
BB

Bongo Bungalow
Posted
posted
on
Fri, Sep 23, 2011 12:52 PM
You've got a really nice look going. I like the darker tones; very mysterious. What do ya mean you don't have a ton of mugs?! Nice collection, I'd say. |
|
V

VampiressRN
Posted
posted
on
Fri, Sep 23, 2011 1:08 PM
Looks great...those shelves are really nice!!! |
|
L
Luki
Posted
posted
on
Fri, Sep 23, 2011 3:35 PM
Thanks everybody for the feedback. Somebody asked me how I did the shelves, so here's what I did. The shelves are Lack shelves from Ikea (http://www.ikea.com/us/en/catalog/products/60103750/). The big base cabinet in the middle is also from Ikea, but it's quite a few years old and I don't think they make it anymore. So for the shelves, I bought some moldings from Bosko, ordering a bit more than the total length I knew I'd need. I got the "grass skirt" stuff from Party City at the beginning of the summer products season. It was called "Rafia Table Mini-Skirt". I used an electric staple gun to staple the braided edge around the front and two sides of the shelves. Then I cut the molding to the lengths I needed. Since I was doing this alone, it was a bit tricky to get the molding to press the skirt grass down over the front so that it would come out how I wanted, so I laid the molding on top of the shelf (I had it resting on a couple of small garbage cans) and then slid it down over the front and, while holding it in place, tilted everything back up on the shelf's back edge. The moldings are about 2" taller than the shelves, so I positioned it all so that about 1" went below and 1" went above. I did this because I knew I'd be adding the lighting and I didn't want to see it, just the effect of it. The lights are also from Ikea. I was being kind of picky about the color and couldn't find any rope lights that I liked, so I got these Dioder LEDs from Ikea (http://www.ikea.com/us/en/catalog/products/20119418/) (just reduced in price, btw!). They're great because they're LED, so they don't get hot of course, plus they're very low profile. They also string together with included connectors so they're great for this kind of application because you can control the length pretty easily to suit your space. But the lights are white, so I got some automotive amber film with an adhesive backing, and cut it into strips, then wrapped the strips around each light segment. The lights also come with these little screw-down mounting clips so they hold in place. I put them right along the inside edge of the molding. The only other thing I did with the shelves was get some basic L-brackets and screw them into the studs right under the shelf (the shelves have their own hidden brackets, but I was worried about the load rating). I covered the brackets with the tiki masks you see, and also put the wires from the lighting behind the masks. so that you can't see any of the wiring. The matting and bamboo trim all came from AmaZulu (and I've had very good experiences with them). The matting is a combination of bac-bac, 180-weave and seagrass mat. The bamboo is "mahogany" bamboo slat trim. I did not follow conventional wisdom at first, and nailed directly through the bamboo. A few of them split, but I didn't really think it messed with the look too much. I think each shelf took a total of about an hour to do, although it was spread out over weeks because I didn't have everything together when I started. |
|
N

newB24
Posted
posted
on
Fri, Sep 23, 2011 5:13 PM
really really sweet and thank for sharing the insider secrets.... looking good, can't wait to see more.... Good news for me, ikea less than 20 minutes away! |
|
L
Luki
Posted
posted
on
Fri, Sep 23, 2011 6:03 PM
I should add that I just nailed the Bosko molding to the shelves, with a nail every couple of feet. Also, after I was about halfway done with all the various bits of bamboo trim, I did start drilling it first. I used very few nails so I didn't have to drill that much. It's amazing how tough bamboo is...even when I was nailing without drilling first, I had to start the nails on a workbench because the bamboo was WAY too tough to nail on sideways in place. Definitely go with what people say and pre-drill the nail / screw holes! |
|
BB

Bruddah Bear
Posted
posted
on
Fri, Sep 23, 2011 8:41 PM
Beautiful job, Luki. Love the greenery too. Bear |
|
E

ErkNoLikeFire
Posted
posted
on
Fri, Sep 23, 2011 9:27 PM
Very nice! |
|
L

Longboard
Posted
posted
on
Mon, Mar 18, 2013 2:23 PM
Where did you get the cool enchanted tiki hut? Your place is looking good. |
|
L

LoriLovesTiki
Posted
posted
on
Mon, Mar 18, 2013 3:14 PM
That's quite a mug collection! Place is looking good. Love how oyu did the shelves, thanks for the steps. |
|
L
Luki
Posted
posted
on
Mon, Mar 18, 2013 5:08 PM
Thanks for the comments! Shame on me for not working on the space at all since these pix were posted, yipes! Anyway, the Enchanted Tiki Room was a Disney Big Fig that was made in very limited quantities. I happened to find one on eBay a few years back for a price that wasn't overly astronomical. There's a thread here about it from '06: I haven't seen one on eBay in quite some time. |


Pages: 1 12 replies