Tiki Central / Other Crafts
Roots Rocka's Clay Journal - New Stuff pg 11
|
T

TikiRootsRocka
Posted
posted
on
Thu, May 23, 2013 4:30 PM
Thanks Wendy! I'm happy to have a one of my pieces in the collection. As always, it was great visiting with you and Dan. |
|
M

MadDogMike
Posted
posted
on
Thu, May 23, 2013 5:19 PM
Mike it was good to see you at Tiki Caliente again. Your pieces look even better in person, photos just never seem to capture the subtleties |
|
Z

zerostreet
Posted
posted
on
Thu, May 23, 2013 5:59 PM
Awesome work! I especially love that Marquesan! |
|
T
TikiRootsRocka
Posted
posted
on
Wed, May 29, 2013 4:31 PM
Mike, great seeing you, too. |
|
M

mp
Posted
posted
on
Wed, May 29, 2013 6:12 PM
Wow! holy smokes! love it Roots! |
|
T
TikiRootsRocka
Posted
posted
on
Thu, Jun 13, 2013 10:40 AM
Thanks MP! |
|
HT

Hale Tiki
Posted
posted
on
Fri, Jun 14, 2013 8:56 AM
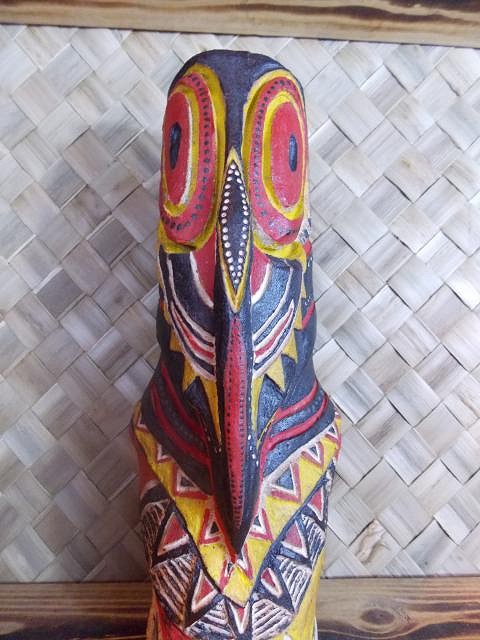
DIG THE PNG! It almost looks like a mask! I love it. And your Marq sculpt almost looks like burnt bamboo. It's eerie, and very cool. |
|
C

Chippy
Posted
posted
on
Mon, Jun 17, 2013 7:36 PM
Looking pretty darn great. Very cool. |
|
ATP

Atomic Tiki Punk
Posted
posted
on
Mon, Jun 17, 2013 7:42 PM
Mike, Each work is better then the last, nice PNG work also. |
|
T
TikiRootsRocka
Posted
posted
on
Thu, Jun 20, 2013 5:11 PM
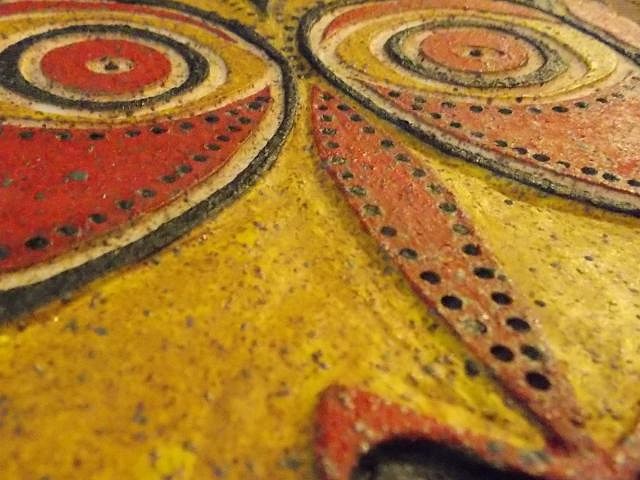
Hey Fellas! This is a coil cooking pot with PNG, Mailu Island inspired designs. Another coil pot. Not tiki, but tried adding some MCM flavor with the turquoise and orange. Tapa fogcutter Moai |
|
T
TikiRootsRocka
Posted
posted
on
Thu, Jun 27, 2013 4:14 PM
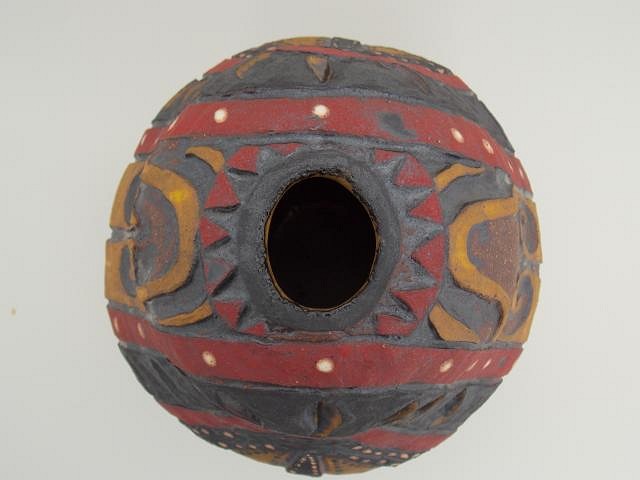
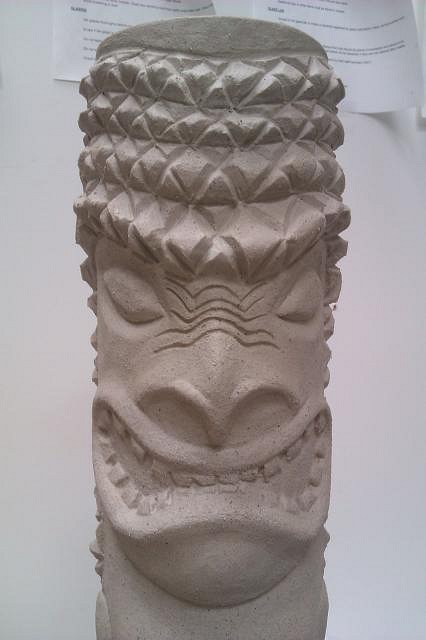
Here's a ceremonial bowl I just got back. I'm pretty sure I'll be re-glazing a few spots, to see if I can highlight a few areas better. I've never used this clay, so I'm very happy with the overall results. This is on Russian River or Red, clay. It's heavy in iron and fires pretty red. I have access to an extruder, but I like to torture myself, so I rolled all the coils. I'm not sure what's more tedious, rolling the coils, or scoring and blending them. For glazing, I coated the outside with matte black and wiped it off. Here's how it turned out.
The red and white are "non-existent," so these are the spots I'll be re-glazing. For these spots, I'm going to lightly paint the underglaze on, then rub some of it off with my fingertips. From my experience with other colored clays with lots of iron, the clay should still bust through the glaze. I'm keepin' my fingers crossed. |
|
H

hang10tiki
Posted
posted
on
Thu, Jun 27, 2013 4:59 PM
Kool Jon |
|
M

MahaloTiki
Posted
posted
on
Fri, Jun 28, 2013 10:18 AM
Looking good!! |
|
T
TikiRootsRocka
Posted
posted
on
Mon, Jul 1, 2013 10:44 AM
Always great hearing from you guys, thanks for stopping by! Ceremonial pot with full glaze, before glaze firing. My mold making disaster. This was easily preventable, but I'll take you through my learning process in another post. In the meantime, I'll be putting my Maori Warrior back together and re-sculpting my PNG Birdman a little more mold friendly. |
|
S

Sophista-tiki
Posted
posted
on
Mon, Jul 1, 2013 7:56 PM
I really love the hand built pieces, very studio potter/old school. also remember me telling you about traditional Me [ Edited by: Sophista-tiki 2013-07-01 22:42 ] |
|
D

danlovestikis
Posted
posted
on
Mon, Jul 1, 2013 9:28 PM
If it was an undercut the broke the head off you can just carve your mold to remove some plaster so your next cast will be fine. That's a good looking tiki. You are making really fun tikis and bowls. Wendy |
|
T
TikiRootsRocka
Posted
posted
on
Mon, Jul 8, 2013 4:49 PM
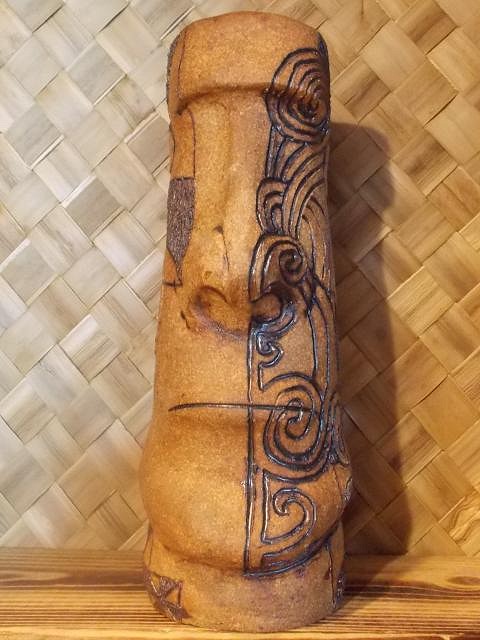
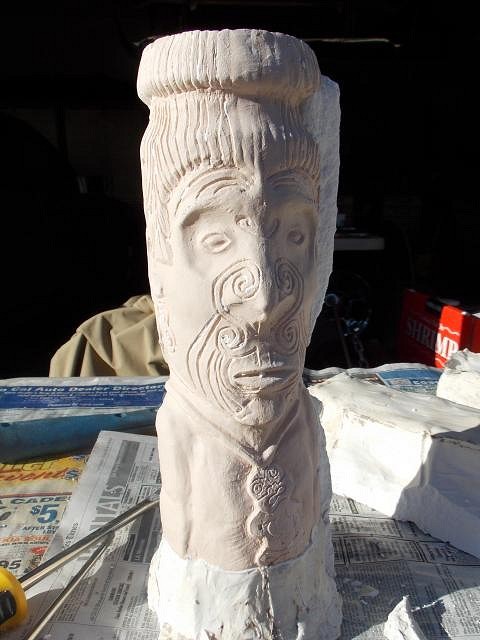
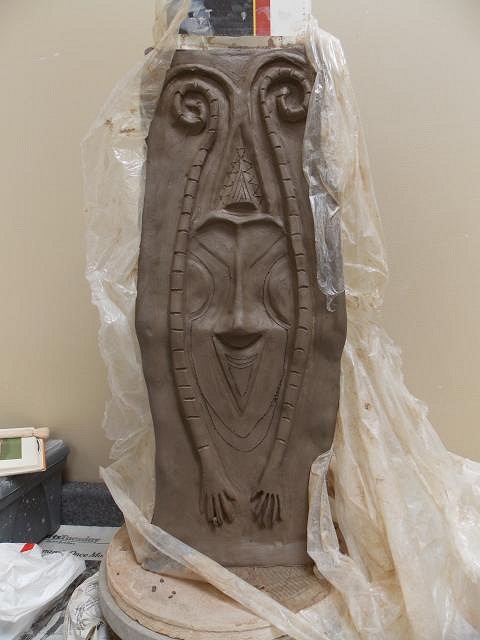
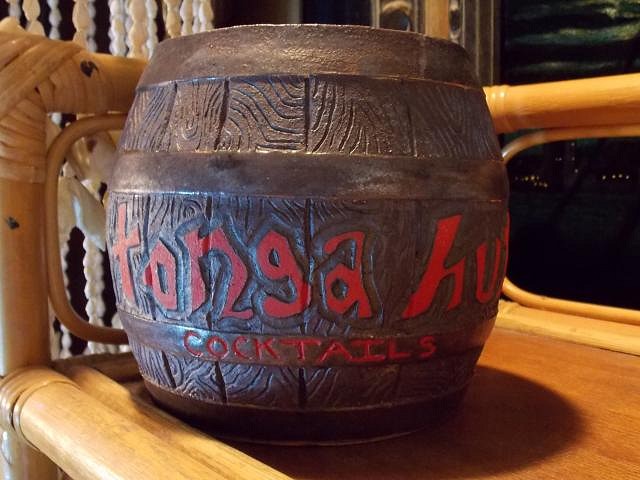
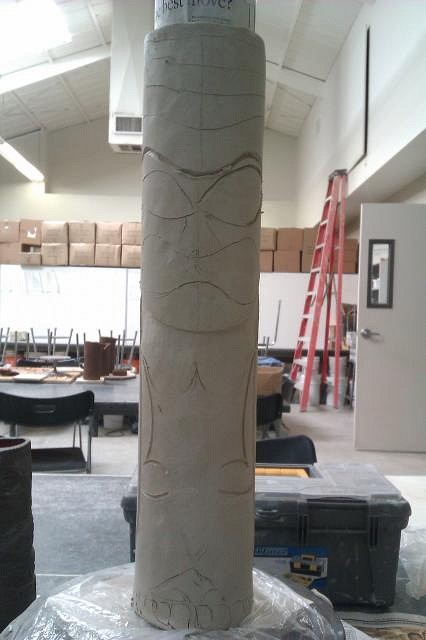
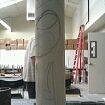
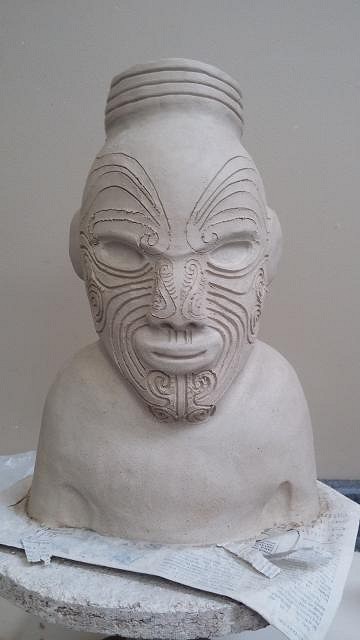
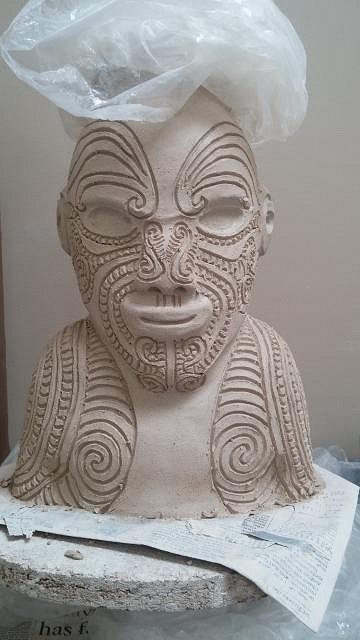
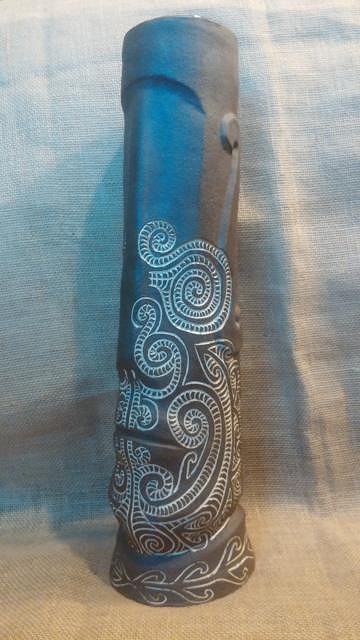
Hi Dawn and Wendy, Wendy, I tried loosening it with a hammer, haha, and that's how I broke it. There's pieces of plaster stuck to the side of the head and I've been too busy/lazy to chisel them off. Is there something that will breakdown the plaster, but not effect the bisque ware? I'm guessing this happened because I didn't use mold soap. So, last week I started this New Caledonia inspired piece from one of my oceanic art books. I want to make a fountain, with water spouting into a bowl, that I'll throw on the wheel or build with coils. Slabs are built around a UPS triangular box, for the main form, that stands about 22-23," before drying. The back panels will just have some design carvings. If I finish carving tomorrow, I'll try and post some pics. Next, I started my piece for the Tonga Hut's 55th anniversary party. It's wheel thrown and carved. It dried without cracking, so hopefully it'll come out of the bisque firing uscathed. |
|
T
TikiRootsRocka
Posted
posted
on
Mon, Jul 29, 2013 4:30 PM
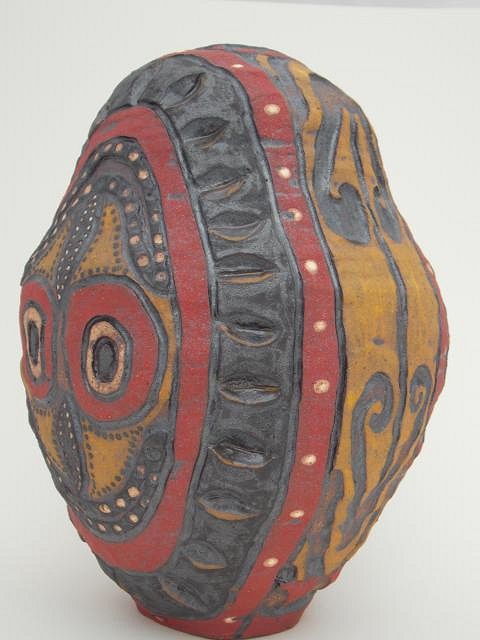
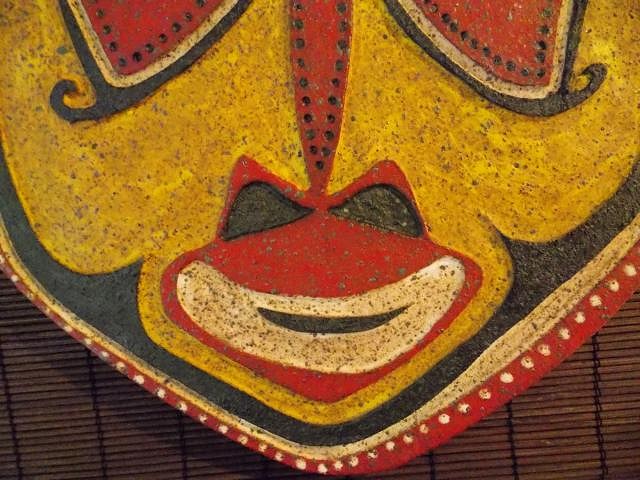
Here's the glazed ceremonial cooking pot.
|
|
G

GROG
Posted
posted
on
Mon, Jul 29, 2013 4:48 PM
Das Really neat. GROG like. |
|
D
danlovestikis
Posted
posted
on
Mon, Jul 29, 2013 6:06 PM
Mold soap is the only way to go. So sorry. But if you use the mold where some broke off you can hand carve that area to fix it if you make your cast thick enough. I always cast them thick to leave wiggle room for manipulation. If you can get a large chunk loose from the bisque with a chisel you can use wood glue to put it back in place on your mold. Go Tiki taught me that and it works. I love how your pieces look aged. Wendy |
|
T
TikiRootsRocka
Posted
posted
on
Thu, Aug 1, 2013 1:39 PM
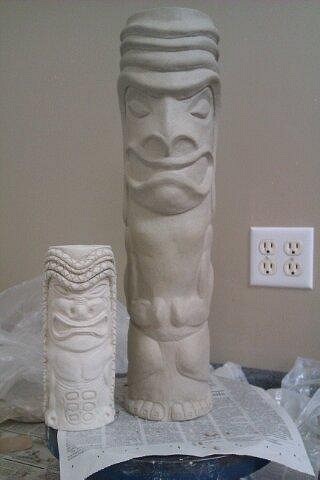
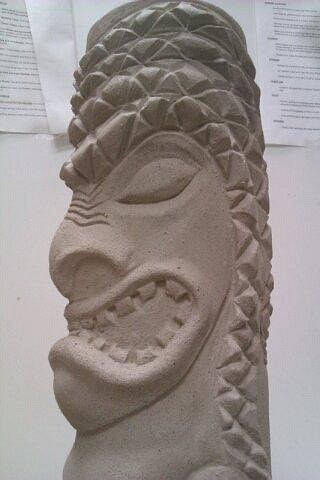
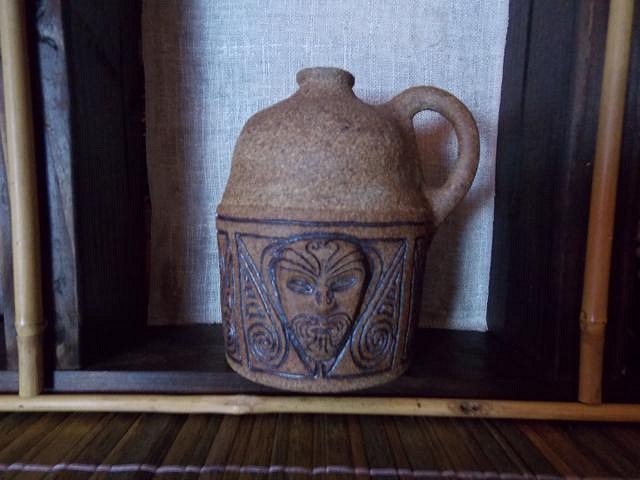
Thanks GROG, hope all is well with ya! Here's pictures of my finished piece for the Tonga Hut's 55th anniversary art show. Here's a Marquesan poi-pounder decanter I threw on the wheel and carved. The top comes off and will be fit with cork. This is #2, but I'll be making some more. I've never tried throwing this shape, so the walls are a little thick on these first two. Thanks for stopping by! |
|
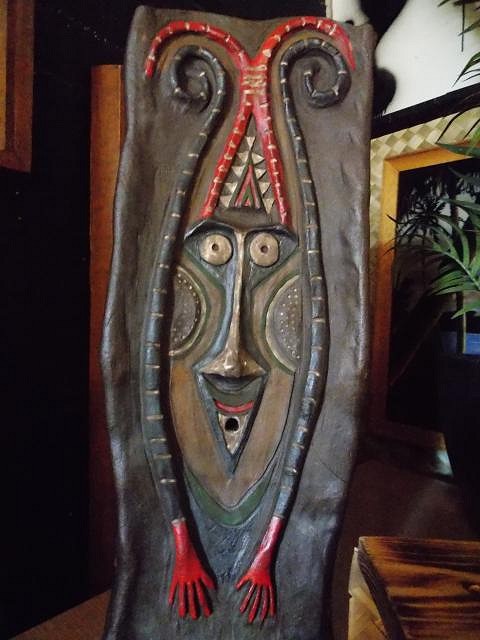
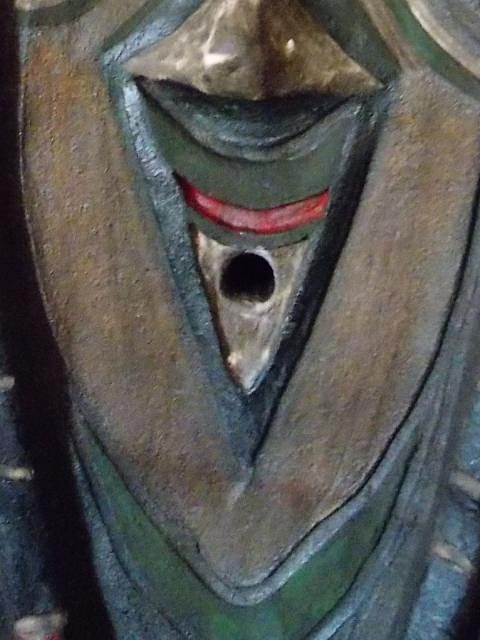
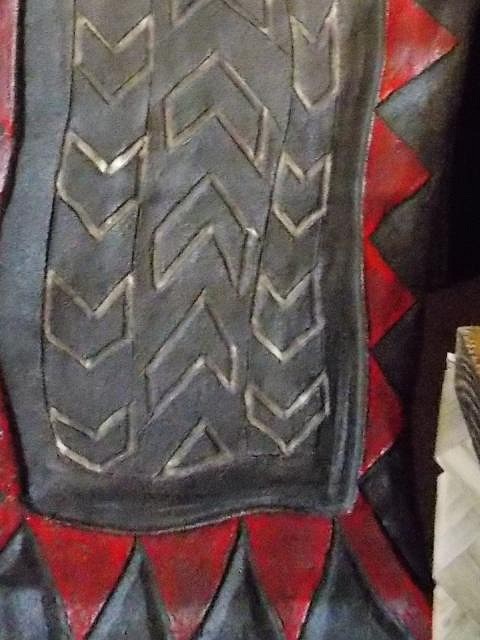
T
TikiRootsRocka
Posted
posted
on
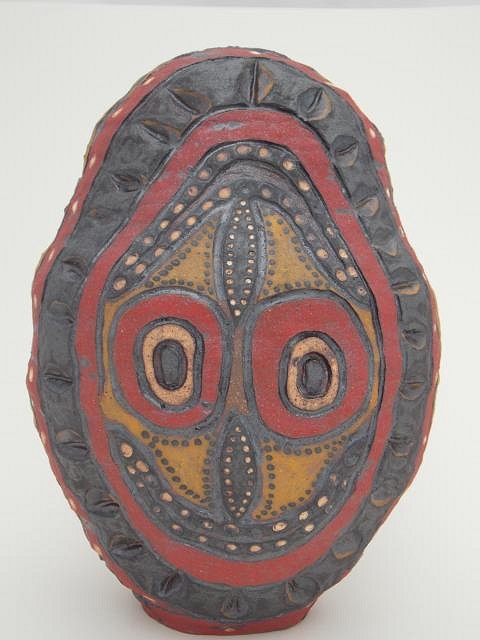
Tue, Aug 6, 2013 10:17 AM
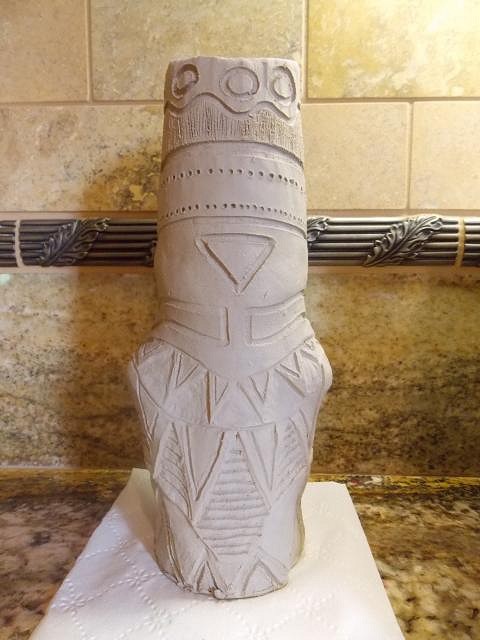
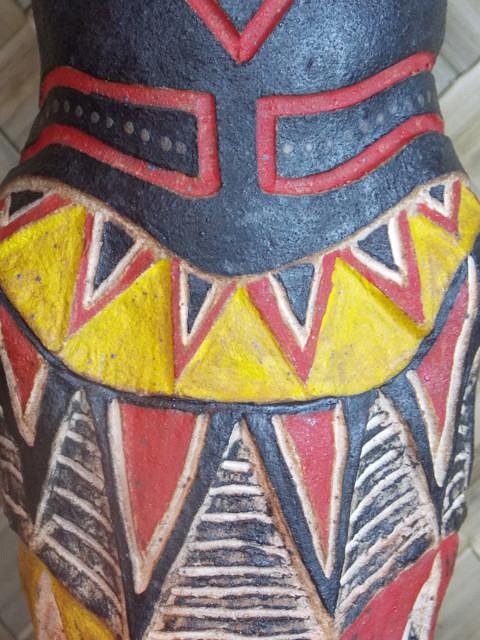
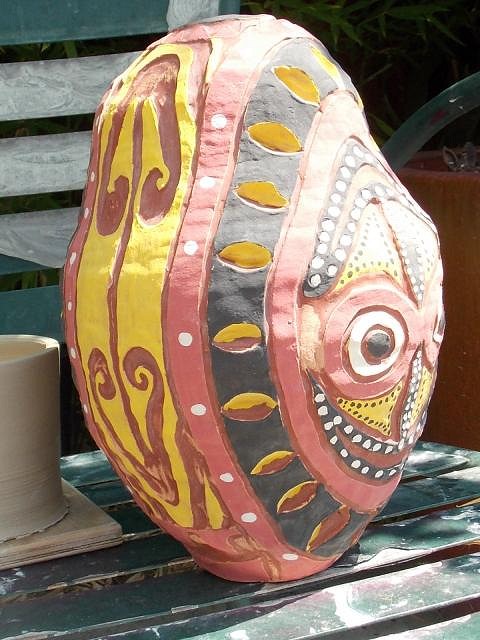
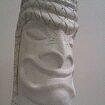
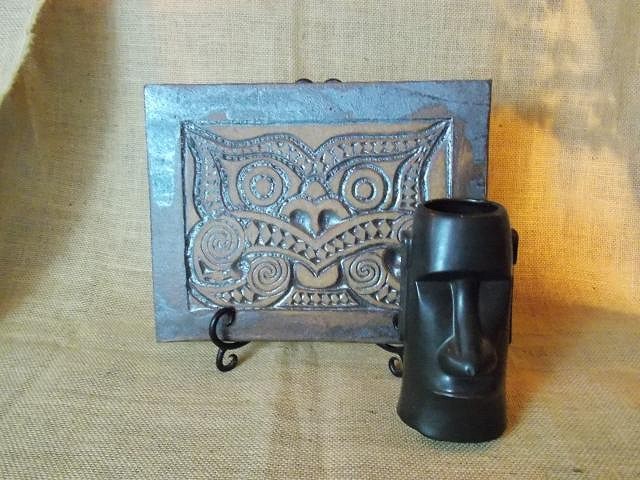
Aloha Friends! Here's a new PNG mask that just came out of the kiln. I'm also happy with how my fountain project is progressing. It got a small crack during glaze firing, but it really doesn't take away from the piece. |
|
G
GROG
Posted
posted
on
Tue, Aug 6, 2013 11:04 AM
The stuff's lookin' really good. GROG like. |
|
H
hang10tiki
Posted
posted
on
Wed, Sep 18, 2013 8:30 AM
Kool |
|
M
MadDogMike
Posted
posted
on
Wed, Sep 18, 2013 11:43 AM
Love that Poi Pounder, bitchin'! |
|
T
TikiRootsRocka
Posted
posted
on
Sun, Nov 3, 2013 7:34 PM
Ok, finally dragged myself out of the studio to post some pics. |
|
T
TikiRootsRocka
Posted
posted
on
Mon, Nov 18, 2013 8:09 PM
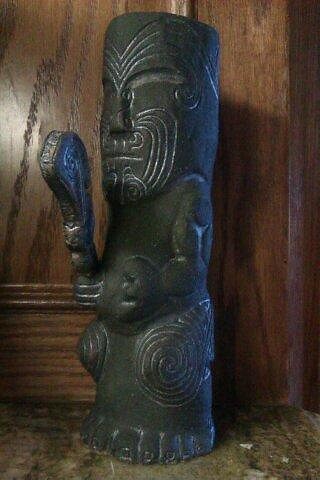
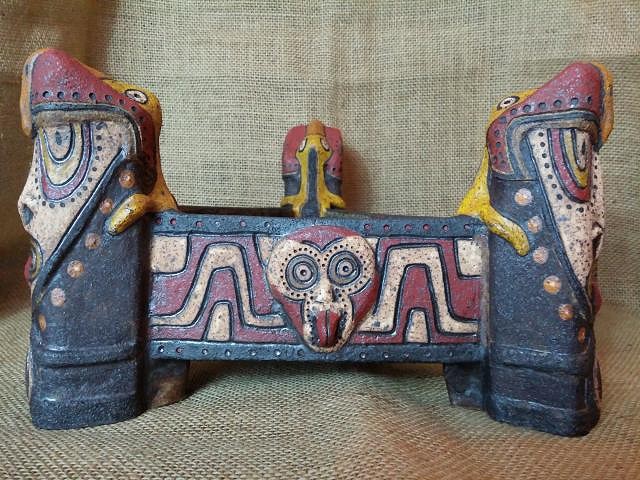
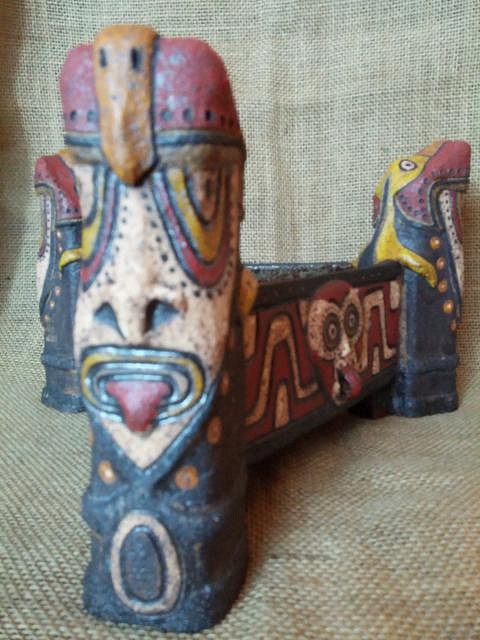
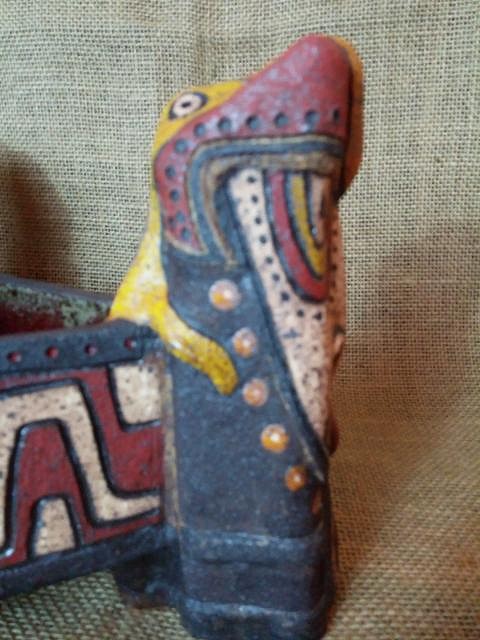
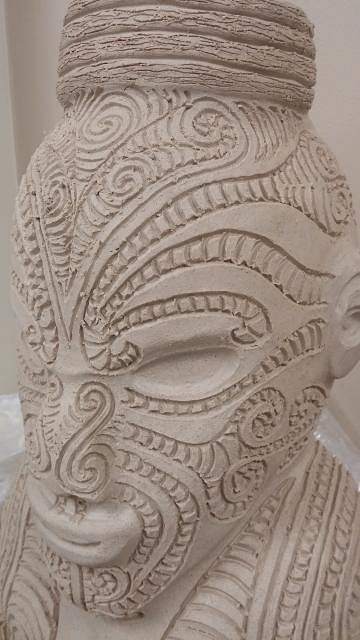
Here's my "Spirit Snatcher" ceremonial bowl built with slabs. It measures 7" inches tall, just under 11" inches wide, and holds 34 liquid ounces. |
|
M
MadDogMike
Posted
posted
on
Mon, Nov 18, 2013 8:18 PM
Always great stuff Mike. Love the guys with the clubs and spears |
|
T
TikiRootsRocka
Posted
posted
on
Tue, Nov 19, 2013 8:02 AM
Thanks, Mike. Your piece for the Palm Springs Tonga Hut is awesome! |
|
D
danlovestikis
Posted
posted
on
Tue, Nov 19, 2013 9:41 AM
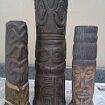
Dan and I are in Las Vegas. What are we doing here? We are looking at your thread. You have made so many great new pieces. Dan and I both love what you've been making. That split tongue gave me shivers. The lamps are so much work and they look great. The war club tikis are fantastic. I hope we can make it to DTB's to see them in person. Wendy and Dan |
|
T

TikiAno
Posted
posted
on
Tue, Nov 19, 2013 10:57 AM
Continued awesome work. I missed your thread for a bit, absolutely love the poi pounder, and look forward to seeing updates on the fountain- fantastic idea. |
|
T
TikiRootsRocka
Posted
posted
on
Thu, Nov 21, 2013 1:01 PM
Thanks, Dan and Wendy! Enjoy the rest of your trip! |
|
D
danlovestikis
Posted
posted
on
Thu, Nov 21, 2013 9:00 PM
I'm sure glad I stopped by again. Very good sculpting on your mug. I'm ready to see it glazed. Wendy |
|
T
TikiRootsRocka
Posted
posted
on
Tue, Dec 3, 2013 3:02 PM
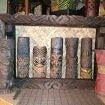
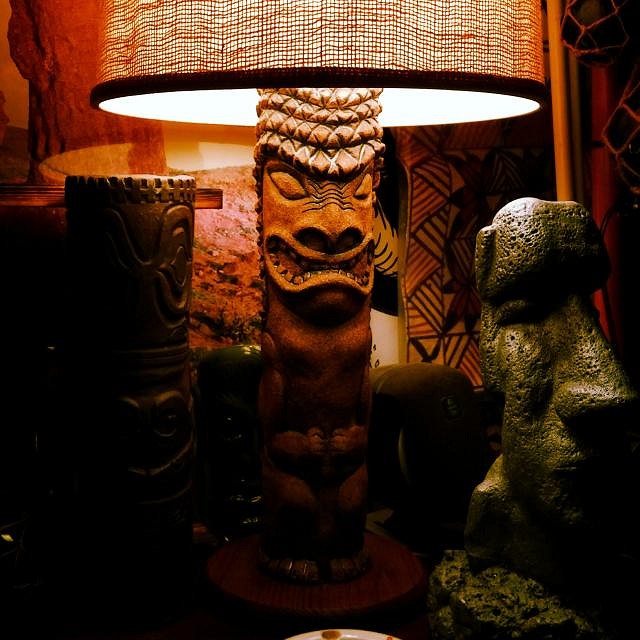
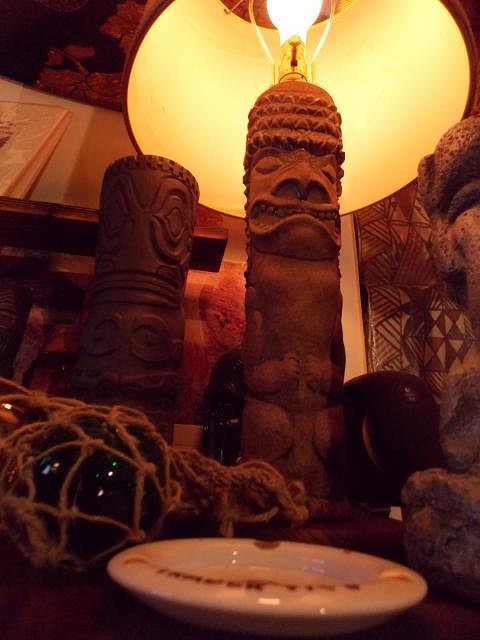
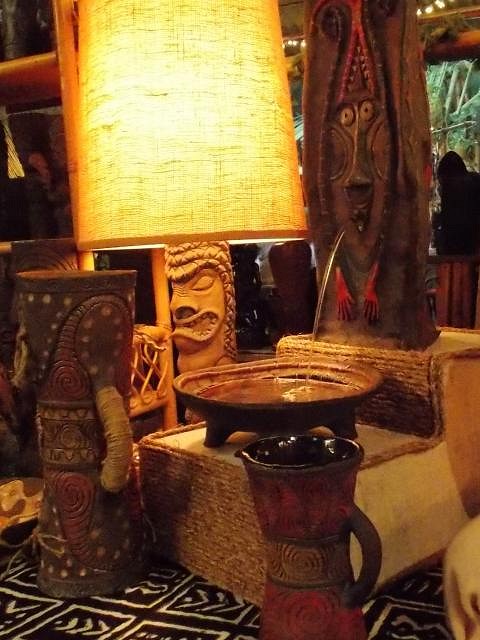
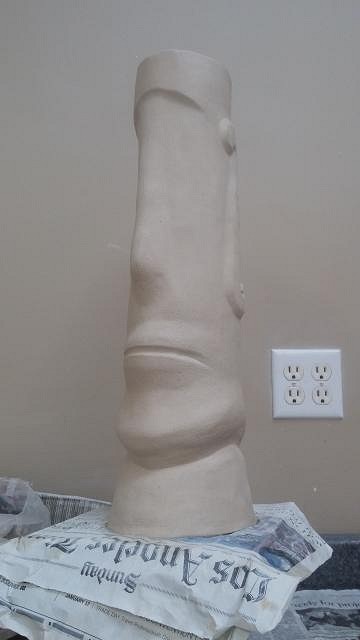
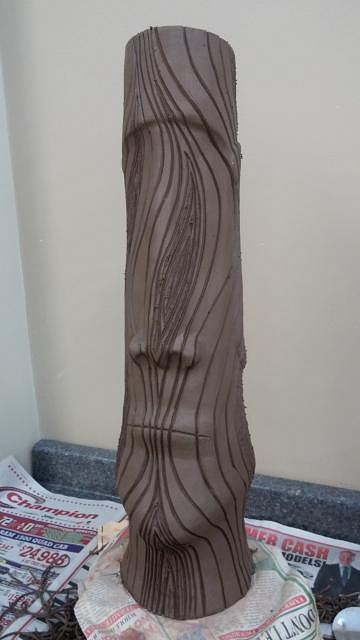
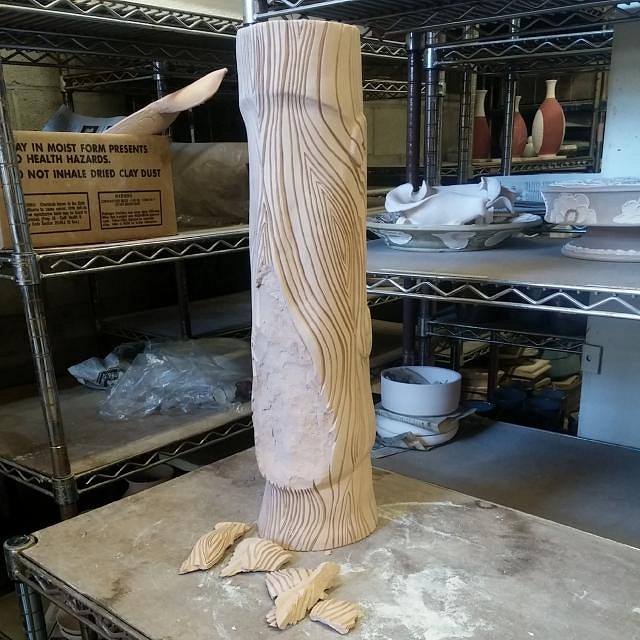
Wow, I can't believe how fast the days go by! It feels like my last post was only a couple days ago, but no, it was 12. And, here's some pictures of the completed lamp. And, here's an assortment of other finished stuff. Thanks for stopping by. You can also see daily updates on my Instagram account: #junglemodern |
|
T
TikiAno
Posted
posted
on
Tue, Dec 3, 2013 5:29 PM
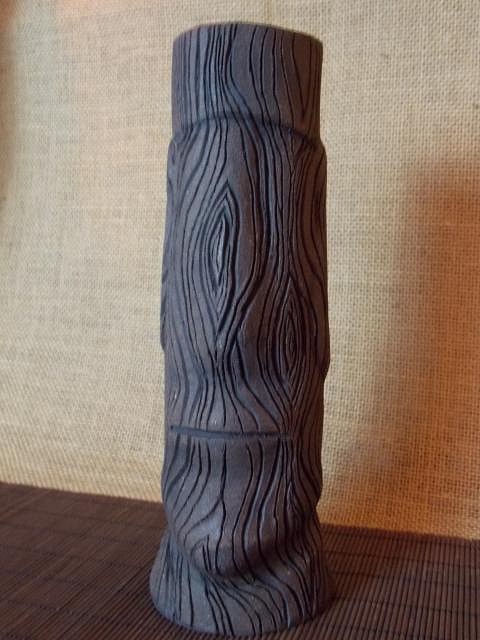
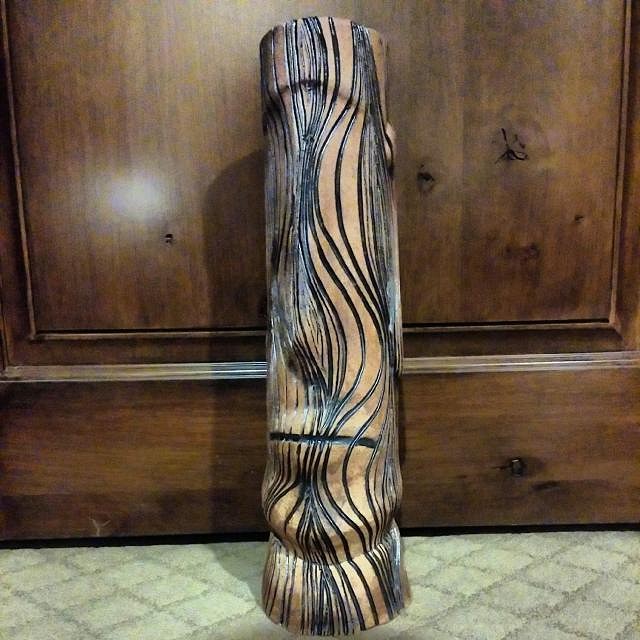
Killer stuff! Love the woodgrain Moai, as well as.. everything else. The Ku came out fantastic, and your sculpting skills are beyond impressive. Thanks for posting! |
|
H
hang10tiki
Posted
posted
on
Tue, Dec 3, 2013 6:33 PM
Awesome......... Jon |
|
S
Sophista-tiki
Posted
posted
on
Wed, Dec 4, 2013 7:57 AM
very nice pieces, again I love that you're going beyong the predictable . |
|
T
TikiRootsRocka
Posted
posted
on
Wed, Dec 4, 2013 7:43 PM
Aloha Tiki Ano, Hang10, and Dawn! Thanks for stopping by, your support is greatly appreciated. TA - I've been fortunate to spend lots of time in the studio over the last few months, working on my sculpting. My advice is to push your limits. It's daunting to think about, but don't be afraid to spend 10-15 hours on something and completely hate it. Jon - I tell people, "I want every piece to be badass, beautiful, or a little bit of both." "Awesome," works, too. Thank you. Dawn - I feel like there's so much to learn about ceramics, that I could dedicate my life to it, and still not know everything. Knowing that, I want to keep learning, and apply that knowledge to my work. I'm also very lucky to be surrounded by such talented people, here, and at my clay studio. The kind words of support and encouragement I've recieved, have also been a huge motivator, and make me want to get better, everyday. There's a lot of people to thank. [ Edited by: TikiRootsRocka 2013-12-05 08:03 ] |
|
T
TikiRootsRocka
Posted
posted
on
Mon, Feb 3, 2014 4:35 PM
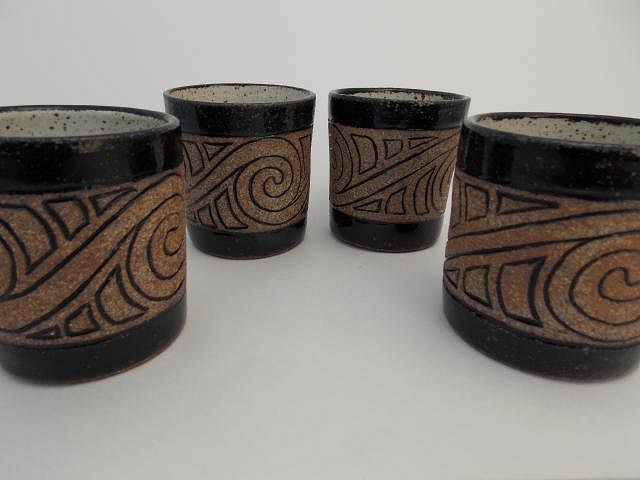
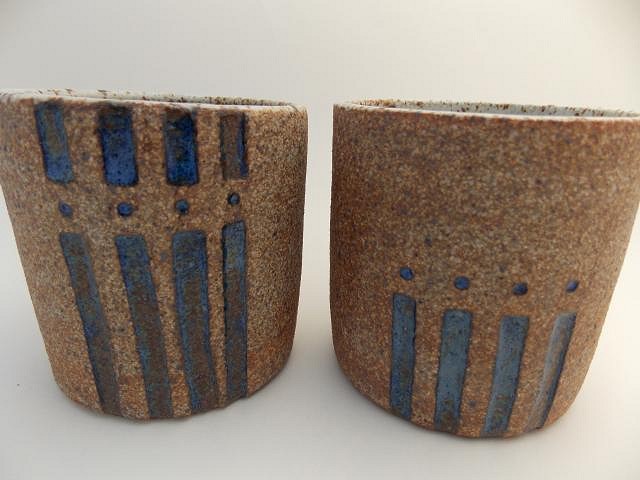
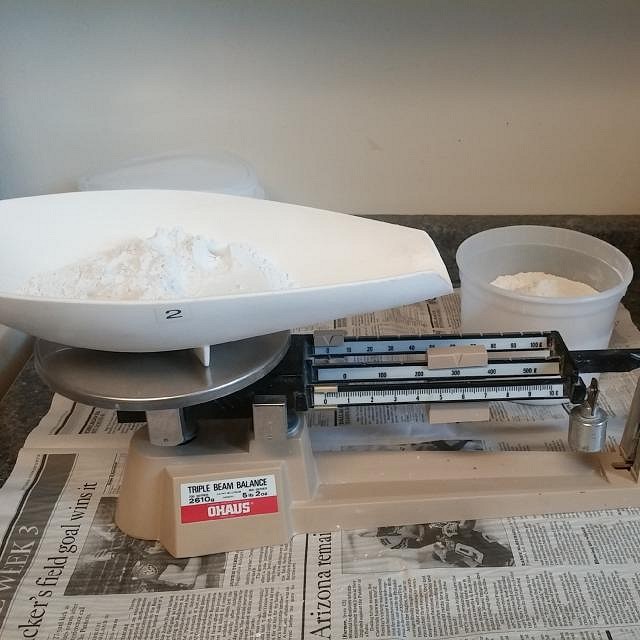
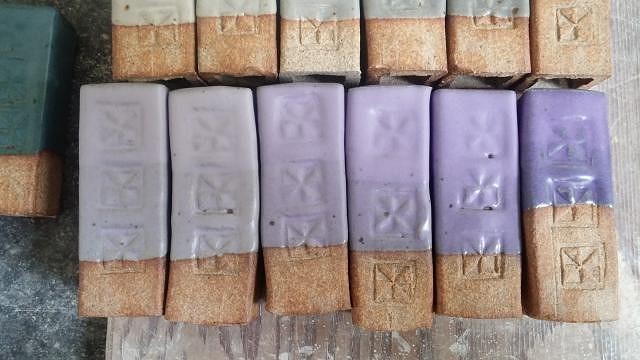
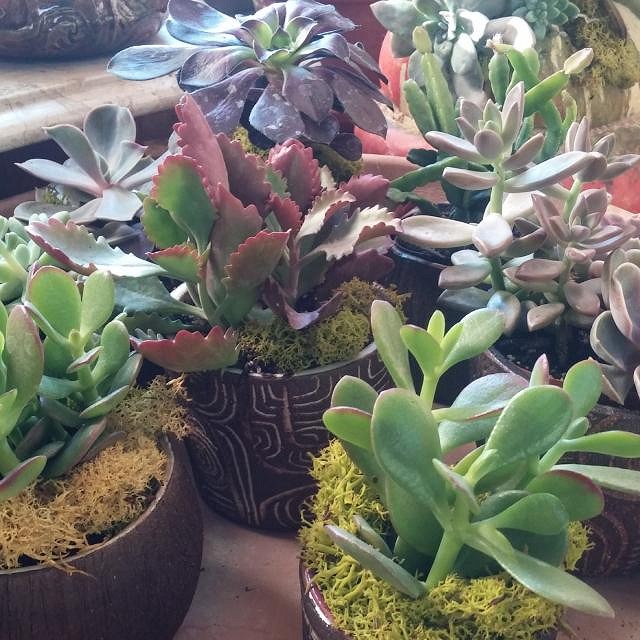
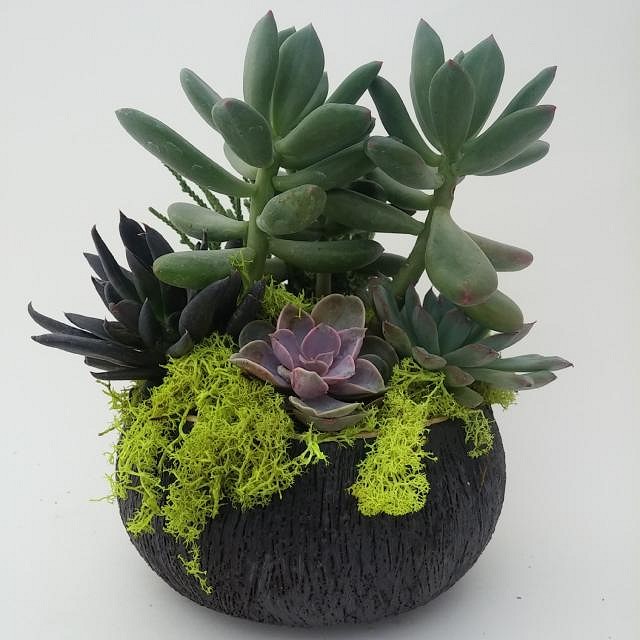
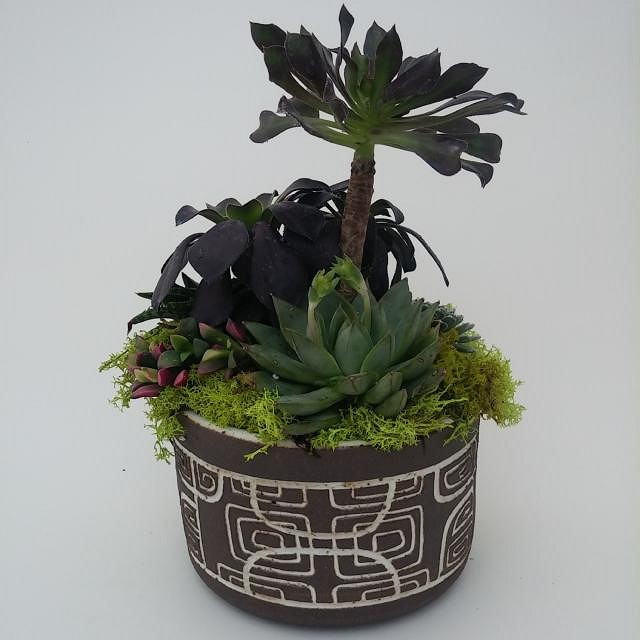
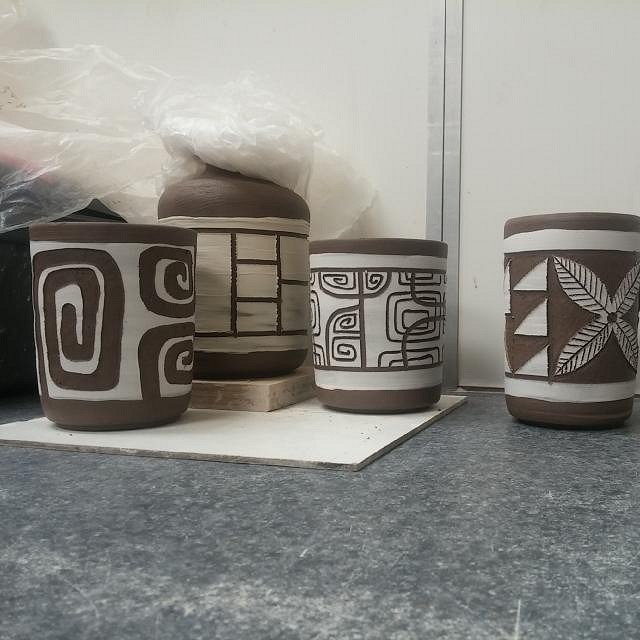
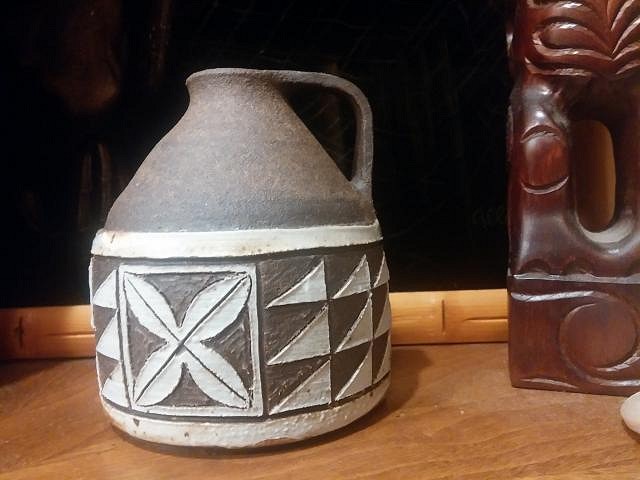
And now, back to Tiki. I've also been taking a glaze calculation class. These are the first test pieces. Not the most applicable to my tiki pieces, but a great start. I usually use iron based clays, so I'm happy with how these stand up to the clay, and hold their color, at cone 10. Here's a moonshine jug that I threw on the wheel. I coated the outside with a porcelain slip and carved in the tapa designs. I also started potting succulents in some of my coconut mugs and Nuka Hiva Booze Barrels, then, scaling them up in size. Valentine's Day is right around the corner, so if you've upset your significant other by exceeding your Tiki budget, these are the perfect make-up gift. I update my Instagram everyday, so if you're interested, you can follow me at Jungle Modern Ceramics, or search #junglemodern. Jungle Modern is also the name of my FB page. Enjoy and thanks for looking. |
|
D
danlovestikis
Posted
posted
on
Mon, Feb 3, 2014 4:58 PM
Terrific photos. I really like your new designs. We will see you at Marketplace on the 8th. Cheers, Wendy |
|
T
TikiAno
Posted
posted
on
Tue, Feb 4, 2014 8:17 AM
Beautiful work, all around. Love the variety.... even the (hush!) non-tiki work! Love your take on Moais, especially how you're able to showcase your style within different designs.... |
|
T
TikiRootsRocka
Posted
posted
on
Tue, Feb 4, 2014 5:39 PM
Can't wait for the next ITMP. Love me some Wendy and Dan! |
|
T

TikiHula
Posted
posted
on
Tue, Feb 4, 2014 8:21 PM
Just amazing work Mike. |
|
TR

Tiki Republic
Posted
posted
on
Tue, Feb 4, 2014 9:42 PM
Excellent work Mike. |
|
ATP
Atomic Tiki Punk
Posted
posted
on
Tue, Feb 4, 2014 9:53 PM
Looking very sharp, Mike! |
|
T
TikiAno
Posted
posted
on
Wed, Feb 5, 2014 3:12 PM
Gorgeous. That's a lot of coils. I hope you're extruding them??? Your work continues to impress all of us. Fantastic. |
|
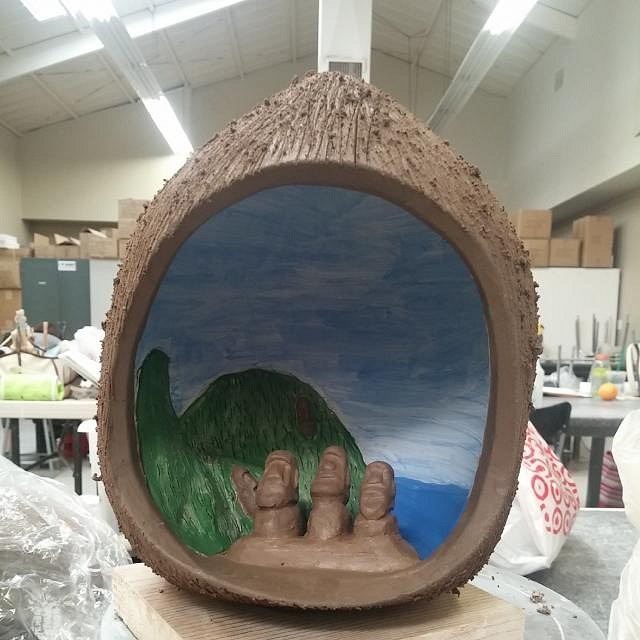
T
TikiRootsRocka
Posted
posted
on
Thu, Feb 13, 2014 9:54 AM
Aloha Tiki Hula, Tiki Republic, ATP, & Tiki Ano, Here's #3 finished. Some sgraffito work I've been doing. And, an Easter Island diorama inside one of my wheel thrown coconuts. Still in progress I'm still updating my IG daily. #junglemodern |
|
M
MadDogMike
Posted
posted
on
Thu, Feb 13, 2014 8:31 PM
Love the sgraffito Mike, I need to do some of that again. The coconut diorama is very cool |