Tiki Central / Other Crafts
Roots Rocka's Clay Journal - New Stuff pg 11
|
T

TikiRootsRocka
Posted
posted
on
Tue, Nov 1, 2011 1:24 PM
Here it goes!!!
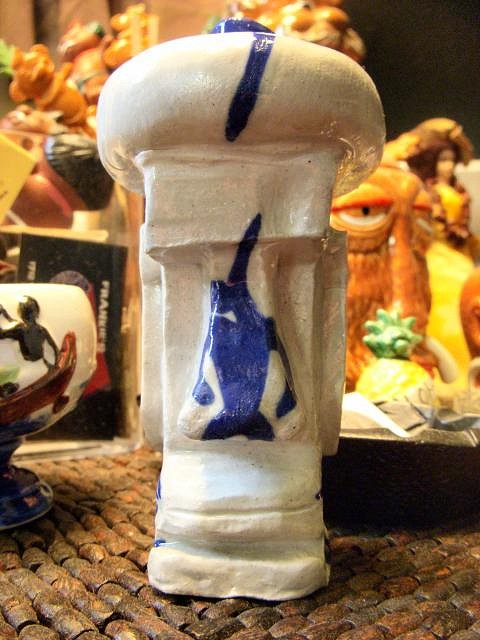
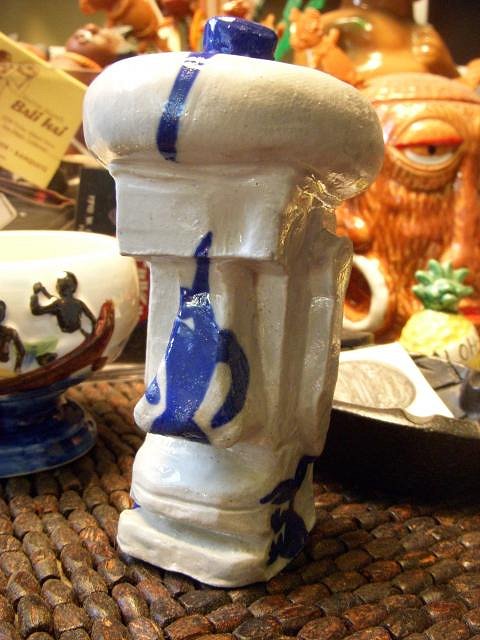
gloss white - 1) dripped on 2) dipped 3) brush streaks topknot - bray shino - 2 dips clear H51 - 2 dips Thanks to everyone for the inspiration and suggestions! I might've never picked up this hobby if it wasn't for TC! My second ceramics class just started, and I'm hooked. This time, we're using "B mixed with sand." So far, I like this way better for sculpting. It's an independent study class, so for my class time, I'm going to focus on glazing for the first 4 weeks and mess around with the wheel for the last two (1 - 2 hour class/wk). Again, any suggestions would be greatly appreciated. Mahalo for looking!!! [ Edited by: TikiRootsRocka 2014-02-04 17:40 ] [ Edited by: TikiRootsRocka 2014-02-13 09:55 ] [ Edited by: TikiRootsRocka 2014-04-22 07:08 ] |
|
U

umeone
Posted
posted
on
Tue, Nov 1, 2011 2:09 PM
Looks good TikiRootsRocka, I like your enthusiasm and your Tikis. :) It's great that you can take some classes, you can share what you learn with us, I need all the help I can get! :lol: Enjoy and welcome, Linda |
|
D

danlovestikis
Posted
posted
on
Tue, Nov 1, 2011 3:21 PM
You've got a great start there. If you looked at my first clay tiki you'd feel like a professional already. I'll have fun watching you go forward. Wendy |
|
M

MadDogMike
Posted
posted
on
Tue, Nov 1, 2011 6:38 PM
The Incredible Melting Moai - that's rich! My advice to you Roots is just just keep playing with clay and push yourself out of your comfort zone (something I need to do more of) Don't be afraid of failure, some of my best project have been spawned from a failed experiment. The journal is such a good idea, mine is one of the few areas in my life that is organized :D Put pictures of your finished pieces in there along with details such as clay used, glazes used (especially custom blends), tools used to texture, ideas for improvement, unusual techniques you tried. I keep a book of finished projects and another of sketched and annotated ideas for future projects. Your most important task in class is to cultivate friendships with people who own kilns so you can get things fired after the semester is over and until you buy a kiln of your own :lol: Keep hanging out here for inspiration and keep posting pics so we can be inspired too. |
|
GSM

Gene S Morgan
Posted
posted
on
Tue, Nov 1, 2011 7:52 PM
I'm liking the last one a lot too. The guy seems to have an attitude and the claze is really nice. Keep up the good work ..... Gene |
|
Z

zerostreet
Posted
posted
on
Wed, Nov 2, 2011 3:55 AM
Yeah that last Moai definitely has style! Nice! |
|
T
TikiRootsRocka
Posted
posted
on
Wed, Nov 2, 2011 3:11 PM
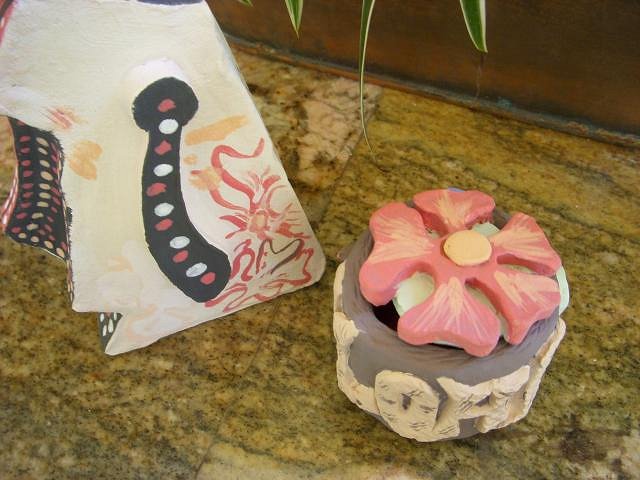
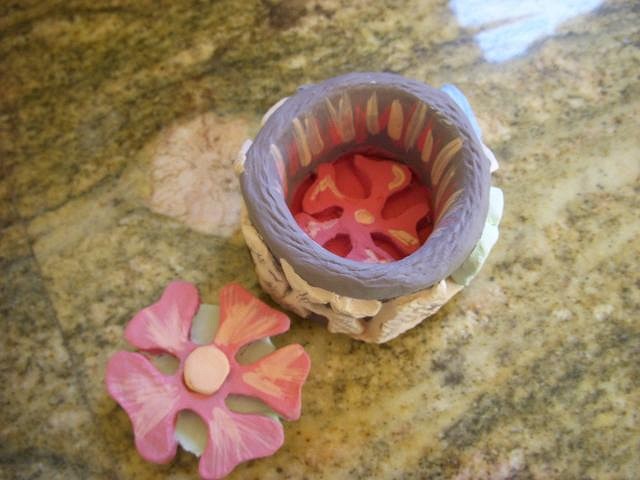
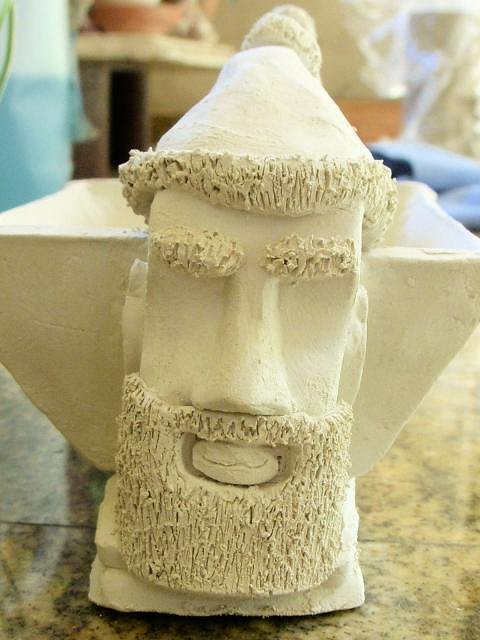
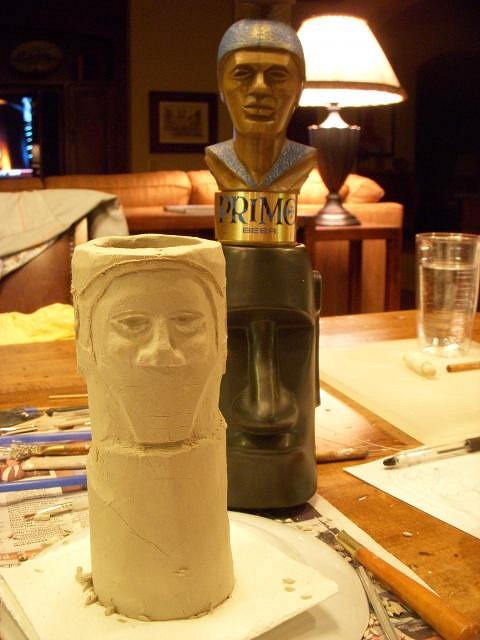
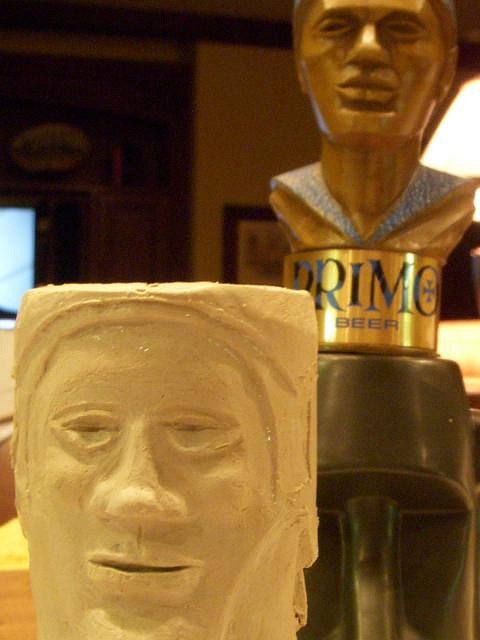
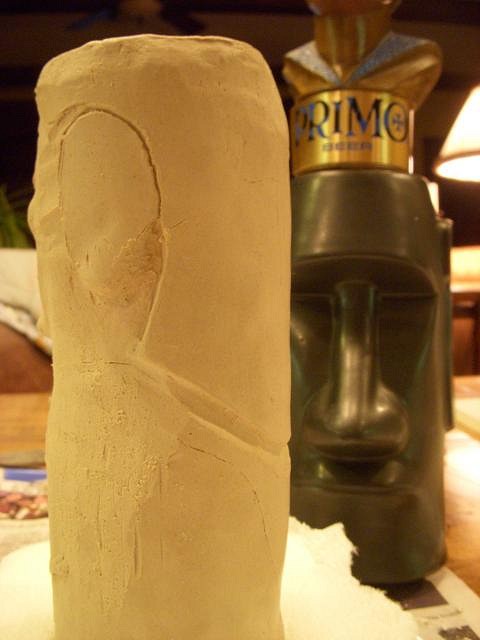
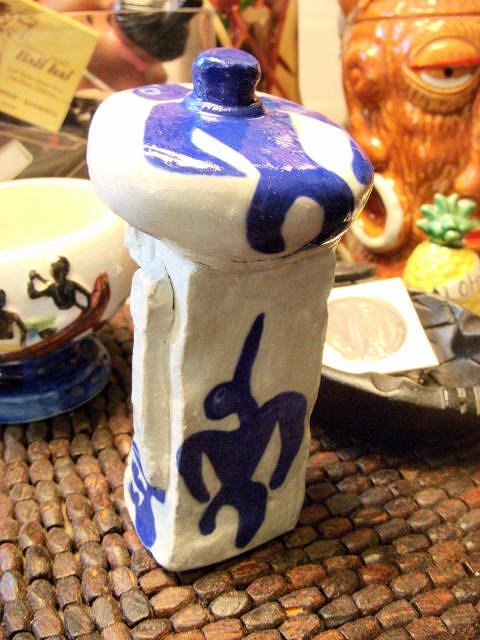
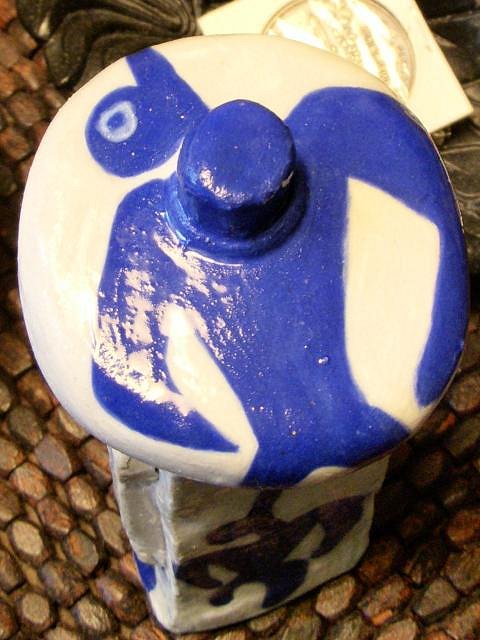
Thanks for the warm welcome and words of encouragement! I'm taking this second session a lot more seriously than the first, so I hope to have some good stuff to share. The "b mixed with sand" seems much better for sculpting than the soldate 60 clay. These next two pieces, are the last from my first session, where we used the soldate 60. The moai was my first try at slab building. I don't really like how it turned out, but figured it's a good opportunity to mess around with some underglaze testing. I'm gonna dip half of this in clear high fire glaze to see the color difference. This was going to be a shot glass, but kept taking different directions, and is kind of jewelery box...I guess. This is my second piece messing around with underglaze and I'll be dipping the whole thing in clear glaze. I made some stuff in class last week that should be out of the kiln and I made some stuff at home, this weekend, that'll be going in...class starts in 50. Have a great day everyone! running out the door |
|
T
TikiRootsRocka
Posted
posted
on
Thu, Nov 3, 2011 2:03 PM
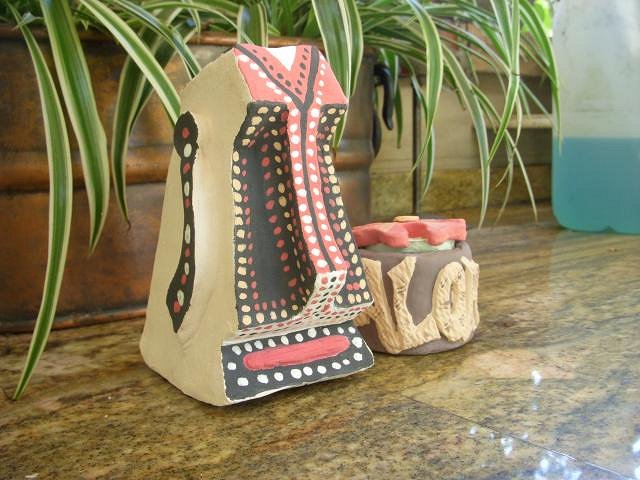
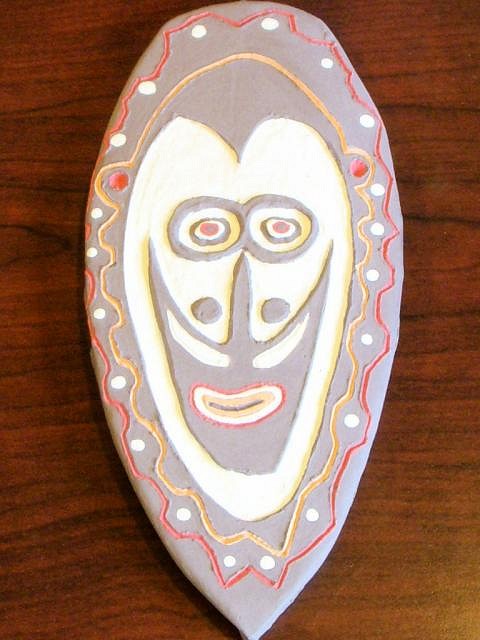
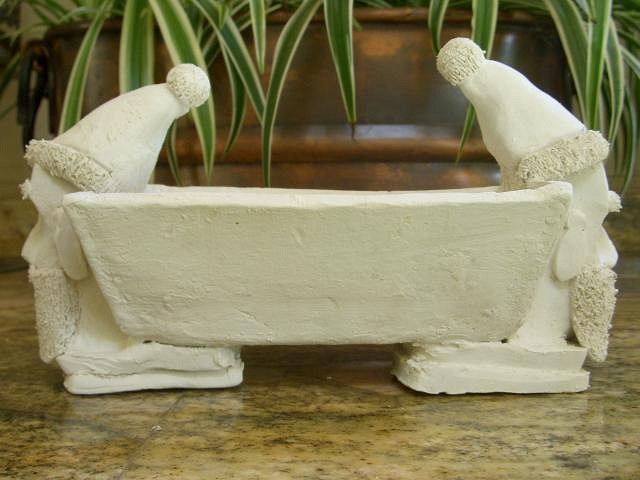
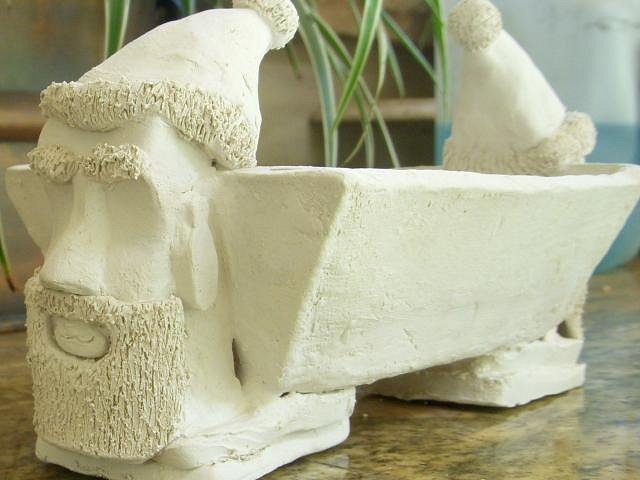
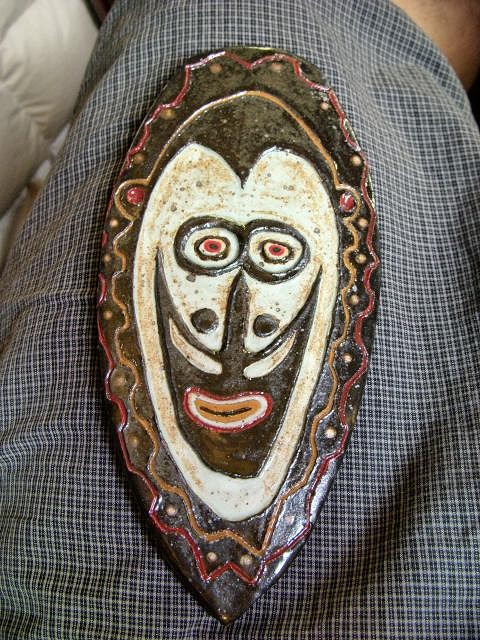
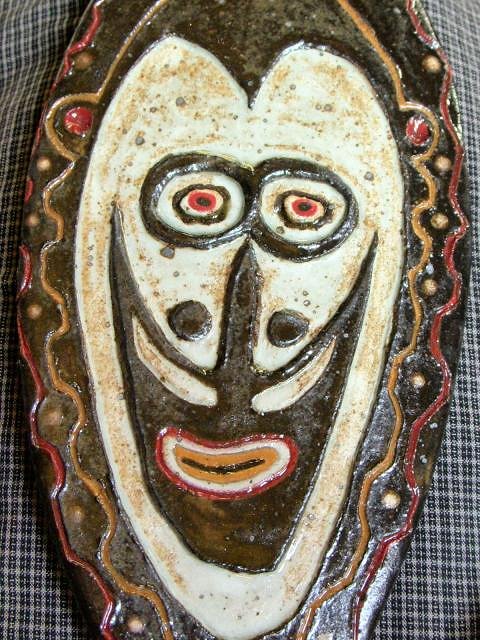
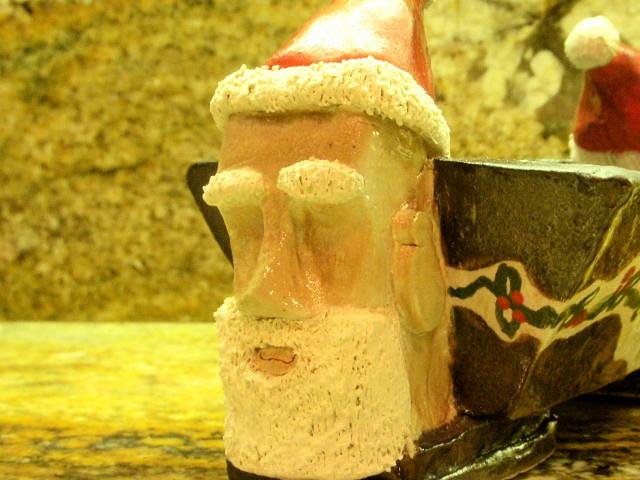
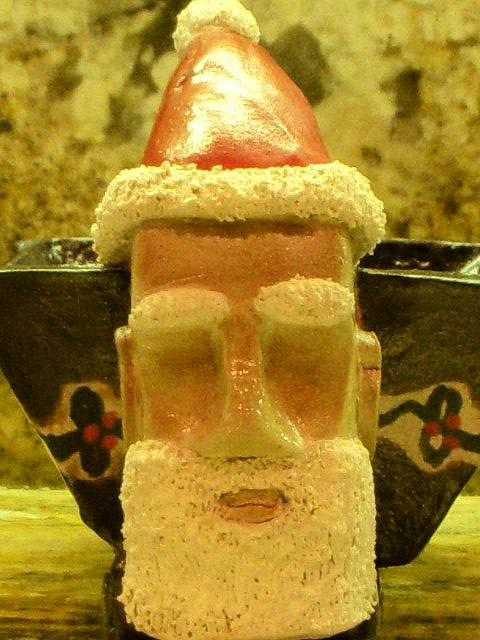
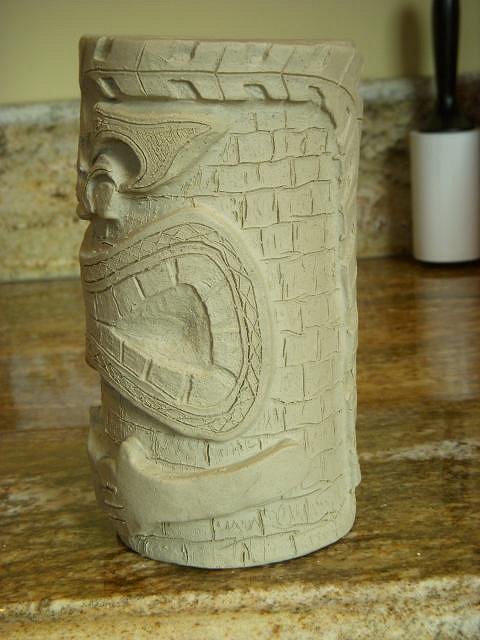
Here's a few more projects in the works. A PNG mask on soldate 60. I got this back yesterday at class and have put 3 coats of underglaze on. I wasn't aware of how long it takes to do detailed underglaze work. Not that this is that detailed, but it took me a good 3-4 hours to put on all 3 coats. I'm sure I'll speed up as I get more comfortable with the brush. Colors used: chocolate brown, white, bright red, and true orange This is my Santa Moai drink trough. Maybe an egg nog drink vessel for the holidays. Thanks for looking! Michael |
|
M
MadDogMike
Posted
posted
on
Thu, Nov 3, 2011 5:32 PM
Mike, good looking stuff - looks like you're having a great time! |
|
M

mp
Posted
posted
on
Sat, Nov 5, 2011 4:50 AM
Its 4:50 in the am here and woke up. Started to lurk and found yer thread. |
|
T
TikiRootsRocka
Posted
posted
on
Mon, Nov 7, 2011 2:27 PM
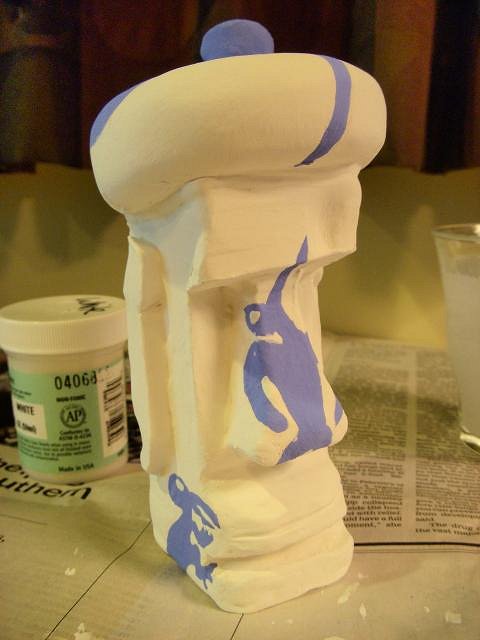
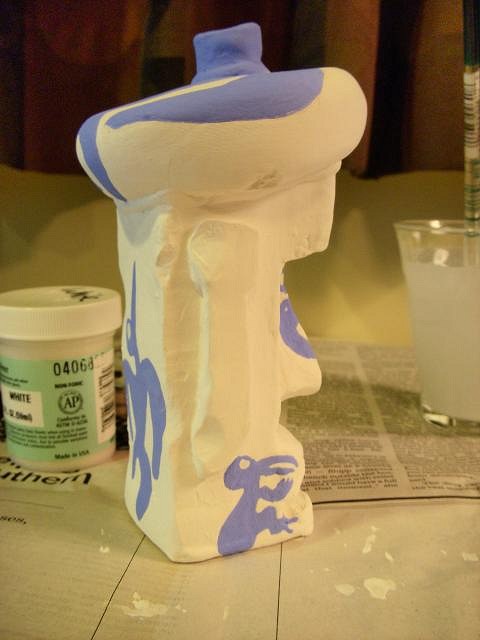
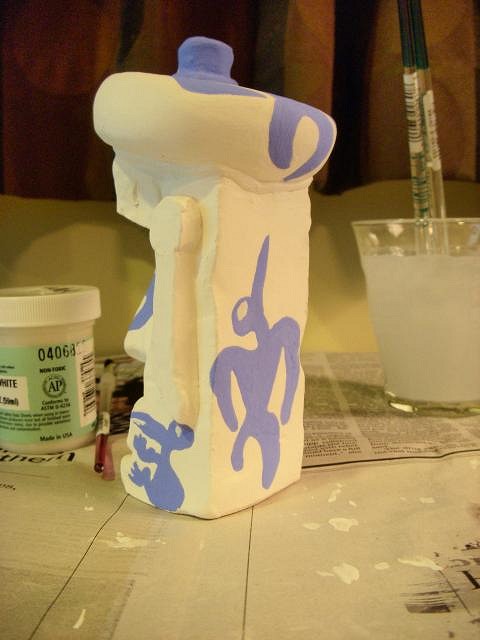
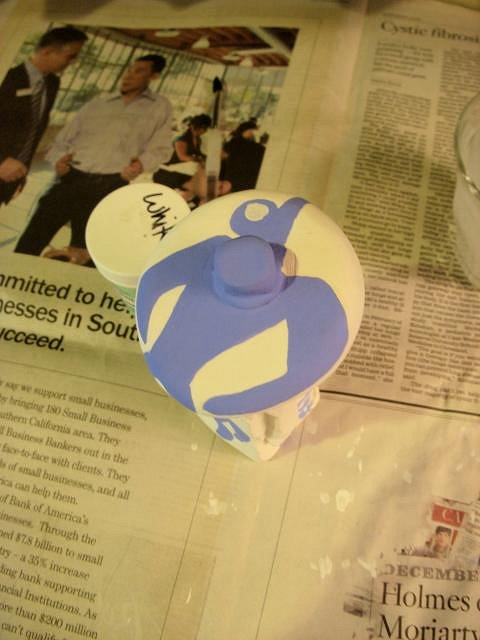
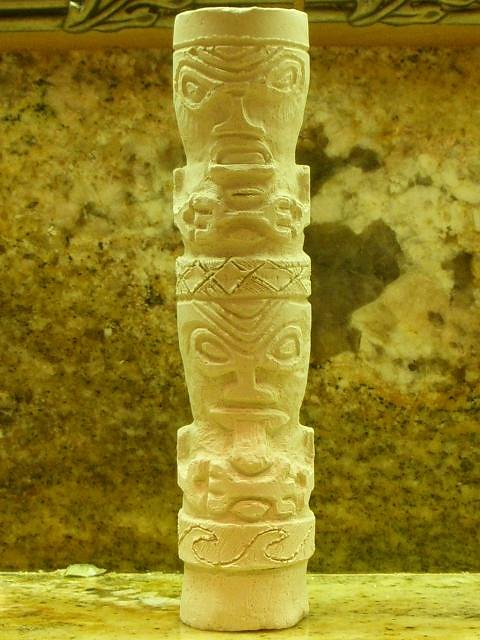
MadDog - I'm having a blast! Here's some new stuff I'm working on. Moai - I know, another moai...this time, with Birdman Cult motifs! Still just playing with underglazes. 3 layers of each. My first mug attempt. Thanks for lookin' and have a great day! |
|
T
TikiRootsRocka
Posted
posted
on
Wed, Nov 16, 2011 3:05 PM
PNG Mask finished: didn't turn out how I thought, but I like it. I learned that soldate 60 has more iron, so it's going to burn through the lighter colors. 3 layeres of white on soldate 60, isn't going to be white. Here's the birdman moai. Thanks for lookin'!!! |
|
U
umeone
Posted
posted
on
Wed, Nov 16, 2011 3:57 PM
Aloha TikiRootsRocka, |
|
T
TikiRootsRocka
Posted
posted
on
Tue, Nov 22, 2011 9:56 AM
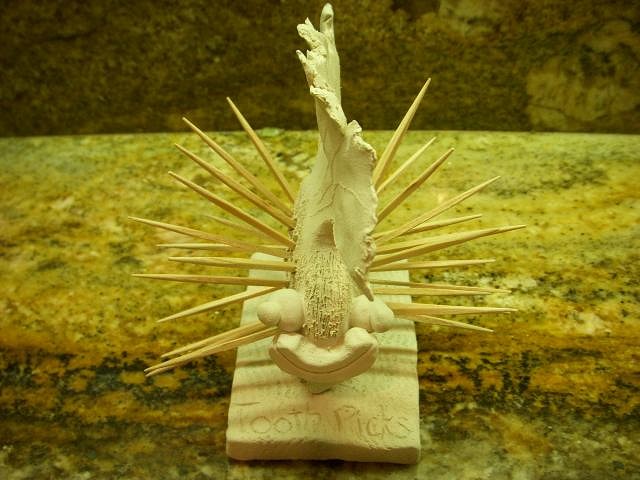
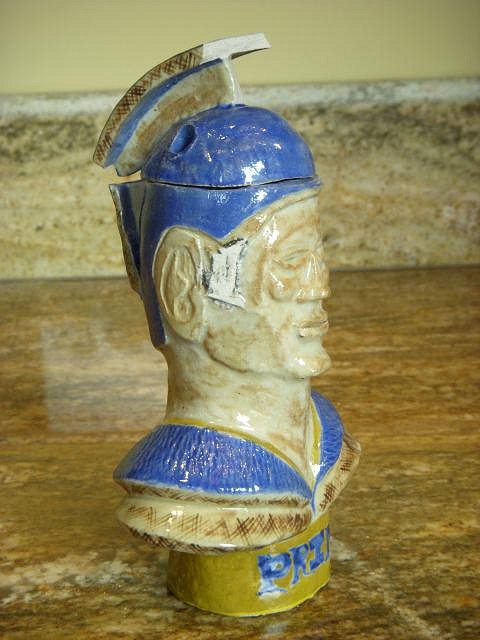
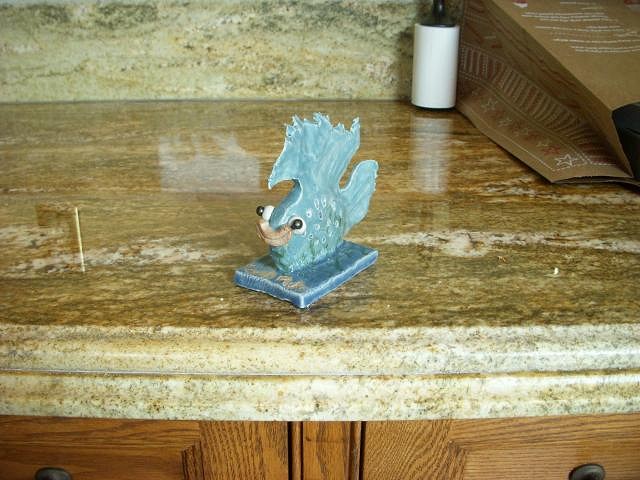
Thanks Linda! The Primo Beer guy is coming along, but I forgot to take pictures. I have him glazed up, I just need to get him fired. Here's what I've been up to. Got the Santa Claus Moai vessel back. It's too small for drinks so I gave it to my mom for a snack dish. Afterall, my birthday present was the ceramics class, so it's only fair she gets the first piece :) I tried using a paint gun for the first time to put the superclear glaze on. Next time, I'll be a little more generous with the superclear. A little 6" Marquesan totem that I'm going to try and mold for a triangle drinking vessel. This changed direction 4-5 times. I originally envisioned a pirahna/blowfish looking thing and now I have a smiley, bug-eyed, blowfish style toothpick holder. I'm a big seafood person and love to cook so this will go perfect in the kitchen. Thanks for looking and have a happy Thanksgiving! |
|
M
MadDogMike
Posted
posted
on
Tue, Nov 22, 2011 11:23 AM
Love the blowfish/toothpic holder! That top fin looks very organic. If you didn't quite get enough glaze coverage on the Santa, you can glaze and fire him again. You just have to be sure you don't exceed the cone of your lowest fired glaze - if you glaze fired at cone 06, you can fire again at cone 06 but you can't fire again at cone 5. Sometimes you can end up firing a piece half a dozen times by the time you do an underglaze, then 3 or 4 glaze firings to cover some skips, then a luster fire, etc. |
|
U
umeone
Posted
posted
on
Thu, Nov 24, 2011 4:57 AM
Love Puffer! :) Mom's love hand made pieces, I'm sure she loves your Tiki Santa. Happy Thanksgiving!!! |
|
T
TikiRootsRocka
Posted
posted
on
Fri, Nov 25, 2011 12:25 PM
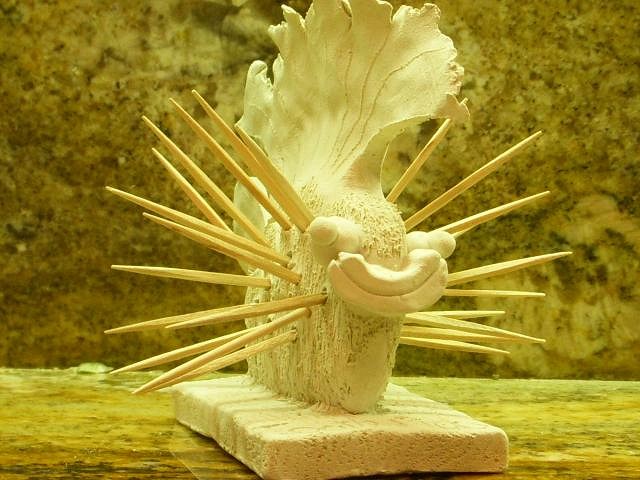
Hi Maddog and Linda, thanks for stopping by! Hope the both of you and the rest of TC had a great Thanksgiving! MDM - On the puffer, the fin is what changed my direction. I was pinching 2 slabs together and it looked like it would be a cool looking fin, so I went in a that direction. Linda - I don't think I've handmade anything and given it for a gift since I was in pre-school. Although it's her job :) , it was a great feeling to see how much my mom likes it. It was stocked full of mini Snickers at Thanksgiving and everybody was asking where she got it. I'm anxiously awaiting my pottery plaster and casting slip so I can mess around with some mold making! Well, that's what I was told I need. Anything else? Have a great weekend! |
|
U
umeone
Posted
posted
on
Mon, Nov 28, 2011 6:07 AM
Oh you've got to let me know how the mold making works for you, I'm thinking about trying one too! :) Good-Luck! |
|
T

TikiDaye
Posted
posted
on
Sat, Dec 3, 2011 10:06 AM
TRR- I'm really loving the PNG mask! What size is it? I like the way the glaze turned out as it gives a rustic look to the piece... Well done! Looking forward to seeing the Marquesan totem... Would never have guessed you just began this summer! Peace |
|
T
TikiRootsRocka
Posted
posted
on
Sun, Dec 4, 2011 7:02 PM
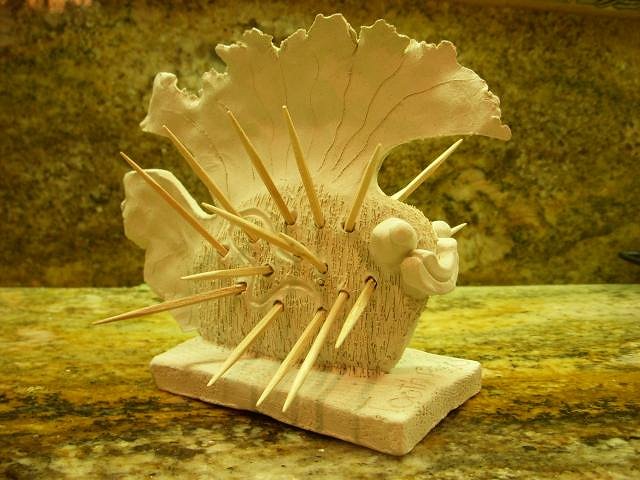
Linda - When I said waiting for my stuff to make molds, I meant, get off my lazy ass and go down to Laguna Clay (only about 15 miles away), to get the stuff. :) Ughhh, still lagging. Unfortunately, there was also a mishap with the Primo Beer mug. Somebody else's piece fell in the kiln and got a bunch of other glaze chunks on mine. It doesn't seem to be a lost cause, but I won't know until I go back to the studio in a couple of days. TikiDaye - Thanks for the kind words! I'm having a great time, so hopefully it's reflecting in my work! I just try and push my limits. A lady who's been doing ceramics for over 20 years told me that I shouldn't try to start painting with underglazes, yet, because I won't know how they'll come out and I'll end up wasting a bunch of time screwing stuff up. To me, if I'm not messing stuff up, I'm not pushing myself. On another note, the Marquesan is bisque fired and the toothpick holder is glazed aqua and ready to be fired again. |
|
T
TikiRootsRocka
Posted
posted
on
Wed, Jan 11, 2012 8:04 AM
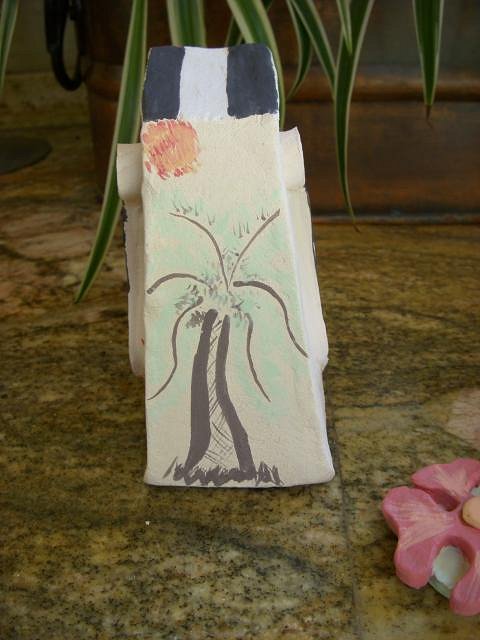
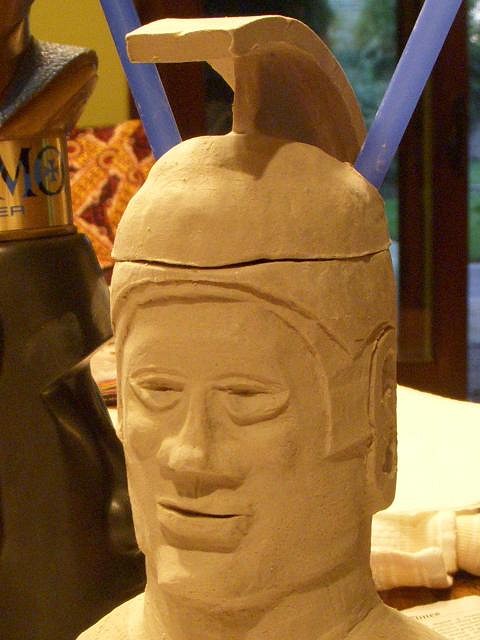
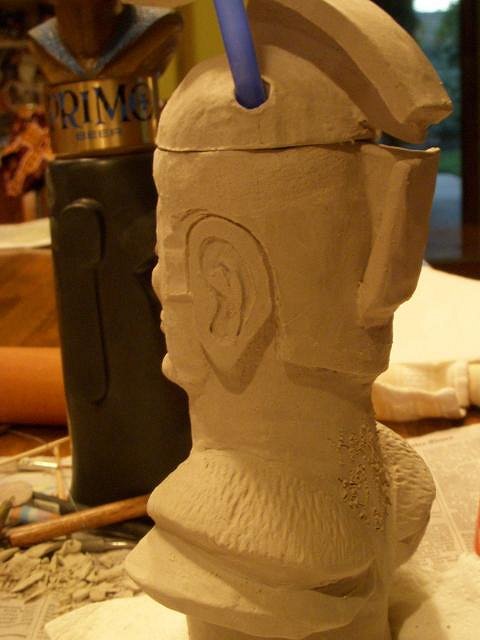
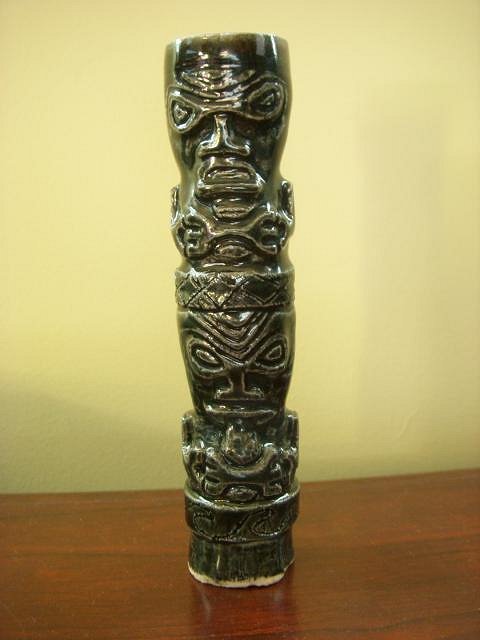
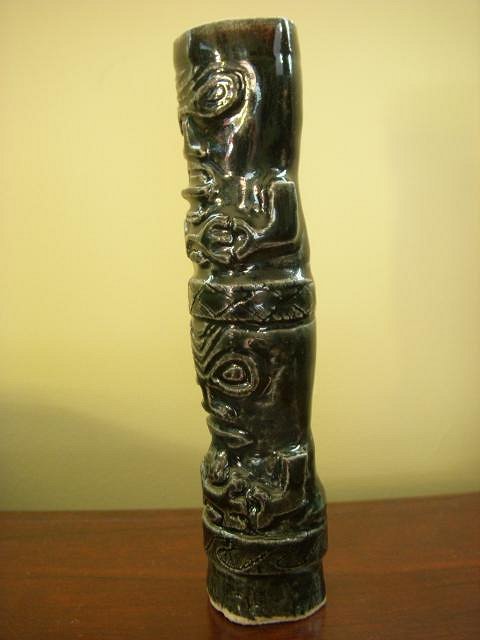
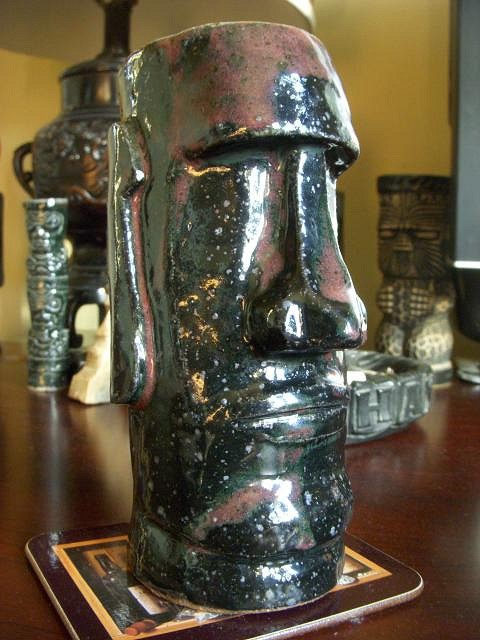
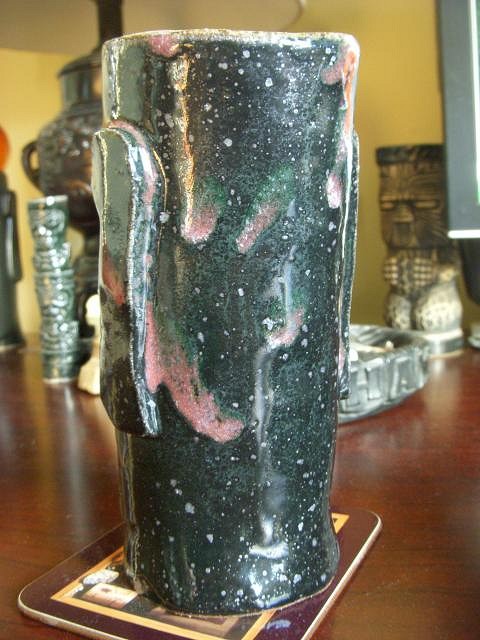
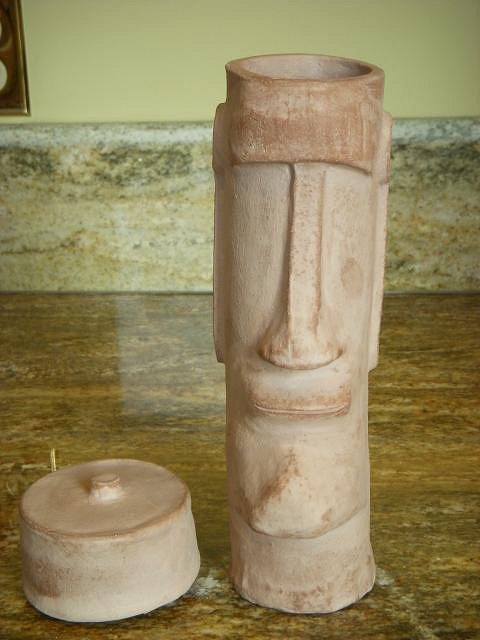
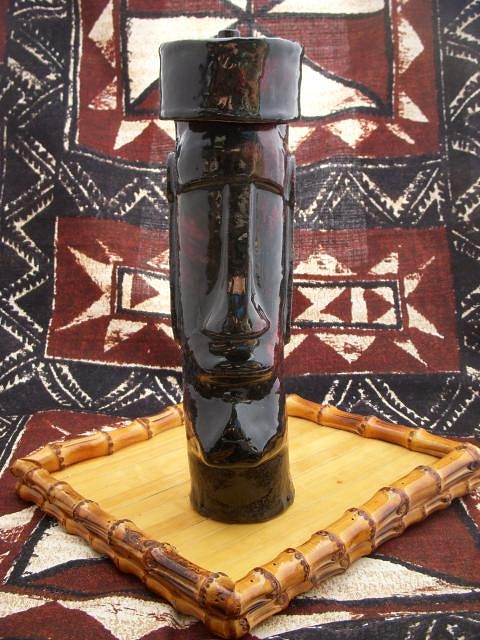
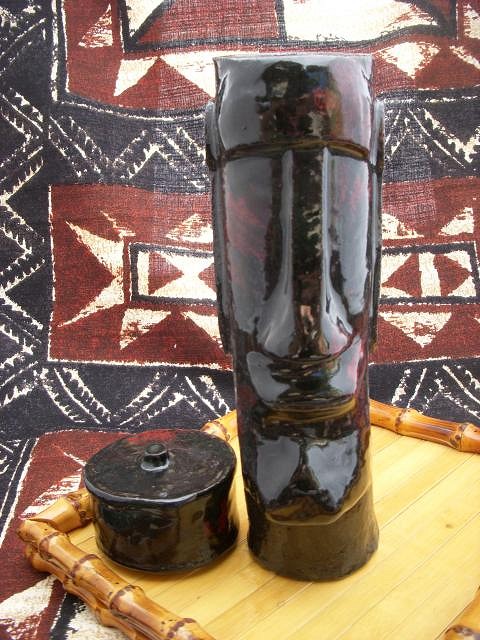
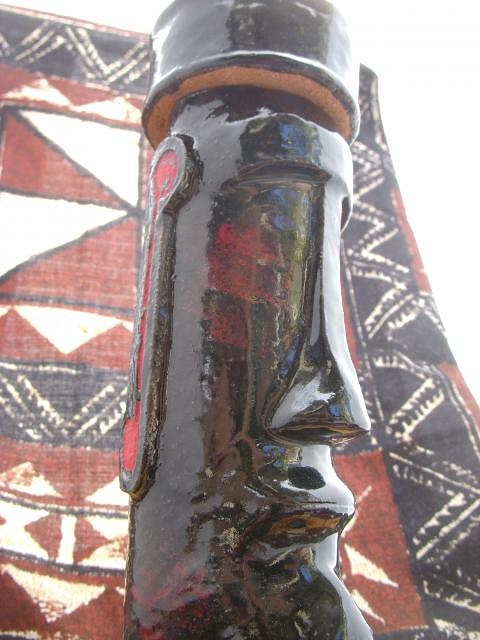
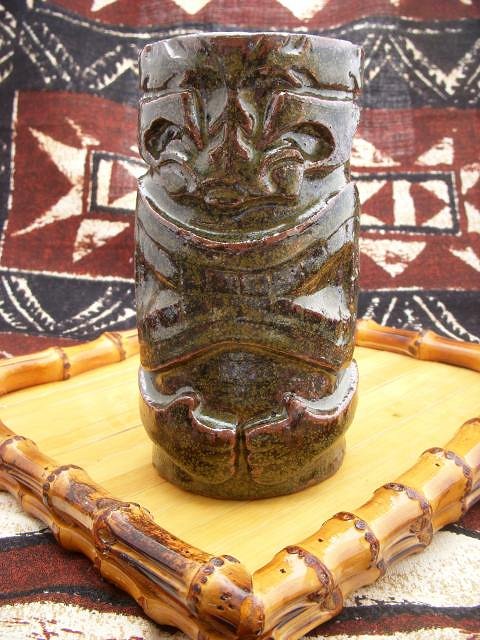
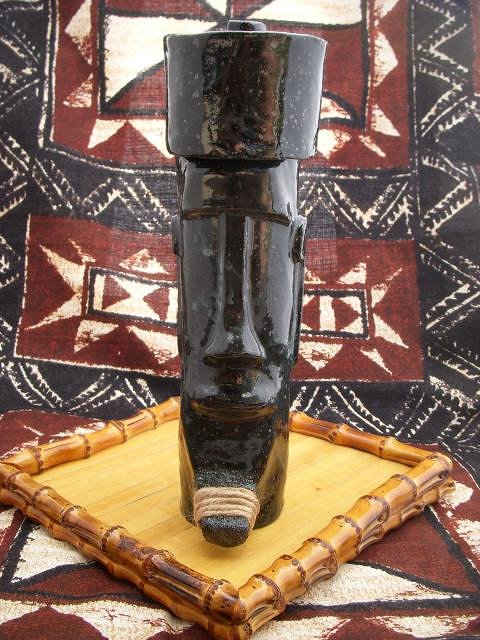
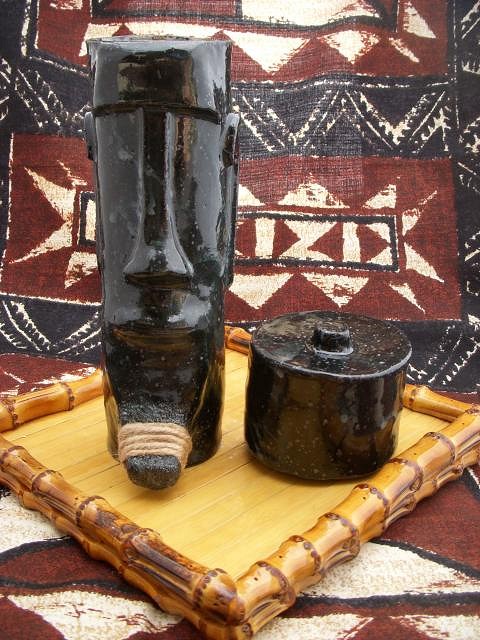
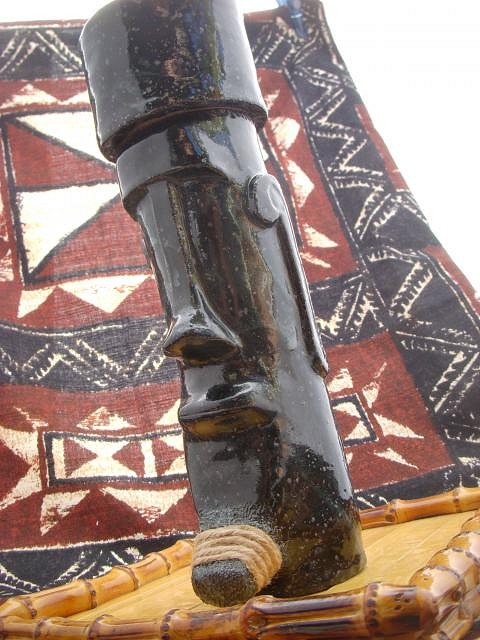
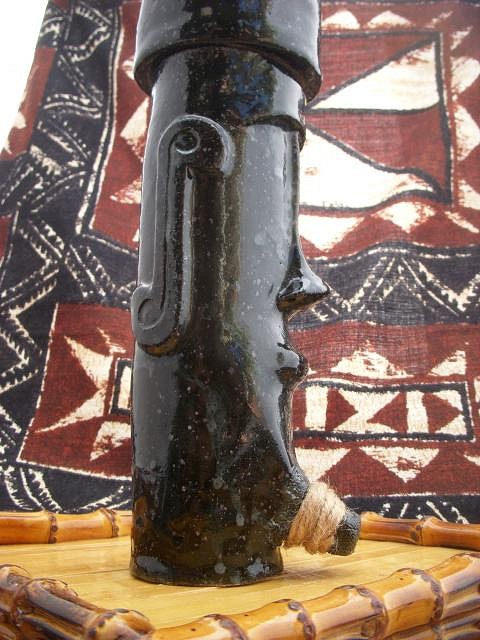
Happy New Year fellow TCers! Here's the Marquesan totem with glaze. I didn't take the time to sand some of the edges and it shows. It was also suggested that I try dabbing the edges with rubbing alcohol, to help smooth them out. Here's my "Skywalker" Moai. The way the glaze turned out it looks kind of like the sky and stars. I'm in the process of re-doing this one with a different glaze instead of the red, to make it look like the milkyway. It's about a foot tall and has a detachable topknot lid. Here's the inspiration for the improved edition. On the puffer fish toothpick holder, I got glaze in the toothpick holes, so you can't put toothpicks in them. On top of the accident in the kiln with the Primo Beer mug, my mom dropped the lid. I didn't like how it turned out anyway, so it's also on my redo list. Thanks for stopping by! |
|
T
TikiRootsRocka
Posted
posted
on
Fri, Jan 13, 2012 9:54 AM
Hello again! Here's the toothpick holder that doesn't hold toothpicks. I wanted to make some crazy looking cannibal, but got lazy and didn't finish. It'll be a good test glaze piece to have fun with. Here's the first piece of 2012 and my first Ku God. Another Moai, but this one has a lean and stands about 13.5" before shrinkage and firings. Thanks for looking and have a great day! |
|
Z
zerostreet
Posted
posted
on
Fri, Jan 13, 2012 11:24 AM
Nice work! Really like the Moais! |
|
H

hang10tiki
Posted
posted
on
Sat, Jan 14, 2012 12:05 AM
Cool stuff |
|
D
danlovestikis
Posted
posted
on
Sat, Jan 14, 2012 1:10 PM
Wow you have made a lot of new designs. When you make your mold be sure to post photos here. You asked umeone if there was anything you have forgotten. You must have mold soap or your mold sections will fuse together permanently. I've tried to post all my mistakes along the way so if you check out my latest project you can go step by step with the mold making process. Remember each mold section must be able to pull straight off your sculpt. If it can't do it when you make the mold it won't do it when you pour your work. Good luck and best wishes, Wendy |
|
V

VampiressRN
Posted
posted
on
Sat, Jan 14, 2012 5:41 PM
Looking great...and I LOVE LOVE LOVE the toothpick holder!!! Keep up the good work. |
|
T
TikiRootsRocka
Posted
posted
on
Thu, Jan 26, 2012 12:51 PM
So, here's my first finished piece started and finished in 2012. #2 of 2012 and my first attempt at a Ku God #3 of 2012...stands about 13.5"...I wanted it the glaze to look like the milkyway...not quite good enough, but not bad on the first attempt. Thanks for looking! |
|
T
TikiRootsRocka
Posted
posted
on
Thu, May 31, 2012 12:00 AM
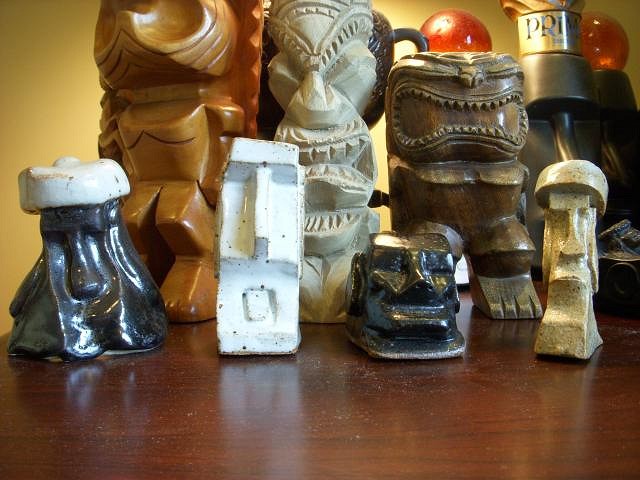
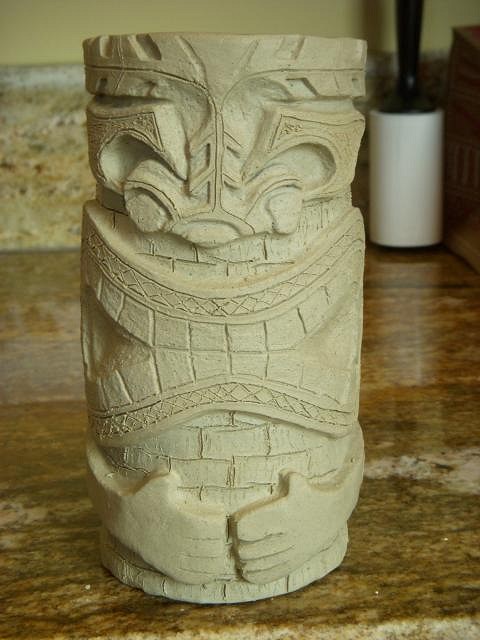
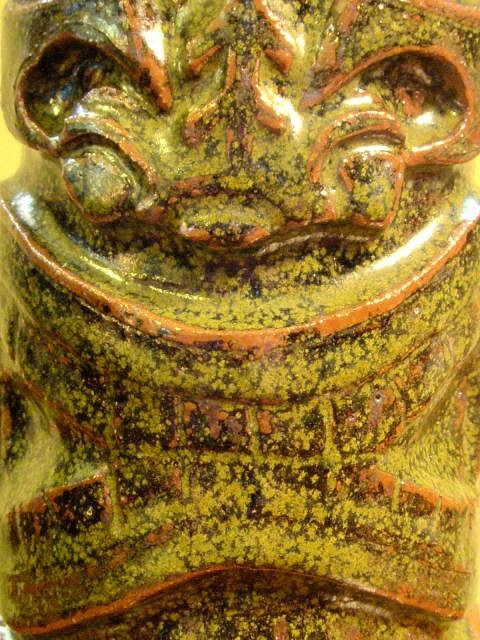
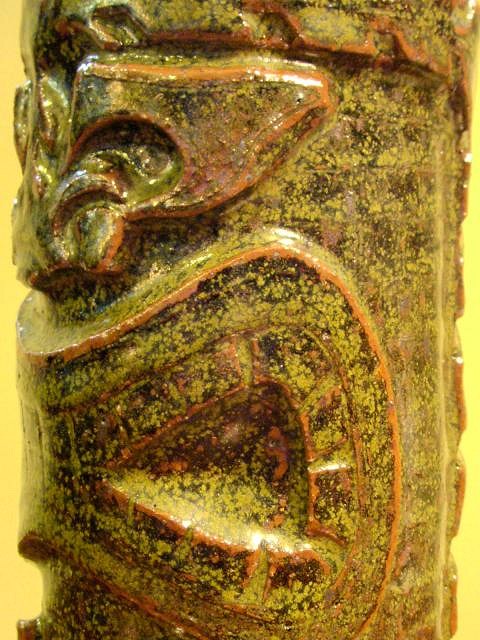
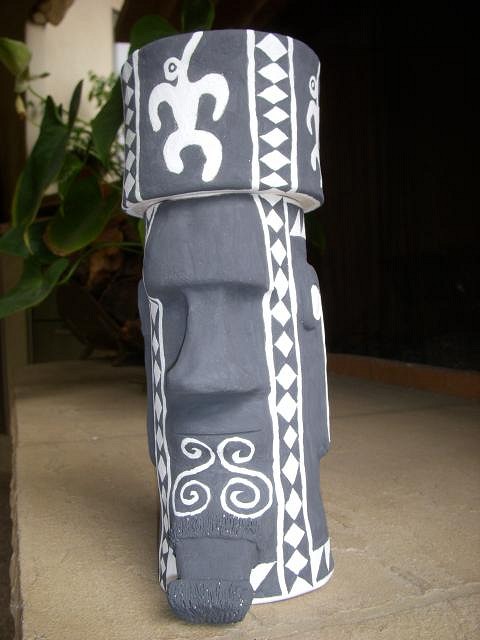
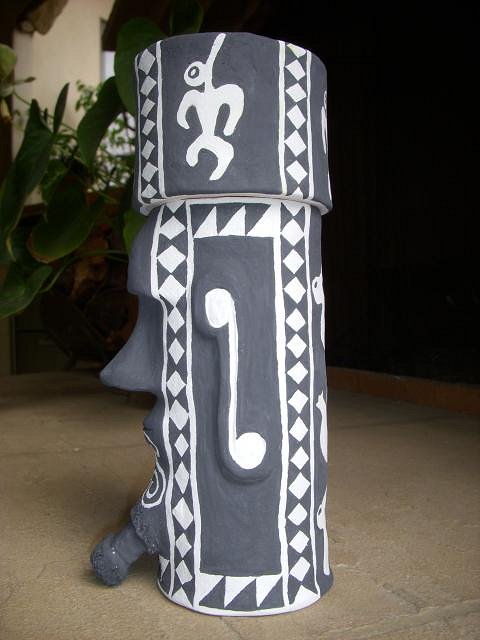
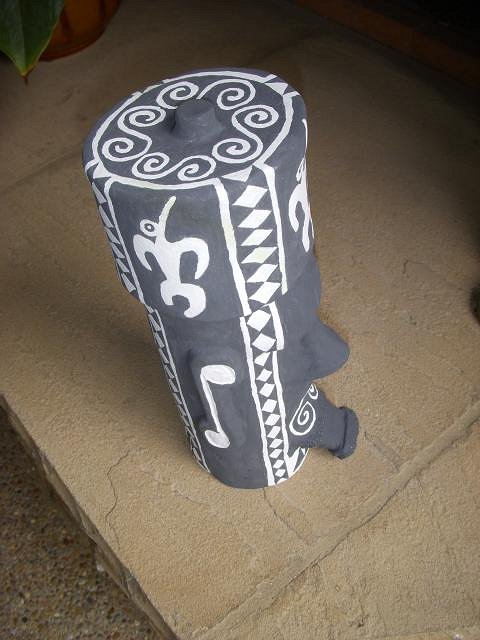
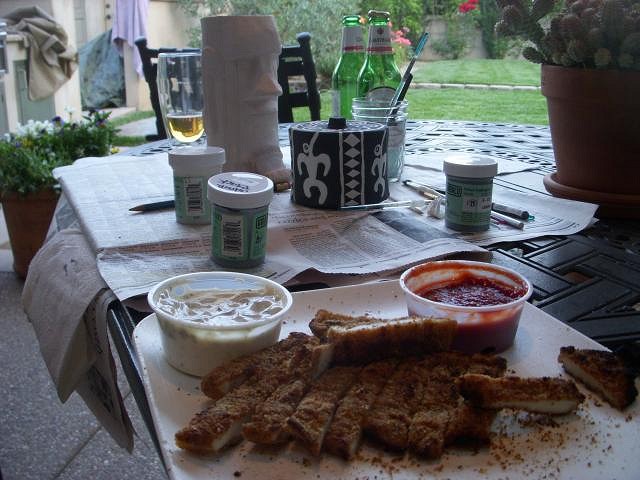
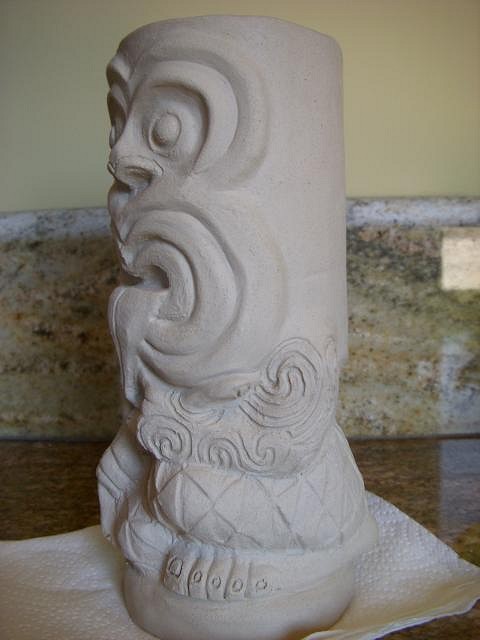
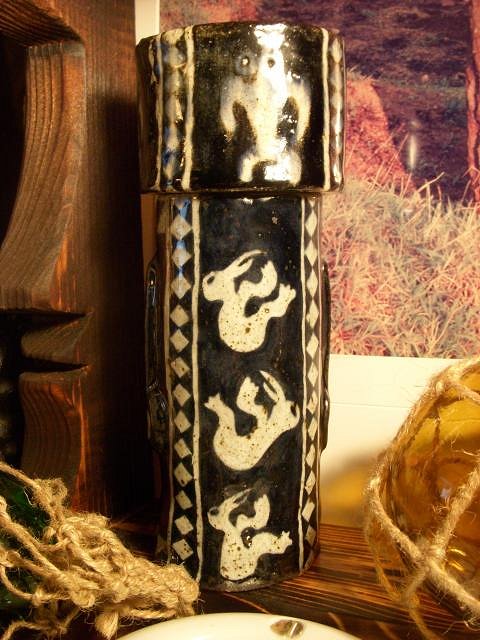
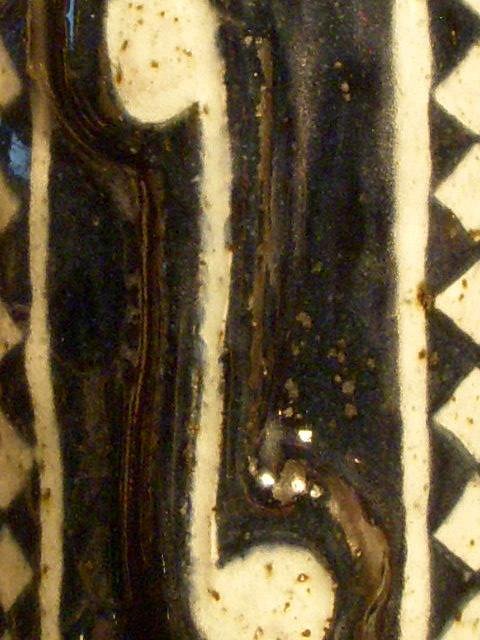
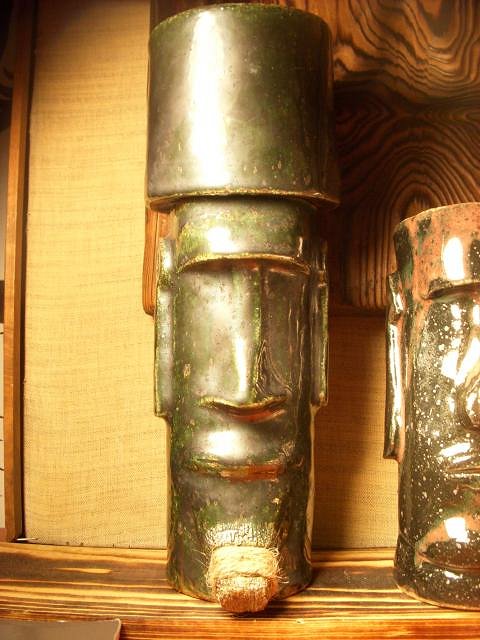
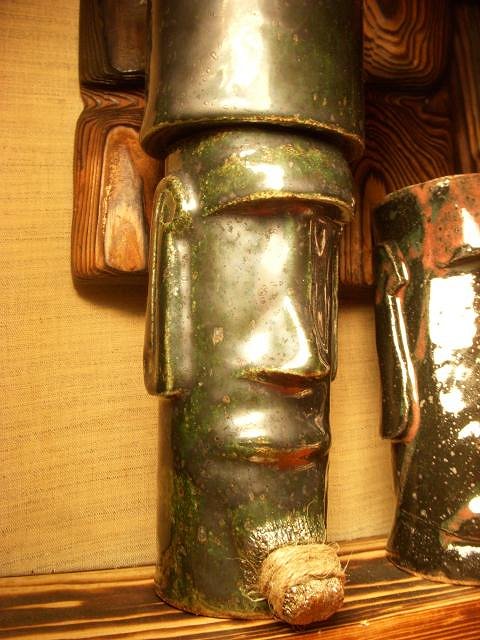
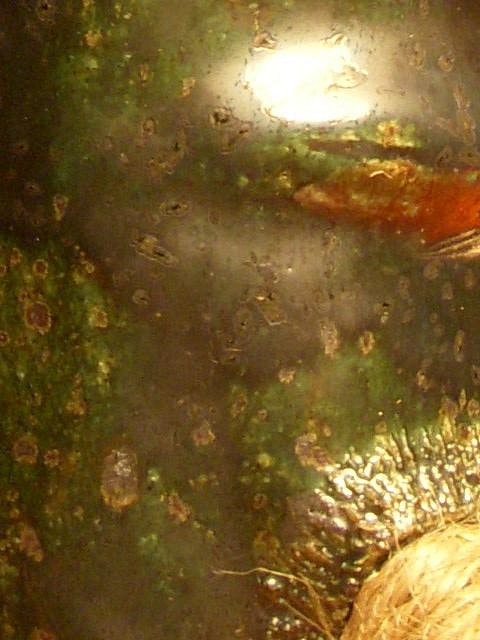
Wow! How time flies! There were several pieces from my last ceramics class that I never fired, until about 3 weeks ago. Rods bod clay has a lot of iron in it, so it should show through all over the white. There's 3 layers of white and one layer of black. I've tested with the white and know that it's not going to stand up that well to this particular clay, which is what I want. It should be gray in some spots, with the brown clay completely showing through in others, with bits of iron busting out everywhere. I'm hoping the one layer of black will give me a light to dark brown range, depending on how much the clay shows through, with a few areas of black where I overlapped and dabbed extra glaze for some variance. I haven't tested this, so I'm going with my gut and keeping my fingers crossed. To finish, I'm gonna dip once in super clear and there will be jute yarn tied around the chin, like the Moai in one of my previous posts.
A little glazin' and some calamari steak snacktime. |
|
M
MadDogMike
Posted
posted
on
Thu, May 31, 2012 8:55 AM
Mike, looks great! I love the glazed designs. I really like the jute twine chin on the guy above, it adds a cool detail. Good thinking to carve a notch where the twine will go so it doesn't slip. You might want to experiment with some sort of shellac or varnish on the twine to seal it and make it more waterproof/washable? |
|
D
danlovestikis
Posted
posted
on
Thu, May 31, 2012 9:46 AM
Hi TikiRootsRocka, I'm really enjoying your thread. I started back on page one to refresh my memory and worked forward. You make great stuff. It is also good to have met you, twice now! Wendy |
|
T
TikiRootsRocka
Posted
posted
on
Thu, May 31, 2012 3:53 PM
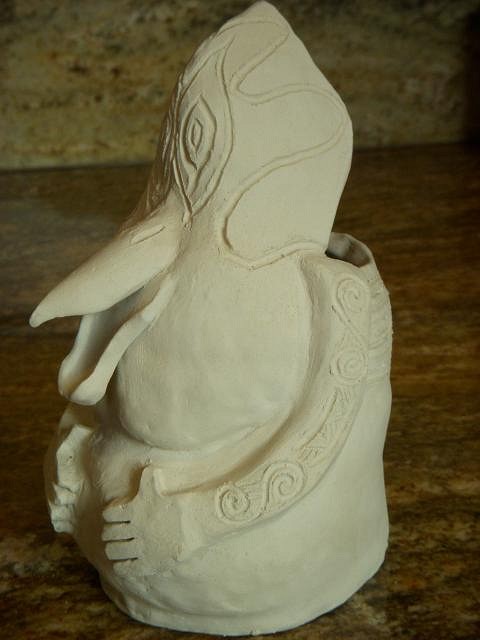
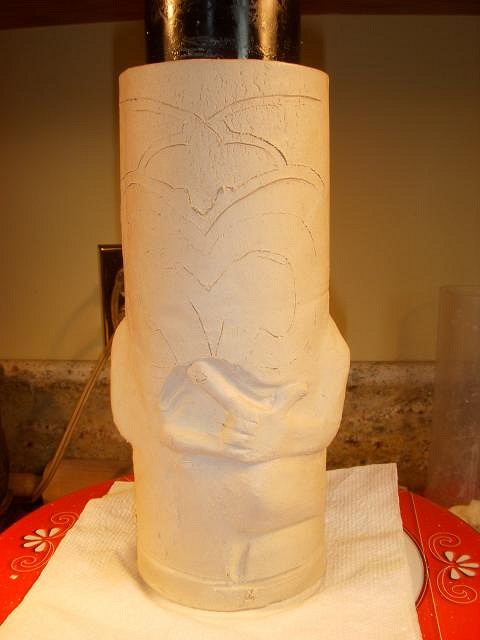
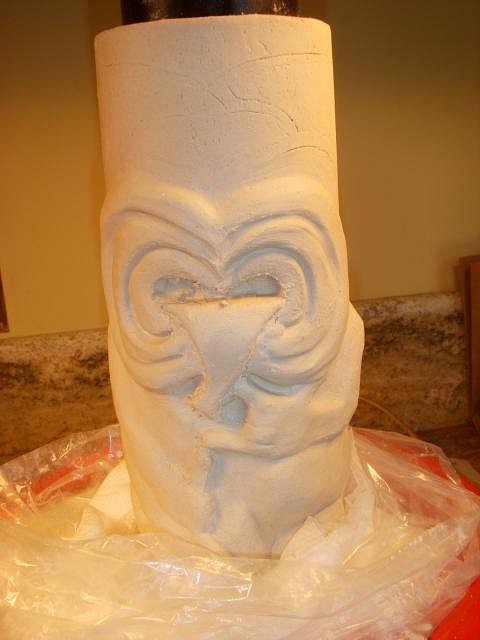
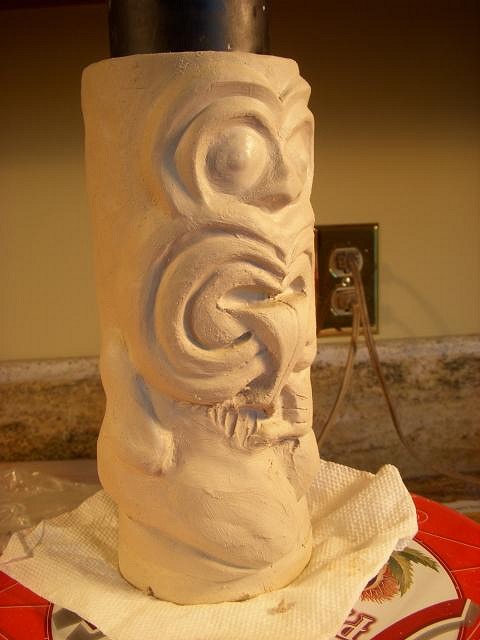
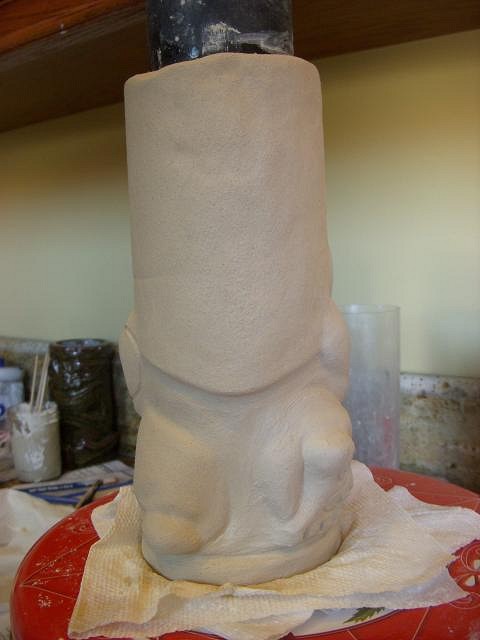
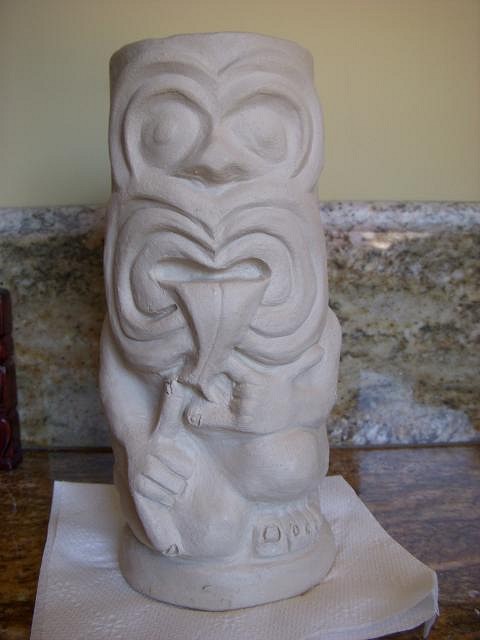
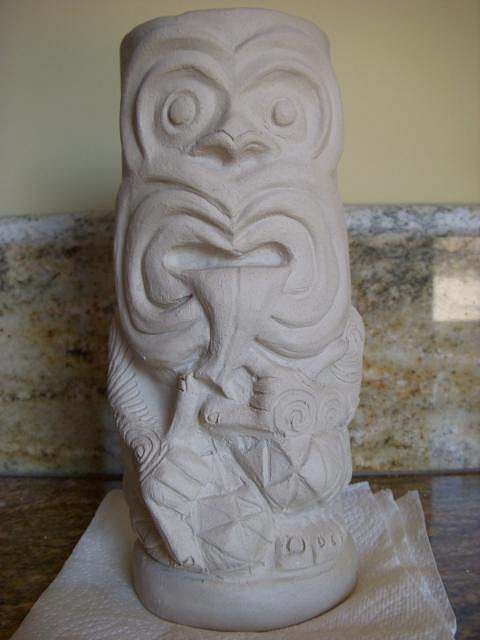
Hi Wendy and Mike, Thanks for stopping by! Great suggestion on the shellac. I think it might also add a little shiny gloss to the jute, to pick-up the super clear shine on the clay. Below, is a project I started a few days ago. He's on bmix with sand clay and call him "Shaka Rocka." I can't draw, so I just started building with little planning. I knew I was going for something Maori like and I also knew I wanted the legs to be in a less common style (from my amature knowledge), so he's squatting with his right foot in the back and his left foot in the front. "Rocka" sign on left knee and "shaka" sign on right thigh. I also have a hard time envisioning things in 3D, so I have a few mugs in the background to help guide my vision. I've always had a hard time executing the sides of mugs in the hip, thigh, and shoulder areas. Using the visuals was a huge help. I hope to execute this well enough to justify messing around with making a mold. |
|
M
MadDogMike
Posted
posted
on
Thu, May 31, 2012 8:09 PM
Very cool Mike. I'll be watching to see how you pull those legs off |
|
T
TikiRootsRocka
Posted
posted
on
Fri, Jun 1, 2012 5:22 PM
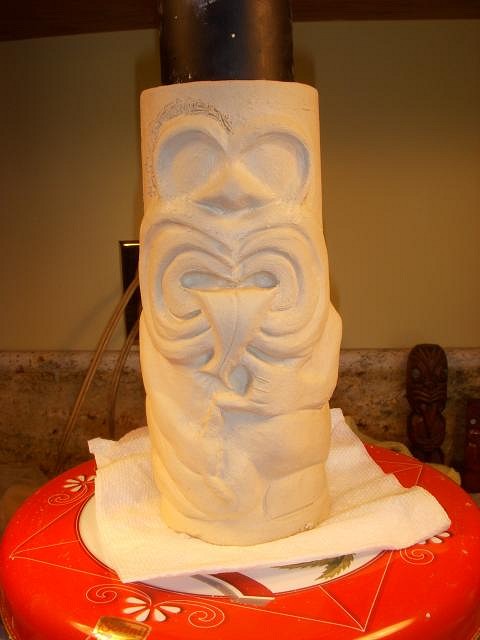
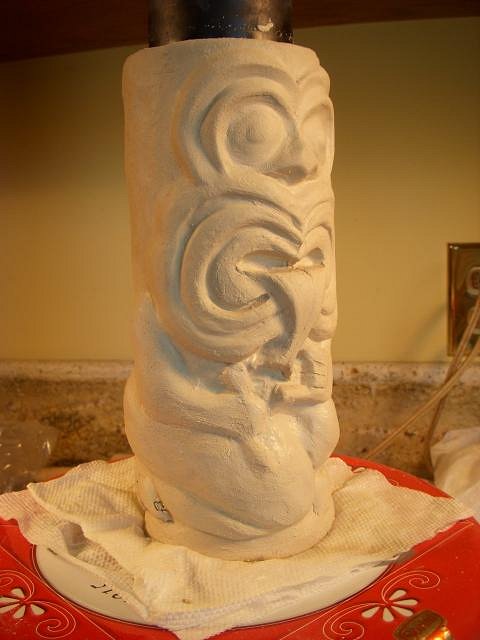
Here's some more progress shots from the last few days.
I didn't like how the arm and shaka hand were looking, so here's the start to my fix. More tomorrow... |
|
D
danlovestikis
Posted
posted
on
Sat, Jun 2, 2012 1:13 PM
He's good, I like him, Wendy |
|
T
TikiRootsRocka
Posted
posted
on
Fri, Jun 8, 2012 5:48 PM
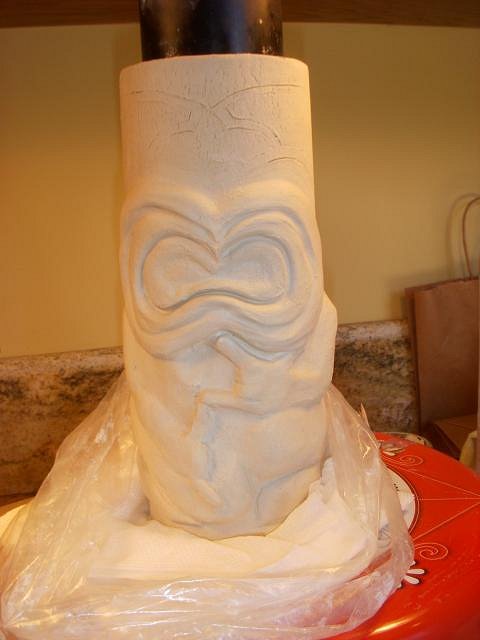
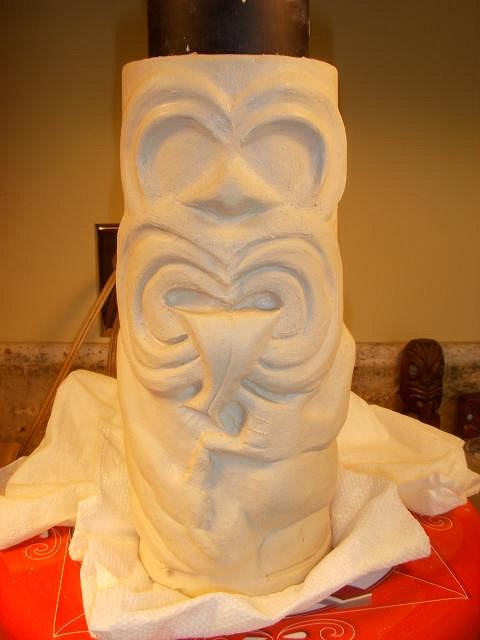
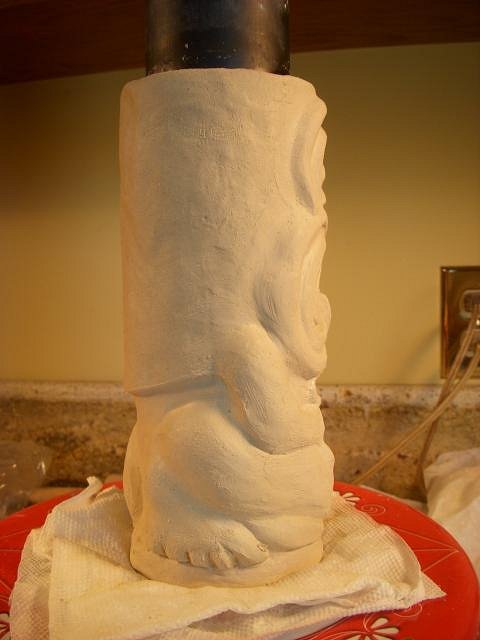
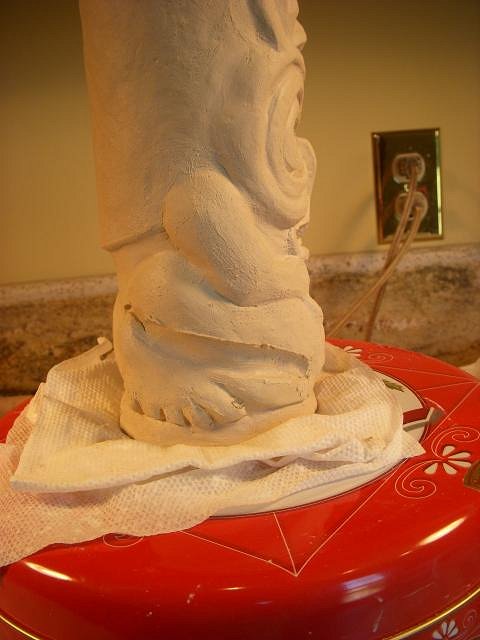
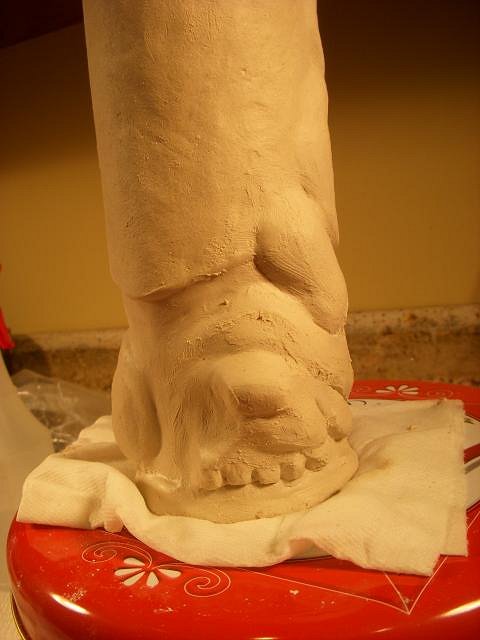
Thank you Wendy. It's been a fun challenge, definitely pushing myself on this one. Here's my first fix of the shaka hand. I realized that I didn't like how the right leg was connecting to the foot in the back. The foot was hidden too far under the body and you couldn't see the bottom half of the leg folding back under the body. The shaka sign is also totally weak, so I did everything again. After the first fix: See the back foot sticking out to the right and the poor connection between foot and leg? Cutout some room for the leg to fold back under.
Now there's room for the leg and the foot points directly back instead of to the right. Getting closer. |
|
M
MadDogMike
Posted
posted
on
Fri, Jun 8, 2012 8:19 PM
Mike, great work on those legs. I have an idea for the Pele/Fire Swap mugs that needs similar legs, I may have to plagiarize your design a bit :D It's something I've had in my head for a couple of years and just couldn't visualize it. |
|
T
TikiRootsRocka
Posted
posted
on
Sat, Jun 9, 2012 11:24 AM
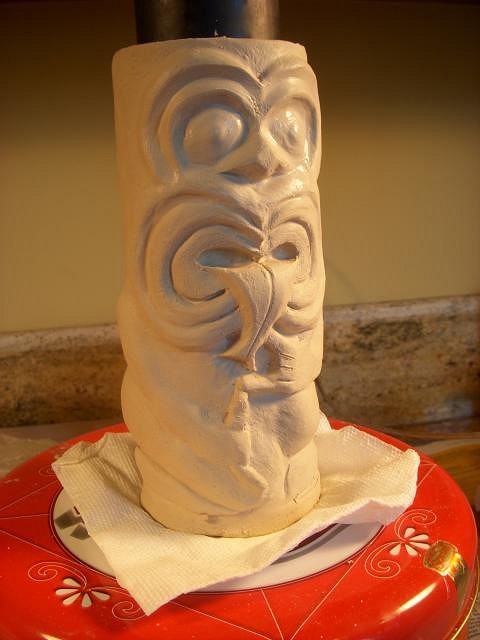
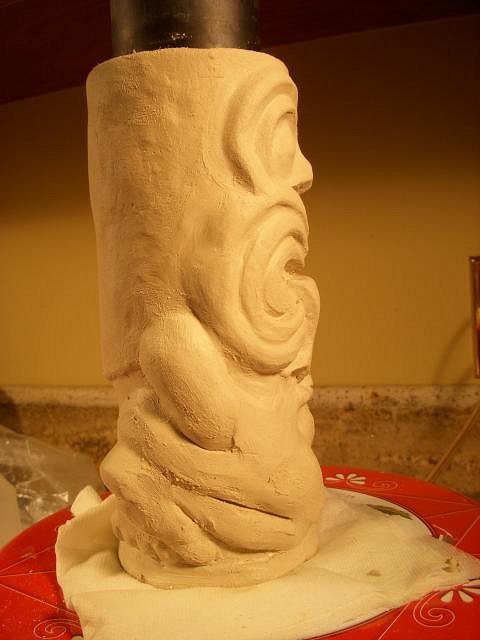
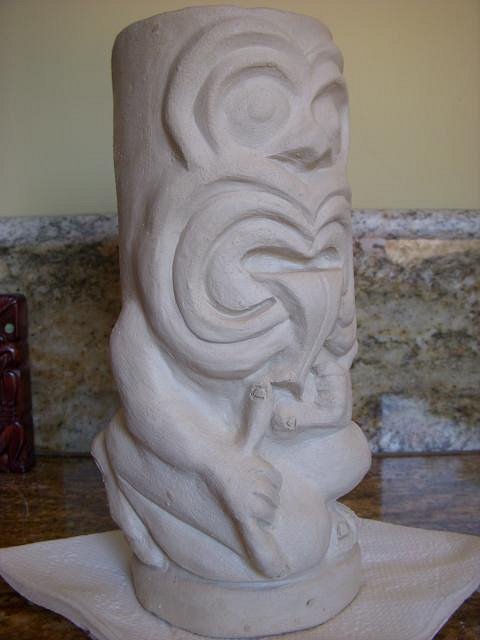
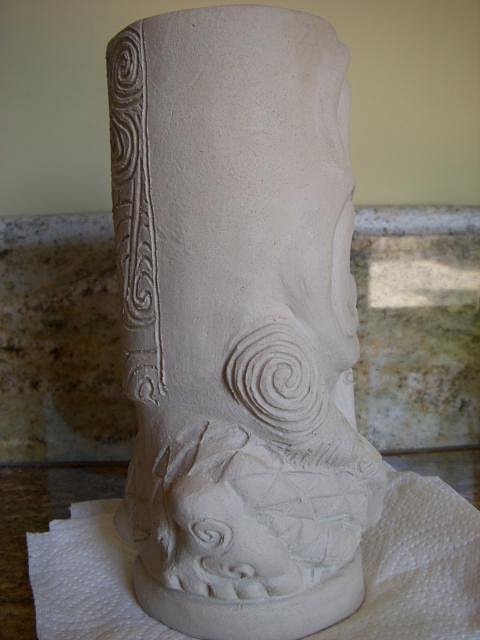
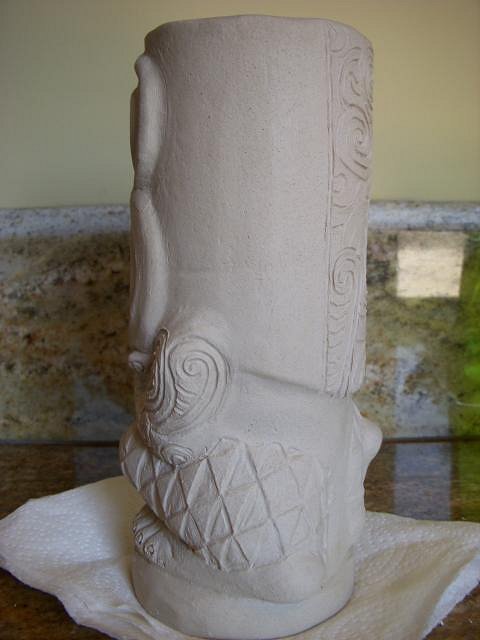
Thanks Mike, I like how it's turned out so far. I started working a on two piece mug that was suppossed to be a poi pounder, then it started looking like a volcano, and I started thinking Pele/Volcano swap...I just gotta commit!!! Well, here's where my Maori sits with tattoos and tapa cloth. Enjoy the rest of your weekend! |
|
B

Beachbumz
Posted
posted
on
Tue, Aug 28, 2012 12:04 PM
Love your designs! The Maori above is very cool, how did he turn out with glaze? |
|
D
danlovestikis
Posted
posted
on
Tue, Aug 28, 2012 12:23 PM
Your newest mug looks great. Do you plan to mold it? Wendy |
|
E

ebtiki
Posted
posted
on
Tue, Aug 28, 2012 1:22 PM
Yes, what Wendy said ... |
|
S

Sophista-tiki
Posted
posted
on
Tue, Aug 28, 2012 6:20 PM
you're totally doing it! nice design and the details put itover the top. |
|
M
MadDogMike
Posted
posted
on
Tue, Aug 28, 2012 6:32 PM
Mike, I love where this is going! |
|
T
TikiRootsRocka
Posted
posted
on
Thu, Aug 30, 2012 11:44 AM
Wow, thanks for the compliments everyone! I regret to say that I haven't touched clay in a couple of months, but I've sure got the itch. I've been busy moving into a new tiki office for my vintage clothing inventory. There's actually a bunch of space outside, so I hope to setup a little art studio, too. Anyhow, my original intent was to sculpt this and make a mold. As the piece progressed, it looked like it was going to be a 7 piece mold because of the undercuts. I've never made a mold, so I got kind of burned out towards the end of my sculpting. I was trying to dry it slowly, but didn't come back for about 5 days and there was a big crack in the back. It goes all the way through and the piece was really dry, so I didn't want to try wetting it again. It's been in this state for about 2 months, sitting and waiting. Any tips on filling the crack? Can I still try and make a mold, or is the clay too dry? I never intended to fire this as I just wanted to make a mold, so I got kind of sloppy with the base, and I'm pretty sure there's air pockets. I don't have my own kiln, so I don't want to be "that guy" at my community place, and risk ruining others' pieces. Thanks for stopping by and for the kind words! |
|
M
MadDogMike
Posted
posted
on
Thu, Aug 30, 2012 12:26 PM
Mike, you can still make a mold from a dry clay master (you can make a mold from practically anything) Just remember that it is more fragile in it's dry state. You'll need plenty of mold release, if you use a water based one (like mold soap), let it dry between coats so the dry clay doesn't soak up too much moisture. And you'll have to be especially careful with your part lines so you don't have any undercuts since the master won't flex any to get it out of the mold. |
|
H
hang10tiki
Posted
posted
on
Thu, Aug 30, 2012 7:00 PM
Lookin good |
|
T
TikiRootsRocka
Posted
posted
on
Tue, Oct 2, 2012 3:02 PM
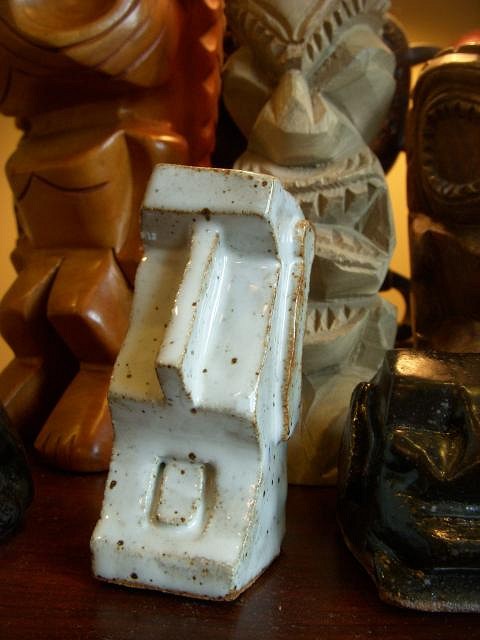
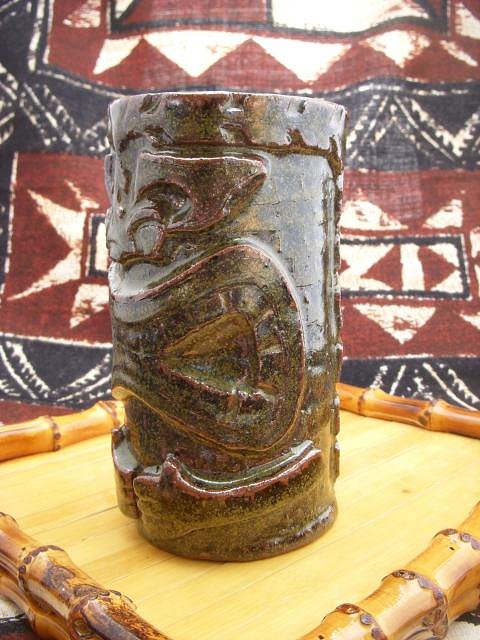
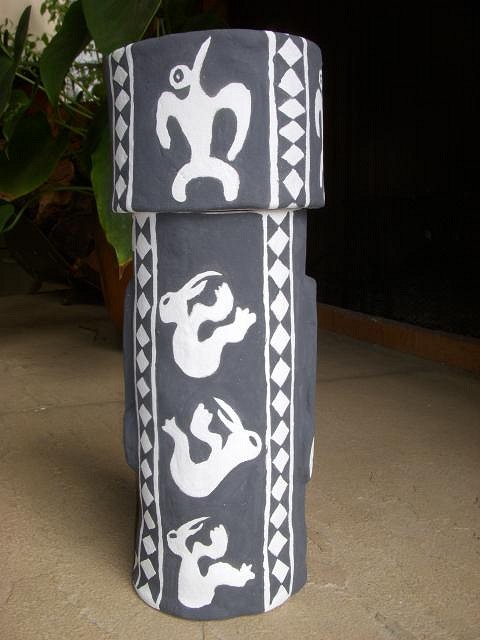
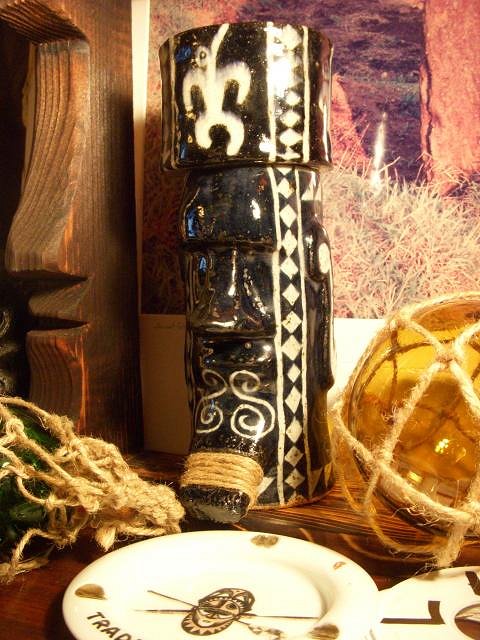
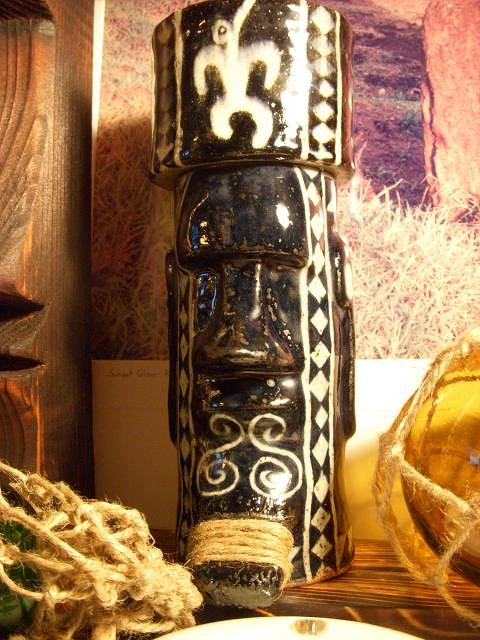
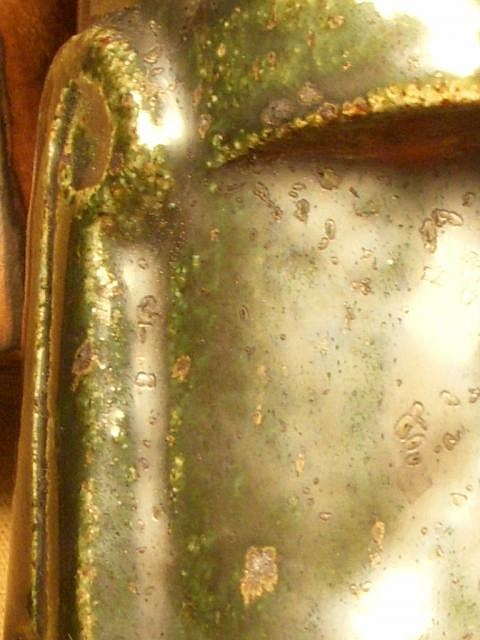
Got this out of the kiln a couple weeks ago. On Rods Bod clay, cone 10, with 3 layers of white, 2 layers of black, and one dip in super clear on the outside. One layer of gloss white and one layer of super clear on the inside.
|
|
T
TikiRootsRocka
Posted
posted
on
Tue, Oct 2, 2012 3:10 PM
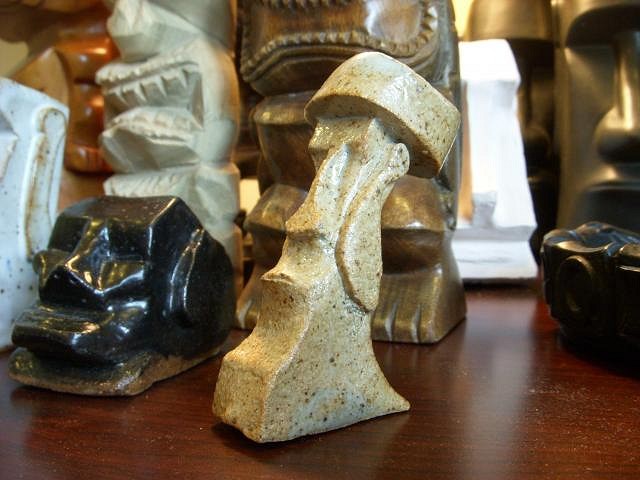
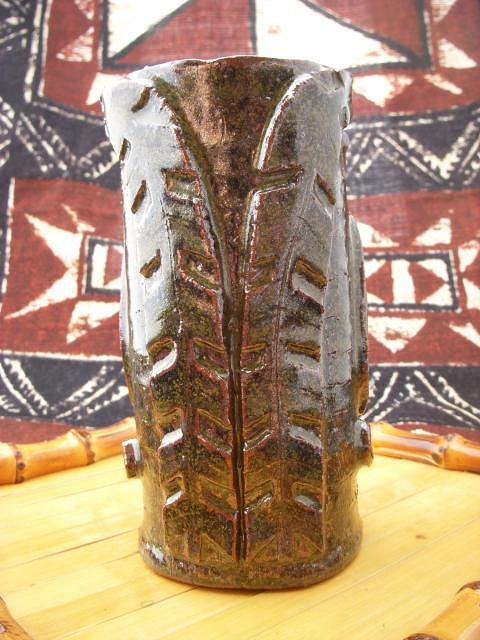
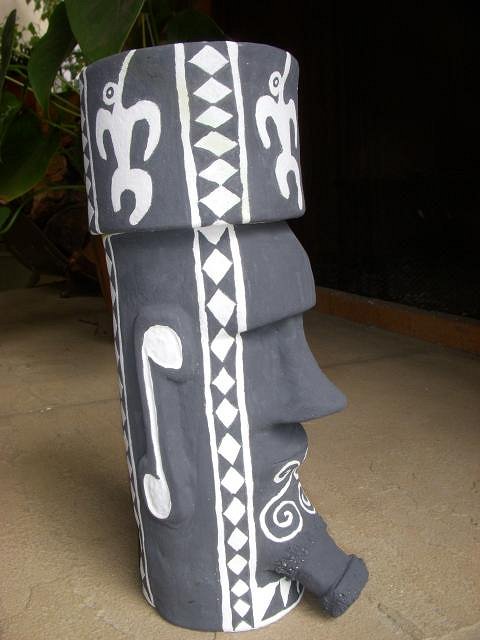
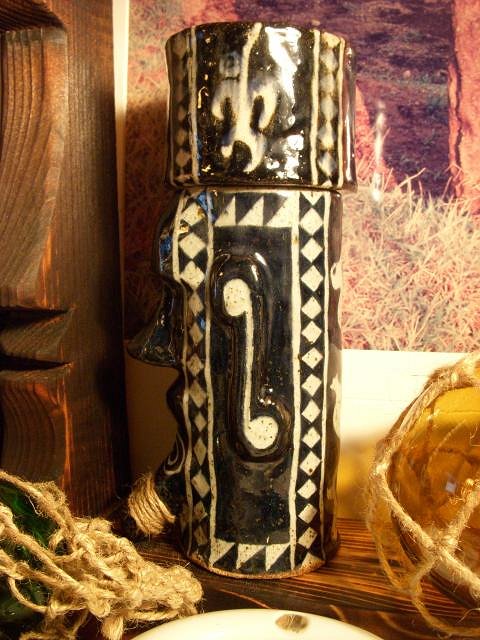
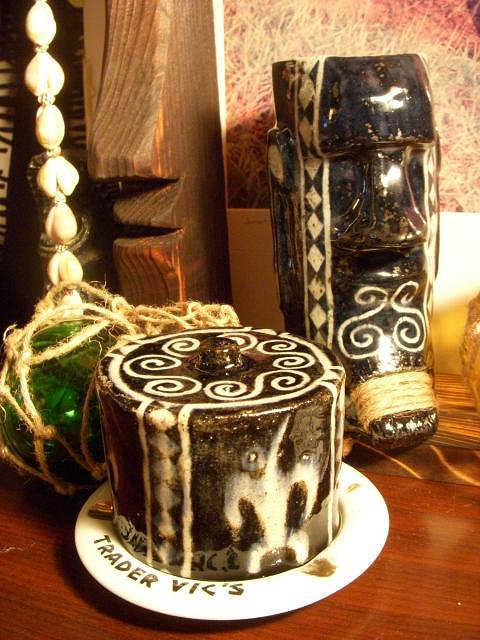
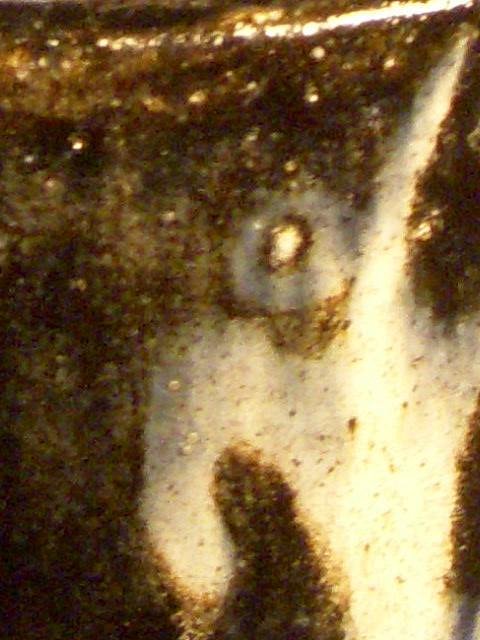
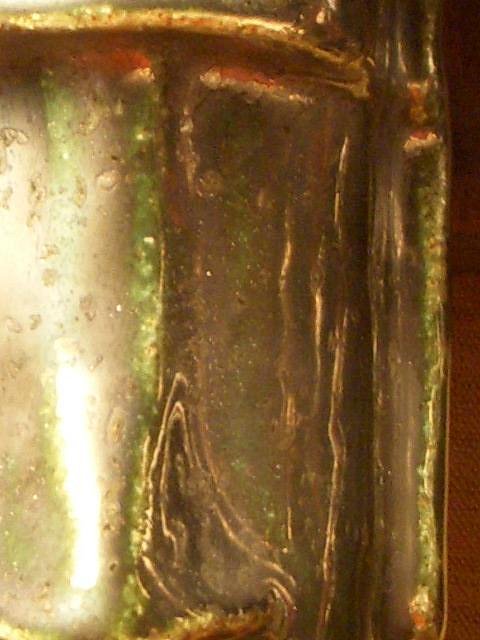
Also got this one back.
Mahalo for lookin'!!! |
|
M
MadDogMike
Posted
posted
on
Tue, Oct 2, 2012 3:26 PM
Cone 10! If you can't take the heat get out of the kiln! :lol: Great looking rustic glazes Mike |