Pages: 1 31 replies
|
L

LoriLovesTiki
Posted
posted
on
Thu, Jan 19, 2012 4:44 PM
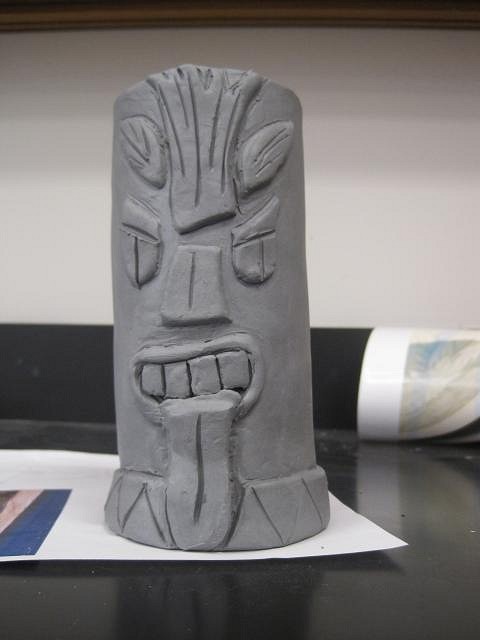
After being awed by the talents of many here on tikicentral I am in the process of trying to form my first mug. I teach technology in an upper elementary school and the students currently in art are making coil pots. So I've spent my prep periods this week with my feeble attempt at mug making. The design mimics a 4 ft carved tiki that's in my backyard. I apologize for both my beginner efforts and for my poor photo documenting. I forgot I wanted to document this so I only have a pic at the end of second day.
Any helpful suggestions are welcomed. I still have work to do on him! In case anyone's interested this is the tiki in my backyard that was my inspiration: thanks for looking! Lori [ Edited by: LoriLovesTiki 2012-02-16 11:38 ] [ Edited by: LoriLovesTiki 2012-02-23 07:13 ] [ Edited by: LoriLovesTiki 2012-03-13 07:42 ] |
|
M

MadDogMike
Posted
posted
on
Thu, Jan 19, 2012 5:44 PM
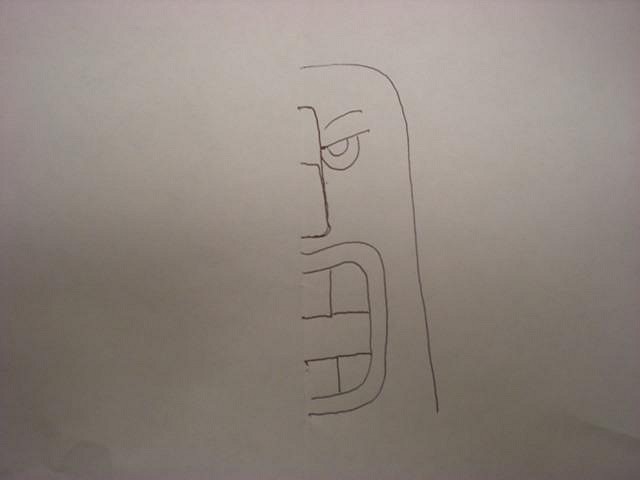
Lori, I have always found people here to be very helpful and encouraging, especially in the "Other Crafts" forum (just watch out for the lushes in "Food & Drink" below :lol: ) Very cool that you are trying your hand at ceramics, it's a great hobby. Symmetry is always a problem for me. If you are looking for intentional asymmetry, that's cool, if not here's a trick I use. Draw out one side of your face in the size you want, lay your paper on the damp clay and trace it with a ball-point pen or other similar tool. It will transfer to the clay. Now flip the paper over and do the same for the other side. Both sides will be the same and you'll have guide lines to carve and built clay on.
Most of all, ENJOY!!! |
|
L
LoriLovesTiki
Posted
posted
on
Thu, Jan 19, 2012 5:52 PM
Great trick, Mike! Yup, this guy's quite asymmetrical! He's actually a but crooked as well! I called him the leaning tower of tiki today. As to be expected with everything new, I've already learned a TON and he hasn't even gone in the kiln yet!!! Thanks for responding. :) |
|
V

VanTiki
Posted
posted
on
Thu, Jan 19, 2012 6:52 PM
Fantastic! Always happy to see a new Mug Maker take the leap of Clay! Are you going to fire the mug in a kiln? Do you have access to one at your school? Keep the pictures coming! Henrik "VanTiki" |
|
D

danlovestikis
Posted
posted
on
Fri, Jan 20, 2012 9:44 PM
Hi Lori, I came here to check up on you and learned something from MDM that I didn't know. One trick I have used is to take a photo and then stick pins through it into the clay to make marks that I can later follow. Since you are hand building you should also check out UMEONE's thread. She's great at hand building. When your mug is dry you can round the edges with sandpaper and it will look professional all of a sudden. WEAR A MASK when near any dry clay. Remember it's really dirt and full of bacteria. It also will just plan ruin your lungs. If I have a cut on my hand I don't work the clay until it heals or I wear a glove. Your mugs going to be great. Wendy |
|
H

hang10tiki
Posted
posted
on
Sat, Jan 21, 2012 12:26 PM
Lori |
|
L
LoriLovesTiki
Posted
posted
on
Sun, Jan 22, 2012 9:35 AM
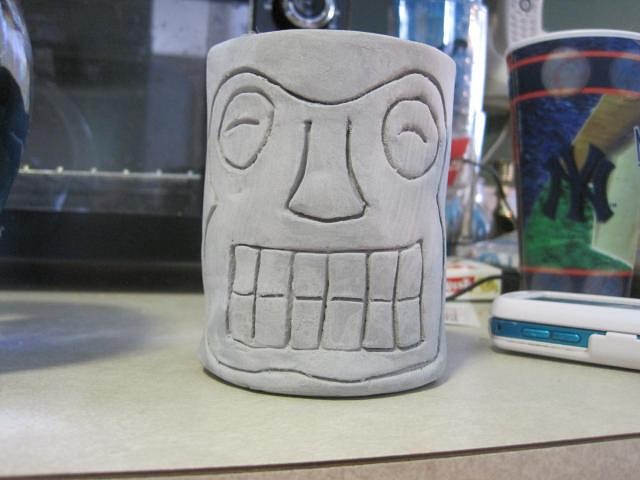
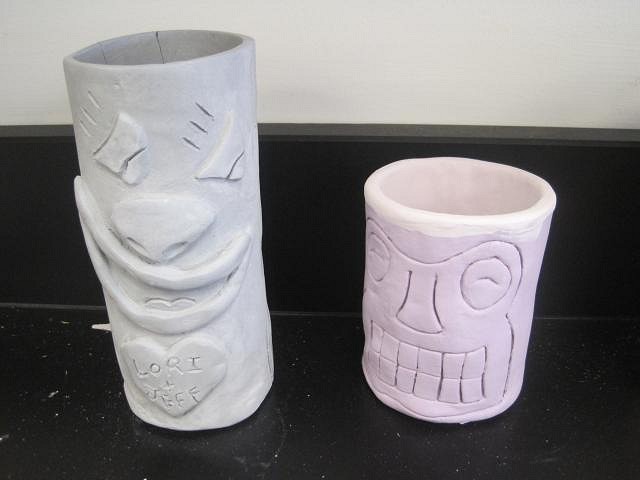
Thanks everyone! Yes, I have access to a kiln @ my school. The first guy is going to get his first fire in a day or two and I hope this second short little fellow I've named "Mel" gets fired at the same time. This one I didn't build up, I just carved into and I used MDM's trick. I drew it, folded the paper in half and then flipped it over. I used the dot trick Wendy mentioned too so his face is somewhat symetrical but he's not very exciting.
I think I like building more than carving so I started #3 by building up my base. Here's my big question - how do I keep the mug from getting all lumpy and bumpy as I hold him as I carve him or add pieces, etc. When the clay is soft enough to mold it's so easy to miss shape. I suspect it's because I'm using elementary school cheapo class. It only gets fired at a cone 4. Nothing's stopping me from buying "better" clay if I new what I was buying although it would be done to fire a couple of mugs in my school's HUGE kiln. Right now whatever I make with the school's supplies are getting fired with the students' stuff. I know I'm pretty luck in that regard, this playing around is costing me nothing but time. Btw, Wendy I sanded the top of Mel and it made a HUGE improvement, that top edge was horrible. I'm going to sand #1 tomorrow am before he gets into the kiln for his first fire! |
|
L
LoriLovesTiki
Posted
posted
on
Sun, Jan 22, 2012 9:37 AM
Thanks so much Wendy! I'll go check out Umeone's thread, I need all the help I can find. I did a Google search and didn't find much in the way of hand building. And I'll get a mask to use for sanding, thanks for telling me that. I appreciate your encouragement so much! |
|
L
LoriLovesTiki
Posted
posted
on
Sun, Jan 22, 2012 9:39 AM
Thanks Jon! when I found the site I looked at the TC names and just pciked it out of the sky but I'm sure I must have seen Wendy's that day b/c they're so similar. (It was accidental on my part!) |
|
D
danlovestikis
Posted
posted
on
Sun, Jan 22, 2012 11:15 AM
Hi Lori, I only use low fire 04 clays. You'll learn how much you need to dry them before carving. They carve very well at what is called leather hard. Also if you get a dent you can always fill it and sand it later. Today on my thread I'm posting an example of fixing an air bubble. I hope you find that there is a lot of fun in carving clay. Remember that an air pocket will make your clay explode in the kiln. Cheers, Wendy |
|
M
MadDogMike
Posted
posted
on
Sun, Jan 22, 2012 1:29 PM
Lori, check your PMs - I sent you a slab tutorial with pics I had made up for someone, maybe it will help you. Mike |
|
V
VanTiki
Posted
posted
on
Mon, Jan 23, 2012 6:30 PM
Great question! When I teach handbuilding classes the "handling" of clay is a major focus. The challenge of hand built ceramics over oil clay sculpture over armature is that the ceramic piece needs to be self supporting - and that for the majority of the time you are working with it it is VERY plastic. Years ago when I took fencing I was always told to hold the sword like a captured bird - not too soft so it will escape, but not too hard that you will crush it. Working with wet/soft clay slabs is just the same. Move slowly, always cradle the piece with as much surface area as possible (use the full flat part of your hand to spread the weight, not just a finger or two that will put marks in the clay). The more you hand build, the more the handling of clay will become second nature. Another big help for smoothing out your piece and getting rid of unwanted finger and tool marks is a scotchbrite pad (the abrasive side of those scrubbing sponges used to scrub dishes). Hit your piece with the rough side of the sponge, then flip to the smooth side. You can get super fancy and do a pass with a soft makeup sponge too (those white super smooth triangle ones). I'll also go through a series of paint brushes (from a rough chip brush to a fine nylon brush) to smooth out my pieces. I posted a few time lapse videos of me making mugs - watch for the sponges and brushes! :) http://www.vantiki.com/VanTiki/Movies.html Timing is everything with hand building. Make your shape. Let it firm up a bit so you can handle it. Add detail. Let it firm up some more. Add more intricate detail and carve away. Let it get leather hard. Carve final detail and get rid of tool marks. If the clay is moving too slowly or quickly between these states, you can slow it down with a spritzer/spray bottle of water, or speed it up with a blowtorch. Cant wait to see the fired and glazed mug! |
|
L
LoriLovesTiki
Posted
posted
on
Tue, Jan 24, 2012 11:16 AM
Thanks for all the information Henrik! The timeline really helps with my understanding of the process too! Thanks so much for everything. I think 1 & 2 are in the kiln as we speak so I'll have to be choosing glaze colors tomorrow I hope. :) [ Edited by: LoriLovesTiki 2012-01-24 11:17 ] |
|
L
LoriLovesTiki
Posted
posted
on
Thu, Feb 16, 2012 11:27 AM
Update: This whole mess took a LOT more time than I ever anticipated! Mugs 1 & 2 came out of the kiln for the second time (glaze fire) with some problems, ahem learning discoveries.
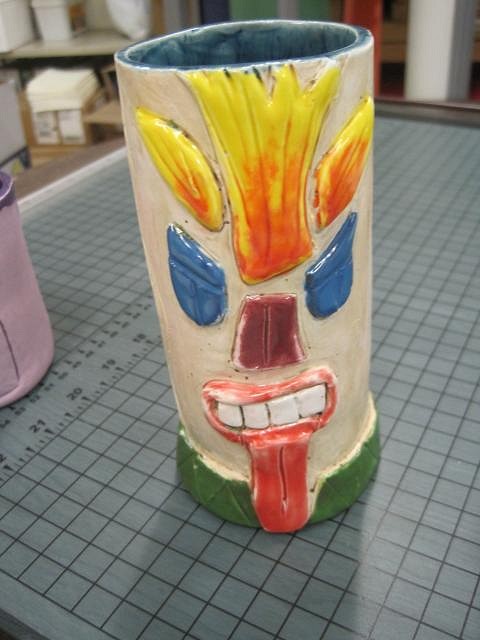
The first mug's glazing was a labor of love. All his features took me FOREVER to paint. It didn't help that I was doing this on my prep period, was searching our ceramic supplies for the colors I wanted, was trying to avoid the underglazes etc. He came out of the kiln looking kinda cool but he needs some touch ups. The background color was one of those glazes with the flecks in it but I didn't really want flecks and specs so I purposely didn't stir up the stuff in the bottom. And since we didn't have any transparent glazes and the Pearl arts & crafts store near me closed by I tried using a sponge to wipe off the excess glaze so I'd get more around the features and in the carvings. Well.....it didn't come out quite the way I wanted so I'm going to do some more work on him. I was disappointed that the sponge also removed some of the glaze on the edges of the nose, lips, base band etc, but the rookie art teacher who has been letting me crash the art room thinks it give him an aged look. I'll post more pictures of him when he's done DONE and mug #3 is patiently waiting for his bisque fire. Thanks for looking. On another note I got my first tiki farm mug for Valentine's dat (the red cannibal mug) and a couple of tiki martini glases from them too!!! [ Edited by: LoriLovesTiki 2012-02-16 11:38 ] |
|
D
danlovestikis
Posted
posted
on
Thu, Feb 16, 2012 1:27 PM
Hi Lori, this is really fun to watch. I haven't experimented with glazes nearly enough. Be sure to keep a journal of your glazes used and what to did with them like not stirring. The journal will help you in the future. I keep a record on every item I make. It also helps when someone asks for something similar. I already am wondering how you got the orange and red effect on the eyebrows and forehead. It's beautiful. MadDogMike does under glaze first. Puts it into water which will show if there are any defects. If there are he adds more under glaze. Then you coat the mug with clear glaze and that seals it in. You just haven't done the last step. I can tell you have been bitten by the tiki bug. Tiki Farm puts out quality tikis by many talented artists. We have collected many of their mugs. Enjoy, Wendy |
|
M
MadDogMike
Posted
posted
on
Thu, Feb 16, 2012 6:10 PM
"This whole mess took a LOT more time than I ever anticipated!" :lol: Ceramics were created to teach PATIENCE to people like you and I :lol: Congrats on your first mug! Just keep plugging on and you'll continue to learn and improve. BTW - Underglaze on the outside is OK. You need a glossy glaze inside to make the mug food safe but a matte finish on the outside can create a raw, primative look and feel. Wendy is right about the notebook; post pictures there along with glaze names and techniques. It can really be helpful later. |
|
L
LoriLovesTiki
Posted
posted
on
Thu, Feb 16, 2012 6:49 PM
Wendy, I kinda blew it on the notetaking thing! I meant to do that - REALLY meant to do it - but didn't. I can however, still remember most so that will be my job for tomorrow, to write it all down. :) The orange and yellow things were supposed to be flames but all i did was 3 coats yellow then 2 coats orange on top. I paint like the elementary school teacher I am! And you're quite right, I'm totally bitten. Thanks again for your comments! |
|
L
LoriLovesTiki
Posted
posted
on
Thu, Feb 16, 2012 6:50 PM
Thanks again Mike for your kind words. Btw, I'm planning on following the tutorial you sent me for my next build. |
|
TT

Tiki Tonie
Posted
posted
on
Sat, Feb 18, 2012 11:21 AM
Nice job Lori!!! I bet the underglaze will end up being a happy mistake, can wait to see how it turns out. So you have motivated me again, thank you. I put it on my calendar to make my molds next weekend (once it's on the calendar, it's a done deal). I'll post the photos on Sunday. Don't you just love those Tiki Farm Martini glasses? I just bought a set of the first run ones on ebay. Thanks for posting your photos! Tiki Tonie |
|
C

Clarita
Posted
posted
on
Sun, Feb 19, 2012 1:52 PM
Hi Lori welcome aboard! very nice to see, you are trying your hand at mug making, I think is great, congrats! The other great thing about TC is, there are a lot of very kind and generous people, willing to help and encourage you. |
|
L
LoriLovesTiki
Posted
posted
on
Sun, Feb 19, 2012 4:14 PM
Thanks for the welcome Clarita! Everyone has been so supportive. I just wish I had 1/100th of the talent of some of the people here. But I am learning from the best. And Friday I spent my free time creating a clay journal as Wedny suggested. :) |
|
Z

ZeroTiki
Posted
posted
on
Wed, Feb 22, 2012 11:04 AM
Remember, Lori - every Tiki artist started with their first mug, once upon a time. I can't wait to follow your evolution, and remember that above all else, if you love the Tiki, the Tiki will love you back. Aloha, |
|
L
LoriLovesTiki
Posted
posted
on
Thu, Feb 23, 2012 6:46 AM
Thanks Zero! I love that "love the Tiki & the Tiki will love you back!" |
|
L
LoriLovesTiki
Posted
posted
on
Thu, Feb 23, 2012 7:12 AM
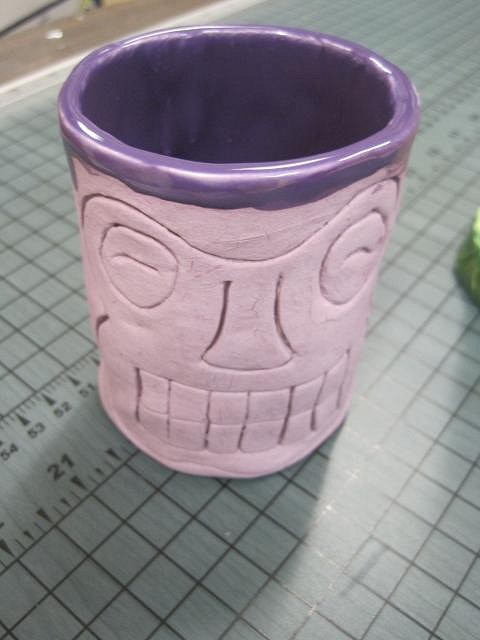
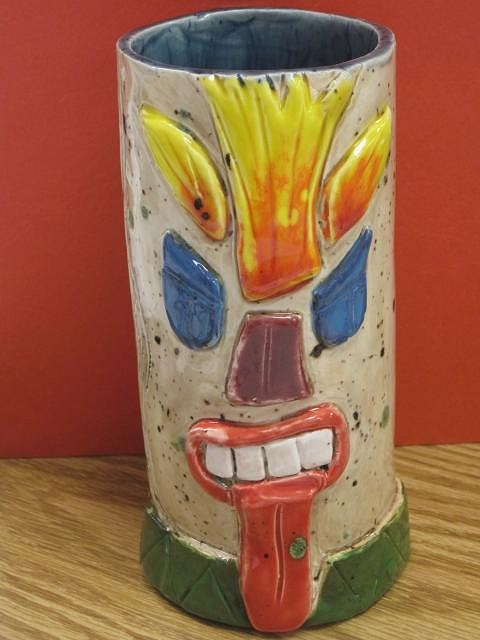
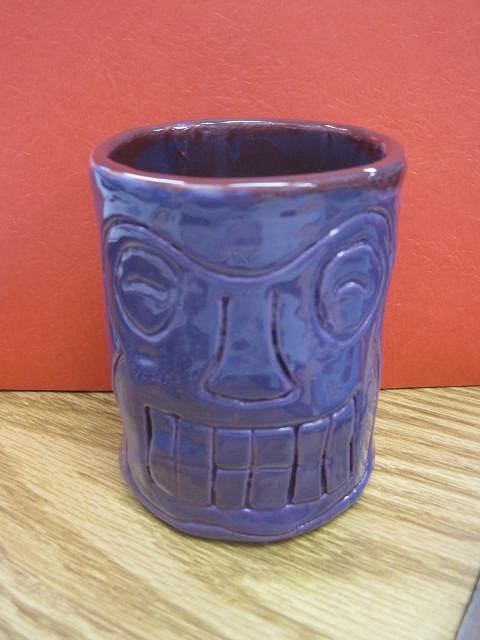
Mugs 1 & 2 are done! I glazed them both again, fixing some mistakes and adding some more glaze to the big one because it seemed unfinished. They're not perfect but I like them enough and even I am kind of impressed with my first attempts! Again, I thinak all of you for your kind words & encouragment. The color I used for the body of the mug was a flecked one cappuccino (crystal magic) so that's what's up with the specs, including the green glob on the tongue. It was the only "brownish" glaze available and beggars can't be choosers.
This little guy, "Mel" came out good but I made a mistake and used the wrong color when I recoated the inside to cover some white spots but amazingly it turned out pretty cool nevertheless. A happy mistake! Thanks for looking! |
|
D
danlovestikis
Posted
posted
on
Thu, Feb 23, 2012 7:50 AM
Hi Lori, both your mugs are really fun. You may also enhance your mugs with Liquitex Glossies an acrylic enamel paint that you put on then bake in your homes oven. You could turn that tongue spot into a bug. Every step is fun. Keep it up, Wendy |
|
L
LoriLovesTiki
Posted
posted
on
Thu, Feb 23, 2012 8:49 AM
OOOHHHH Wendy, what a great idea!!! I'll have to check out that paint you mentioned! Thanks. |
|
M
MadDogMike
Posted
posted
on
Thu, Feb 23, 2012 10:21 AM
That's one of the cool things about glazing - you often get a second chance (sometimes even a third, fourth, fifth or sixth chance to get it right) Keep at it and you be a master in no time! |
|
L
LoriLovesTiki
Posted
posted
on
Tue, Mar 13, 2012 7:41 AM
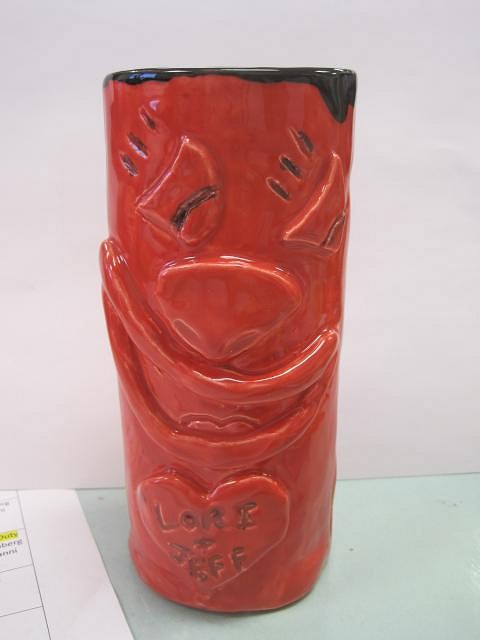
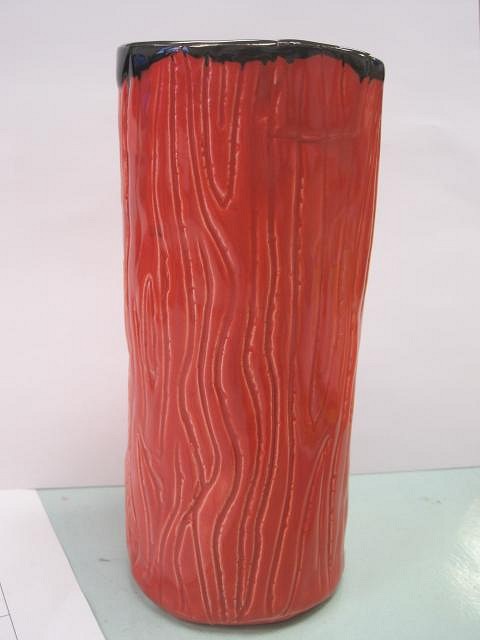
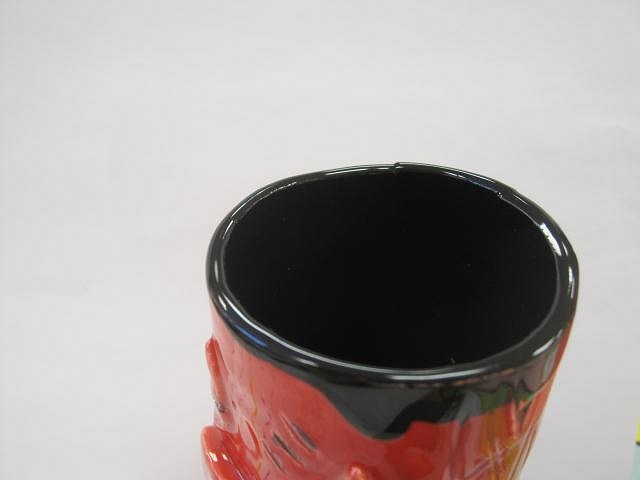
Mug #3 was a Valentine's Day present for my husband that he got yesterday, March 12th! Nearly one month late exactly. This one had bad timing and had to wait around for both its firings. I have nothing in the works now but there's an after school ceramics club that begins today so I should be starting another mug soon. With each project I learn something new. This one I made asymmetrical on purpose after MDM showed me a technique for creating symmetry which I failed at! The art teacher who lets me use his supplies and kiln thinks this one looks like a clown. Oh well. I need an old tiki carving book for inspiration, I haven't found one yet! Thanks for looking.... I really like the woodgrain carved into the back - and the black inside is cool too. My husband liked his mug. :) |
|
D
danlovestikis
Posted
posted
on
Tue, Mar 13, 2012 7:55 AM
Adorable. You must be a wonderful couple. It's super good to have you here. Wendy |
|
L
LoriLovesTiki
Posted
posted
on
Wed, Mar 14, 2012 8:42 AM
Thanks Wendy! You are so good at making me feel welcome and that I'm NOT wasting my time. I appreciate your kind comments and hope one day we will meet in person. :) |
|
D
danlovestikis
Posted
posted
on
Mon, Jun 18, 2012 5:46 PM
Lori, don't forget to post your swap photos here. The swap thread will go away but hopefully you will be adding to this thread for many years to come. Cheers, Wendy |
|
H

hannajames
Posted
posted
on
Sat, Jul 7, 2012 3:26 AM
Hi! I am actually a newbie here and your post caught my eye. I also wanted to try doing that stuff and I hope I could get help from you. Thank you so much :) |

Pages: 1 31 replies