Tiki Central / Other Crafts
Questions about Ceramic Mugs ...
Pages: 1 11 replies
|
W

Whystler
Posted
posted
on
Wed, Jul 11, 2012 2:07 PM
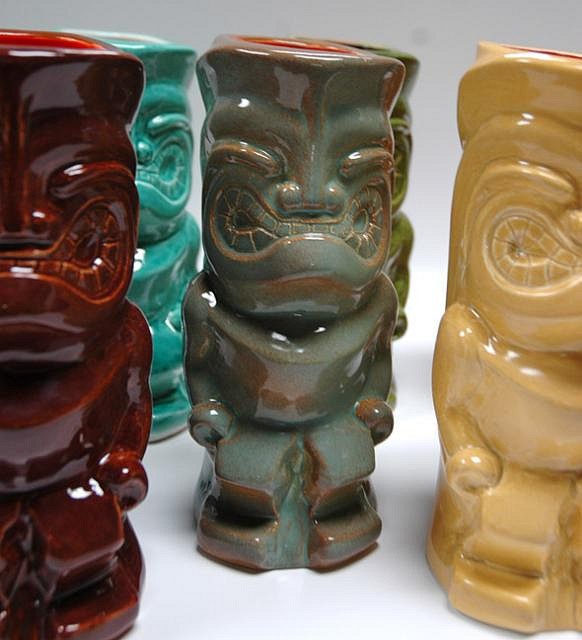
Hey all, There was a time when I was heavily into clay art as a business. I hand built green man faces/masks, dragon and faerie sculptures, and the like for a local Renaissance Faire. But I never did experiment with slip casting. I really love the look of the slip cast mugs that various folks are designing. And, of course, I have a few questions - mostly about glazing. Are you mug bottoms bare or glazed? And if they are fully glazed, how do you achieve this ... stilts and pins? I found that using pins created slumping occasionally, which is not a good thing on a bottom that you need to be flat I suspect. I have a nice faux celadon glaze recipe that we used to use ... and also a similar brown glaze. These colours seems to be compatable with the tiki style. If you have any advice about glazes, I would love to hear it. Here is one of the greenmen I used to make with the celadon glaze over a buff speckle clay. Would this look good for a tiki mug do you think?
Are molds generally two part? Or are 4 part molds as easy to use? Do you use a separate mold part for the bottom, or not? I'm just gettin sum idee-ers. It's always good to hoard info for the future :) -Whystler [ Edited by: Whystler 2012-07-11 14:08 ] |
|
D

danlovestikis
Posted
posted
on
Wed, Jul 11, 2012 3:29 PM
Hi Whystler, that glaze is very nice. On my thread I show the step by step making of 1 to 6 peace molds. The number of pieces is dependent on the shape of your sculpt. Indented bottoms need their own mold piece. A flat bottom will not. All your questions about molds can be found on my thread within the 110 pages! Wendy PS it is good to keep all your posts within one thread - just change your title to show you have updated - I do this most mornings |
|
M

MadDogMike
Posted
posted
on
Wed, Jul 11, 2012 5:51 PM
Dryfooted vs stilted is a personal preference. Stilting often leaves stilt marks but you can grind them off with a Dremel if you have to. If you recess the bottom you can still glaze the recessed area and leave just the ring unglazed. That Celadon glaze would have a nice vintage look to it. Maui Tiki did one a little while back that looked great. I prefer commercial glazes, maybe I'm just lazy :D It's just that you need to do so much testing with a home made glaze to be sure you get it right. I'd hate to spend 2 weeks on a sculpt and have it ruined because the glaze didn't fit the clay body I used. The commercial glazes are fairly inexpensive and they are very consistent. |
|
D
danlovestikis
Posted
posted
on
Wed, Jul 11, 2012 5:56 PM
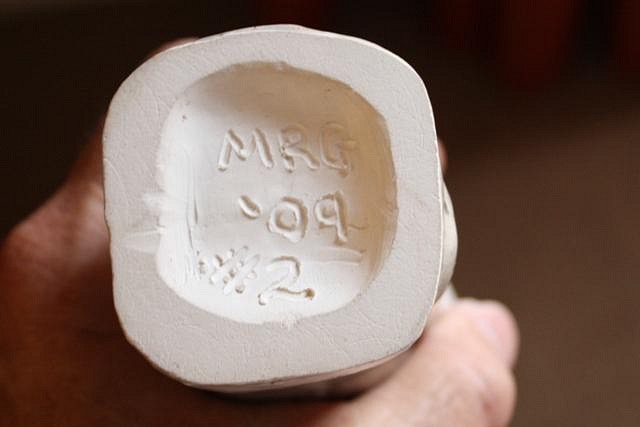
MadDogMike finished off answering the rest of your questions. I've been glazing the bottoms and using stilts. Today I pulled stilts off the bottom of a bowl and it pulled a section of the glaze off. I'm going to have to re-glaze it and hope for the best. I've used both a dremmel and sand paper after using stilts. Wendy |
|
W
Whystler
Posted
posted
on
Wed, Jul 11, 2012 6:17 PM
Thanks for the answers guys! I like the recessed/wipe off foot approach best. But I'm not sure my first attempt should be a 3 part mold... Food for thought, and I appreciate it! -Whystler |
|
M
MadDogMike
Posted
posted
on
Wed, Jul 11, 2012 6:39 PM
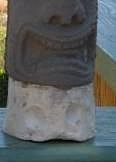
Hey Whystler, there's a cheat I use if I'm doing a short run of mugs mostly for personal use. You can use a 2 piece mold with a flat bottom. Then after it's pulled from the mold and the clay is still soft you can gently push on the clay to dimple it in. Here's an example on a small bottle. It's not considered very professional but it is better than a flat bottom and it will work until you're ready to try a 3 piece mold. |
|
ATP

Atomic Tiki Punk
Posted
posted
on
Wed, Jul 11, 2012 7:03 PM
These are the masters listen & learn. |
|
B

Beachbumz
Posted
posted
on
Wed, Jul 11, 2012 7:24 PM
Howzit Whystler Aloha And Good Luck! |
|
W
Whystler
Posted
posted
on
Wed, Jul 11, 2012 8:42 PM
Geez... The more you guys talk about this, the more excited I get about making a design and going for a mold sooner. My partner is my glaze guy, so he'll probably enjoy mixing up the glaze I mentioned. We have a cupboard full of glaze chemicals left. MadDogMike .. that's a good cheat in a pinch. When I saw you do that .. I thought .. yeahhhh. Maybe I could make a stamp for the bottom. Is the clay moist enough for an impression at the mold removal stage, or is it leather hard and carvable only? BeachBumz ... that is very tempting to try the 3 part on the first go. Do you just bind the two upper halfs together at the pouring and the 3rd half wedges in without extra support - or do you bind that too? -Whystler |
|
D
danlovestikis
Posted
posted
on
Wed, Jul 11, 2012 8:53 PM
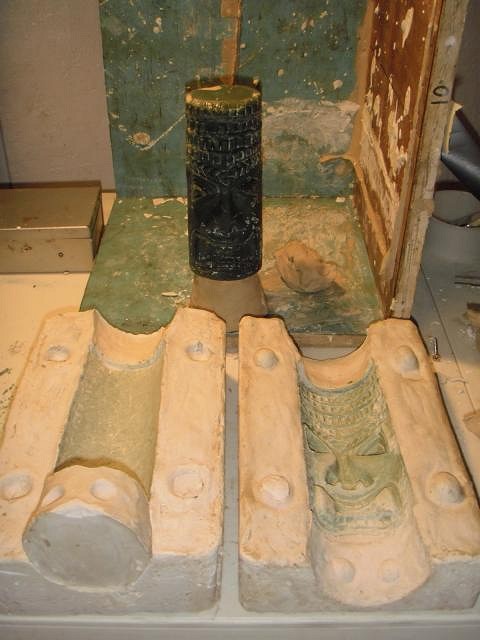
See the dents in the round piece for the bottom. There are bumps that correspond to those on the other two large pieces. Those dents and bumps are locks that hold it in place when the two larger pieces are straped together. Wendy |
|
S

swizzle
Posted
posted
on
Wed, Jul 11, 2012 9:01 PM
G'day Whystler, I suggest you check out this thread here and also use the search function and you should be able to find more. The technique Beachbumz mentioned is the same one that i used and can be found in my thread. I originally got the idea from Mautiki. There's plenty of information around, you just need to look for it and be prepared to do a lot of reading. Cheers |
|
M
MadDogMike
Posted
posted
on
Wed, Jul 11, 2012 9:16 PM
The clay hardness depends on how long you leave it in the mold, usually it's left just long enough to keep it's form. That may be a few hours or even less. It will be wet enough to stamp, add to, reshape, etc. If you leave it in the mold long enough it will come out leather hard or even bone dry |

Pages: 1 11 replies